
How to set up proxy in Indigo anti-detect browser
This guide will help you step-by-step to connect a proxy in the Indigo browser. We will look at the process of setting up a connection in the browser.
Step 1: Purchasing a proxy on the CyberYozh App website
Step 1: Opening the website
Go to the CyberYozh App proxy catalog
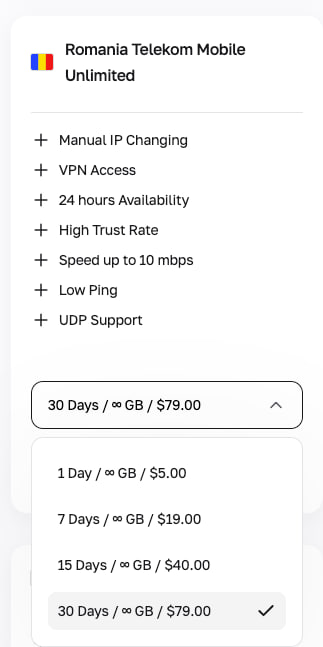
Step 2: Choosing and buying a proxy
• Determine the type of proxy you need (HTTP, SOCKS5).

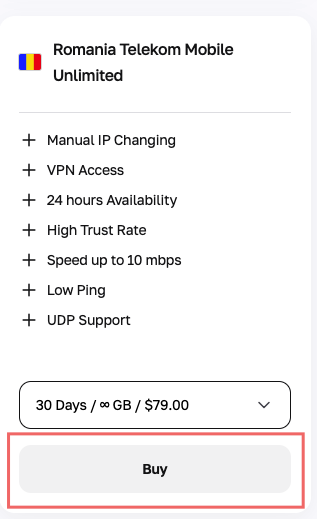
• Place an order by selecting the proxy duration and clicking the "Buy" button.
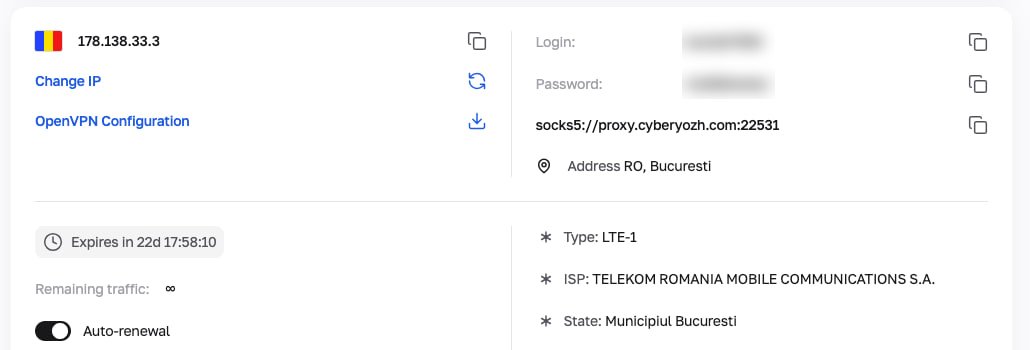
Step 3: Receiving connection data
After completing the purchase, you will receive the following proxy parameters:
• Proxy type (HTTP, SOCKS5)
• IP address or proxy host
• Proxy port
• Login and password
Step 2: Configuring the proxy in the Indigo browser
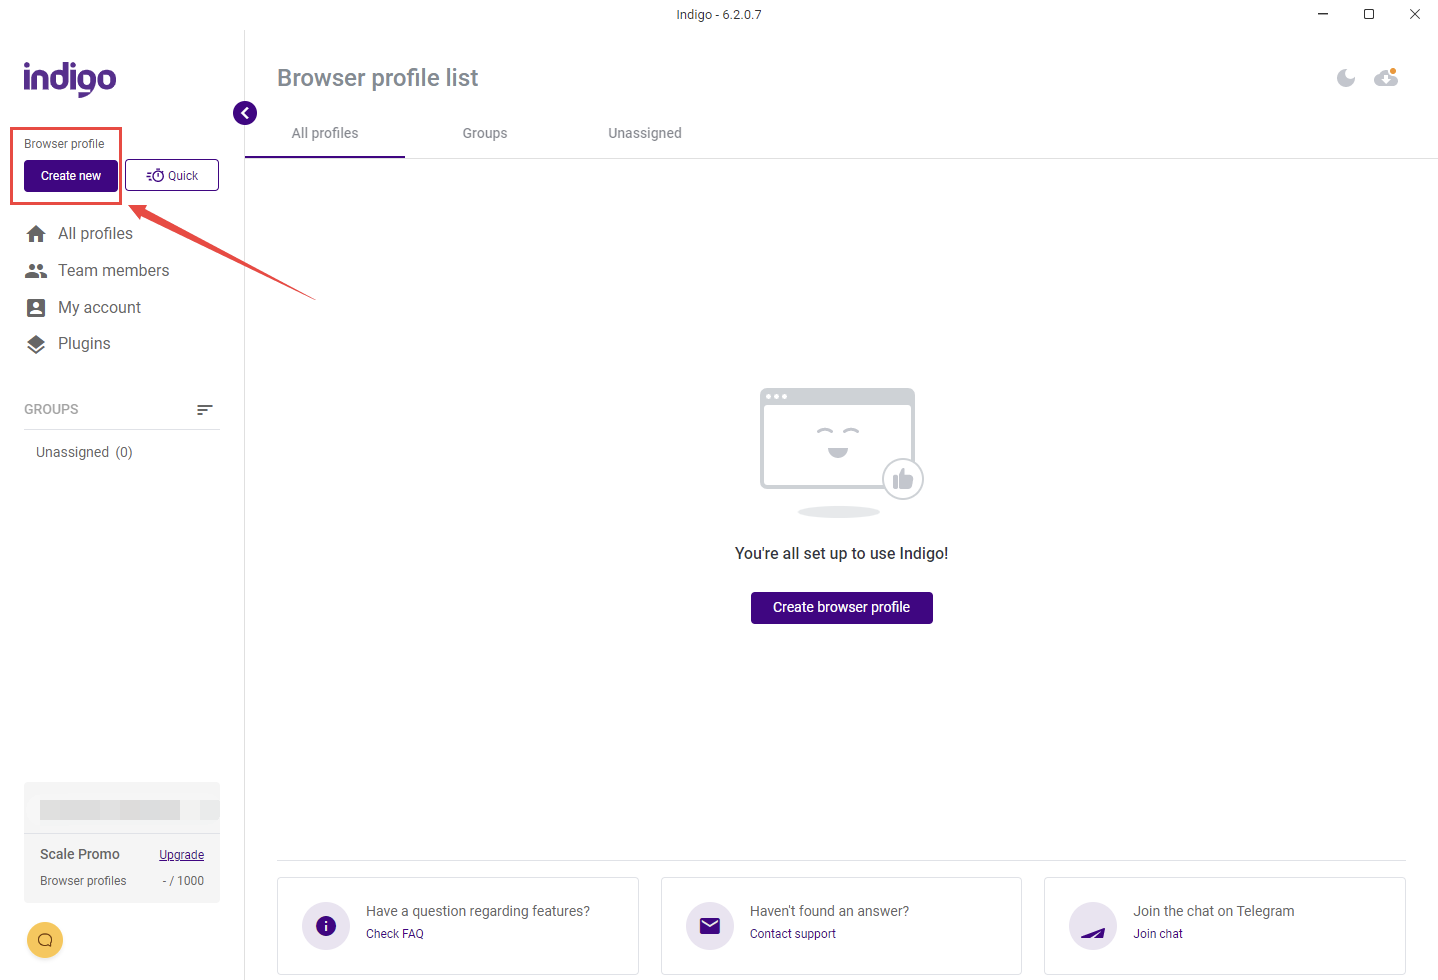
Step 1: Launching the browser
Open the Indigo browser on your computer.
Step 2: Creating a new profile
Click the “Create new” button to create a new profile.
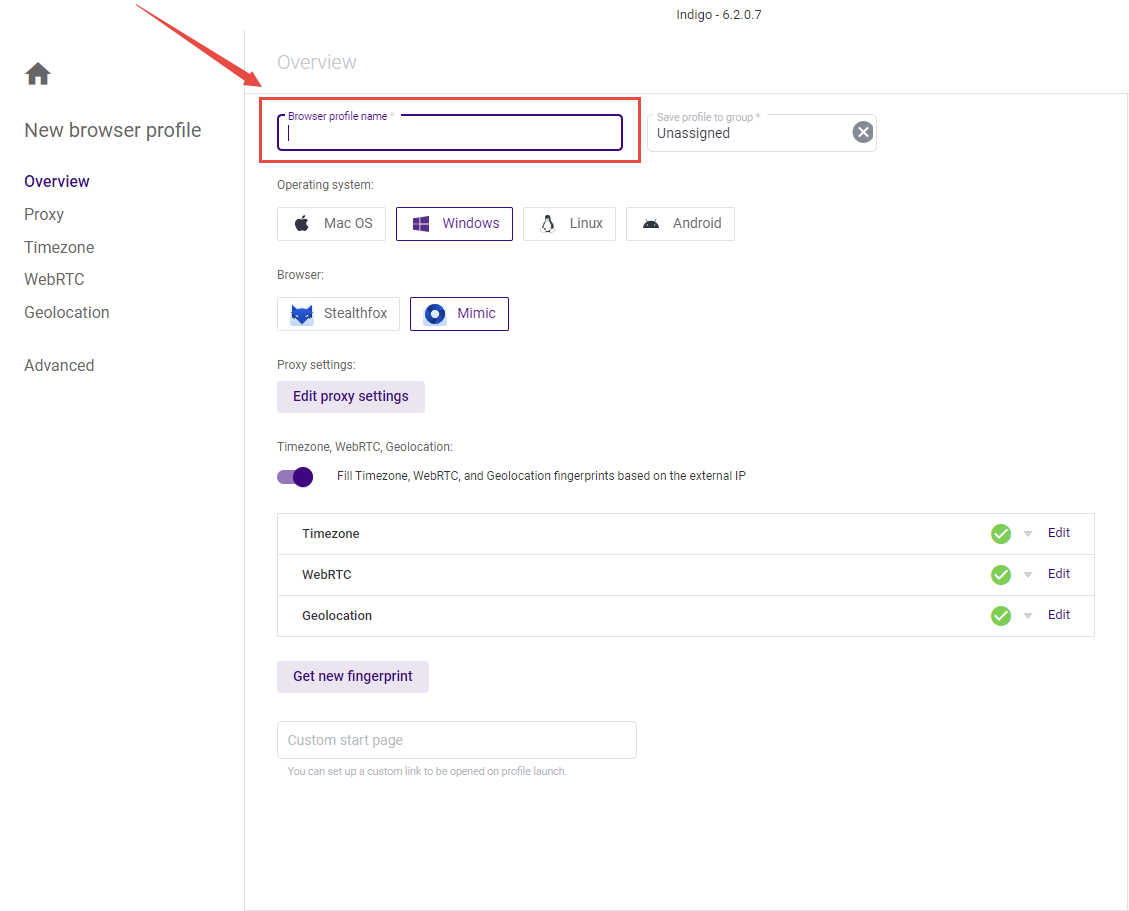
Step 3: Filling in profile information
Profile Name: Enter a profile name convenient for you (e.g., MyIndigoProfile).
Group: Specify a profile group if necessary.
Operating System: Select the required OS (e.g., Windows, Mac, etc.).
Browser: Select the version of the browser you want to use.
Other basic settings: Set the necessary parameters, such as the theme, etc.
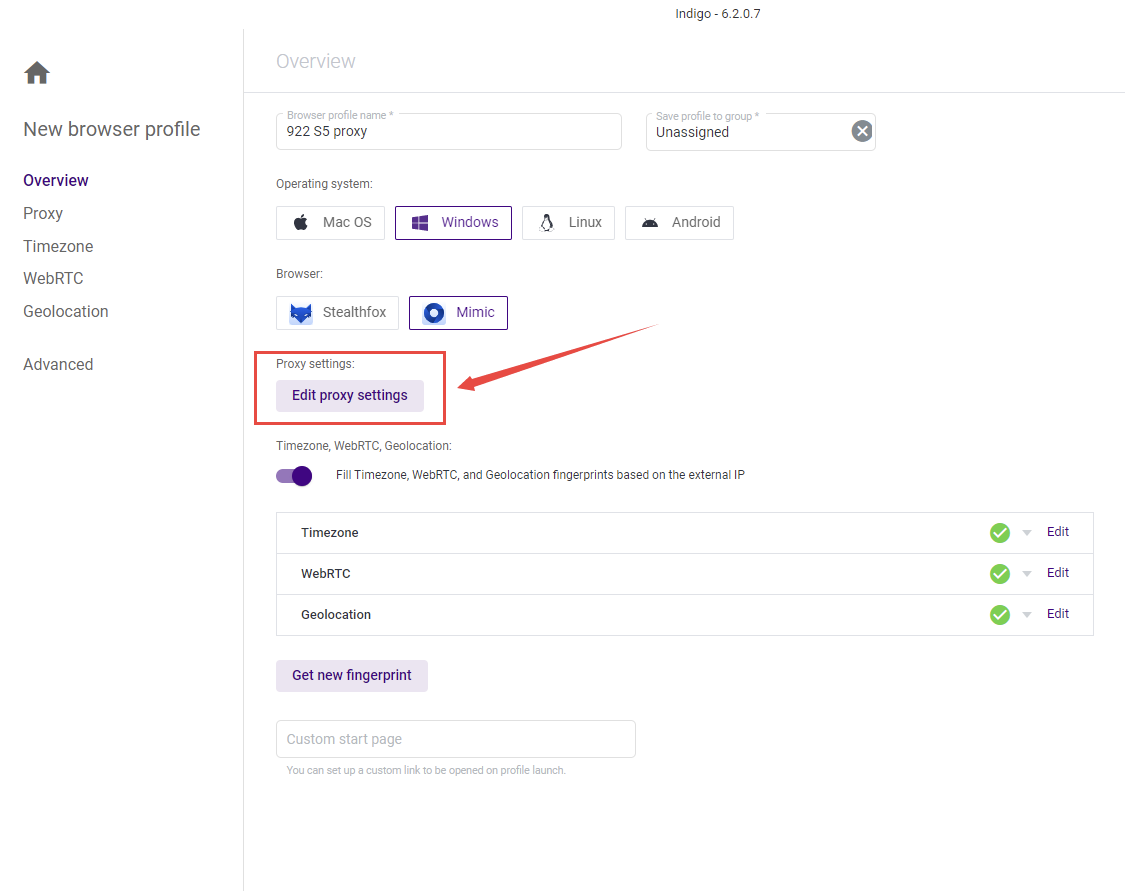
Step 4: Proxy settings
Click the “Edit proxy settings” button to start the proxy configuration.
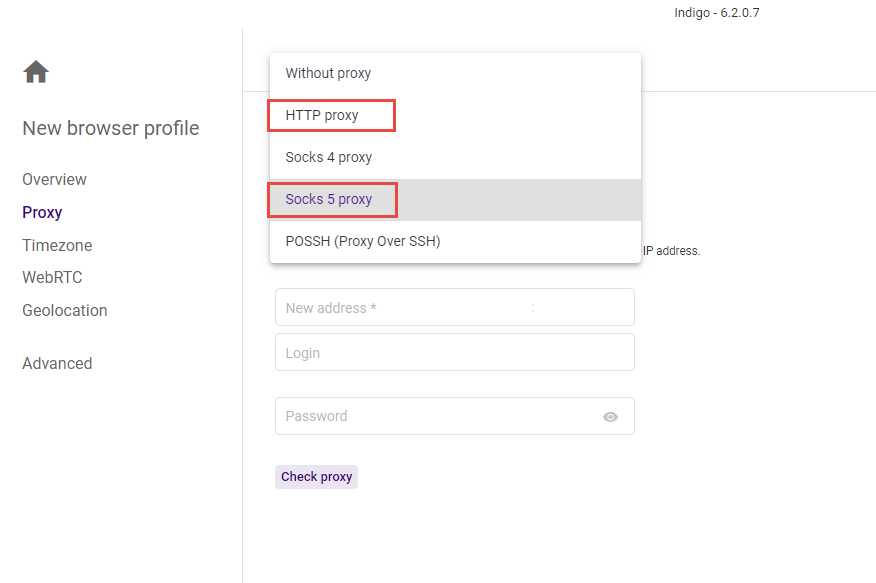
Step 5: Selecting the proxy type
In the window that opens, select the type of proxy you purchased (HTTP, SOCKS5).
Step 6: Entering proxy data
Specify the IP address (or host) of your proxy.
Enter the port.
Specify the login and password (this is the data you received in the first stage).
Click the “Check proxy” button.
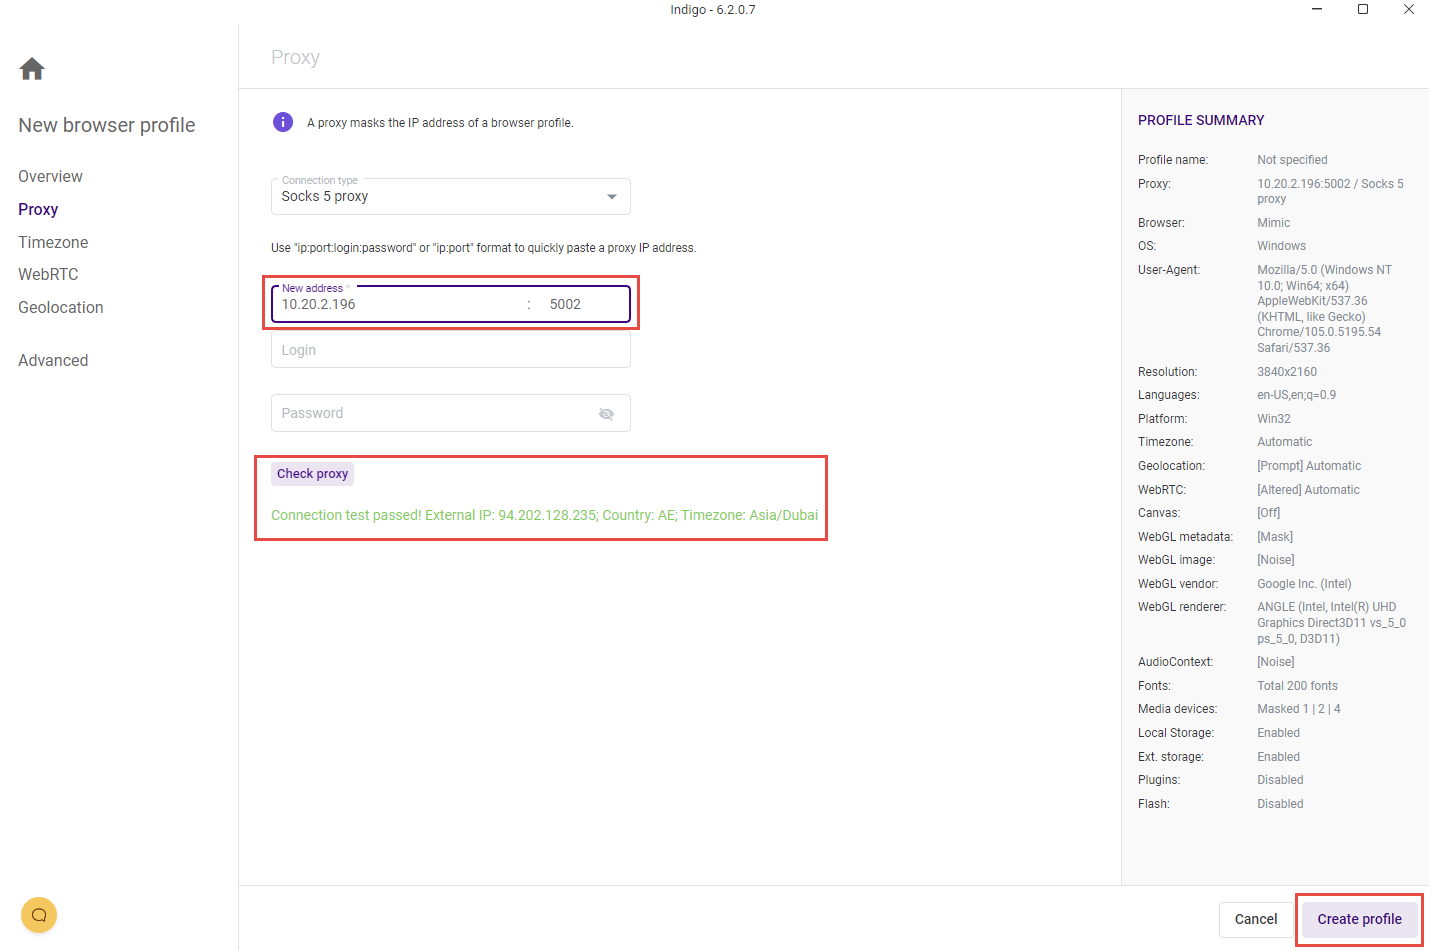
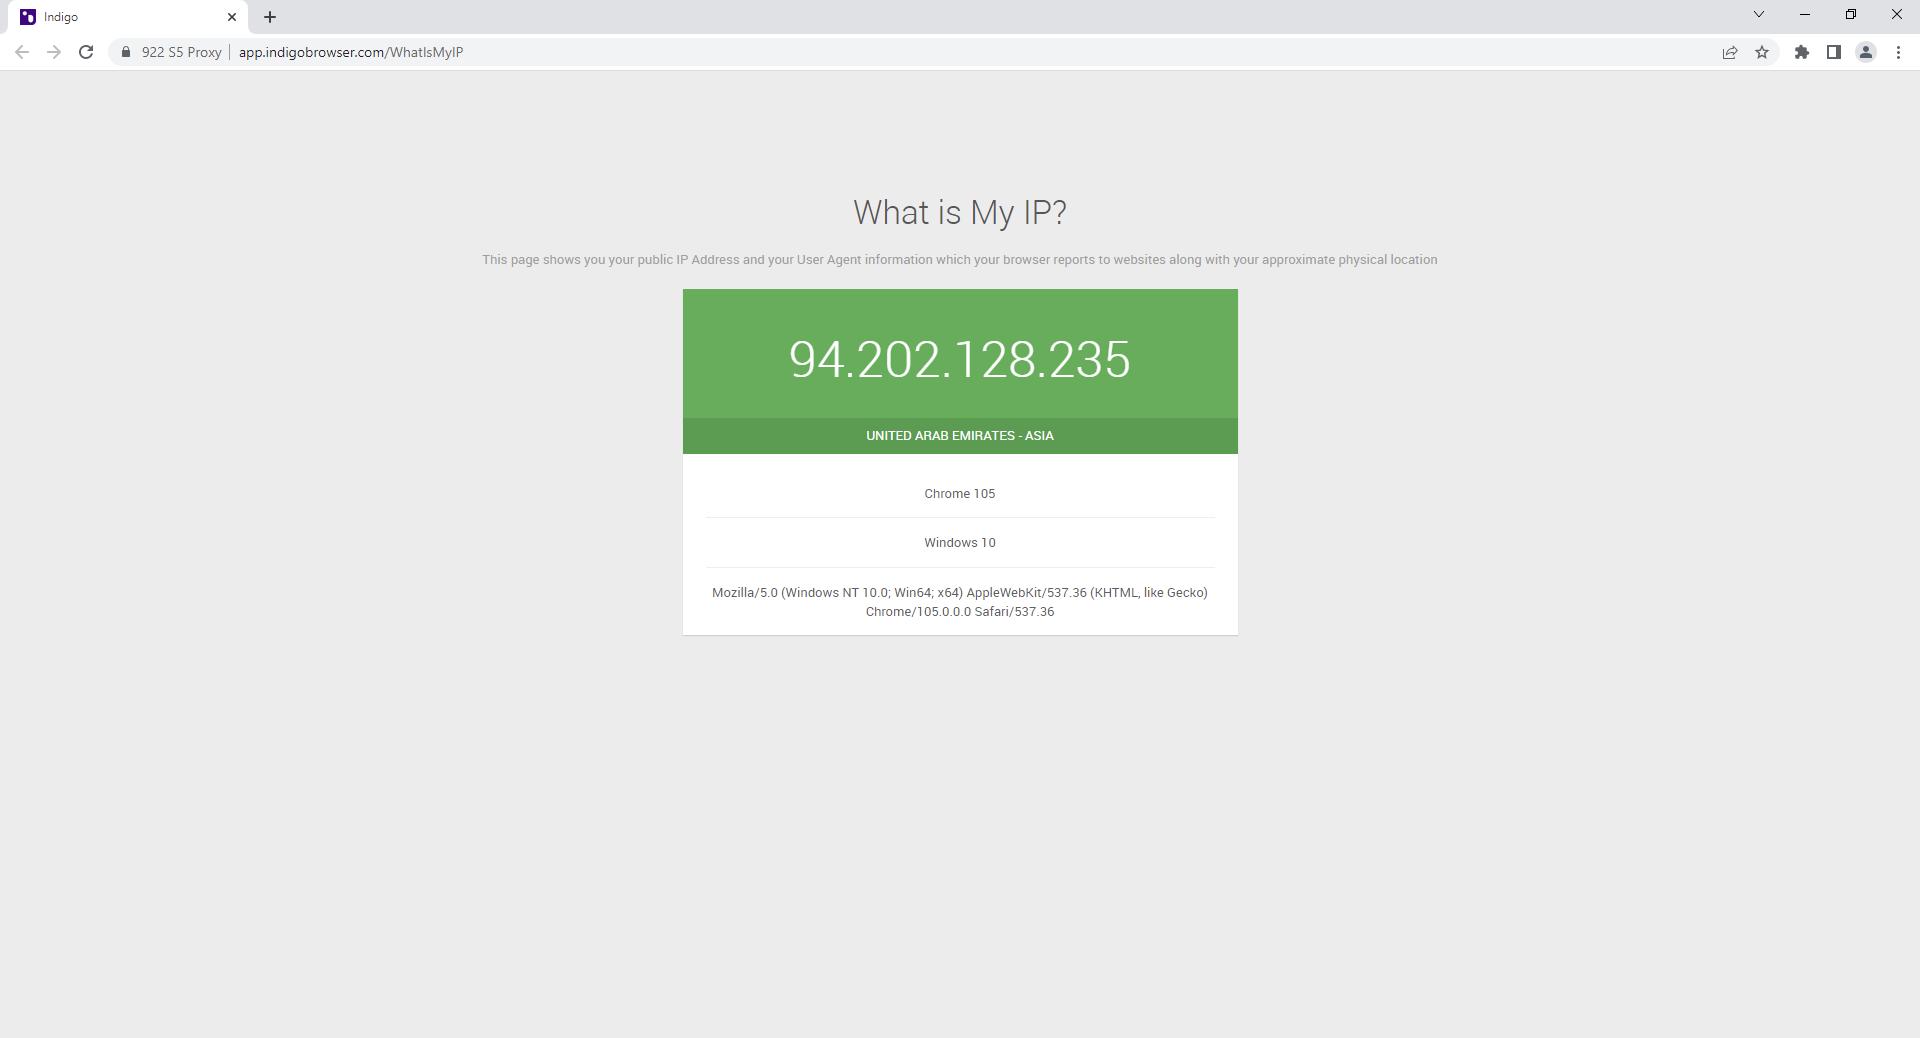
Step 7: Connection check
If you see a green status message, it means the connection to the proxy was successful, and you can use it.
Step 8: Completing profile setup
Click the “Create profile” button to finish creating the profile with the proxy settings.
Now your Indigo browser profile is configured to work through a proxy, and you are ready for safe and private browsing. For even greater protection and privacy, we recommend using virtual numbers to protect personal data to minimize the risk of data leaks.
Helpful?
Share article
