
How to connect a proxy to a cloud phone and align IP geolocation settings
When you connect a proxy to a cloud phone in CyberYozh App, the remote ARM server provides a separate Android hardware environment while the proxy defines its external network footprint and geographic location. As covered in our getting-started guide to setting up a cloud phone, keep one architectural rule in mind: the Server region (United States, Singapore, or China) only selects the physical data center hosting the ARM server blade. Your external IP address, country, city, timezone, and GPS coordinates come from the proxy channel you attach.
For agencies and teams managing multiple client or brand projects, assigning a dedicated proxy to each cloud phone profile keeps network sessions, cookies, and regional signals separated. Team members simply launch the assigned phone profile and work through its bound IP address without sharing credentials or mixing client accounts on the same connection.
TL;DR: How to connect a proxy to a cloud phone in 4 quick steps
If you already have an active cloud phone slot in CyberYozh App, follow this sequence to configure your network and location settings:
Open the proxy settings: in CLOUD PHONES -> My phones, click + Create profile and scroll to the Proxy section, or click the three-dots menu on an existing profile card and select Change Proxy/GEO.
Attach a proxy: keep the toggle on My proxies to pick an active Mobile, Residential (Static or Rotating), or Datacenter channel from your account, or switch to Manual and paste your SOCKS5 string (socks5://user:pass@1.2.3.4:1080).
Verify connectivity and IP reputation: inside the Check proxy panel, click Check IP (or Refresh to cycle a rotating IP) and enable the Deep Fraud Score check toggle ($0.15 /IP) or use the pre-flight IP Fraud Score checker before logging into target apps.
Match language and GPS to your IP: in Device and region, switch Phone language from Random to Manual entry and leave Language of IP country selected. Once the phone is running, open the Geolocation section at the bottom of Change Proxy/GEO to keep GPS Based on IP or switch to Custom to enter exact Latitude and Longitude coordinates.
Which proxy type to pair with your cloud phone
Before you connect a proxy to a cloud phone, match the network type to your session length and target platform. Because Android applications route traffic over both TCP and UDP, cloud phones work with SOCKS5 proxies (and mobile SOCKS5 channels are the primary choice for social media apps). You can bind connections directly from the CyberYozh App proxy catalog or paste custom SOCKS5 credentials. The table below compares the four proxy categories available for cloud phone profiles:
Proxy category in CyberYozh App | Starting price and billing model | Traffic allowance and session behavior | Primary cloud phone workflows |
From $1.70/day (Shared) or $3.50/day (Dedicated) | Unlimited traffic; real cellular carrier IPs (CGNAT); manual or API-triggered IP resets on dedicated ports; timer rotation (5 or 30 min) on shared ports; HTTP/HTTPS, SOCKS5, and UDP support | Operating social media apps (TikTok, Instagram, X, Telegram), managing ad accounts, and running mobile-first workflows that benefit from real cellular carrier IPs shared by hundreds of mobile subscribers | |
From $5.29/month per dedicated IP | Unlimited traffic; one fixed residential IP from a real internet service provider (ISP) for the entire rental period; 99.9% uptime; HTTP/HTTPS and SOCKS5 support | Long-term client account management, e-commerce seller apps (Shopify, Amazon), and persistent multi-week sessions where the IP address must remain fixed | |
Usage-based per GB (depending on plan and volume; standard packages from $4.00/GB at 3 GB min down to $2.50/GB at 100 GB) | Billed per GB with automatic traffic rollover to the next billing month; 100M+ IPs across 195+ countries; per-request rotation or sticky sessions up to 24 hours (1 to 1440 min); free geo-targeting (country, region, city, ZIP, and ISP) | Regional app localization testing, multi-location market research, checking localized mobile ad delivery, and single-day QA tasks across 195+ countries | |
From $1.77/month (Shared) or $2.18/month (Dedicated) | Unlimited traffic on dedicated plans; high-speed static IPv4/IPv6 server connections; 99.99% uptime; HTTP and SOCKS5 support | Internal app development testing, staging server checks, and high-speed automated QA tasks where server-grade throughput matters more than carrier or ISP network identity |
Step 1: Bind a proxy in Create profile or via Change Proxy/GEO
You can connect a proxy to a cloud phone directly during initial profile creation, or update the network channel on an existing profile at any time. To configure a new device, open CLOUD PHONES -> My phones, click + Create profile, and scroll to the Proxy block. To change the proxy or location on an existing cloud phone, click the three-dots menu icon on the profile card in My phones and select Change Proxy/GEO.
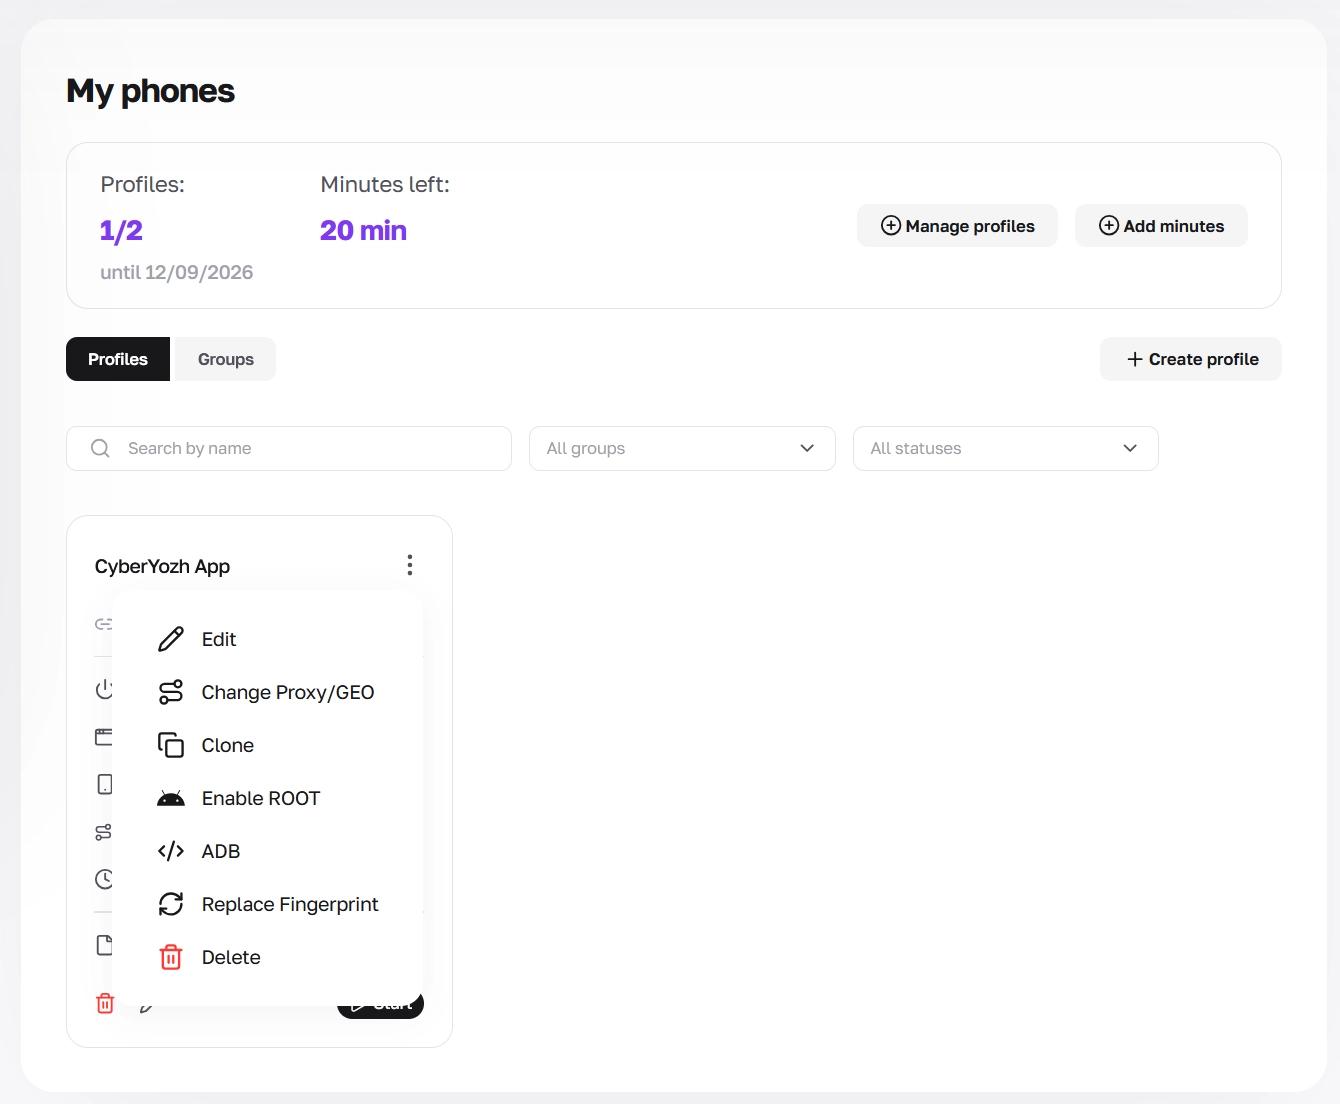
Both windows give you two ways to attach a proxy channel:
Option A: Select and configure a proxy from your CyberYozh App account (My proxies)
Leave the top-left mode toggle set to My proxies.
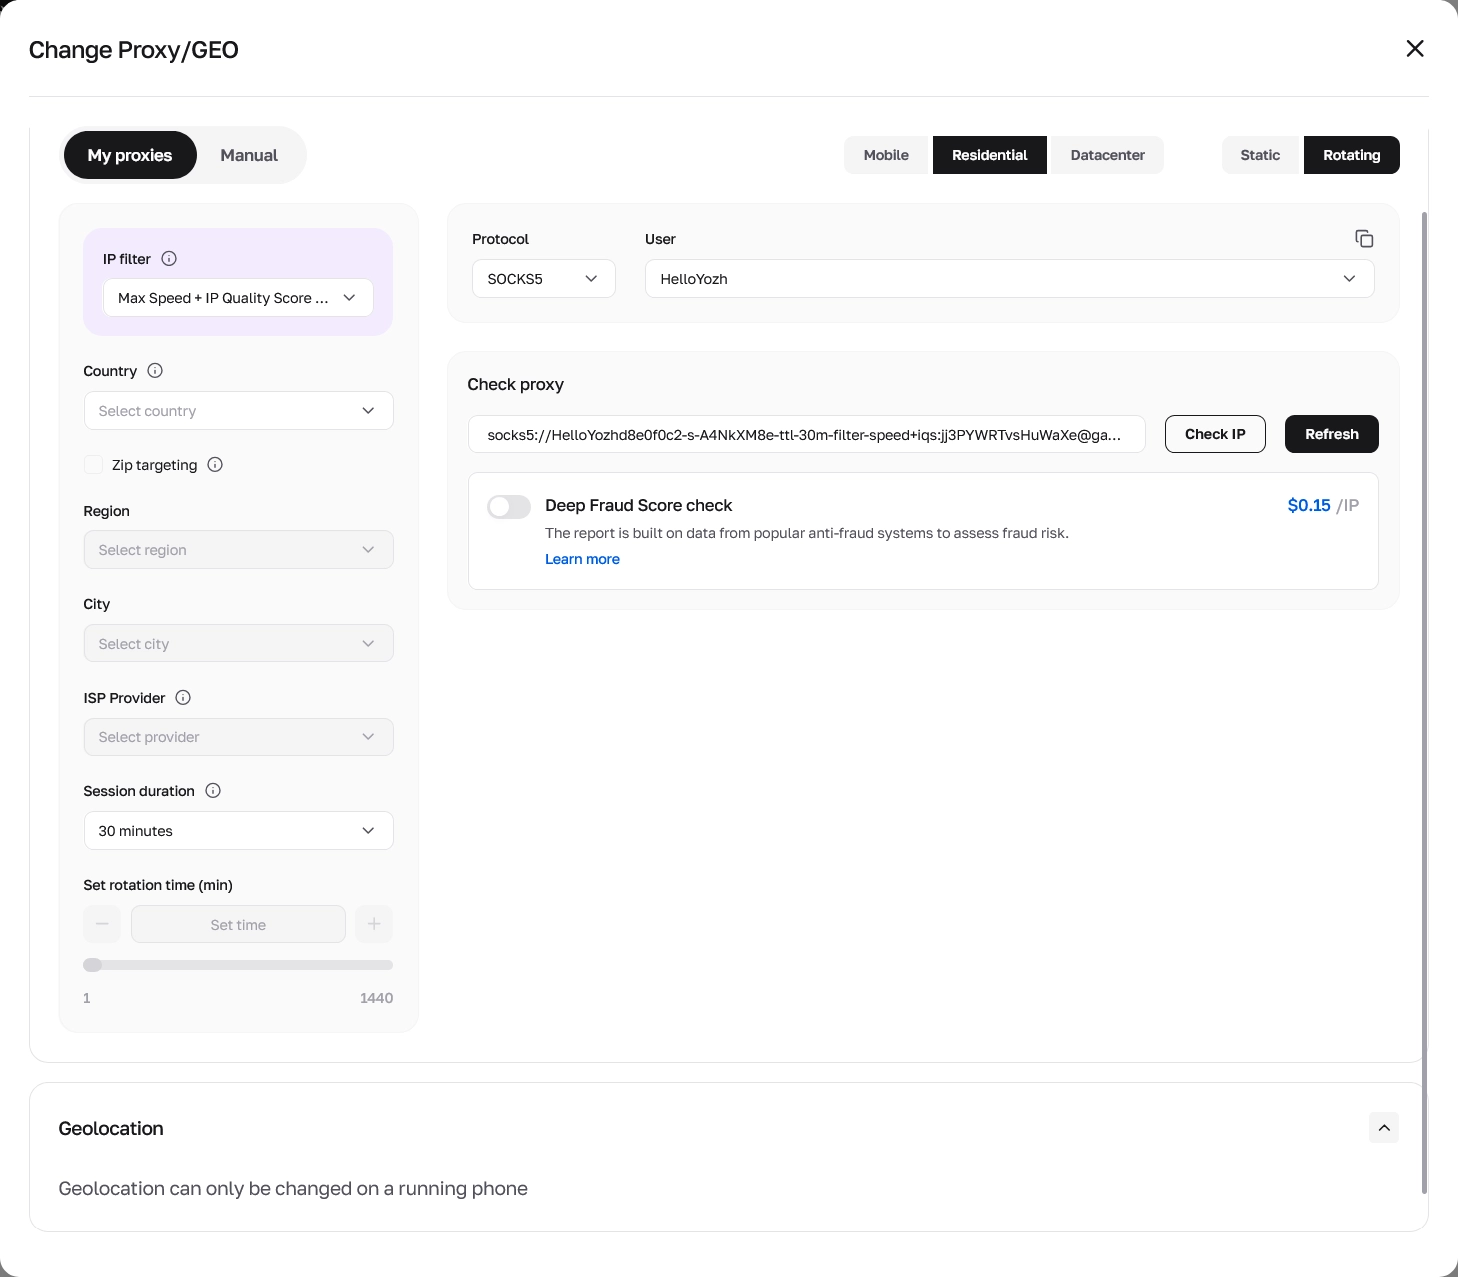
Switch between the Mobile, Residential, and Datacenter tabs on the top right to filter the active proxies in your account.
If you select Residential, use the secondary toggle on the far right to choose between Static (fixed ISP address) and Rotating (pool-based residential traffic).
When configuring a Rotating residential proxy in Change Proxy/GEO, use the left panel to tailor your connection:
IP filter: select a pre-filter mode such as Max Speed + IP Quality Score to screen residential nodes automatically before assignment.
Location and ISP targeting: pick your target Country (Select country), enable the Zip targeting checkbox if needed, and narrow the exit node by Region (Select region), City (Select city), and ISP Provider (Select provider).
Session duration and rotation time: choose a preset duration from the Session duration dropdown (such as 30 minutes) or use the Set rotation time (min) field and slider (1 to 1440 minutes) to lock in a sticky session for up to 24 hours.
Protocol and User: on the right side, verify that Protocol is set to SOCKS5 and your credential profile is selected under User.
If you do not have an active proxy in the selected category yet (No proxies), click the purple Buy proxy button (or Buy) to rent a channel from the CyberYozh App catalog using your account balance.
Option B: Paste a custom SOCKS5 proxy (Manual)
Switch the top-left toggle from My proxies to Manual.
Paste your SOCKS5 proxy connection string in the standard format: socks5://user:pass@1.2.3.4:1080 (or socks5://user:pass@host:port).
Match the session behavior to your task. If you generate credentials from a rotating residential proxy pool for multi-step app sessions, configure a sticky session (up to 24 hours / 1440 minutes) so the external IP does not rotate in the middle of an active login. For multi-week stability on a fixed home IP, choose static residential ISP proxies. For social media apps, choose mobile LTE/5G proxies with unlimited traffic.

Step 2: Run Check IP and Deep Fraud Score verification
Before you finish setting up how to connect a proxy to a cloud phone, verify both gateway connectivity and IP reputation inside the Check proxy card on the right side of the window:
Test and refresh proxy connectivity: click the Check IP button next to your SOCKS5 connection string. This test confirms that the proxy gateway responds, displays the resolved exit country and city, and catches credential typos before you launch the phone. When using rotating proxies in Change Proxy/GEO, you can also click the black Refresh button to generate a new session string and cycle the exit IP.
Pre-flight risk evaluation: directly below the connection string, enable the Deep Fraud Score check toggle ($0.15 /IP) to assess fraud risk right inside the proxy setup window, or run a check in the standalone pre-flight IP Fraud Score checker ($0.15 per check, or via the $19/month plan covering 1,500 IP checks, 1,500 phone checks, and 500 card checks). The report pulls data from anti-fraud systems (including IPQualityScore, ThreatMetrix, PerimeterX, and Stripe Radar) and 118 OSINT blacklists to confirm the IP has a clean history before your cloud phone sends its first packet.
Step 3: Align system language and GPS geolocation with your proxy IP
Whenever you connect a proxy to a cloud phone, the Android system locale and GPS coordinates should match your external IP location so mobile apps do not detect conflicting regional signals. CyberYozh App handles system language during profile creation and provides live GPS controls once the phone is running:
3.1. Match Android system language to your IP country
In the Device and region section of the Create profile window, locate Phone language and switch the toggle from Random to Manual entry.
Keep the default dropdown option Language of IP country. When the cloud phone boots, it reads the country of your attached proxy IP and automatically sets the matching Android system language and regional timezone.
If your localization test requires a specific interface language regardless of IP country, open the Manual entry dropdown and choose from the 10 supported options (Language of IP country, English, Russian, Ukrainian, Spanish, Portuguese (BR), Chinese, Vietnamese, Indonesian, and others).
3.2. Configure GPS coordinates in the Geolocation panel (Based on IP vs. Custom)
At the bottom of the Change Proxy/GEO window sits the Geolocation panel. While a cloud phone is stopped, this section displays the message: Geolocation can only be changed on a running phone.
To check or customize the device's GPS coordinates, follow these steps:
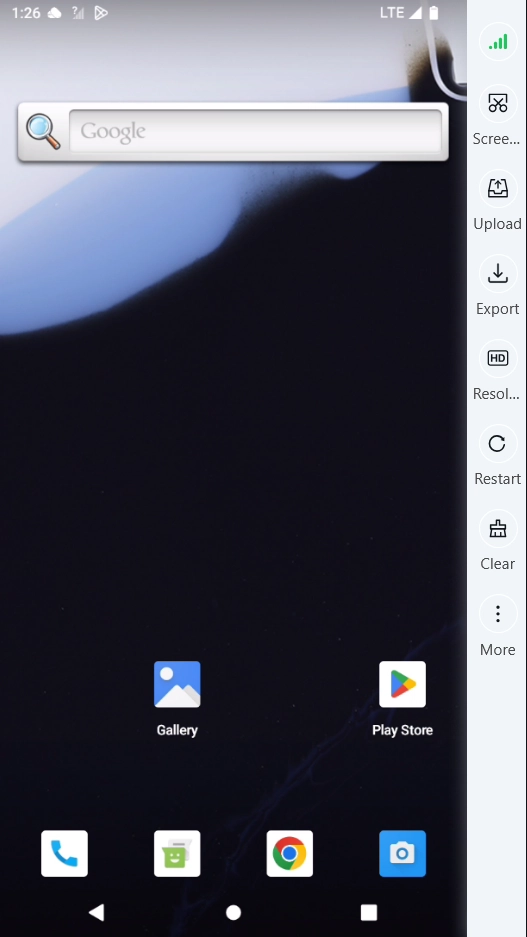
Start the cloud phone: click Start on your profile card in My phones and wait for the Android OS to boot in your browser window (you will see the active LTE network indicator in the top status bar and the device control toolbar on the right).
Open the Geolocation panel: return to the My phones tab, open the three-dots menu on the running profile card, click Change Proxy/GEO, and scroll down to the Geolocation block.
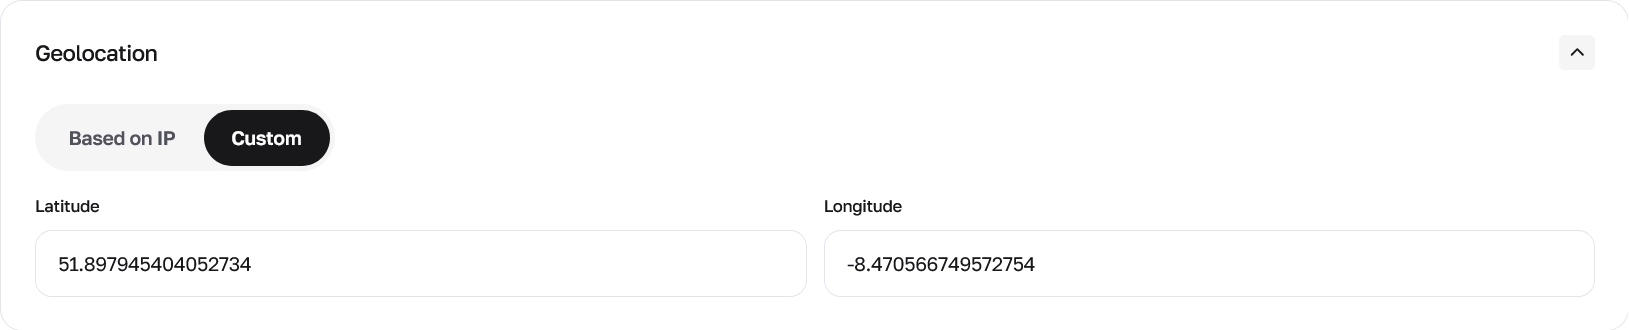
Keep Based on IP (automatic GPS matching): by default, the Geolocation toggle is set to Based on IP. In this mode, the platform automatically calculates and assigns GPS latitude and longitude coordinates matching your proxy IP location (for example, 51.897945404052734,-8.470566749572754), with a one-click copy icon next to the coordinates.

Set Custom GPS coordinates (manual override): if your workflow requires pinning the device to a specific street address or testing location-based app features in a particular neighborhood, switch the Geolocation toggle from Based on IP to Custom. Enter your target coordinates in the Latitude (for example, 51.897945404052734) and Longitude (for example, -8.470566749572754) fields and save the changes.
In the upcoming guides, we will cover mobile automation and app workflows in detail, including Automation & Synchronizer and Apps & mobile workflows.
Troubleshooting proxy connection and geolocation issues
Issue or symptom | Root cause | Practical resolution in CyberYozh App |
Check IP test fails during profile setup | Typo in custom proxy credentials, expired proxy rental, or non-SOCKS5 format. | Switch to My proxies to select an active channel from your account, click Refresh to generate a new session string if using rotating residential proxies, or verify that your Manual string follows the exact socks5://user:pass@1.2.3.4:1080 syntax with no trailing spaces. |
The Geolocation section says "Geolocation can only be changed on a running phone" | You opened Change Proxy/GEO while the cloud phone profile was in the Not created or Stopped state. | Click Start on the profile card in My phones to boot the Android device first. Once the phone is running, reopen Change Proxy/GEO to switch Geolocation between Based on IP and Custom (Latitude / Longitude). |
Mobile app shows content in the wrong language or region | System language was left on Random or set to a mismatched locale, or the operator confused Server region with IP location. | Remember that Server region (US, Singapore, China) only hosts the physical ARM hardware. Open Change Proxy/GEO to attach a proxy in your target country, set Phone language to Language of IP country, and verify that Geolocation is set to Based on IP. |
Unexpected verification prompts during an active app session | Using a per-request rotating proxy that changes the external IP mid-session, sharing one proxy across multiple phones, or using an IP with prior abuse history. | Assign a dedicated proxy to each phone profile. For persistent app logins, use mobile LTE/5G proxies with unlimited traffic, static residential ISP proxies, or rotating residential proxies with Session duration / Set rotation time (min) locked up to 1440 minutes, and enable Deep Fraud Score check ($0.15 /IP) before logging in. |
👉 Explore the CyberYozh App proxy catalog and check IP reputation before launching your cloud phone