
How to Configure a Clean Aurorium Proxy Setup for Isolated Profiles
Modern security filters analyze the raw network transport layer before they even read your browser footprint. If your application data broadcasts a Windows operating system but your TCP packets carry the signature of a Linux server, the target platform rejects your connection instantly.
A professional Aurorium proxy setup requires strict attention to protocol selection and operating system matching. This guide details exactly how to configure your workspace for stable data operations.
TL;DR: Protecting your network footprint
AI footprint generation: Aurorium stops parameter collisions natively. It builds mathematical hardware profiles using real device data.
The transport mismatch: Target servers catch passive OS fingerprinting (p0f) errors instantly. Your network node must modify TCP headers to match your browser profile.
UDP routing: SOCKS5 and UDP support are mandatory to handle WebRTC traffic safely without exposing local interfaces.
Risk assessment: Audit your assigned IP through a ThreatMetrix or IPQualityScore database before connecting.
How Aurorium isolates hardware footprints
Aurorium browser approaches identity isolation differently than legacy tools. It relies heavily on artificial intelligence to generate hardware footprints. Standard browsers often recycle the same hardware combinations from a limited database, creating severe collision risks. Aurorium pulls from global databases of real user devices to build mathematically sound configurations.
The platform excels at team operations. It features a native Action Synchronizer. You can mirror your keystrokes and mouse clicks across multiple independent windows simultaneously. A public security audit by the Berlin-based research group Cure53 verifies the integrity of its core code. This is the exact same team that tests major global VPN providers and Tor network components.
Selecting IP nodes for an Aurorium proxy setup
A pristine browser profile still requires a clean IP address. CyberYozh App delivers infrastructure engineered specifically for managing isolated environments at scale. If your workflow involves aggressive data extraction or scraping, you need a dynamic routing layer.
👉 Scale with Rotating Residential Proxies: Access a dynamic pool of over 100 million addresses. You can configure sticky sessions for up to 24 hours or rotate the IP on every single request to entirely avoid rate limits.
Step-by-step Aurorium proxy setup
Connecting your network layer requires precision. Follow these exact steps to add your nodes globally and bind them directly to your profiles.
1. Centralize your connections in the Proxy Manager
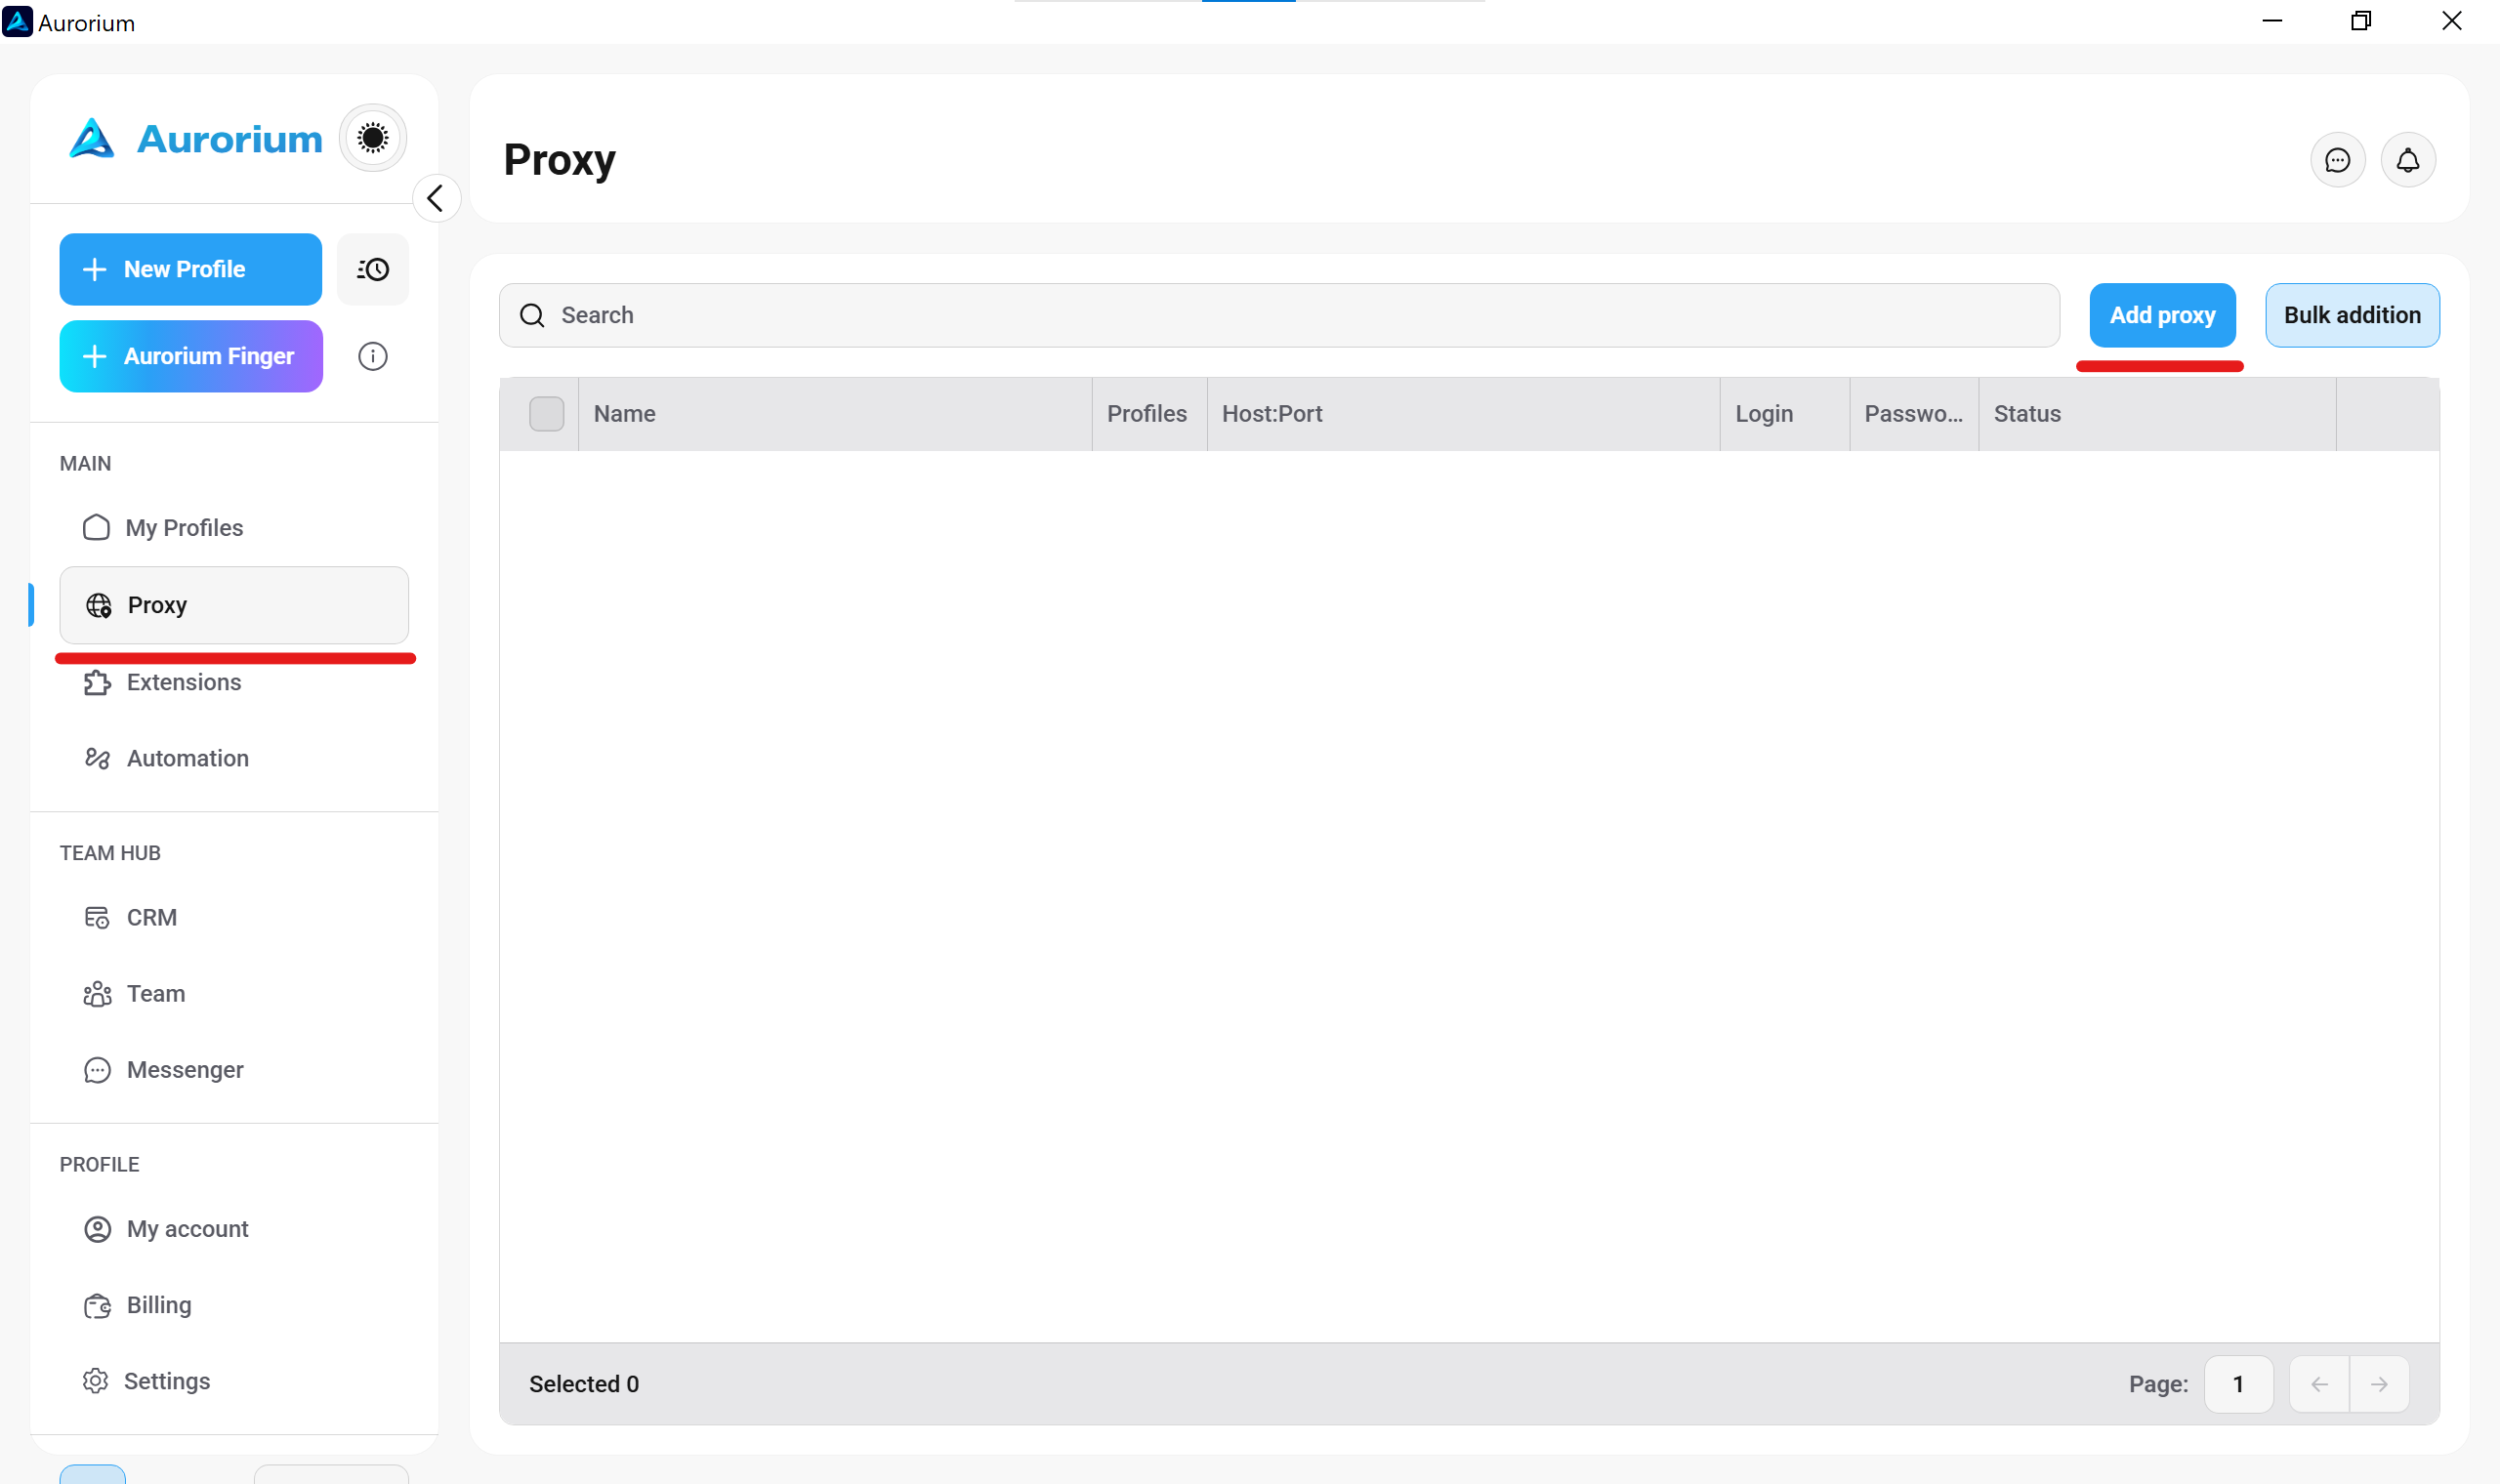
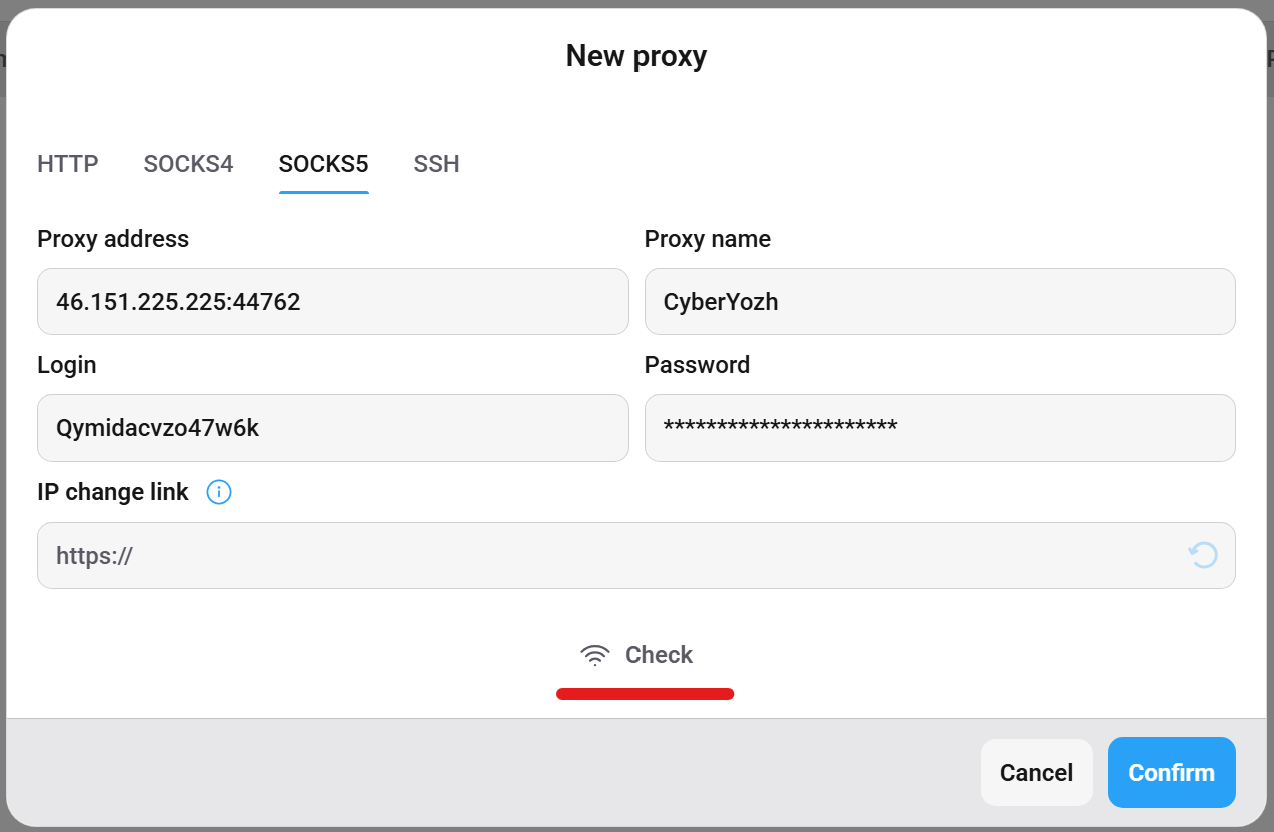
Do not add proxies manually inside every single profile. Open the main Proxy tab on the left sidebar and click the Add proxy button.
2. Enforce SOCKS5 and input credentials
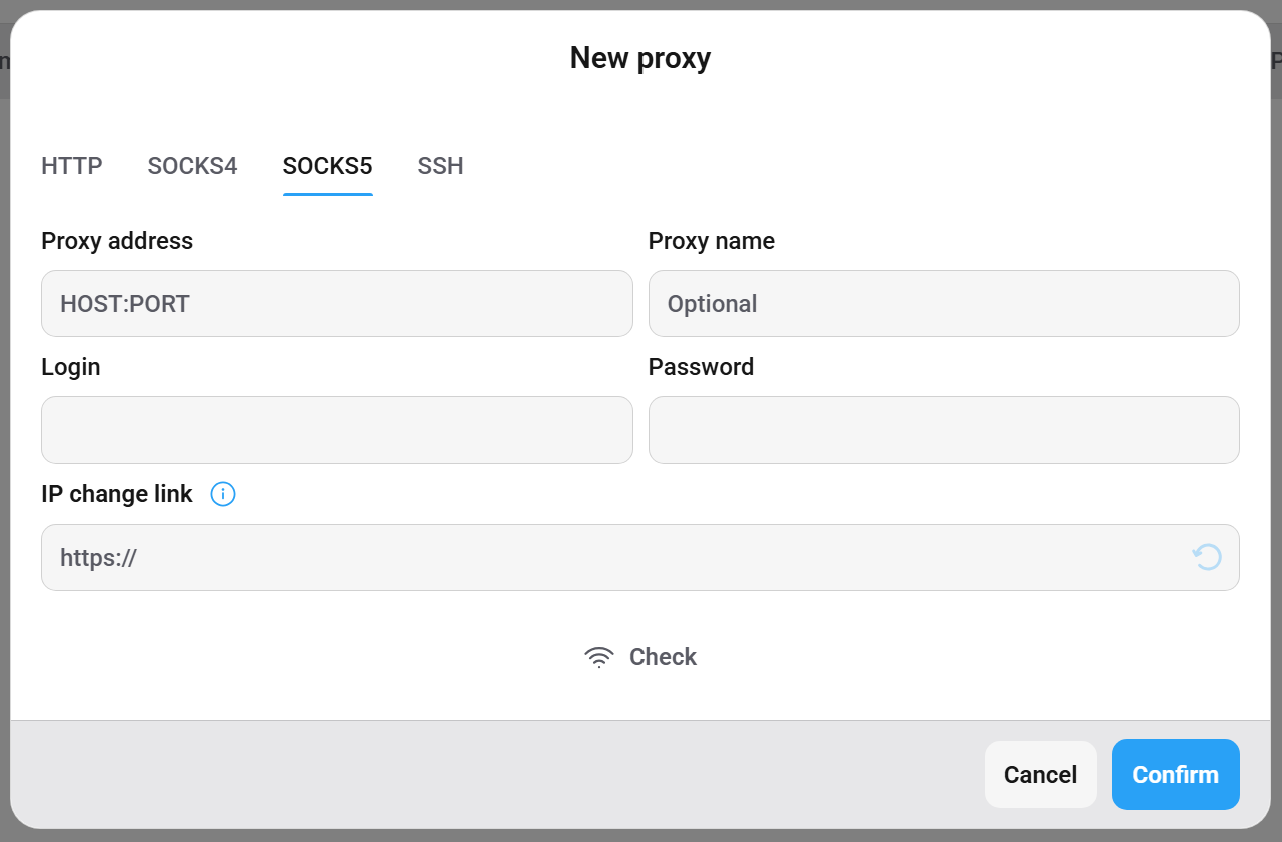
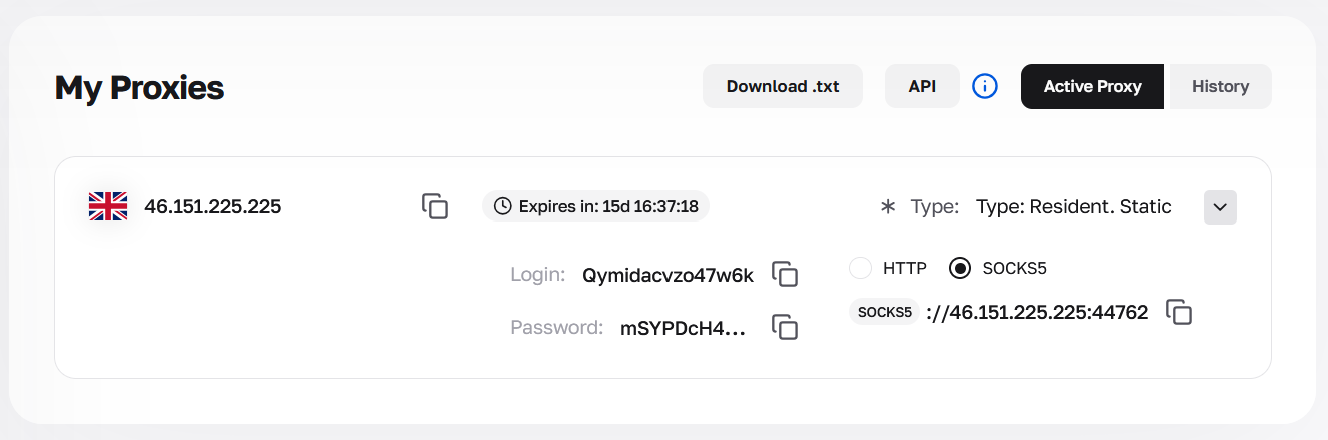
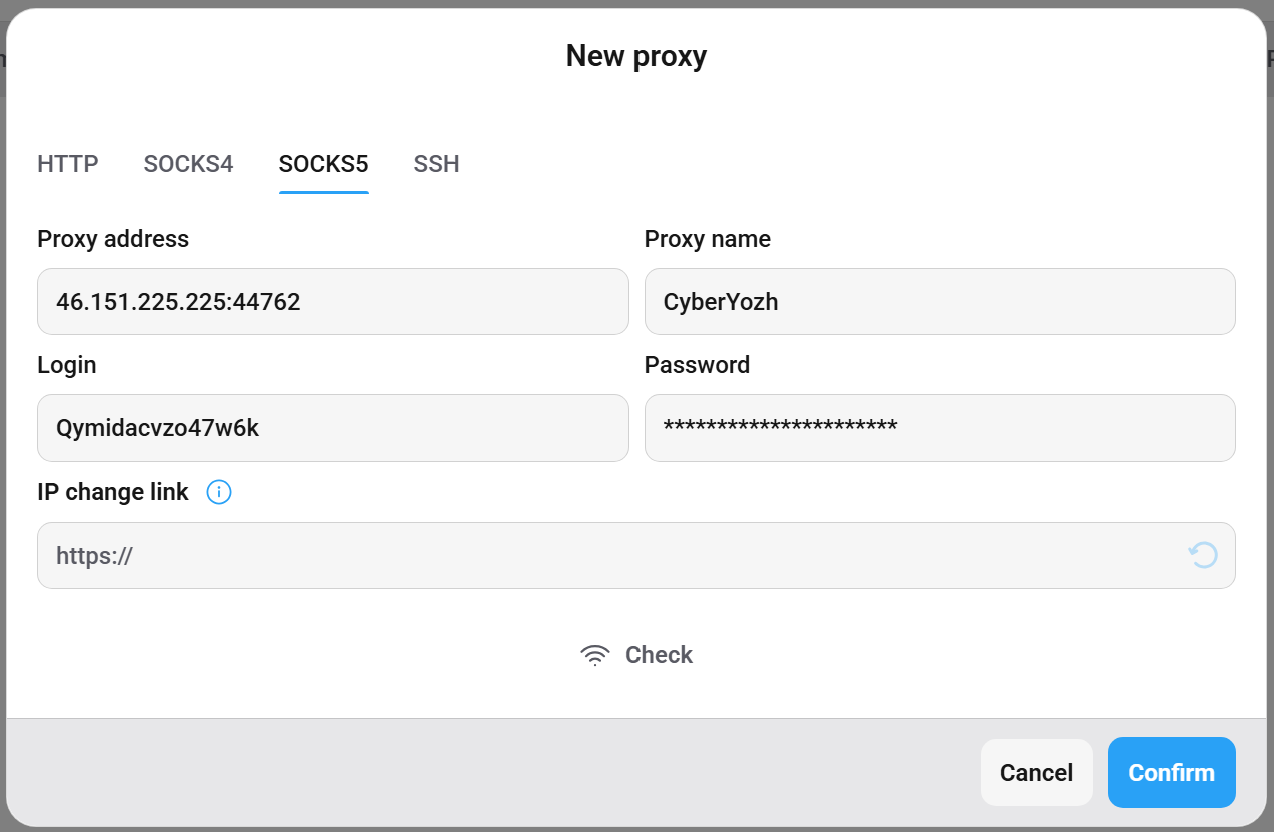
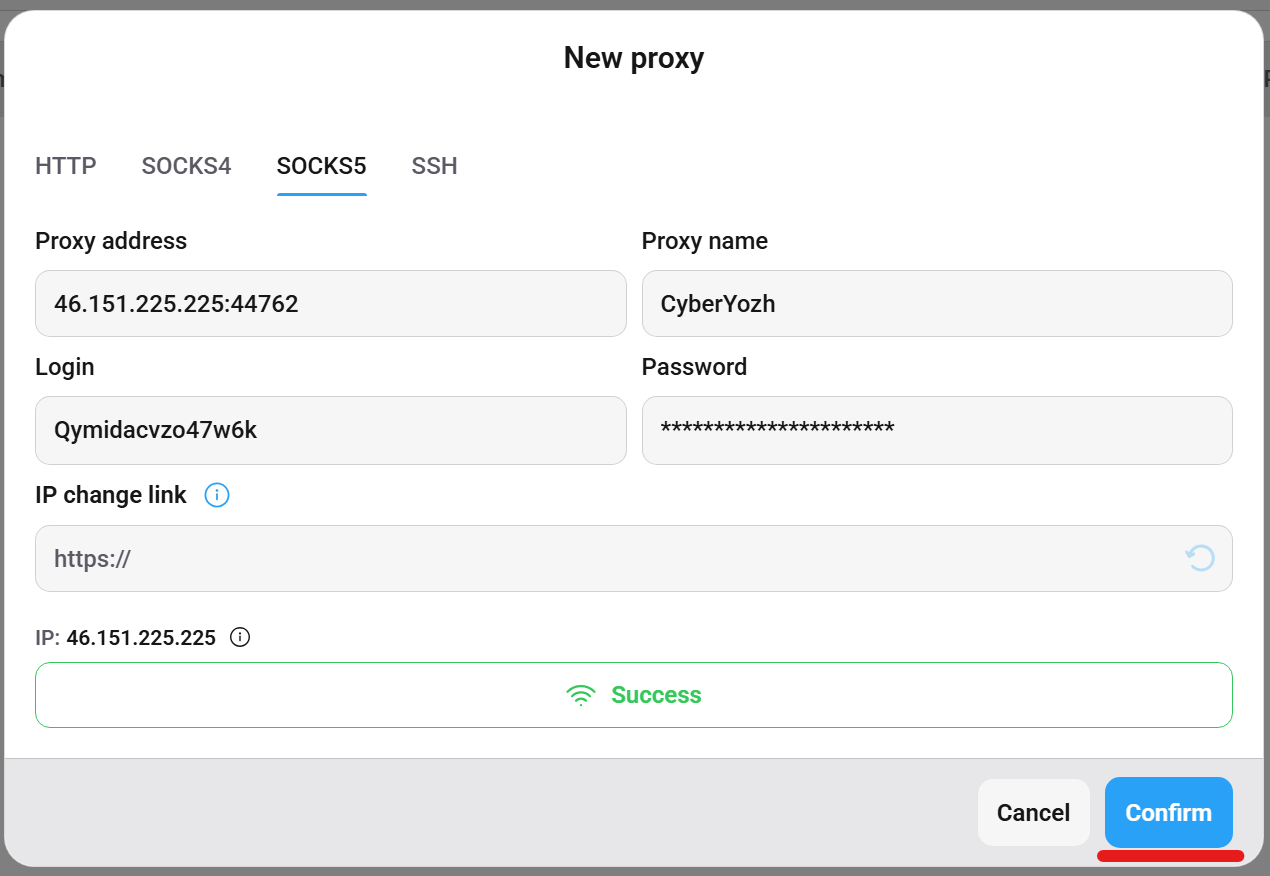
Select the SOCKS5 protocol. SOCKS5 handles all traffic types transparently without rewriting request headers, providing a much cleaner connection for isolated profiles. Paste your CyberYozh connection string (IP, Port, Login, Password). If you use mobile proxies, paste your IP change URL into the designated field to control rotation via API.
3. Validate the node
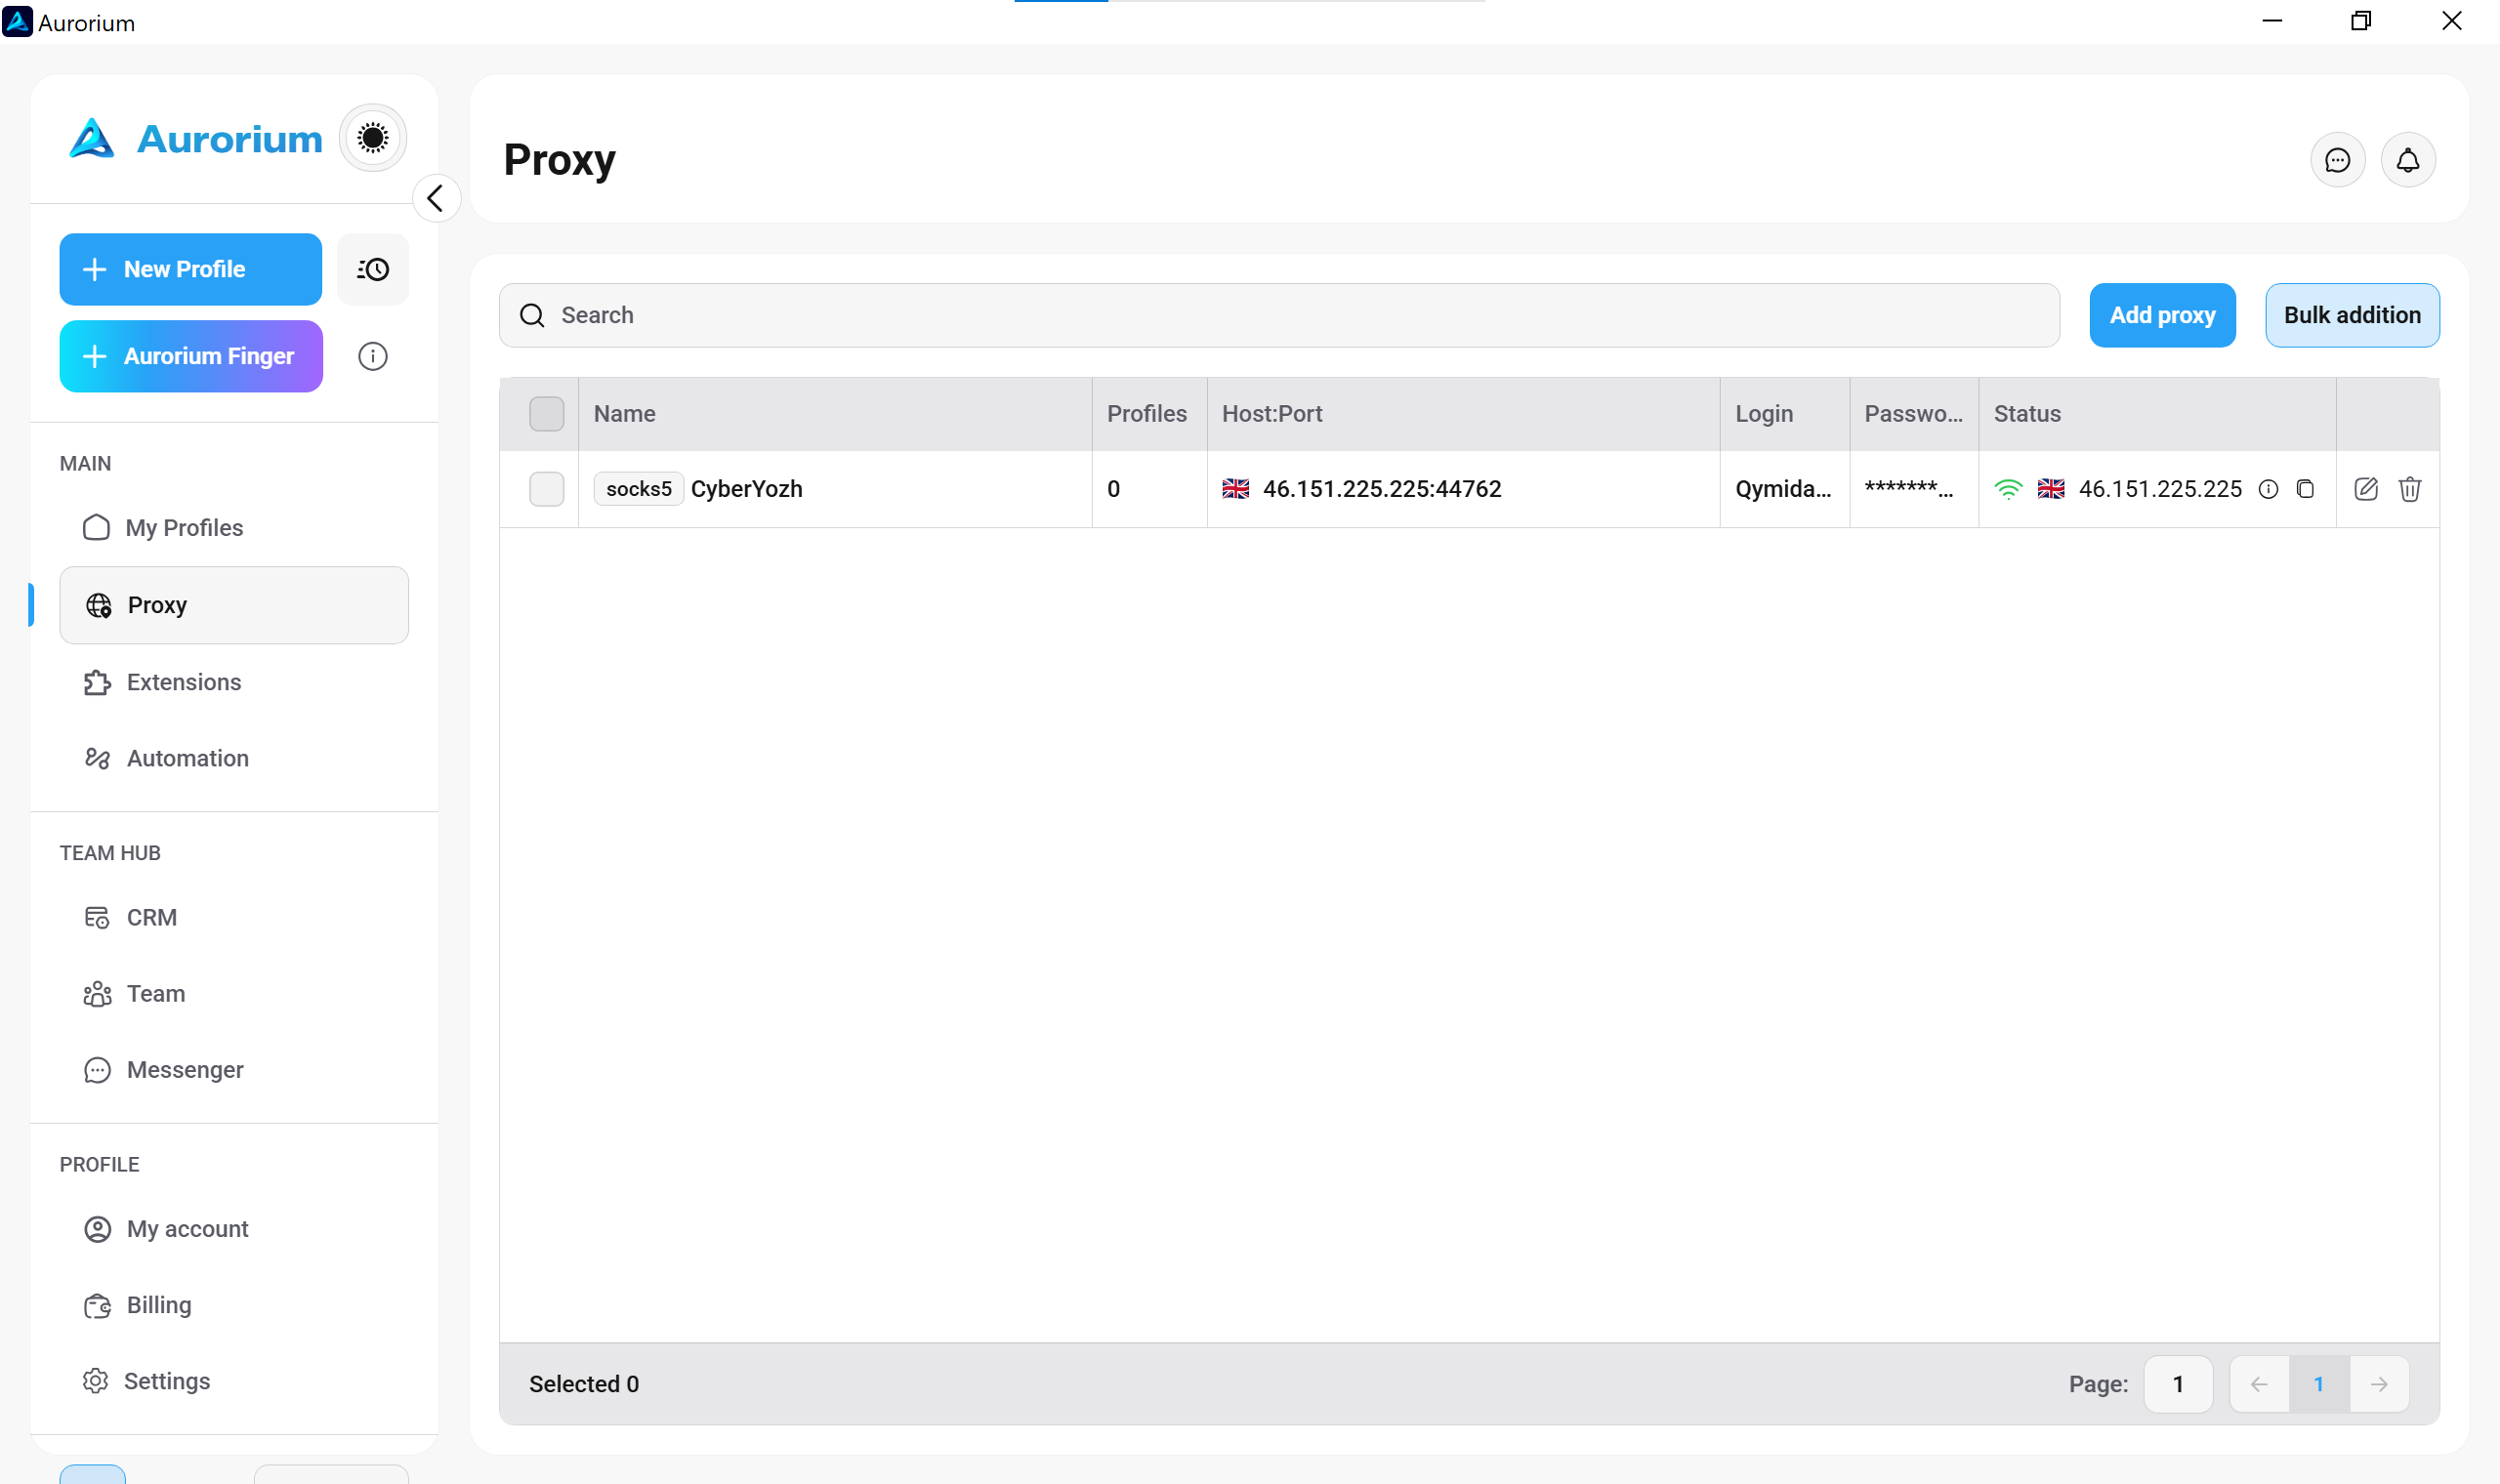
Click Check before saving. The system verifies the physical reachability of the proxy and confirms your geographical location. Once you see a green Success message, click Confirm. Your proxy now sits in the global manager, ready for deployment.
4. Bind the proxy to a new profile
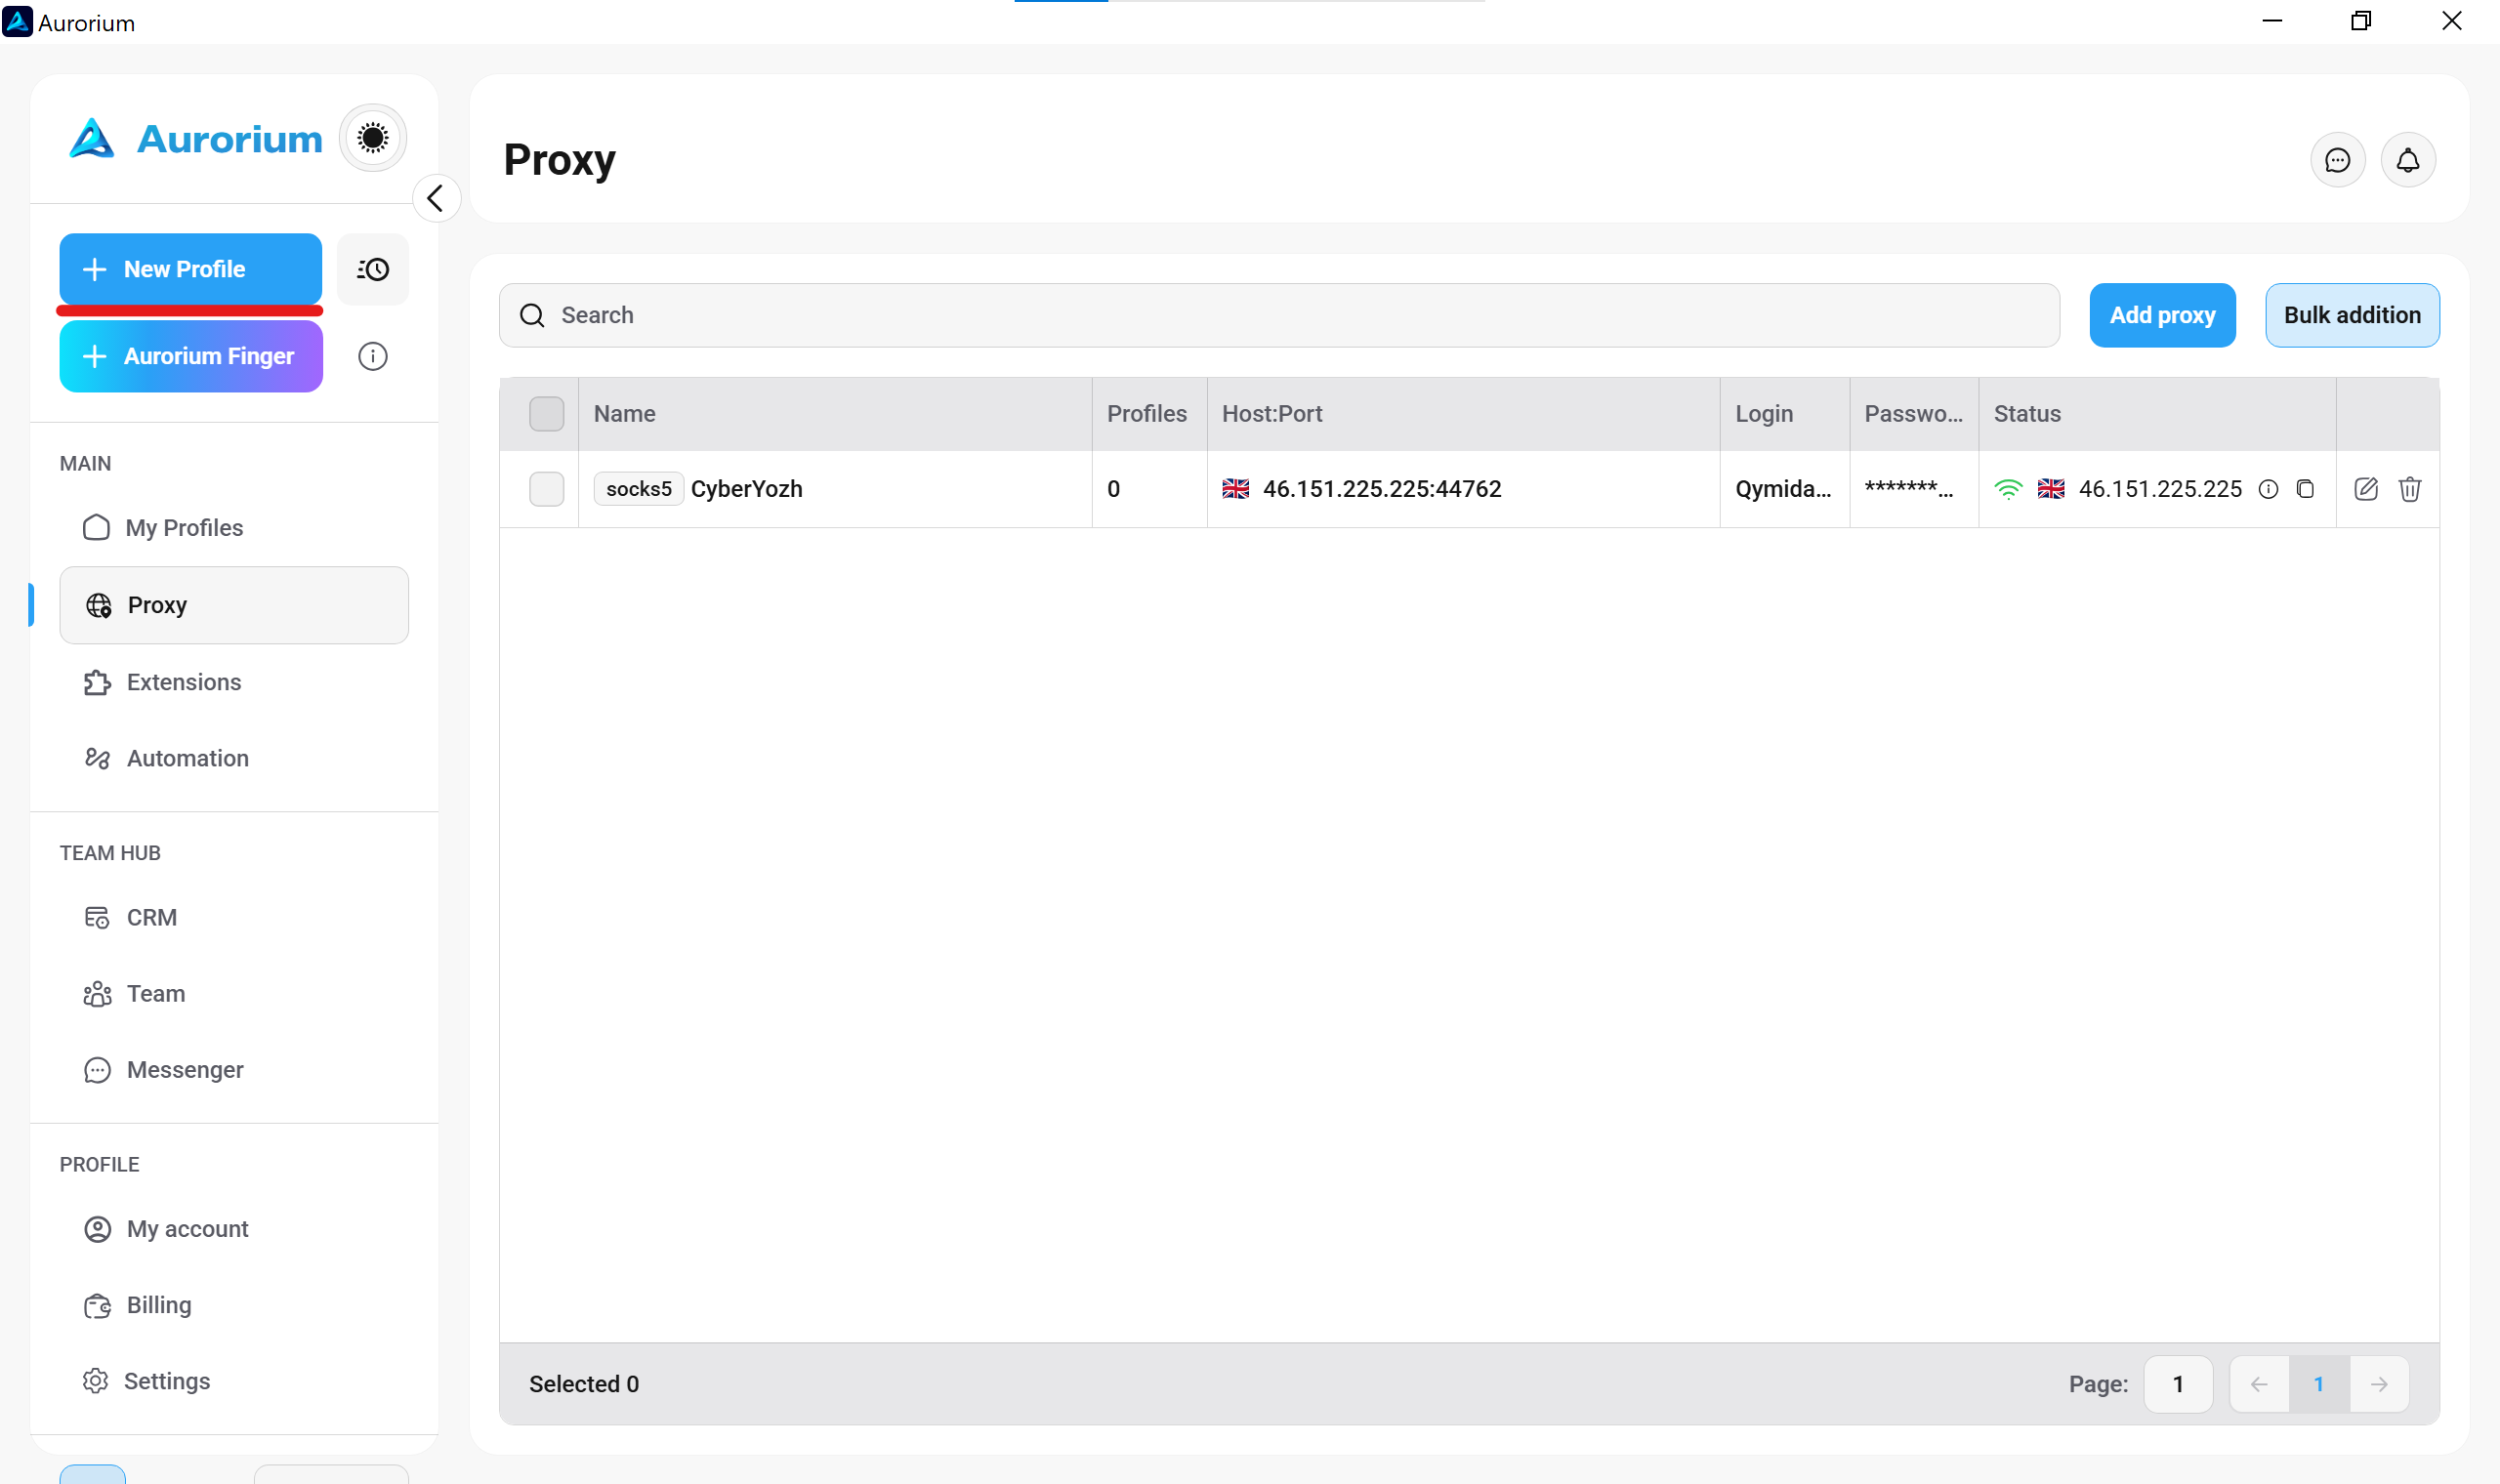
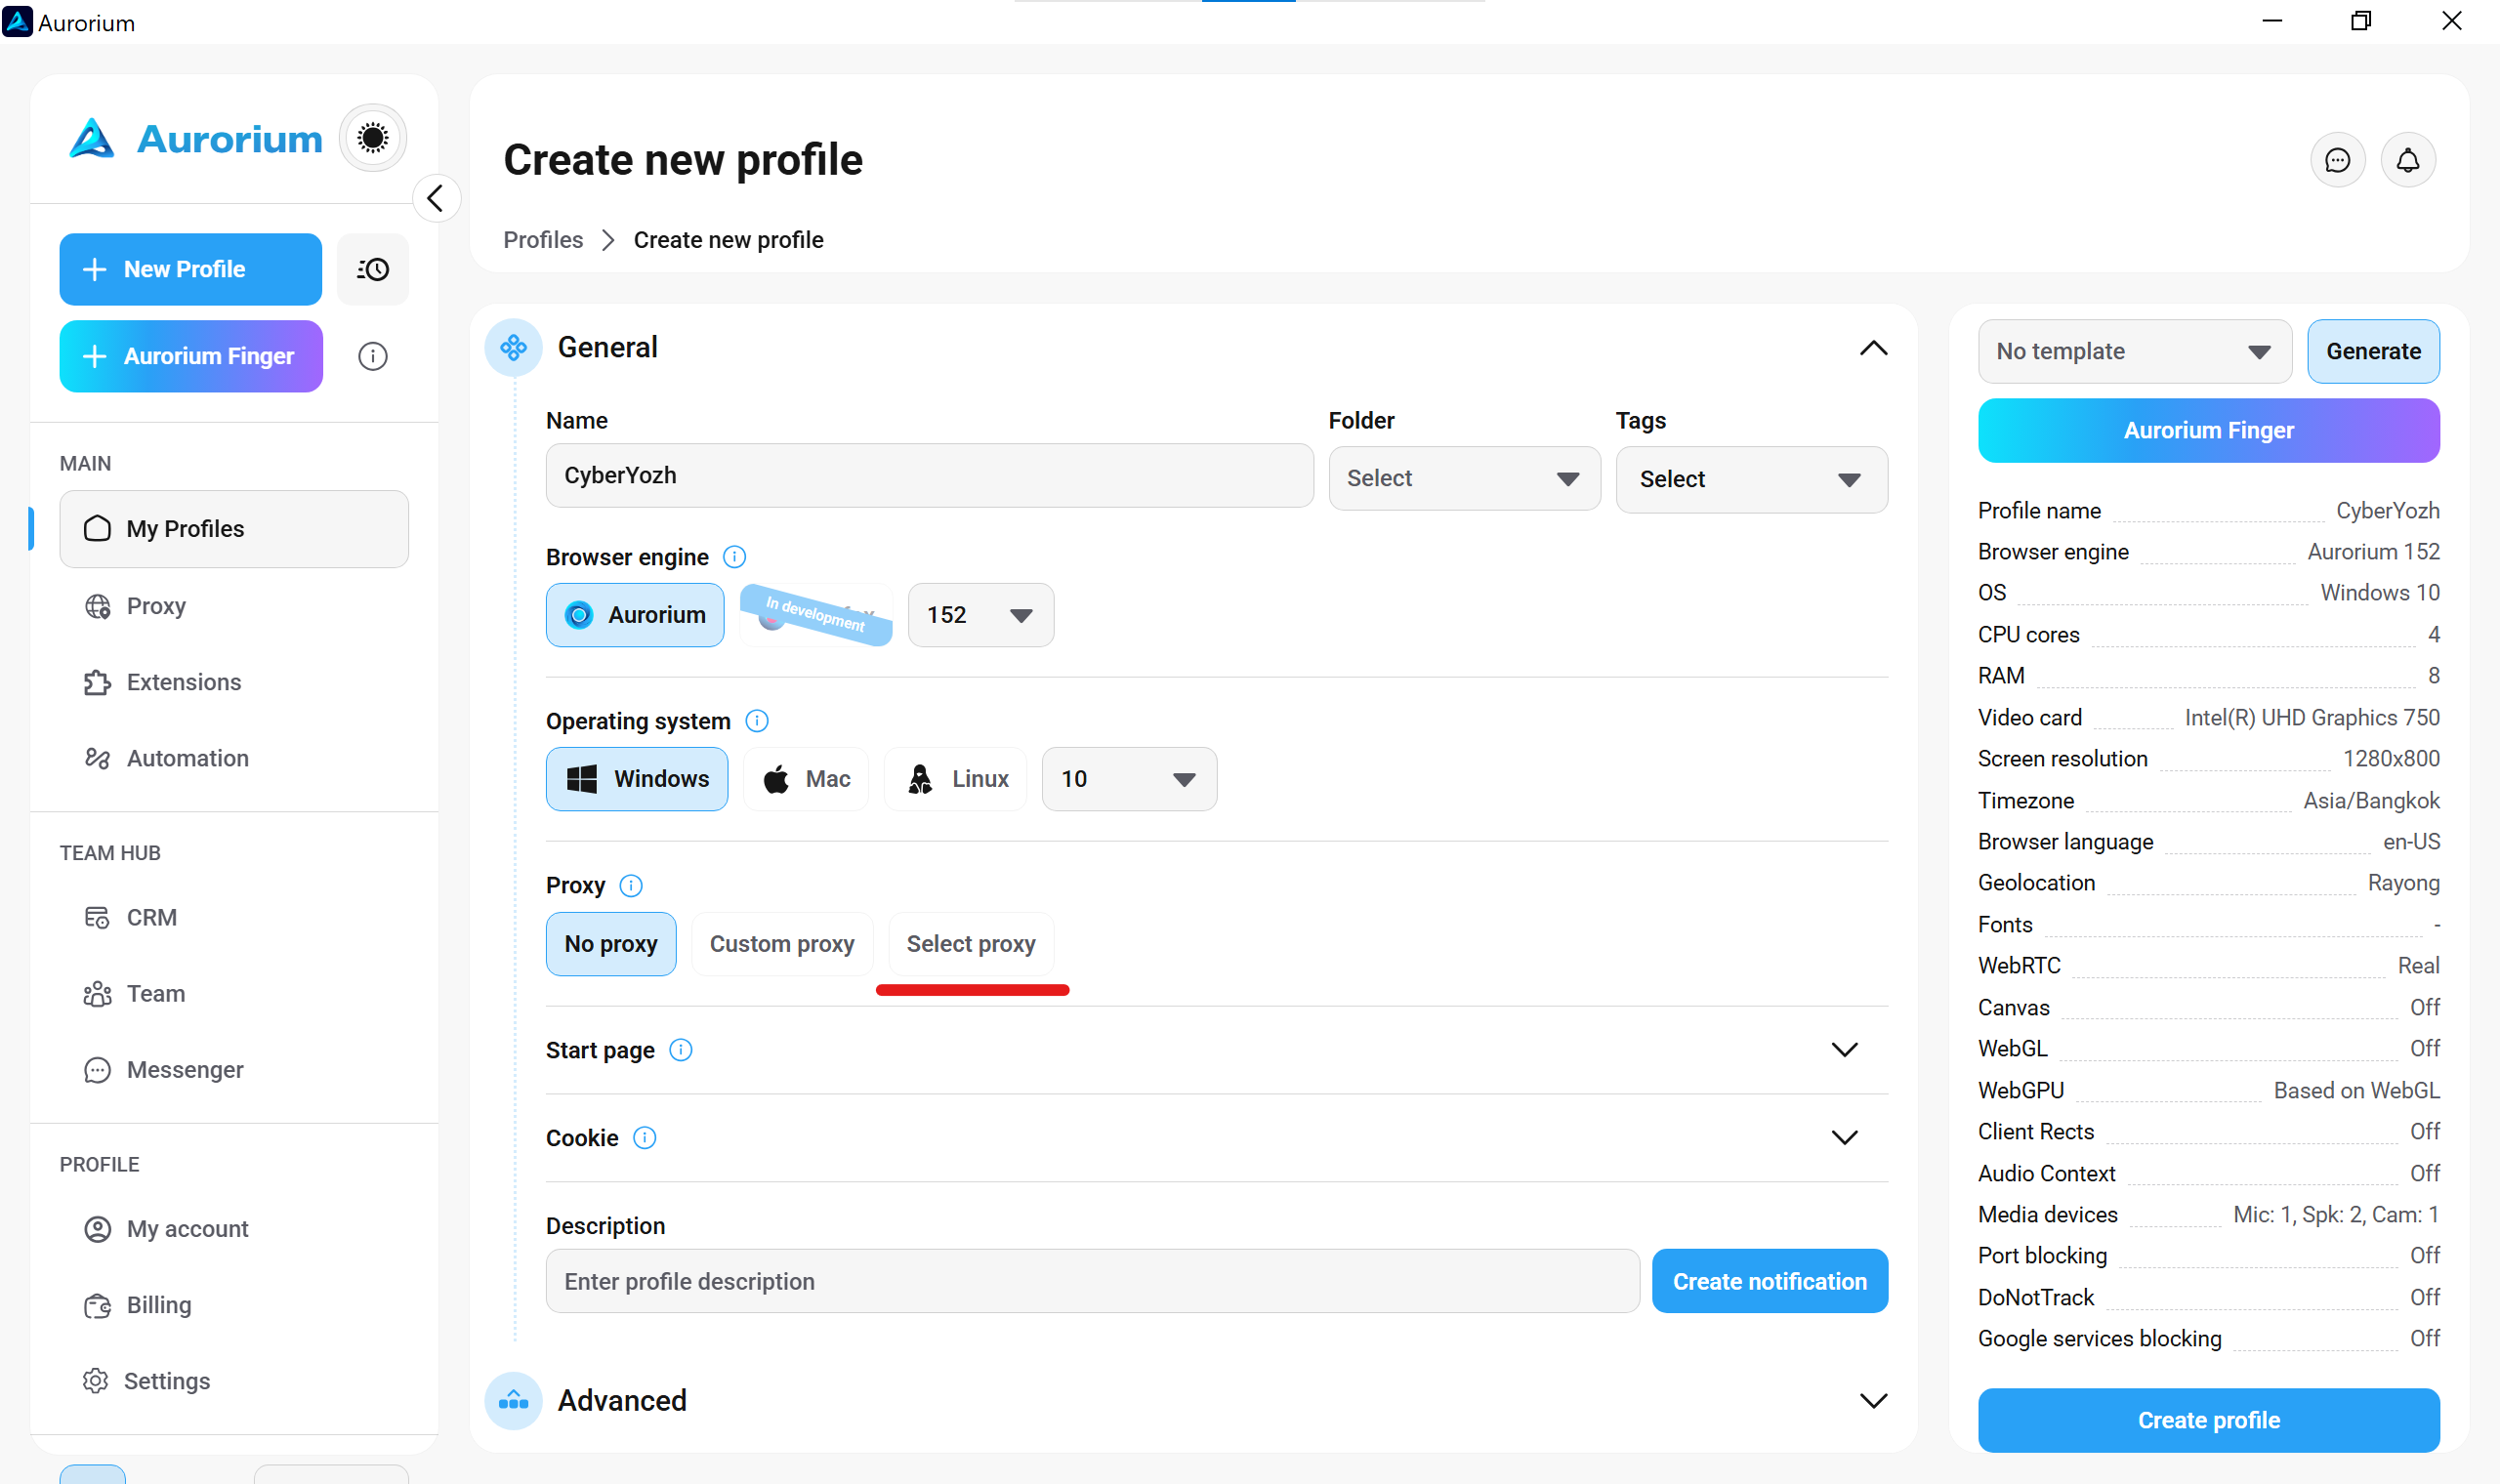
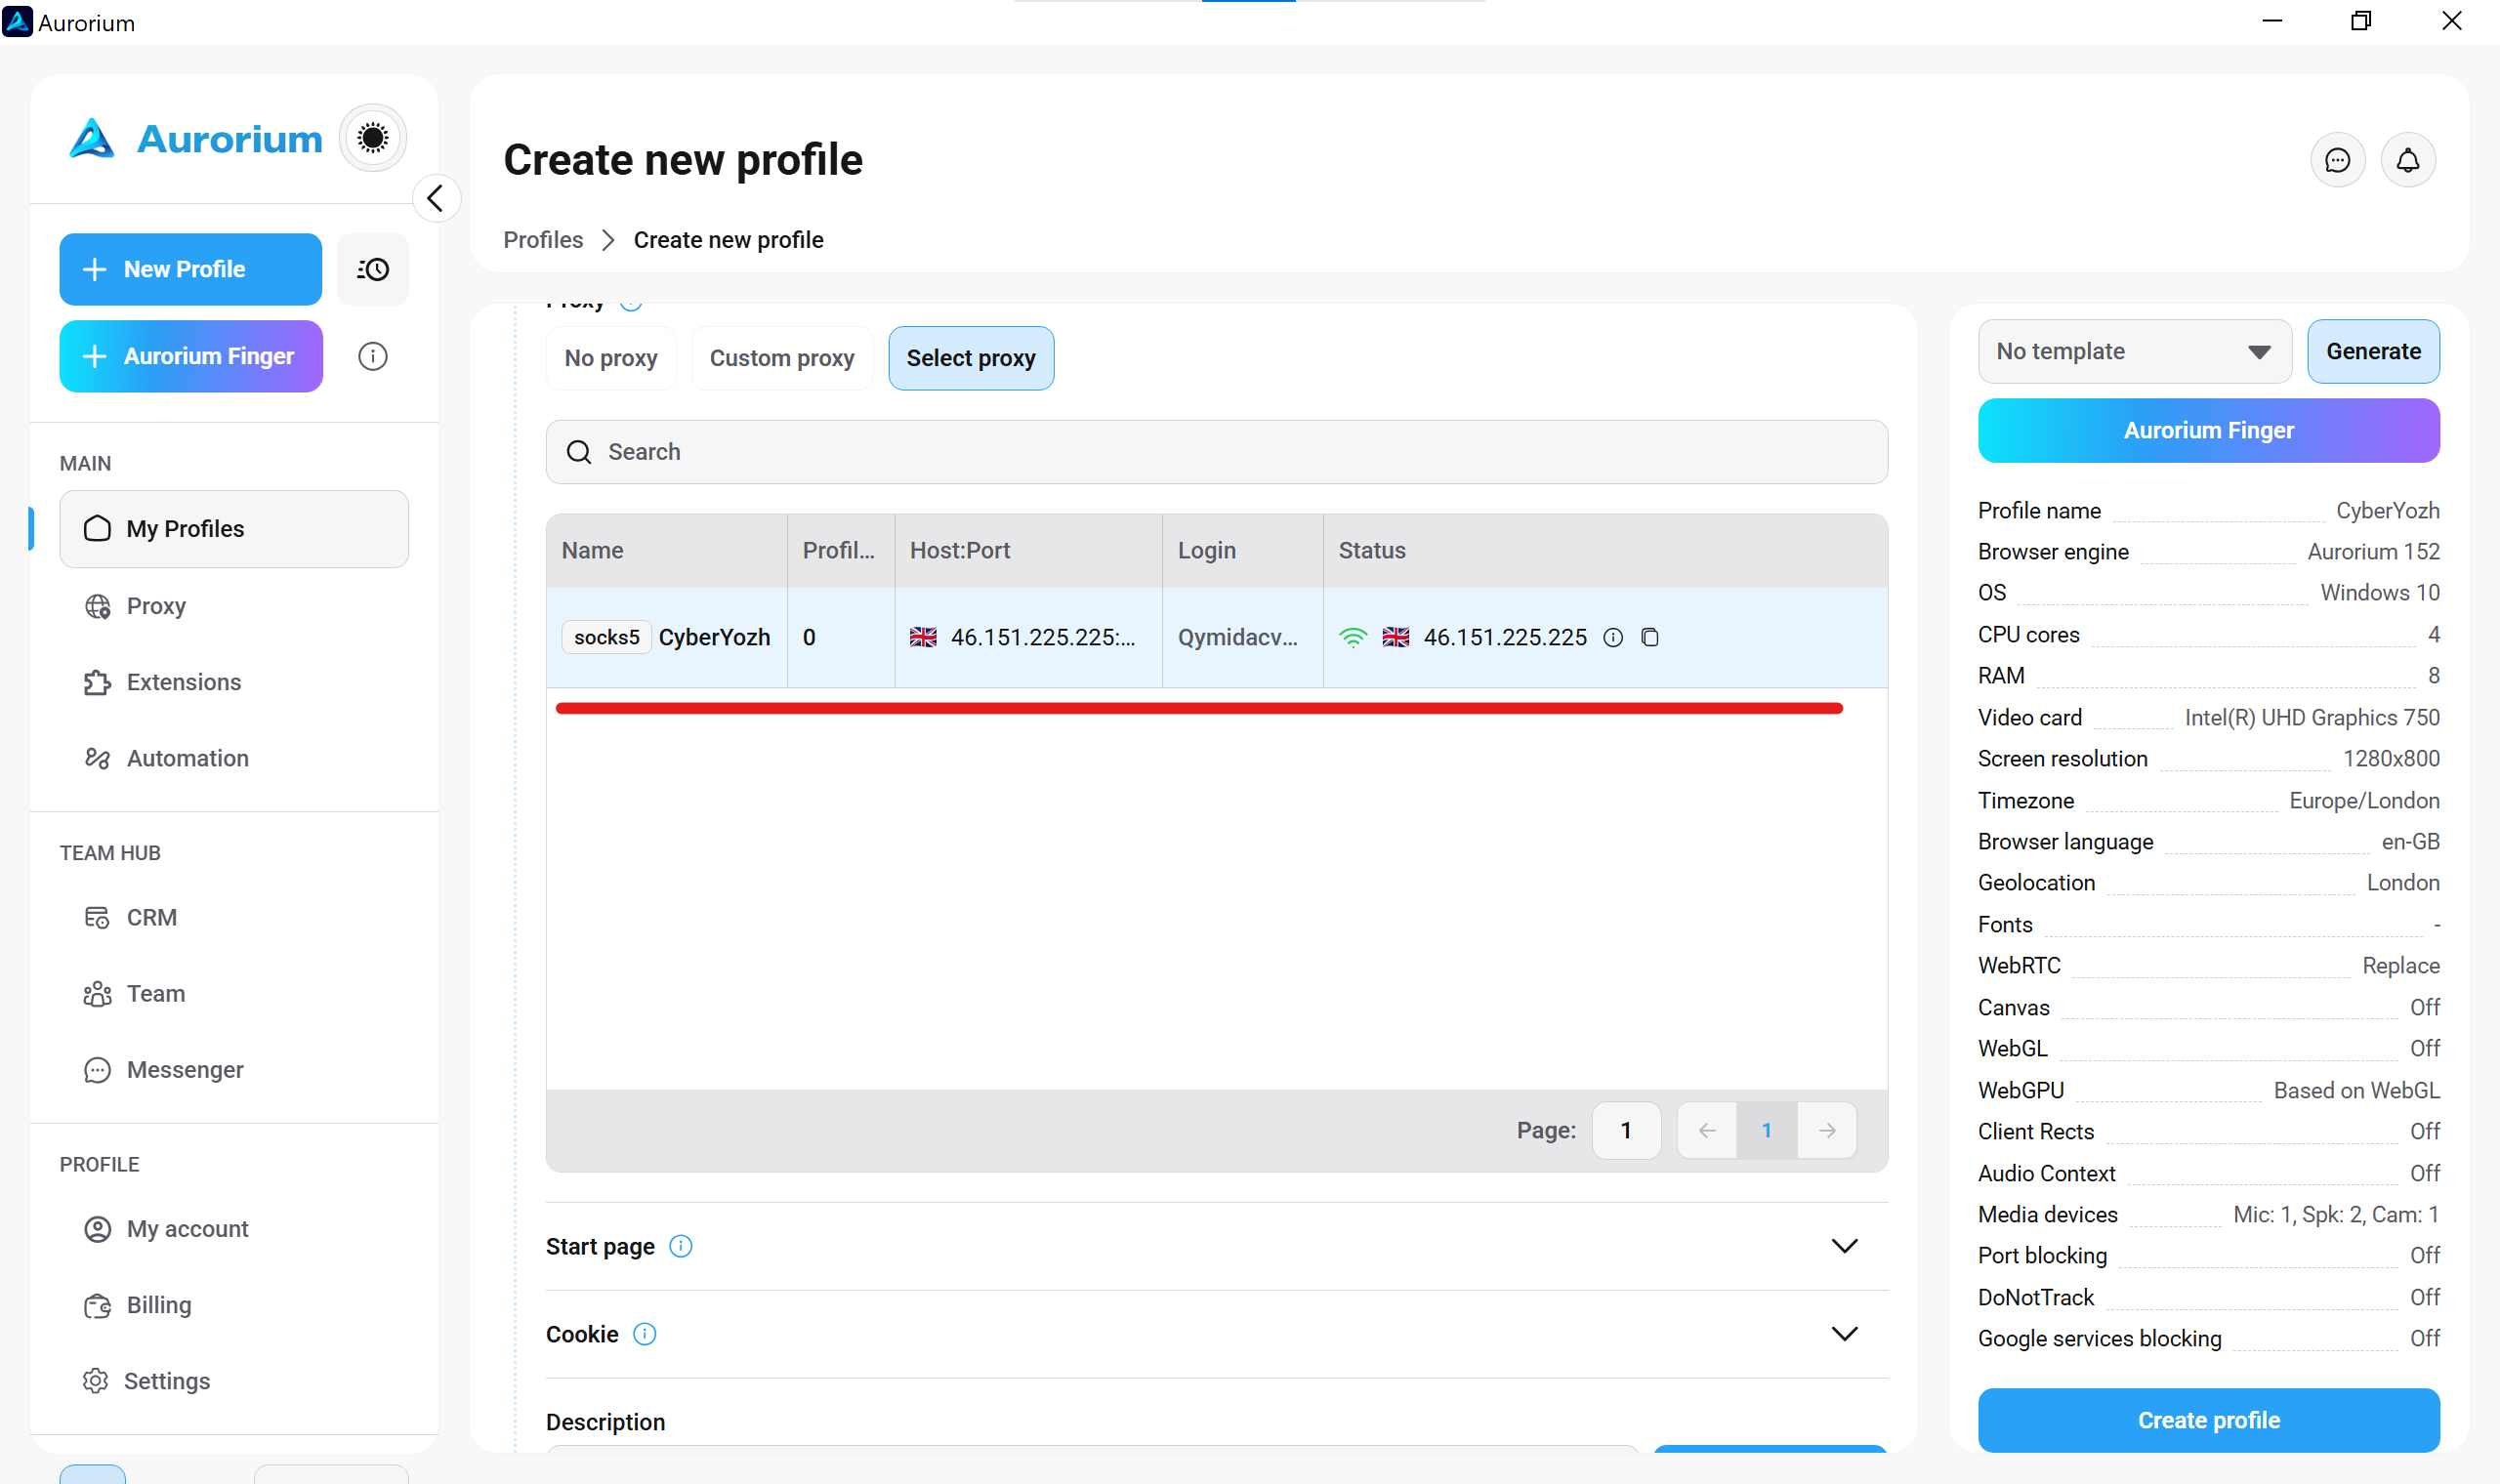
Navigate to the My Profiles tab and click New Profile. Scroll down to the Proxy section. Click Select proxy instead of Custom proxy. Choose your verified CyberYozh node from the dropdown list.
5. Align your TCP/IP stack (p0f protection)
Look at the Operating system selector right above the proxy settings. This is the most critical step. If you select Windows here, you must physically align your packet headers to prevent them from broadcasting a Linux kernel.
👉 Upgrade to Premium Mobile Proxies: Only dedicated premium ports on CyberYozh grant access to the native Fingerprint OS feature and VLESS/Xray protocol support.
Activate it and set it to Windows. The provider physically rewrites your TCP packet headers (TTL and MSS values), effectively neutralizing passive OS fingerprinting mismatches.
6. Finalize and launch the environment
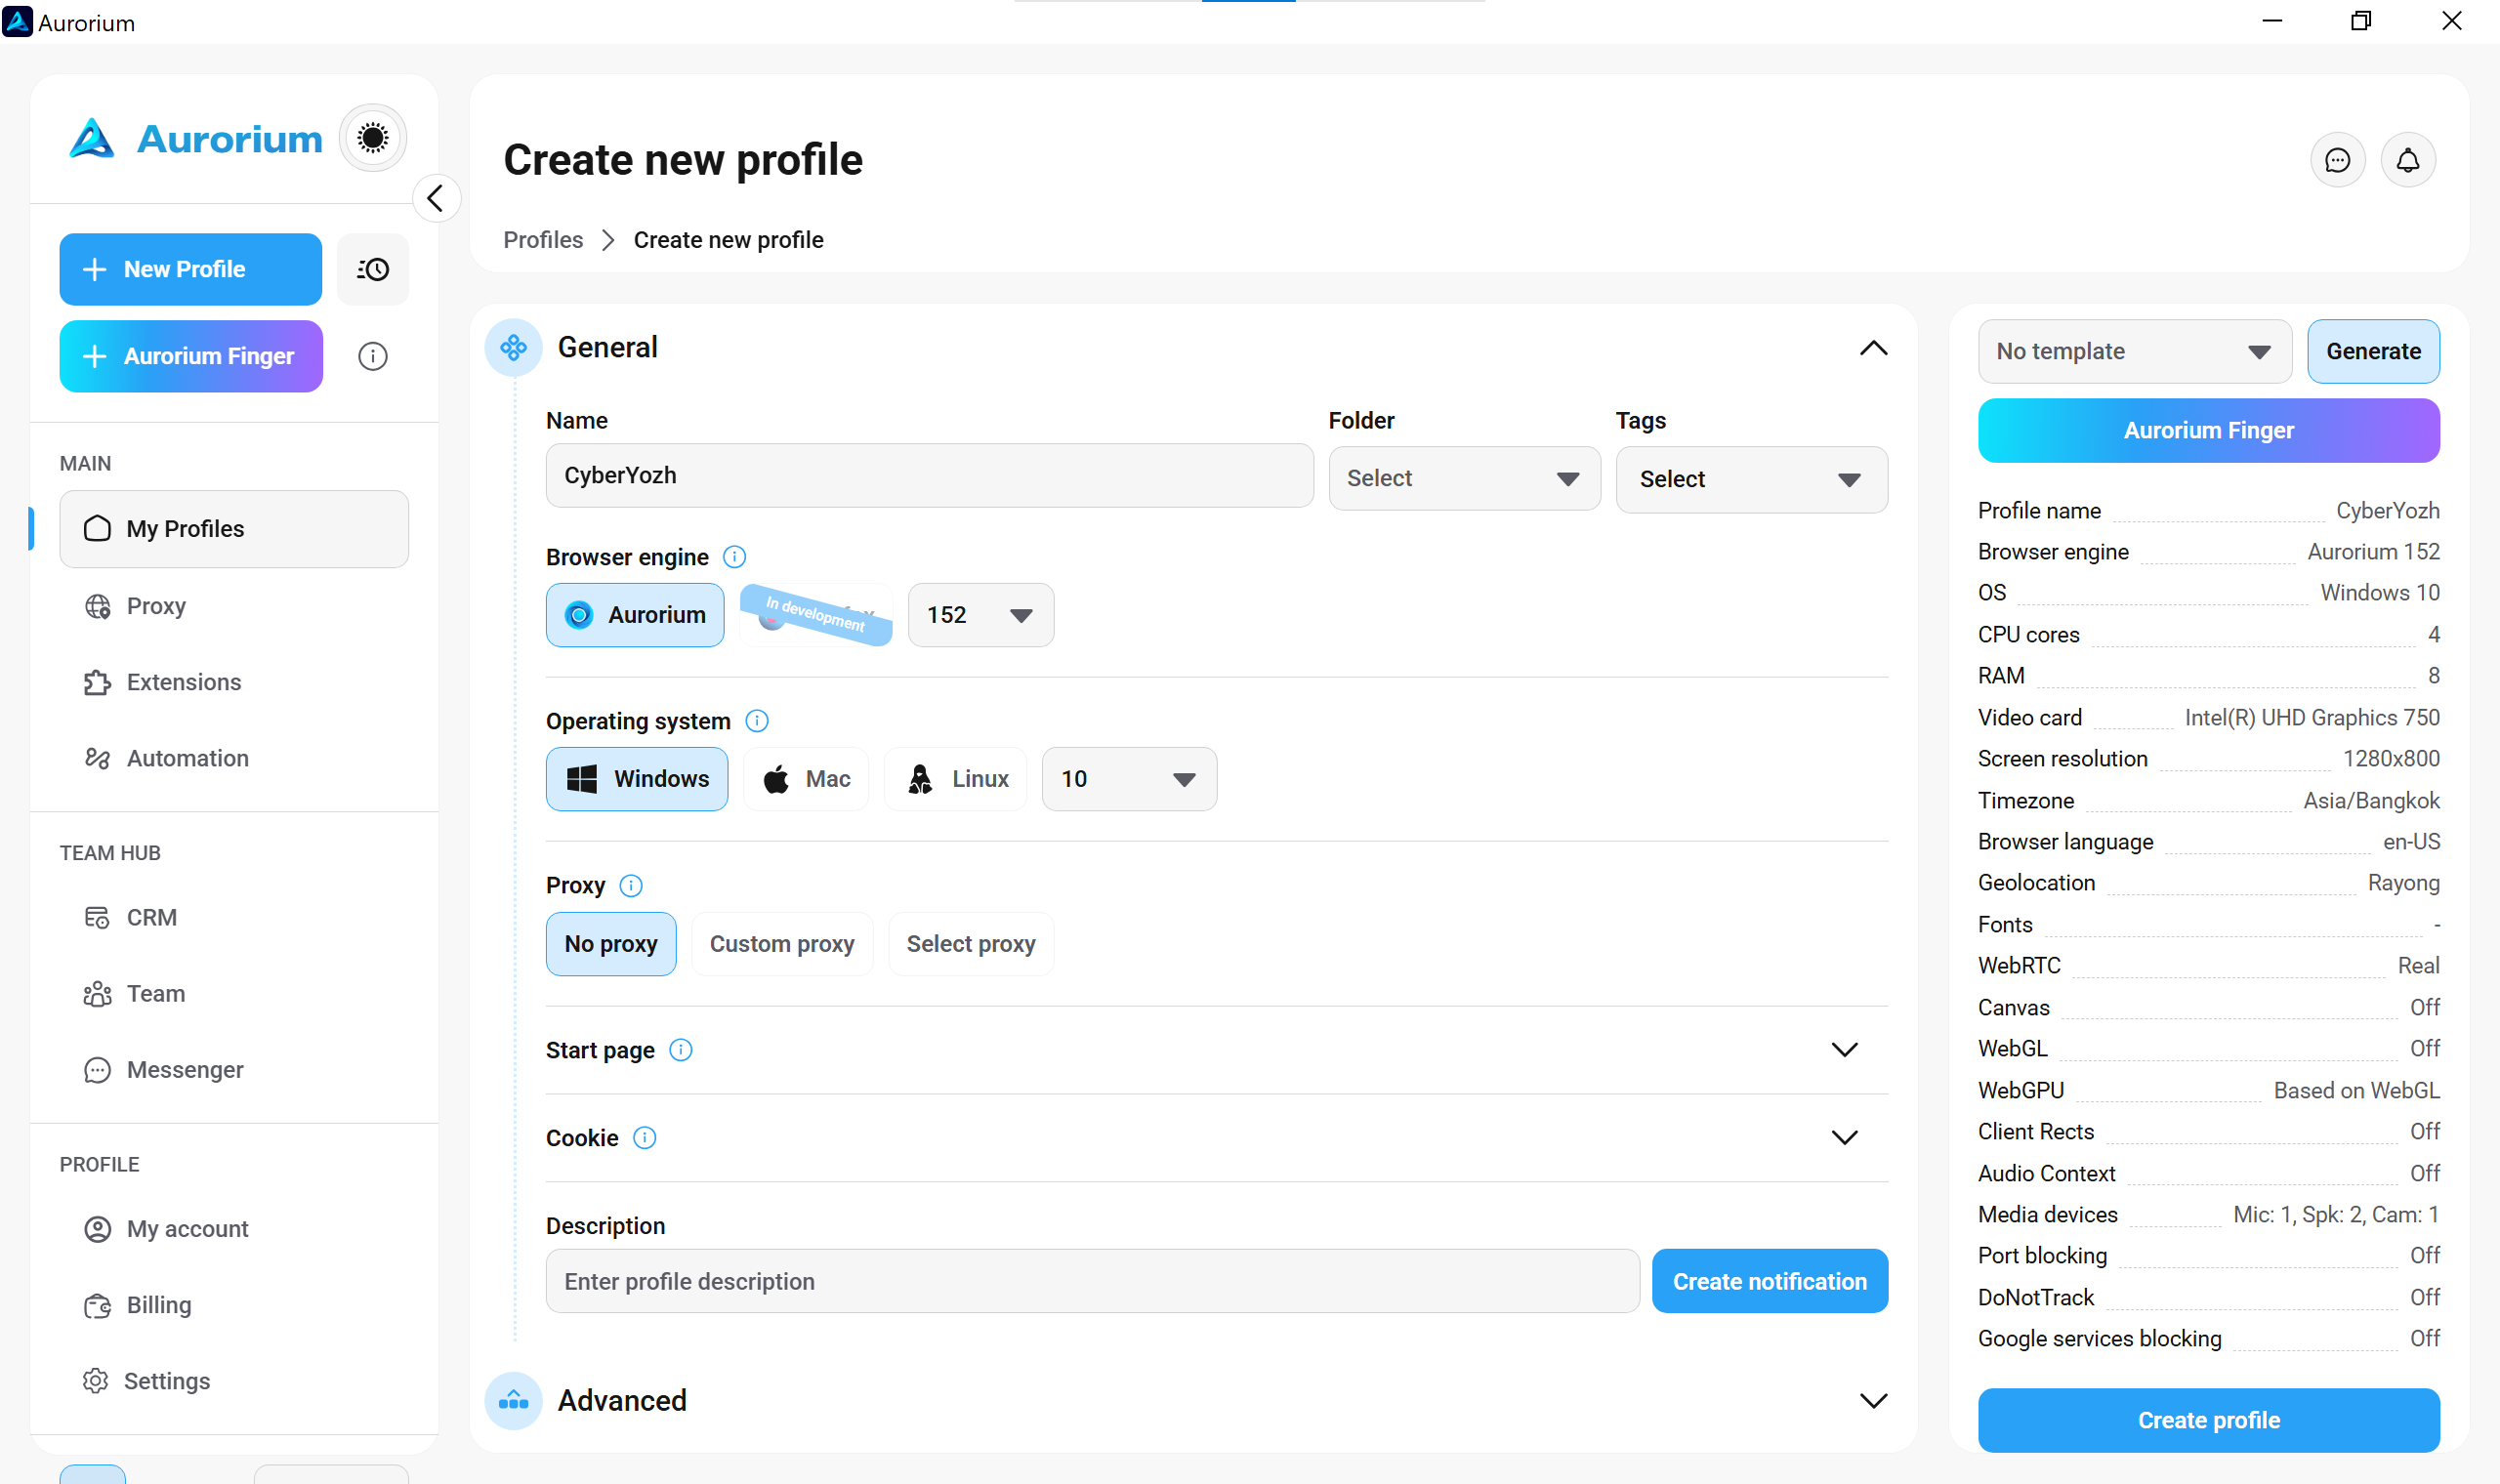
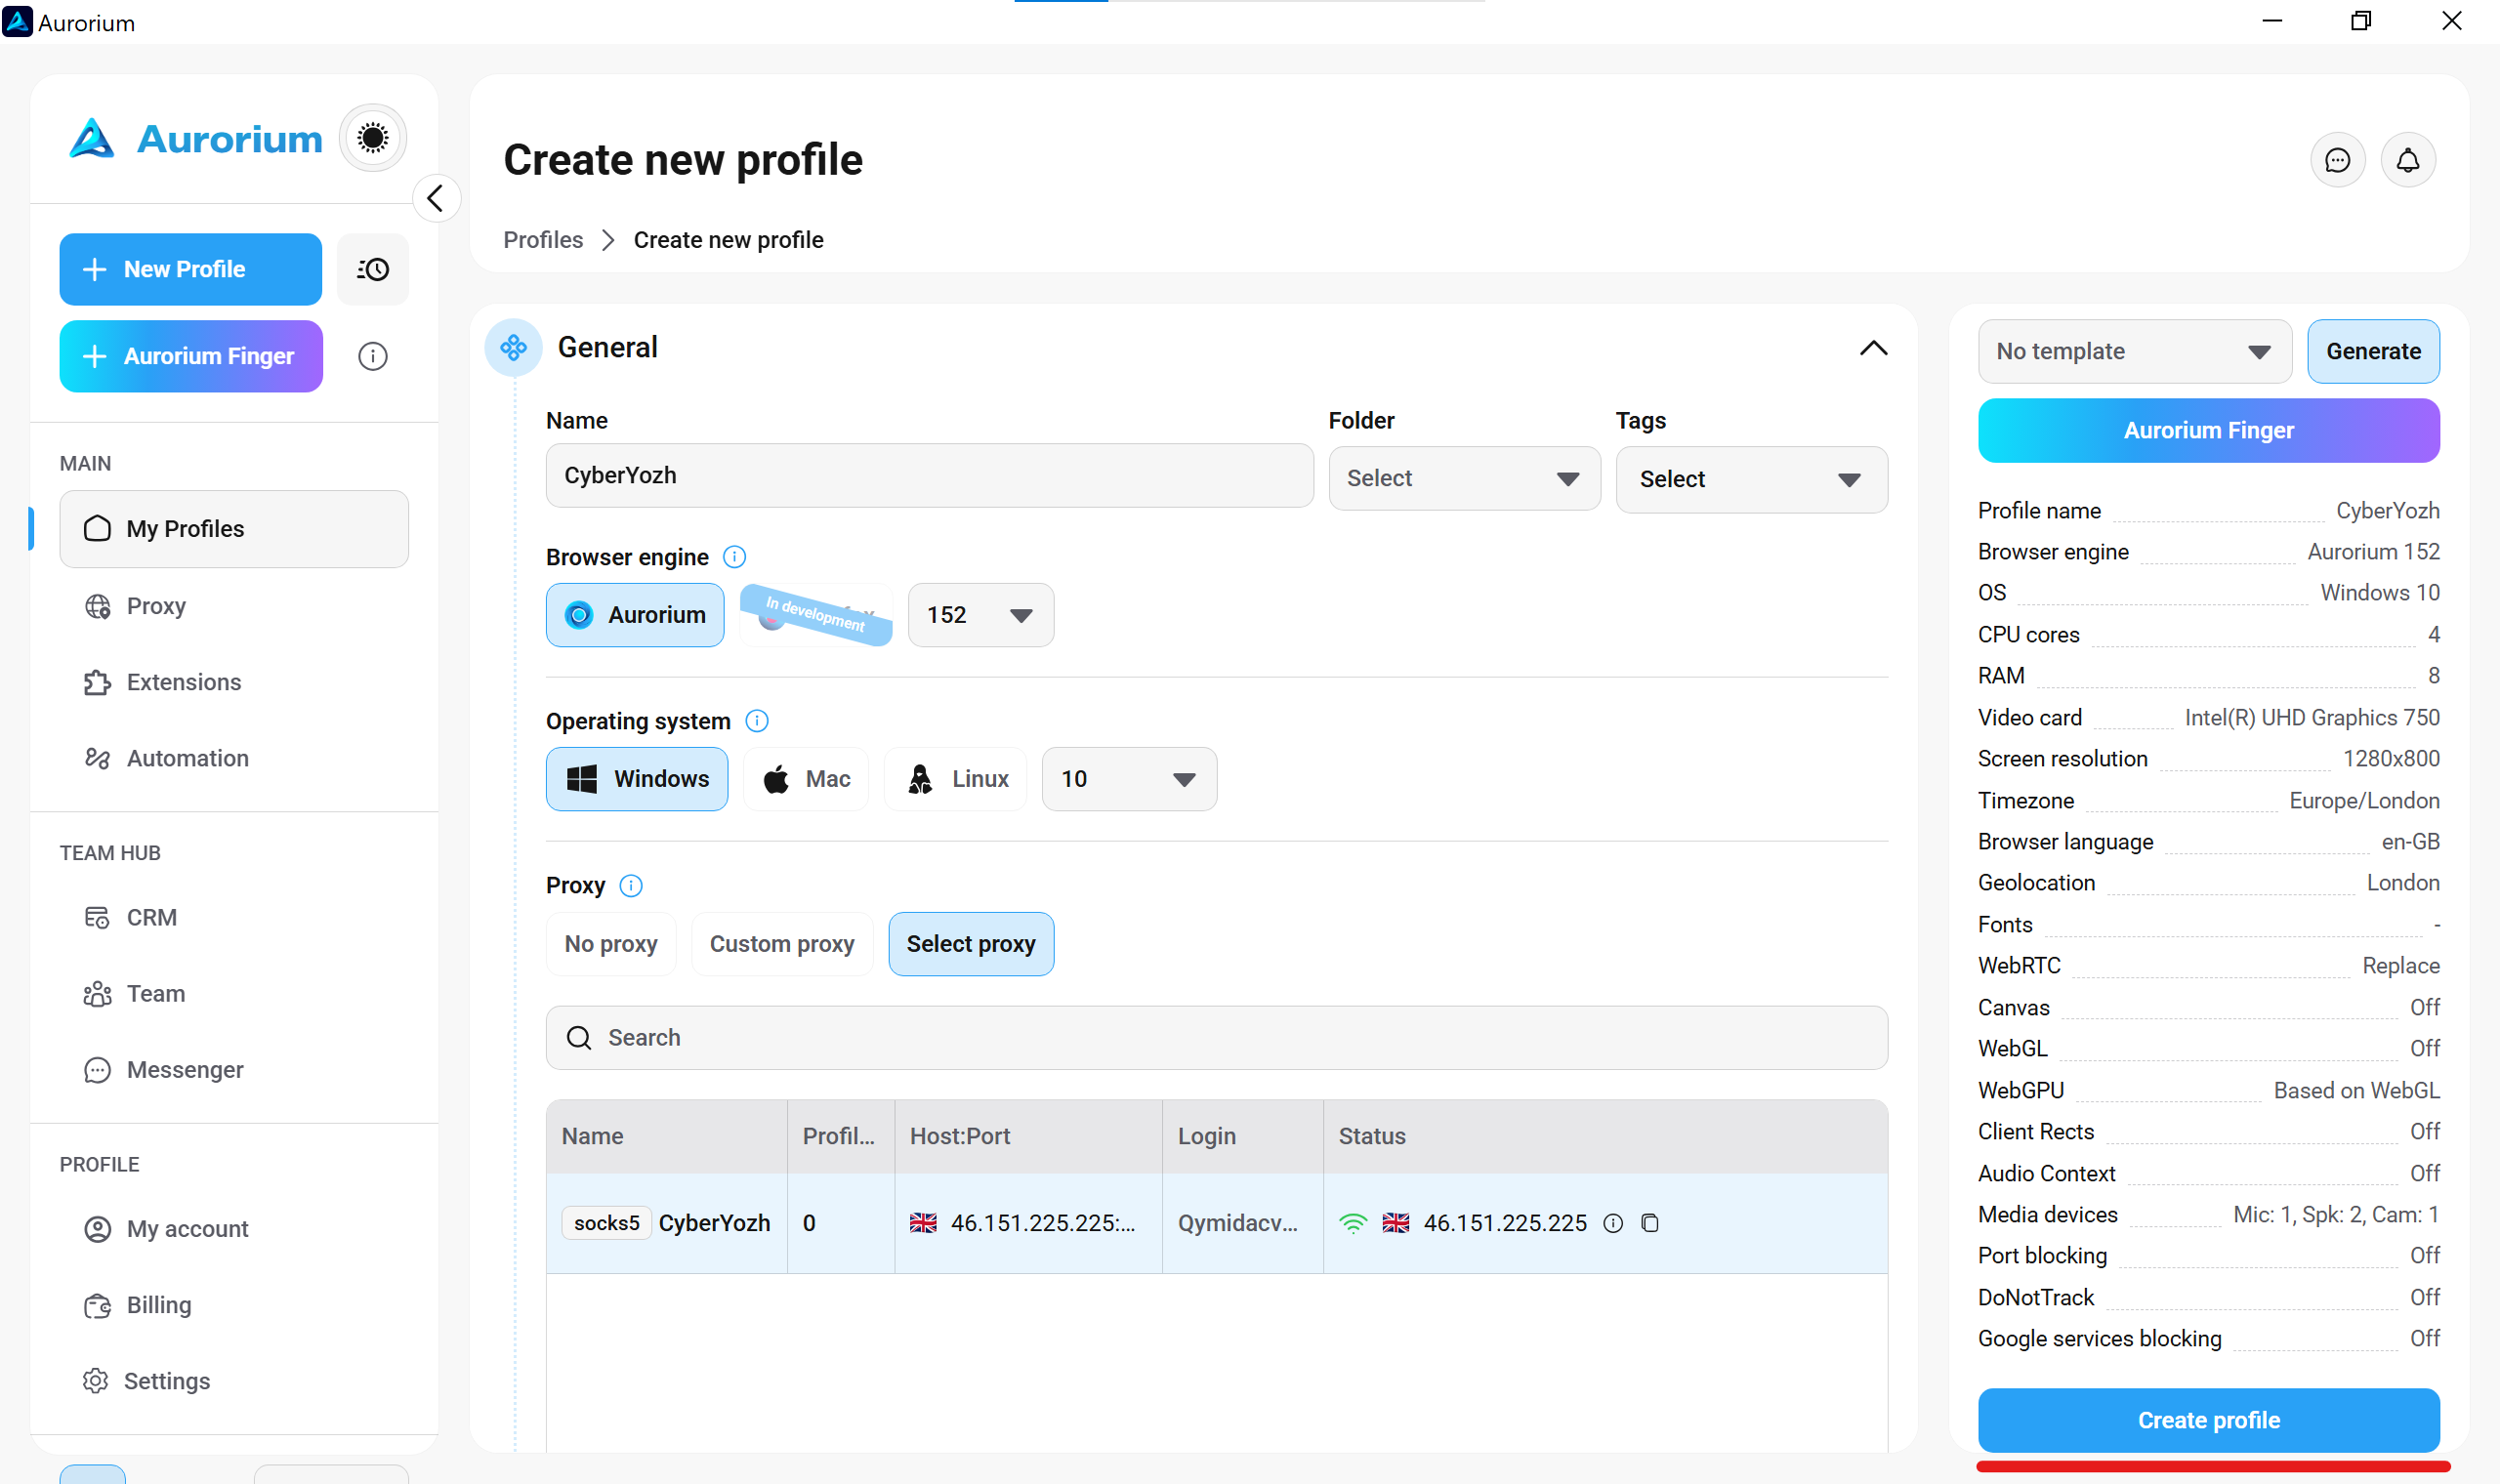
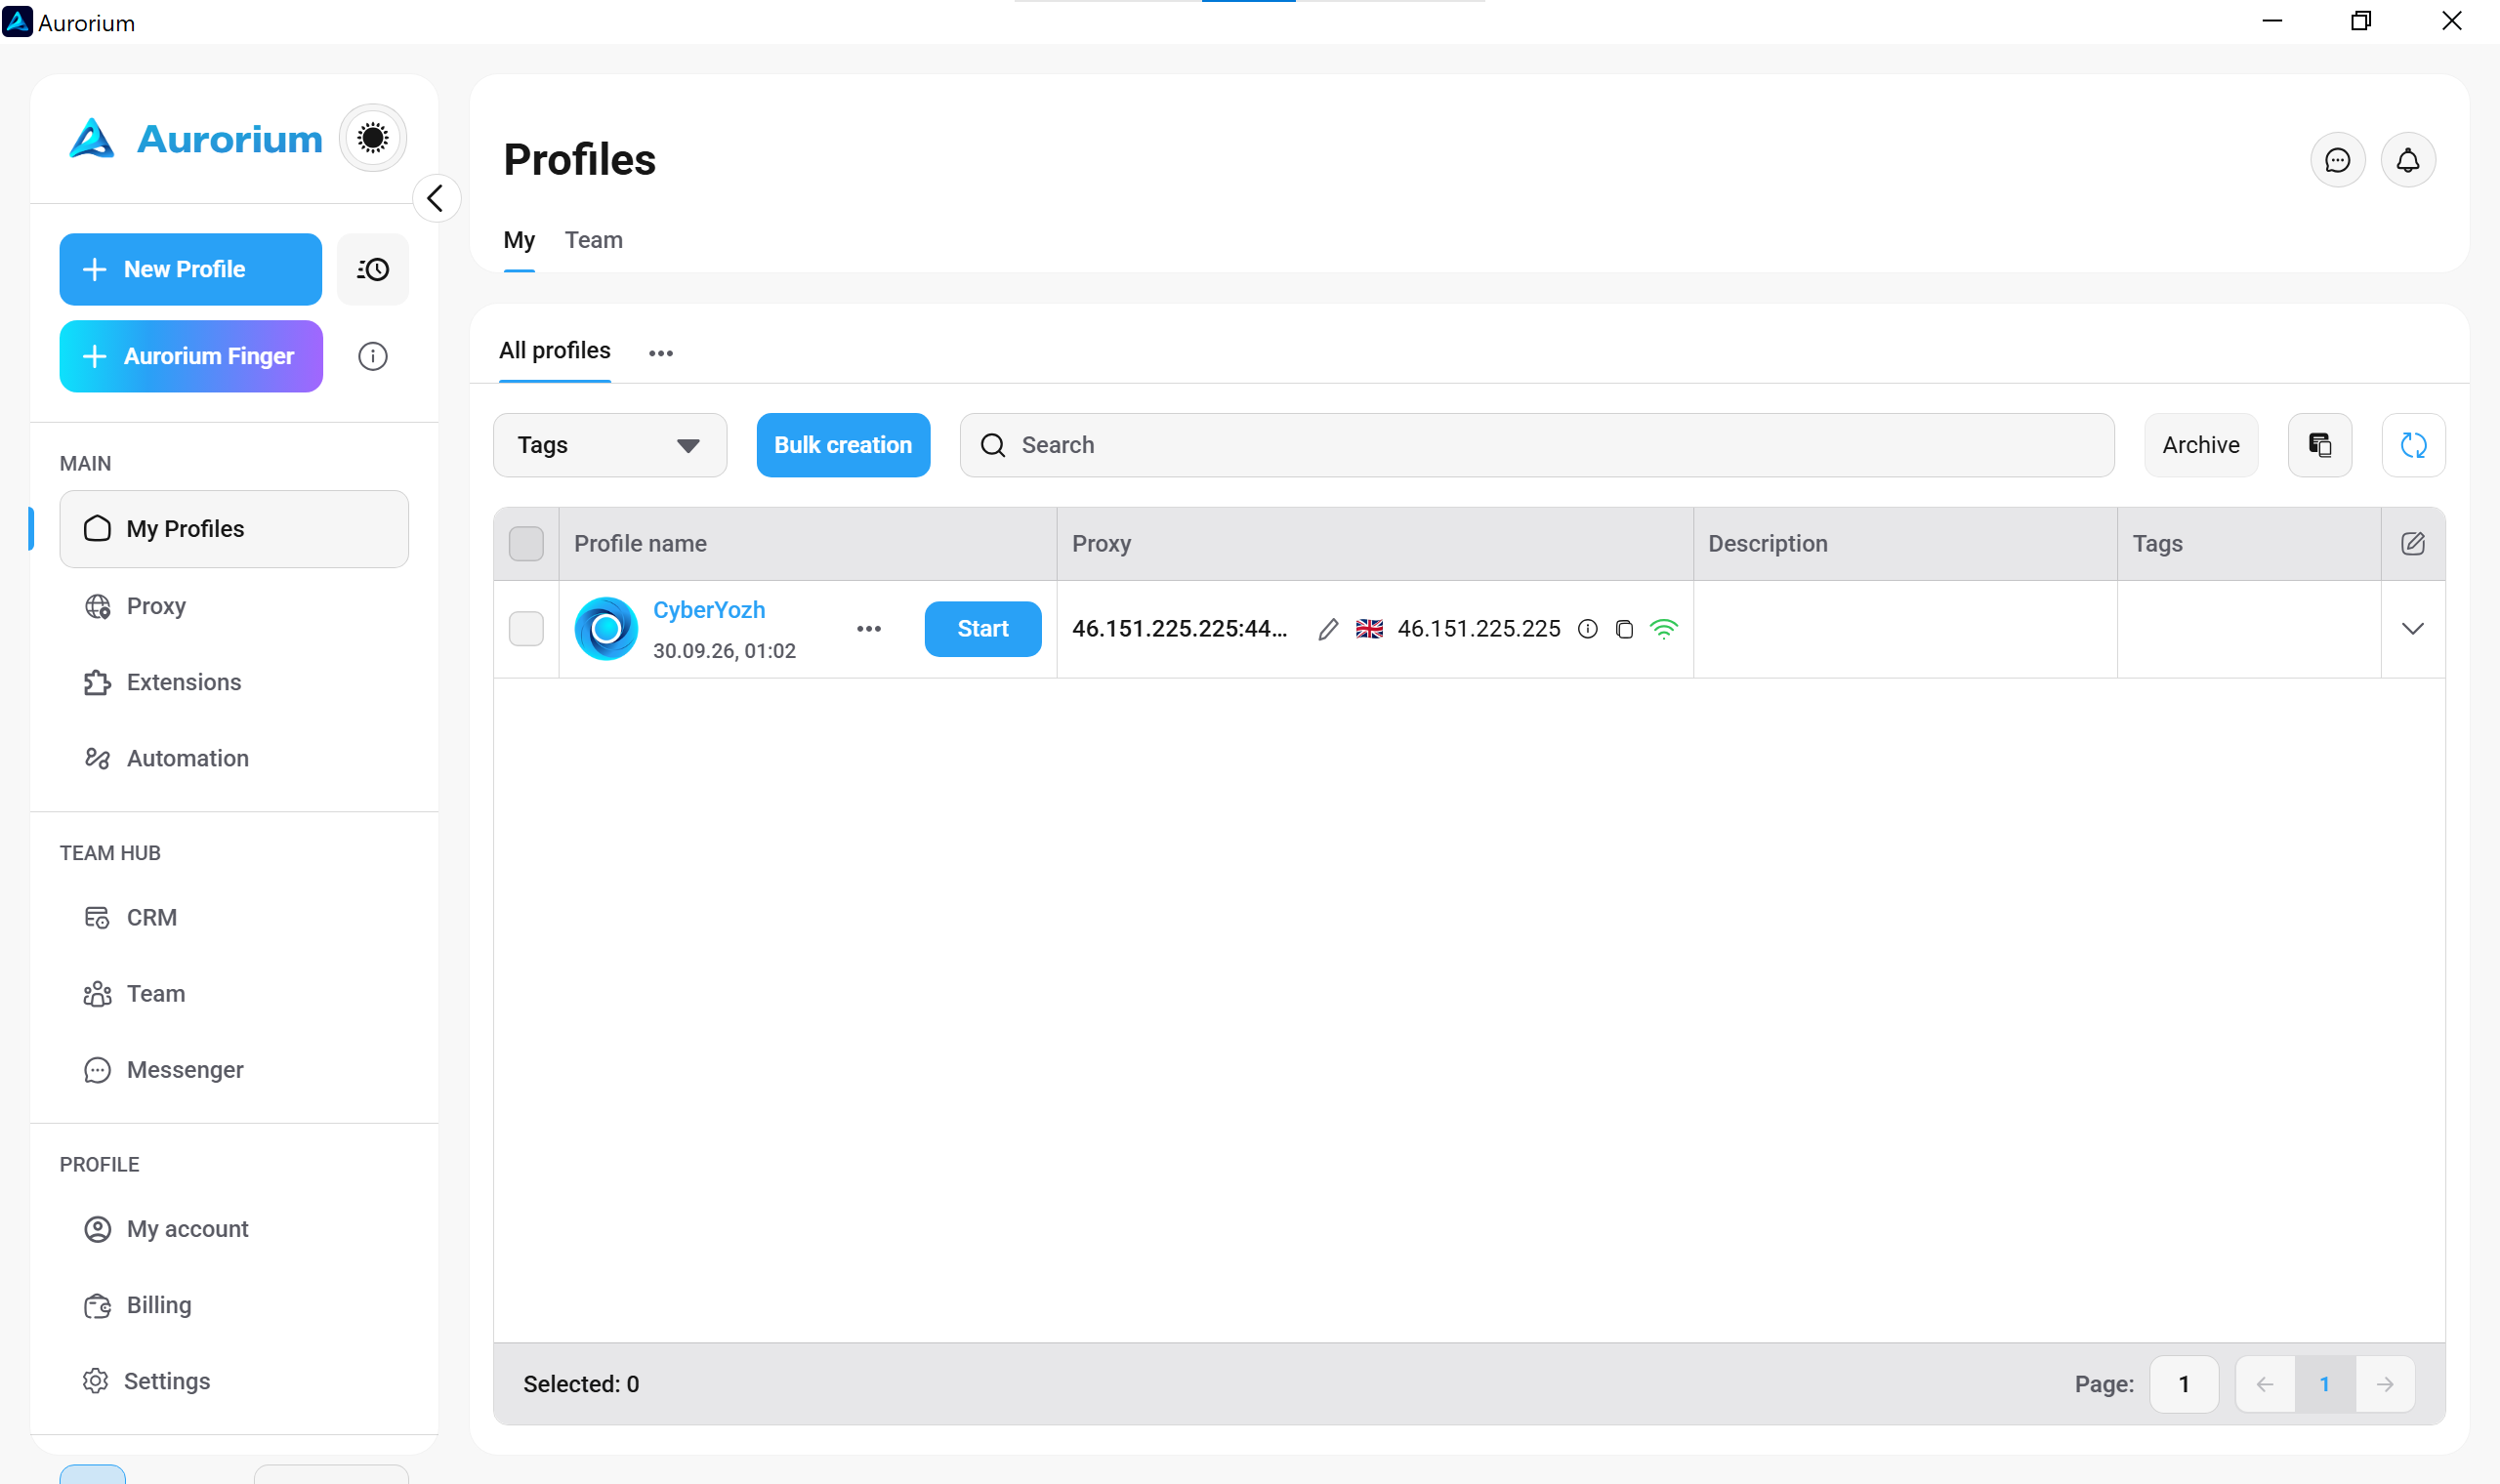
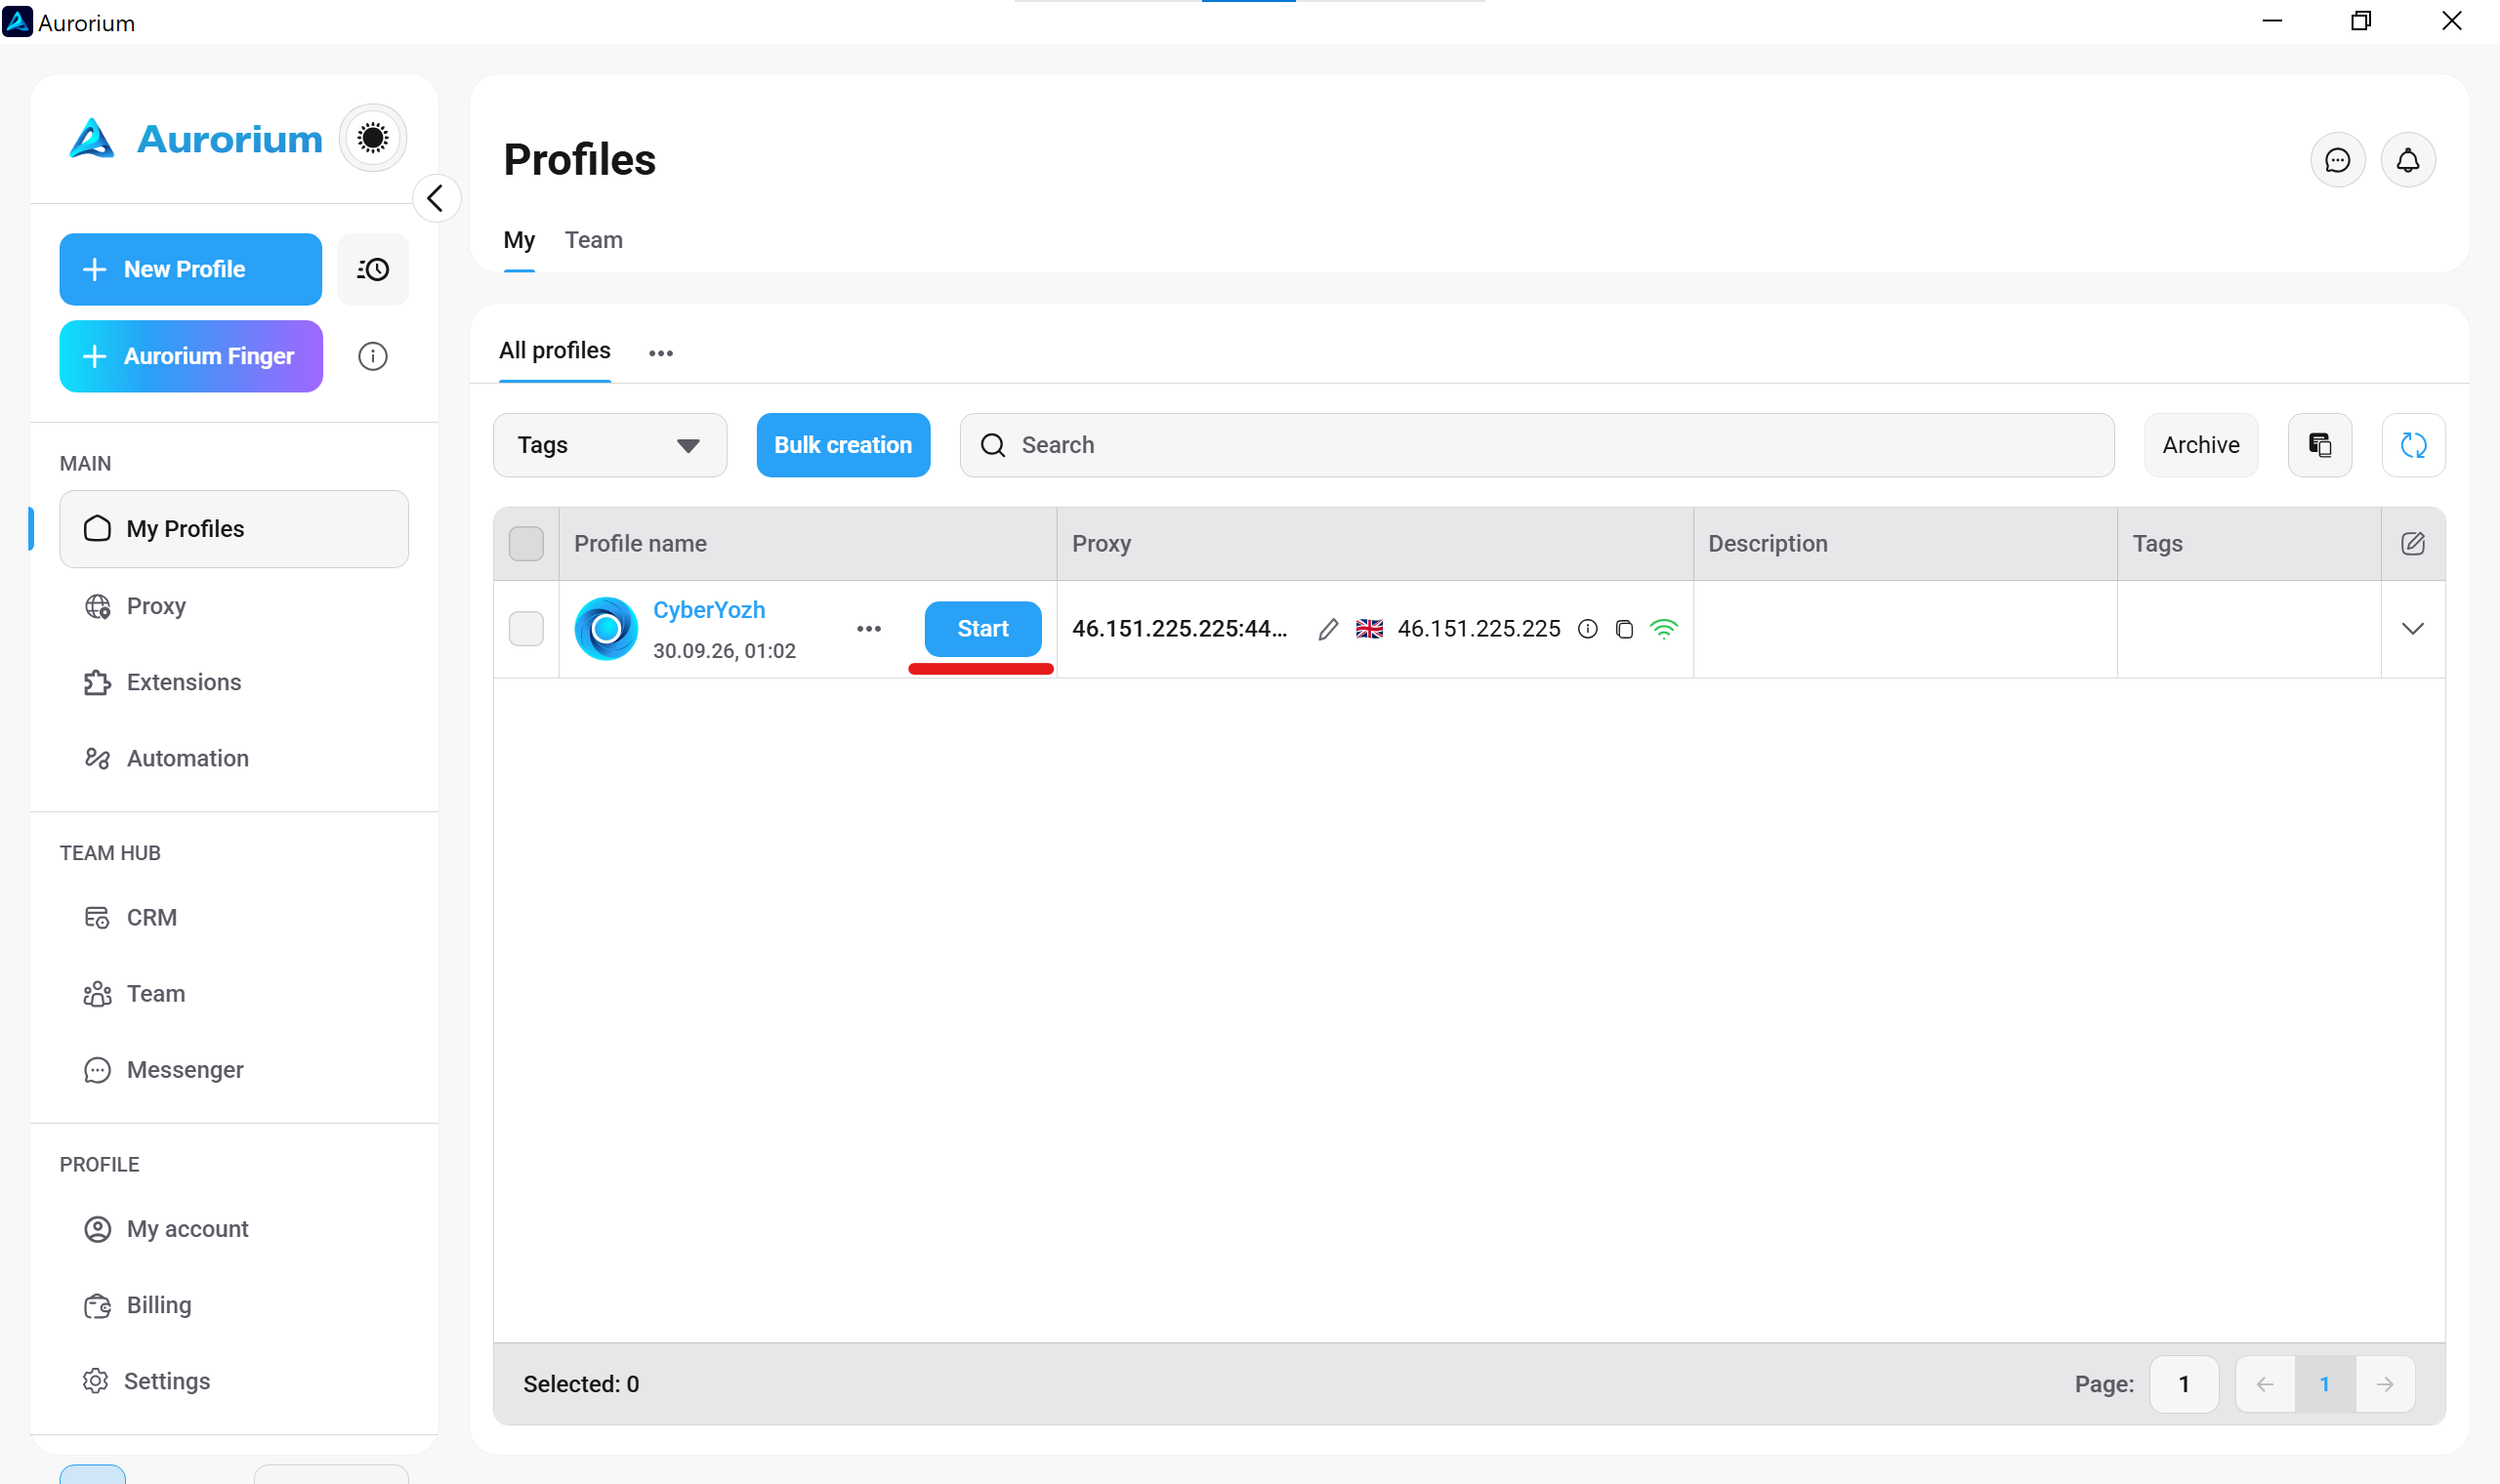
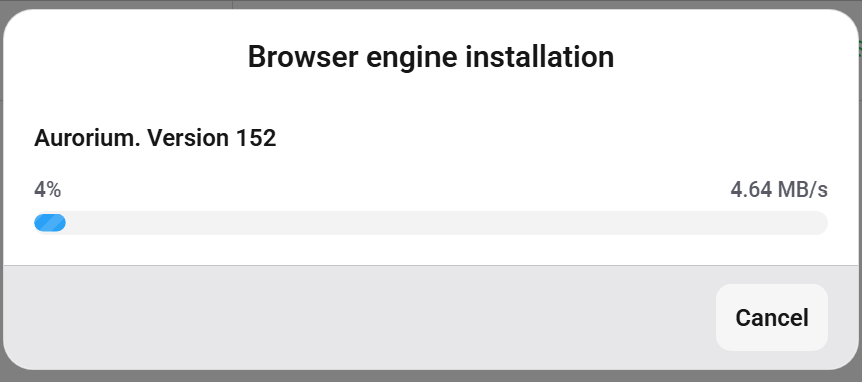
Click the Create profile button. The system saves your environment to the main Profiles list. Click Start. The application downloads the matching browser engine version during the initial launch. Wait for the progress bar to complete. The isolated window opens automatically.
7. Technical footprint audit
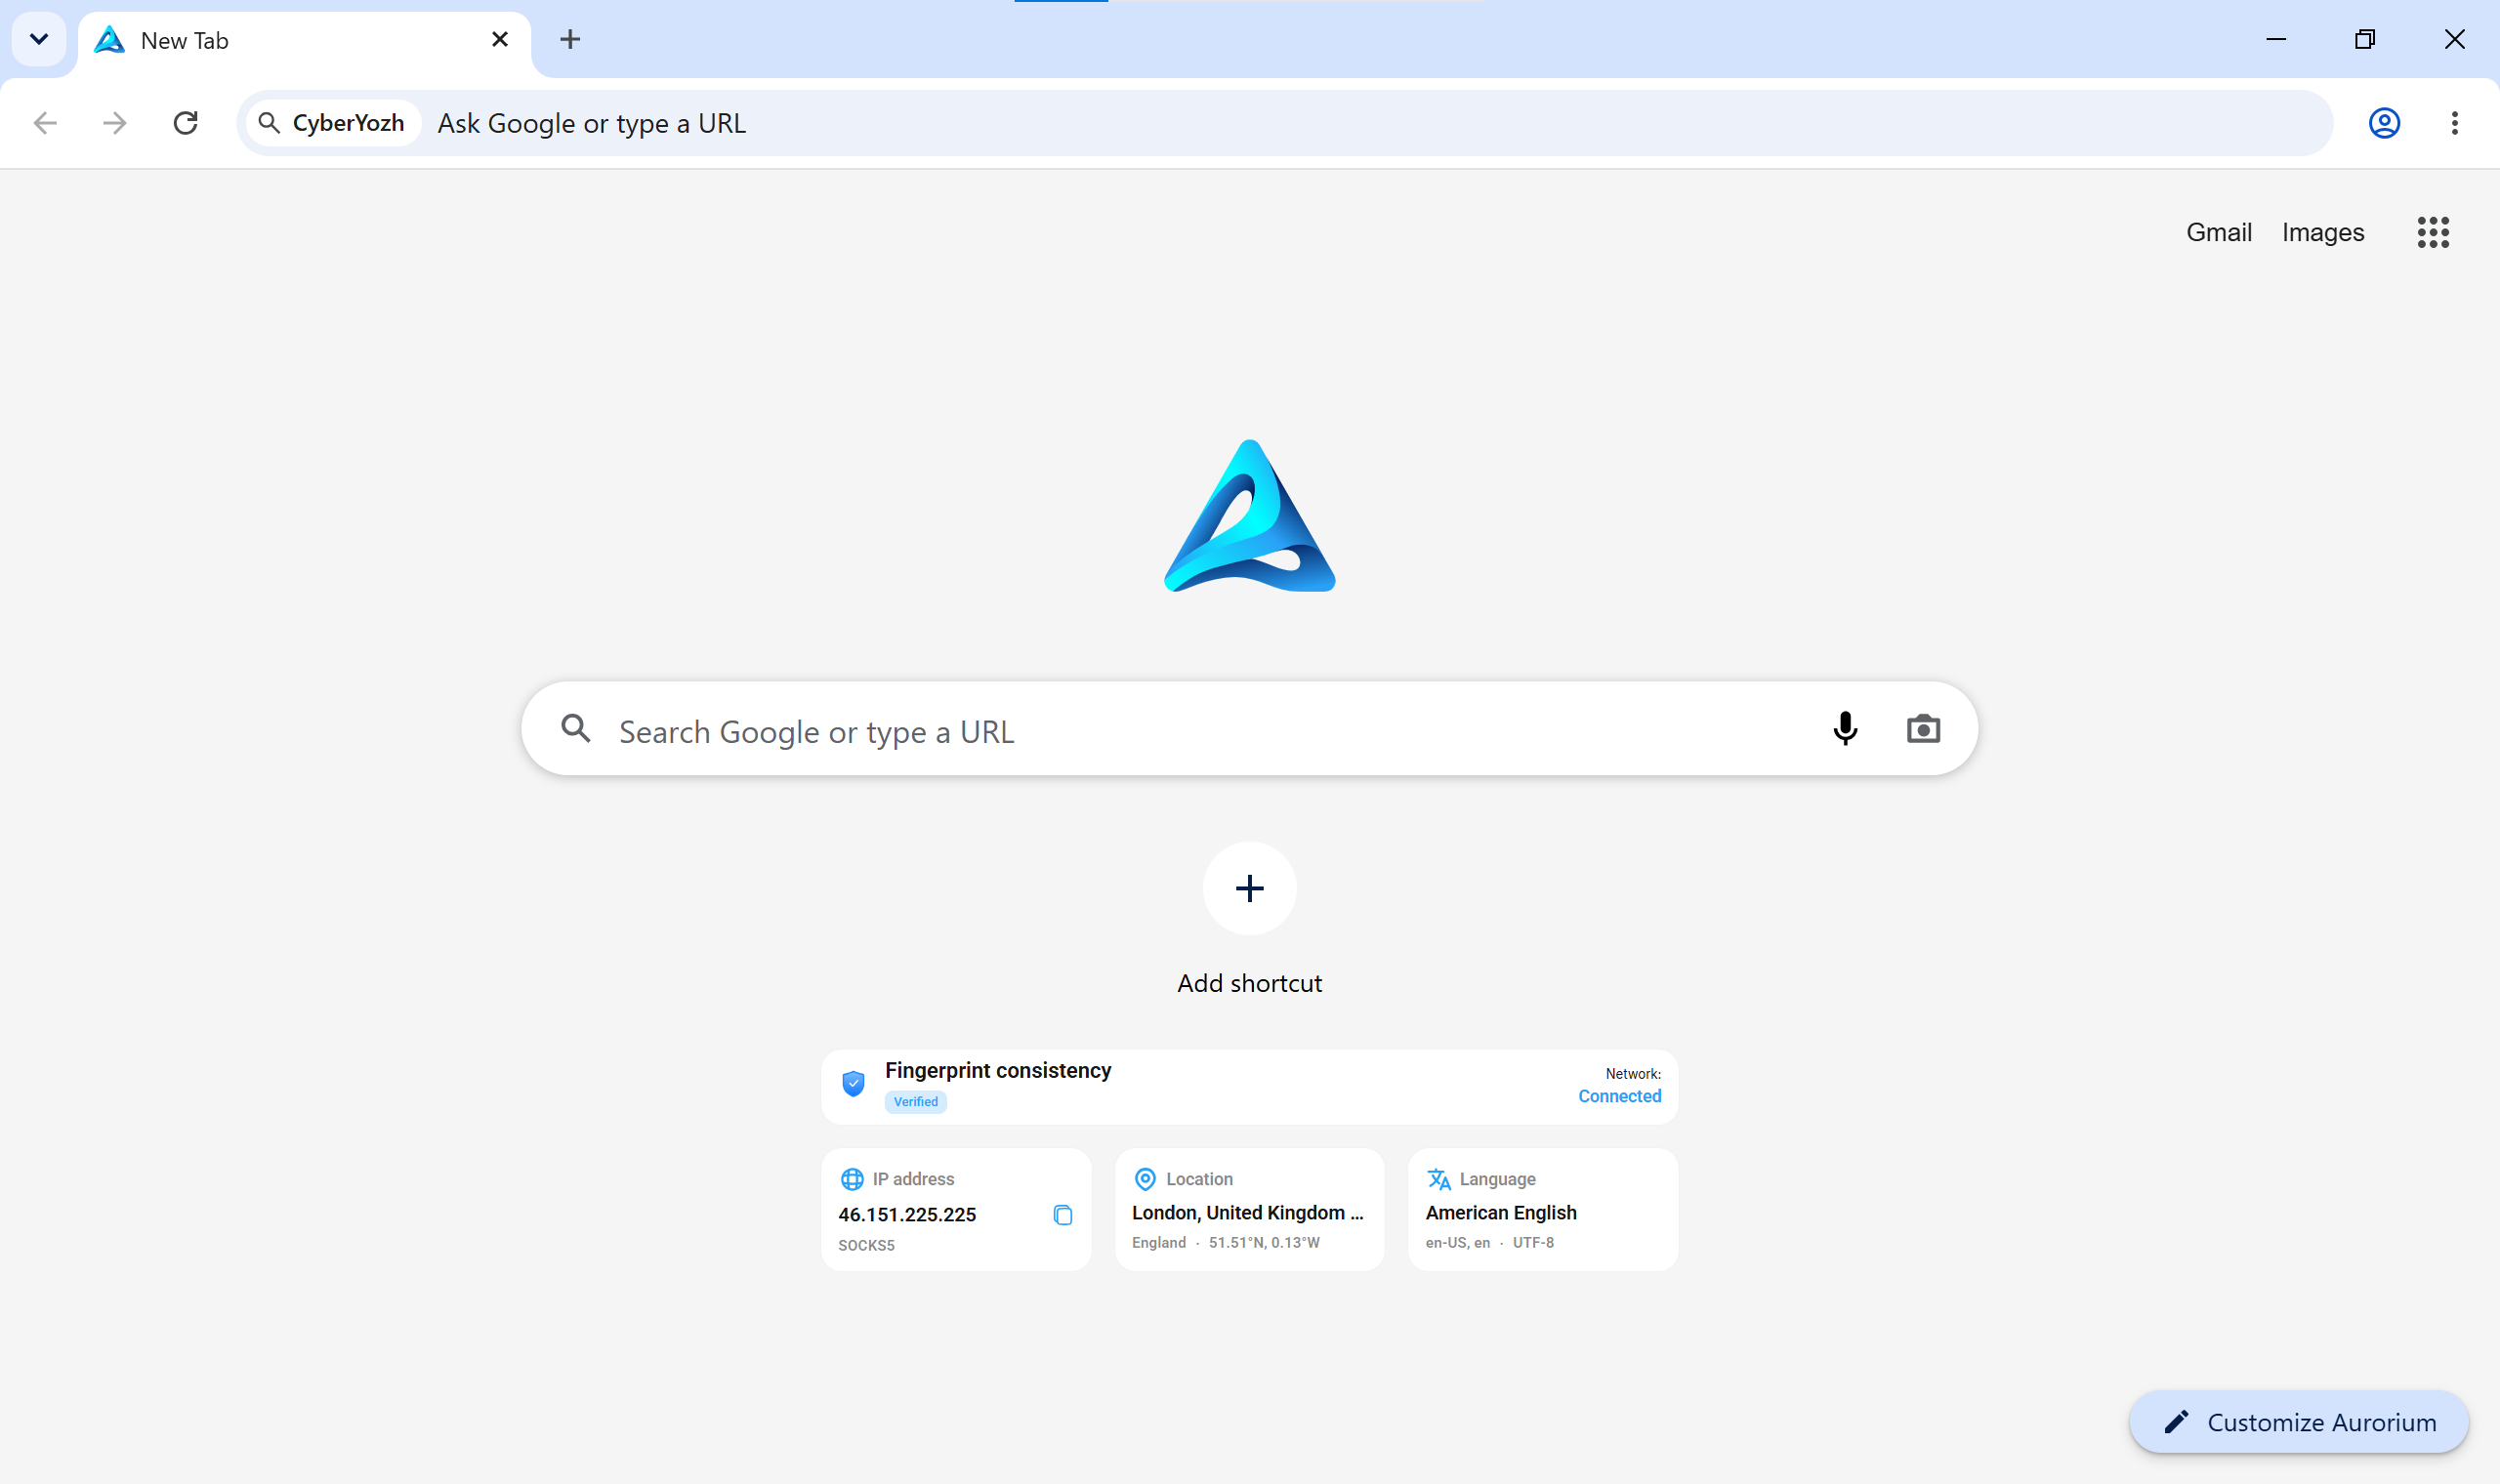
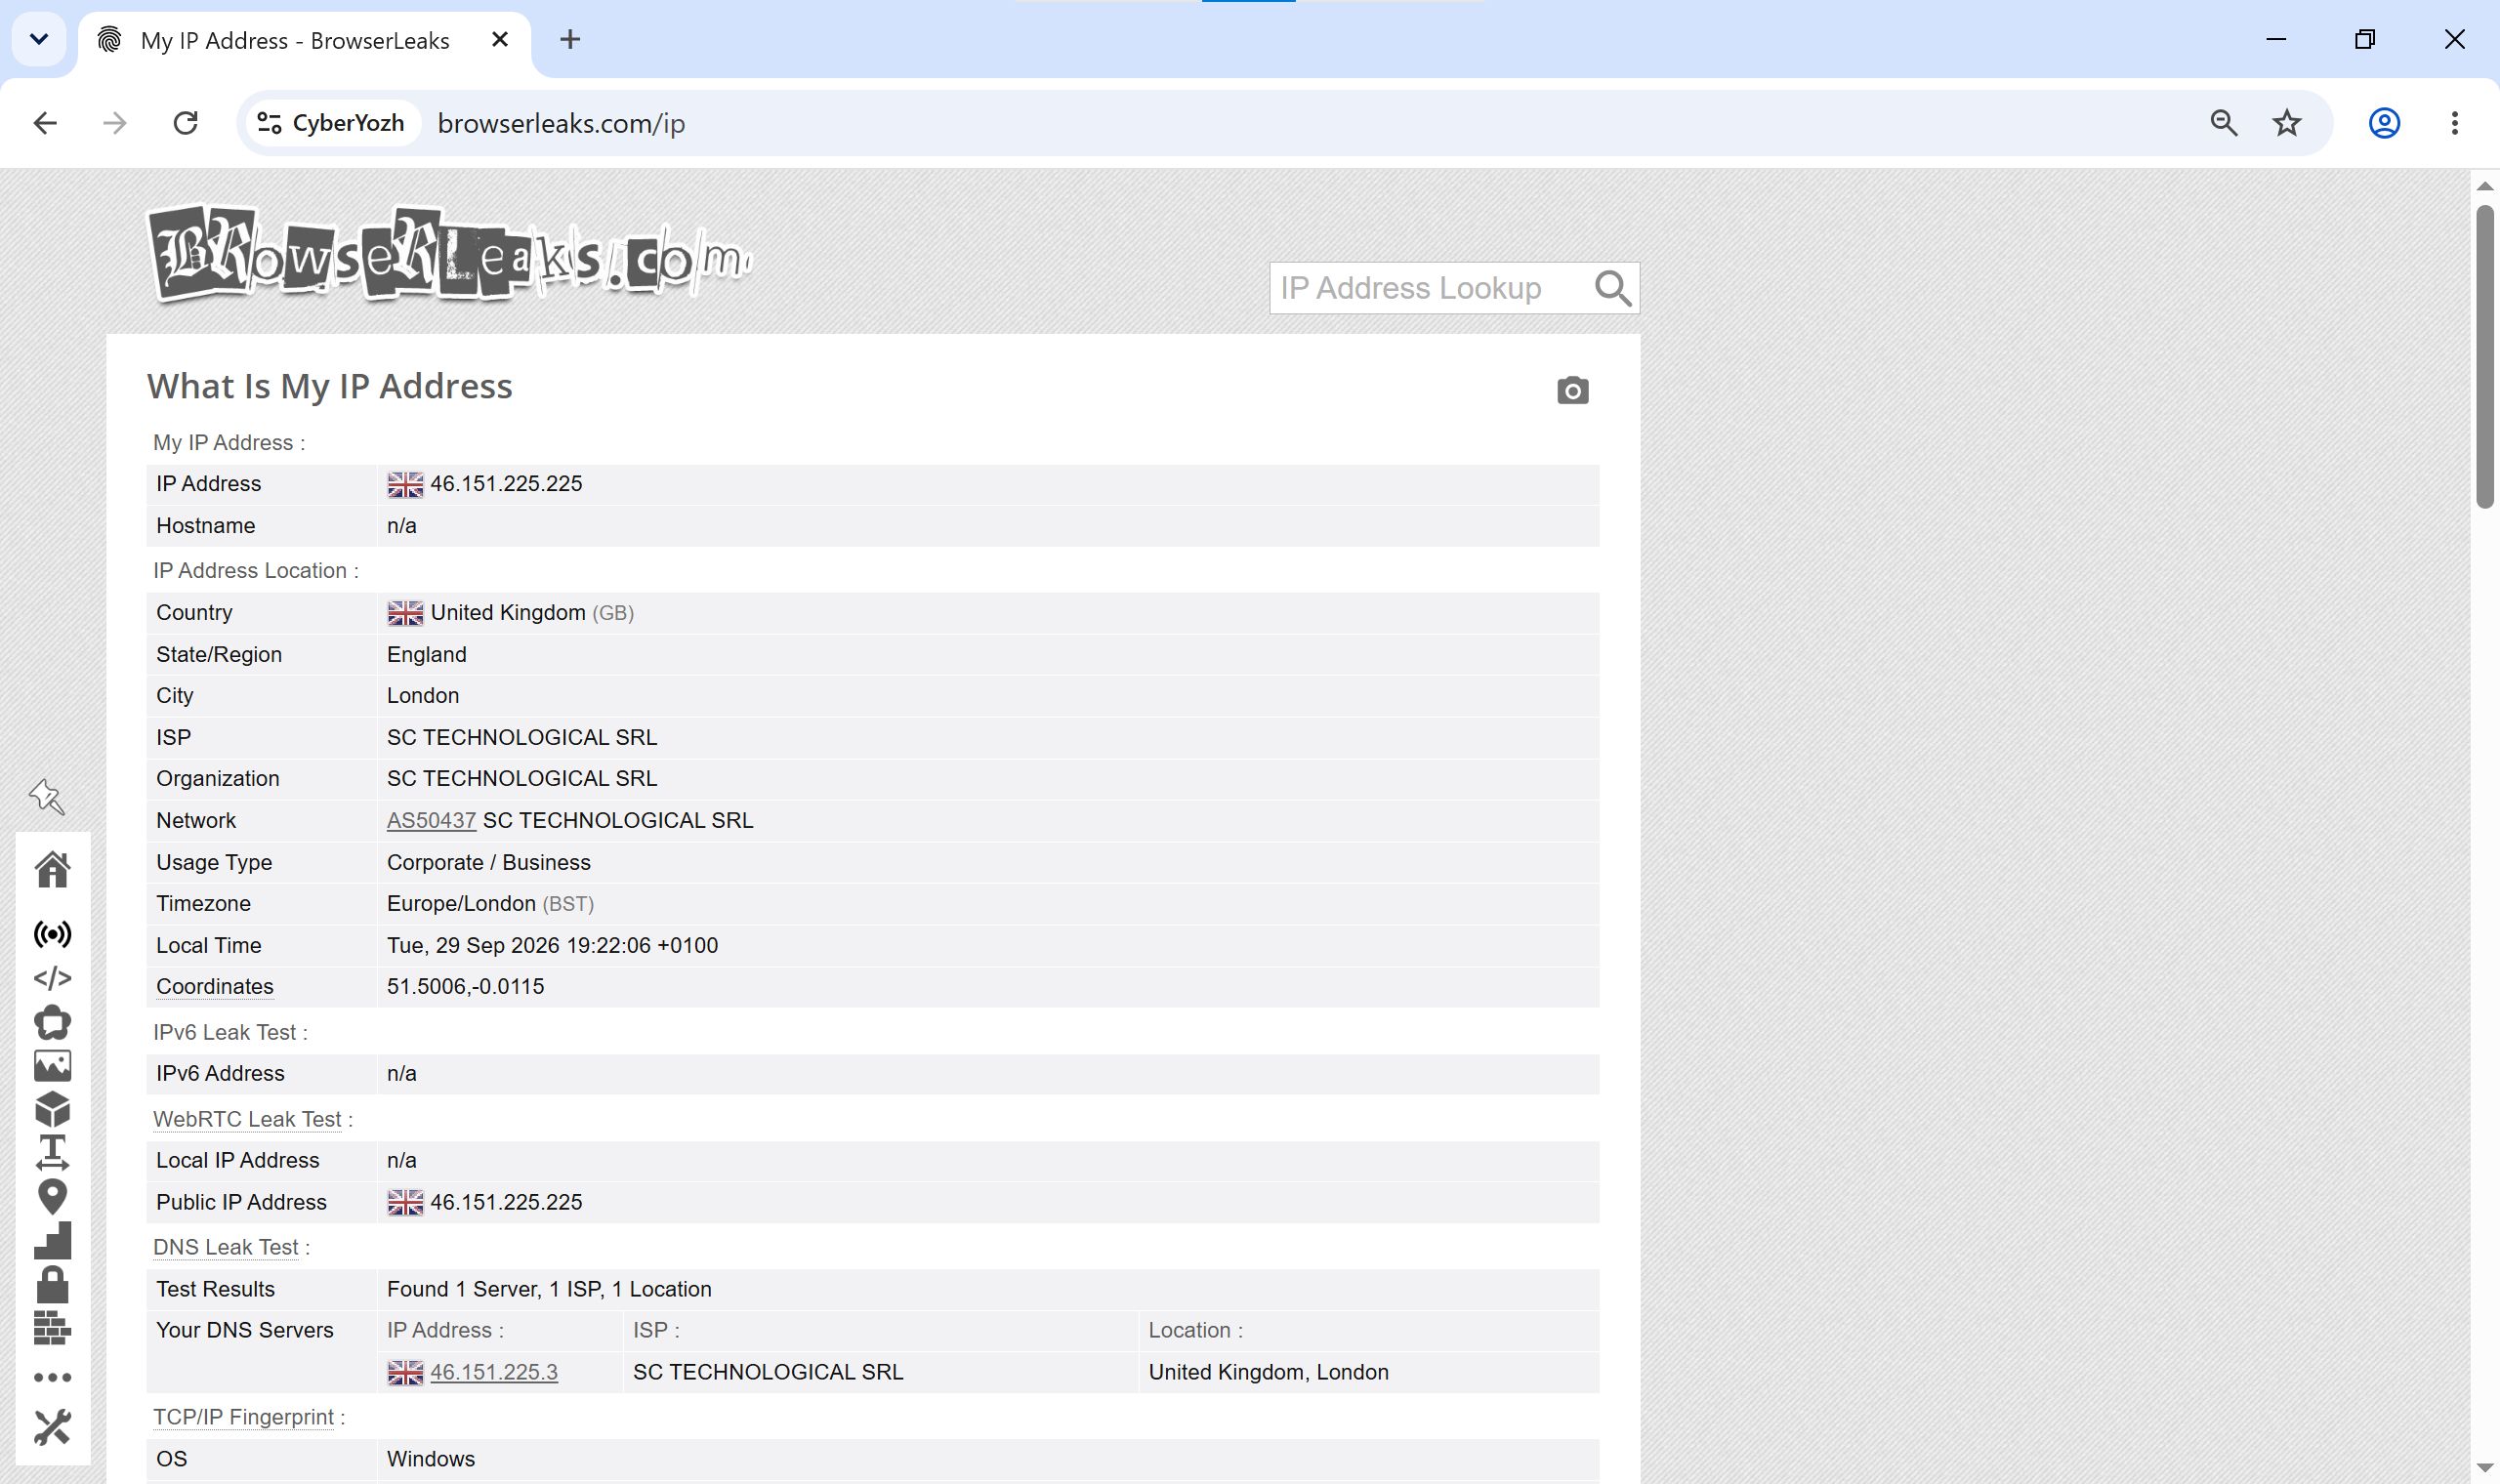
The Aurorium start page immediately displays your basic connection status. Navigate to BrowserLeaks to conduct a deep technical audit. Verify your WebRTC parameters broadcast the exact proxy IP without exposing local interfaces. Scroll down to the TCP/IP Fingerprint section. It must display the exact Windows OS we aligned on the server.
👉 Audit your node via Fraud Score Checker: Evaluate your hidden abuse velocity and IP risk rating using ThreatMetrix and IPQualityScore databases before you launch your actual session.
Geo-syncing your profile: Local SMS numbers and virtual cards
IP alignment represents only one facet of a stable environment. Strict platforms demand exact matches between your network footprint and billing data.
👉 Use Residential ISP Proxies: Bind your profile to a static address tied to a legitimate home internet provider that holds the connection for months.
Deploy the CyberYozh SMS service to rent residential phone numbers from authentic local operators.
Next, issue a virtual tokenized bank card directly from the platform. Configure the card's billing address (AVS match) to precisely reflect the geolocation of your ISP proxy node.
This unified approach reduces the risk of automated security triggers.
Your Aurorium proxy setup is now complete. Lock down your transport layer natively and stop letting deep packet inspection disrupt your workflow.
FAQs about Aurorium proxy setup
Why is a specific Aurorium proxy setup necessary?
Legacy routing leaves transport-layer traces. A dedicated configuration ensures your TCP packet headers match your browser's generated hardware profile, protecting your network footprint from deep packet inspection.
How does an Aurorium proxy setup prevent WebRTC leaks?
The configuration utilizes SOCKS5 and enforces UDP routing natively. This encapsulates peer-to-peer WebRTC traffic directly inside the isolated tunnel, ensuring your local interface never broadcasts to the target server.
Should I use HTTP for my Aurorium proxy setup?
Deploy SOCKS5. HTTP proxies often modify request headers and break non-web traffic. If your goal is crypto automation where lightning-fast data transfer matters.
👉 Rent Datacenter Proxies: Premium dedicated servers offering ultra-low latency specifically for SOCKS5 tunneling.
What is the best Aurorium proxy setup for social media?
Strict platforms trust cellular networks. CGNAT technology blends your requests natively with traffic from real smartphones.
👉 Deploy Mobile LTE/5G Proxies: The optimal solution for account farming and ad arbitration, giving you full control over manual IP rotation.
How do I change IPs during an Aurorium proxy setup?
Paste your specific IP change URL from the CyberYozh dashboard directly into the proxy configuration window. This allows you to trigger a physical modem reset seamlessly.
Does a proper Aurorium proxy setup fix p0f errors?
Yes, provided you align the OS. You select your target OS in the Aurorium profile, then activate the Fingerprint OS feature on the CyberYozh network level to match it exactly.
How do I test my proxy node before connecting?
Run your assigned IP address through a Fraud Score checker. This analyzes your abuse velocity and risk rating using enterprise databases before you initiate the session.