
Postman — is the essential tool for any Backend developer and QA engineer. It allows you to send API requests, analyze responses, and automate testing.
But APIs do not exist in a vacuum. In the real world, servers are protected by security systems (WAF), have regional settings, and serve different content to different countries. To test these scenarios remotely, you need to route Postman traffic through a proxy.
In this guide, we will break down which type of proxy to choose for different types of testing and how to set up the Global Proxy Configuration in Postman.
Part 1. Strategy: What Proxy Do You Need for API Tests?
In development, the type of proxy depends on exactly what you are testing.
1. Datacenter Proxies — For Load and CI/CD
- What they are: Fast IPs from data centers (AWS, DigitalOcean, etc.).
- What they are for: Load Testing, API availability monitoring, integration into CI/CD pipelines.
- Pros: High speed and optimal cost. If you need to send 10,000 requests per minute, this is your choice.
2. Residential Proxies (ISP) — For Production and Localization
- What they are: IP addresses from real home internet service providers.
- What they are for: Testing geo-dependent features (currency validation, checking content availability in different regions), debugging API interaction with security systems (WAF), automated data scraping.
- Why: Security systems often restrict requests from data centers to protect resources. Residential proxies allow you to emulate requests under "real user network" conditions.
3. Mobile Proxies (4G/5G) — For Mobile Applications
- What they are: IPs from cellular operators.
- What they are for: Testing APIs that serve mobile applications.
- Why: Some APIs adapt responses if they detect a mobile connection type (e.g., serving optimized content).
Part 2. Data Preparation
For tests, we recommend using private channels from CyberYozh App.
After purchase, you will receive the following data:
- IP (Host):
172.98.60.180 - Port:
58763 - Username / Password: Authorization credentials.
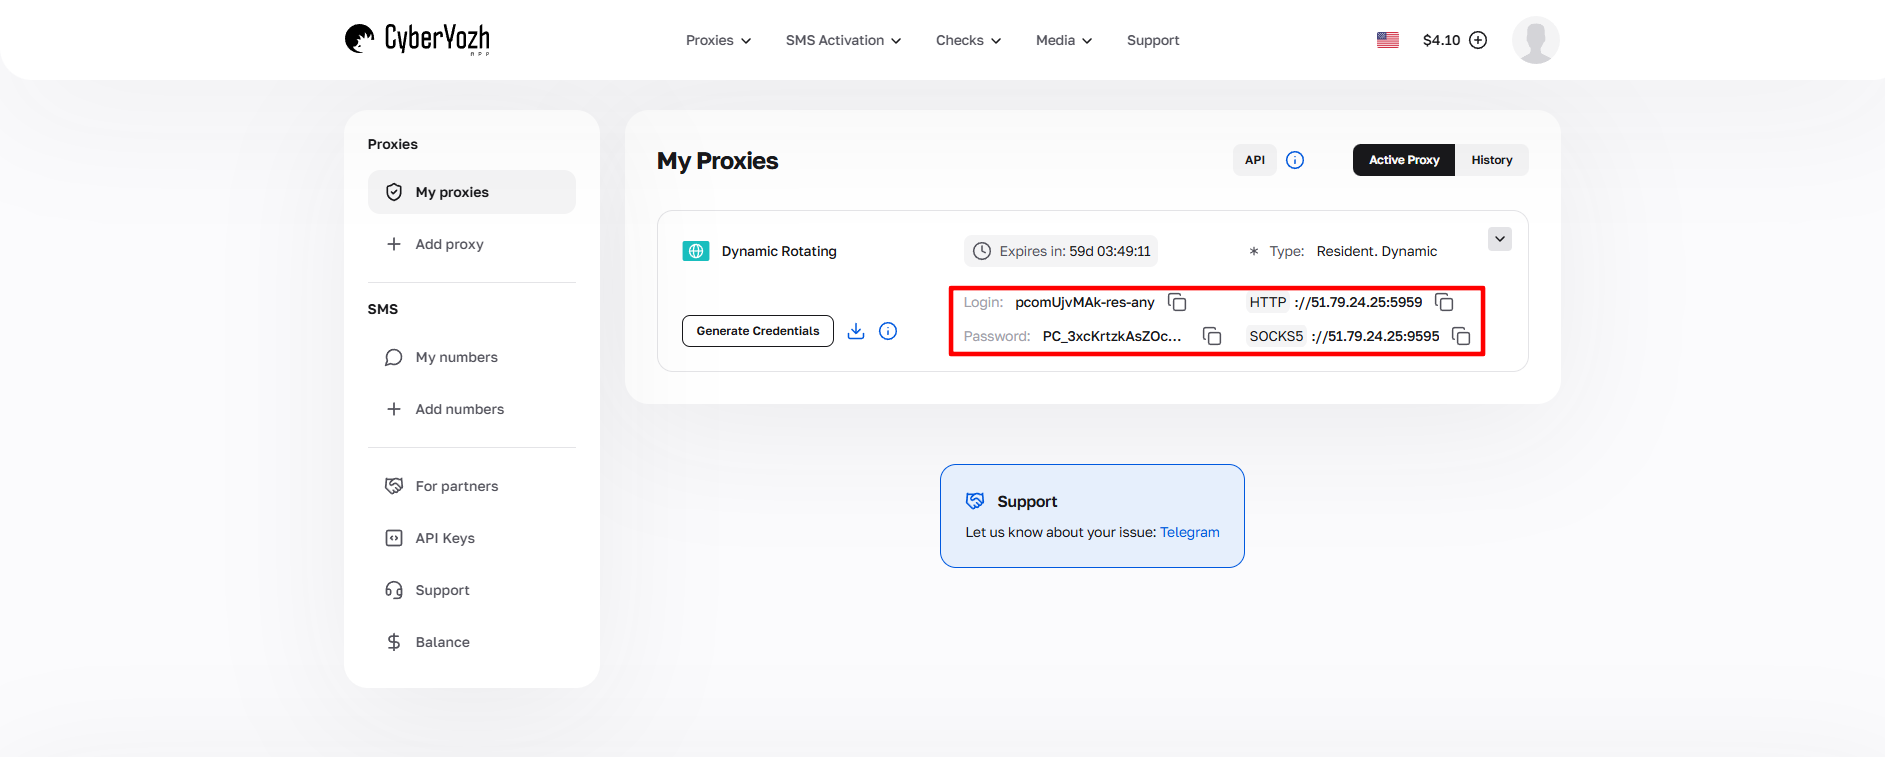 Fig. 1. Screenshot of the CyberYozh App platform interface, showing the location of proxy connection data. The image displays fields for IP address (Host), Port, Proxy Username, and Proxy Password.
Part 3. Configuring Global Proxy in Postman
Postman allows you to configure a proxy globally — this means that all requests you send from any collection will go through the specified server.
Step 1. Opening Settings
- Launch Postman.
- Click on the gear icon (Settings) in the top right corner (or File -> Settings menu).
- Go to the Proxy tab.
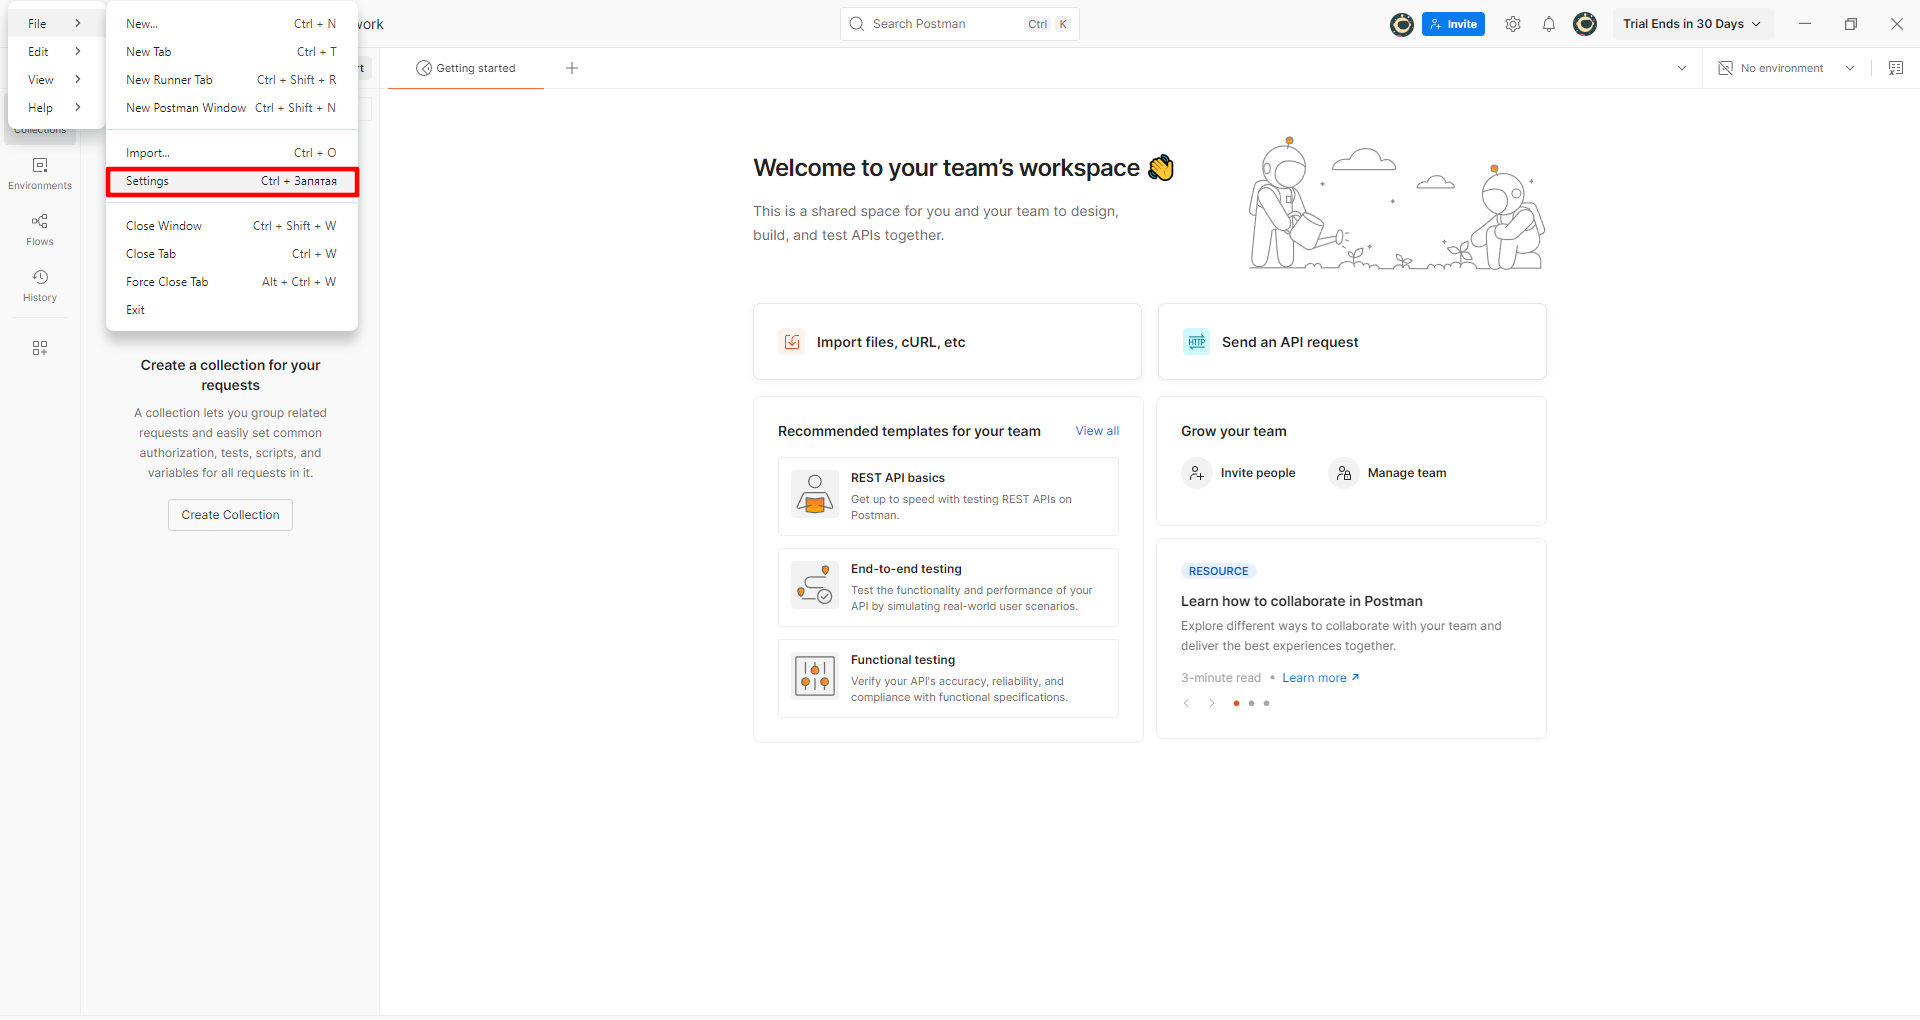 Fig. 2. Postman settings menu interface, showing the navigation path to proxy parameters. The image shows the location of the "File" menu (or the three-line icon) in the top left corner of the interface, from where you navigate to "Settings" and then to the "Proxy" tab for proxy connection configuration.
Step 2. Activation and Data Entry
On the Proxy tab, there are two sections: "System Proxy" (use OS settings) and "Global Proxy Configuration". We need the second one, as it provides more control.
In the Global Proxy Configuration block, toggle the switch to ON.
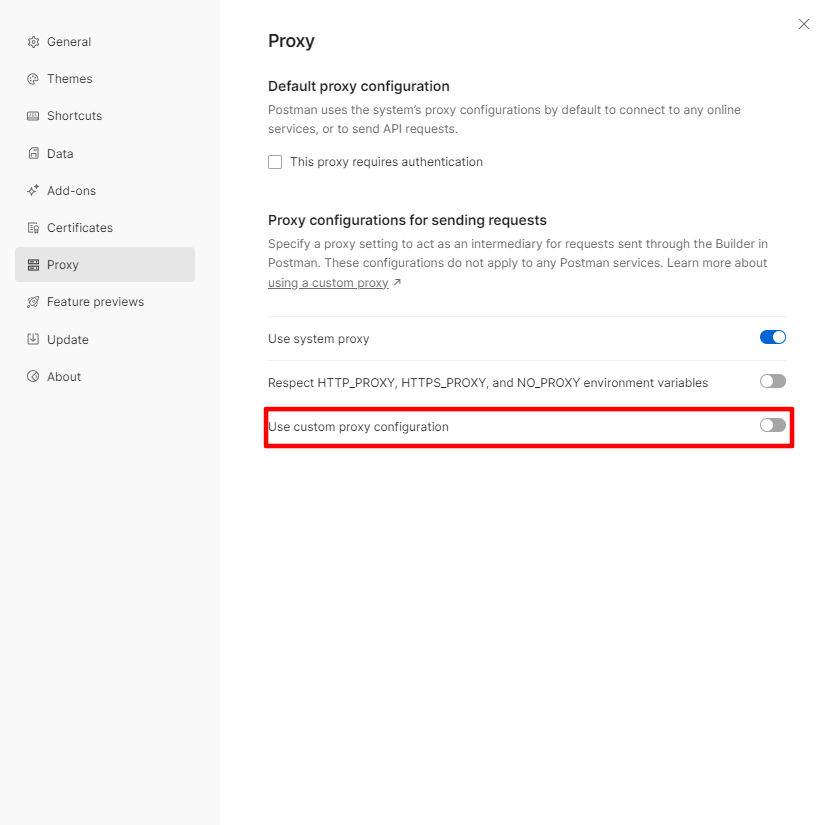 Fig. 3. Postman proxy settings interface, showing the global proxy configuration panel with the toggle activated.
Proxy Type: Ensure the checkboxes for HTTP and HTTPS are checked. Postman works with web protocols.
- Data Entry:
- Proxy Server: Enter the IP address (e.g.,
172.98.60.180). - Port: Enter the port (e.g.,
58763). - Authorization:
- Toggle the Proxy Auth switch to ON.
Enter the Username and Password from your personal account.
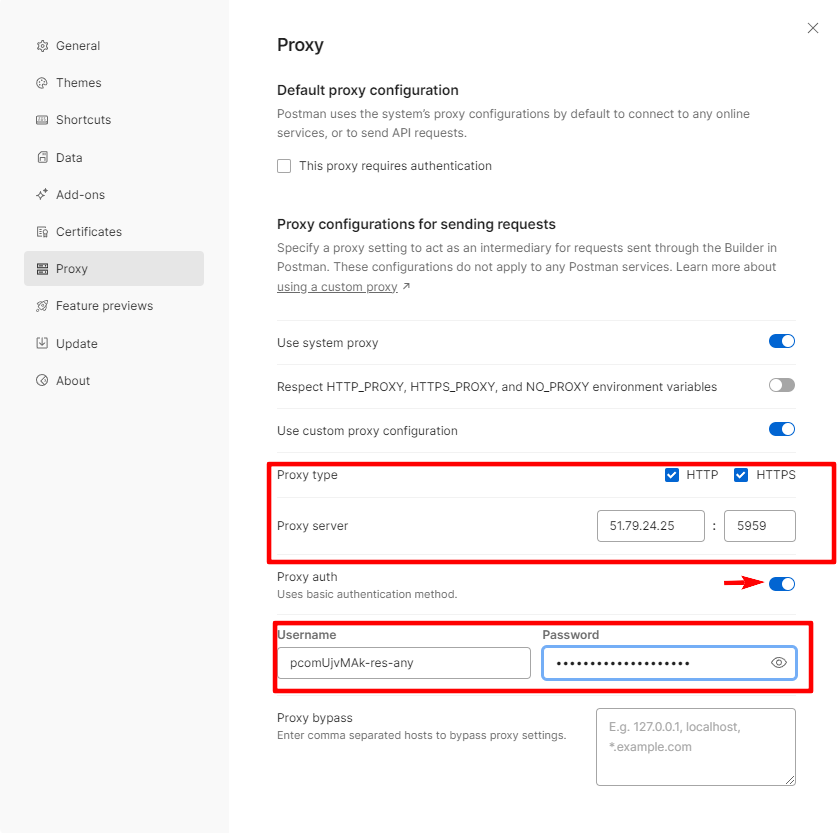 Fig. 4. Example of global proxy configuration setup in the Postman interface. The image demonstrates the filled fields for proxy connection.
Close the settings window (X). Postman saves changes automatically.
Part 4. Verification (The Developer Way)
How to make sure the proxy is working? In Postman, this is done by sending a test request rather than through a browser.
- Create a new request (+ button).
- Select the GET method.
- In the URL field, enter an API address that returns your current IP. For example:
https://api.ipify.org?format=jsonorhttps://postman-echo.com/ip - Click Send.
Look at the response Body. If you see your proxy address in the ip field instead of your real network IP — congratulations, the configuration was successful!
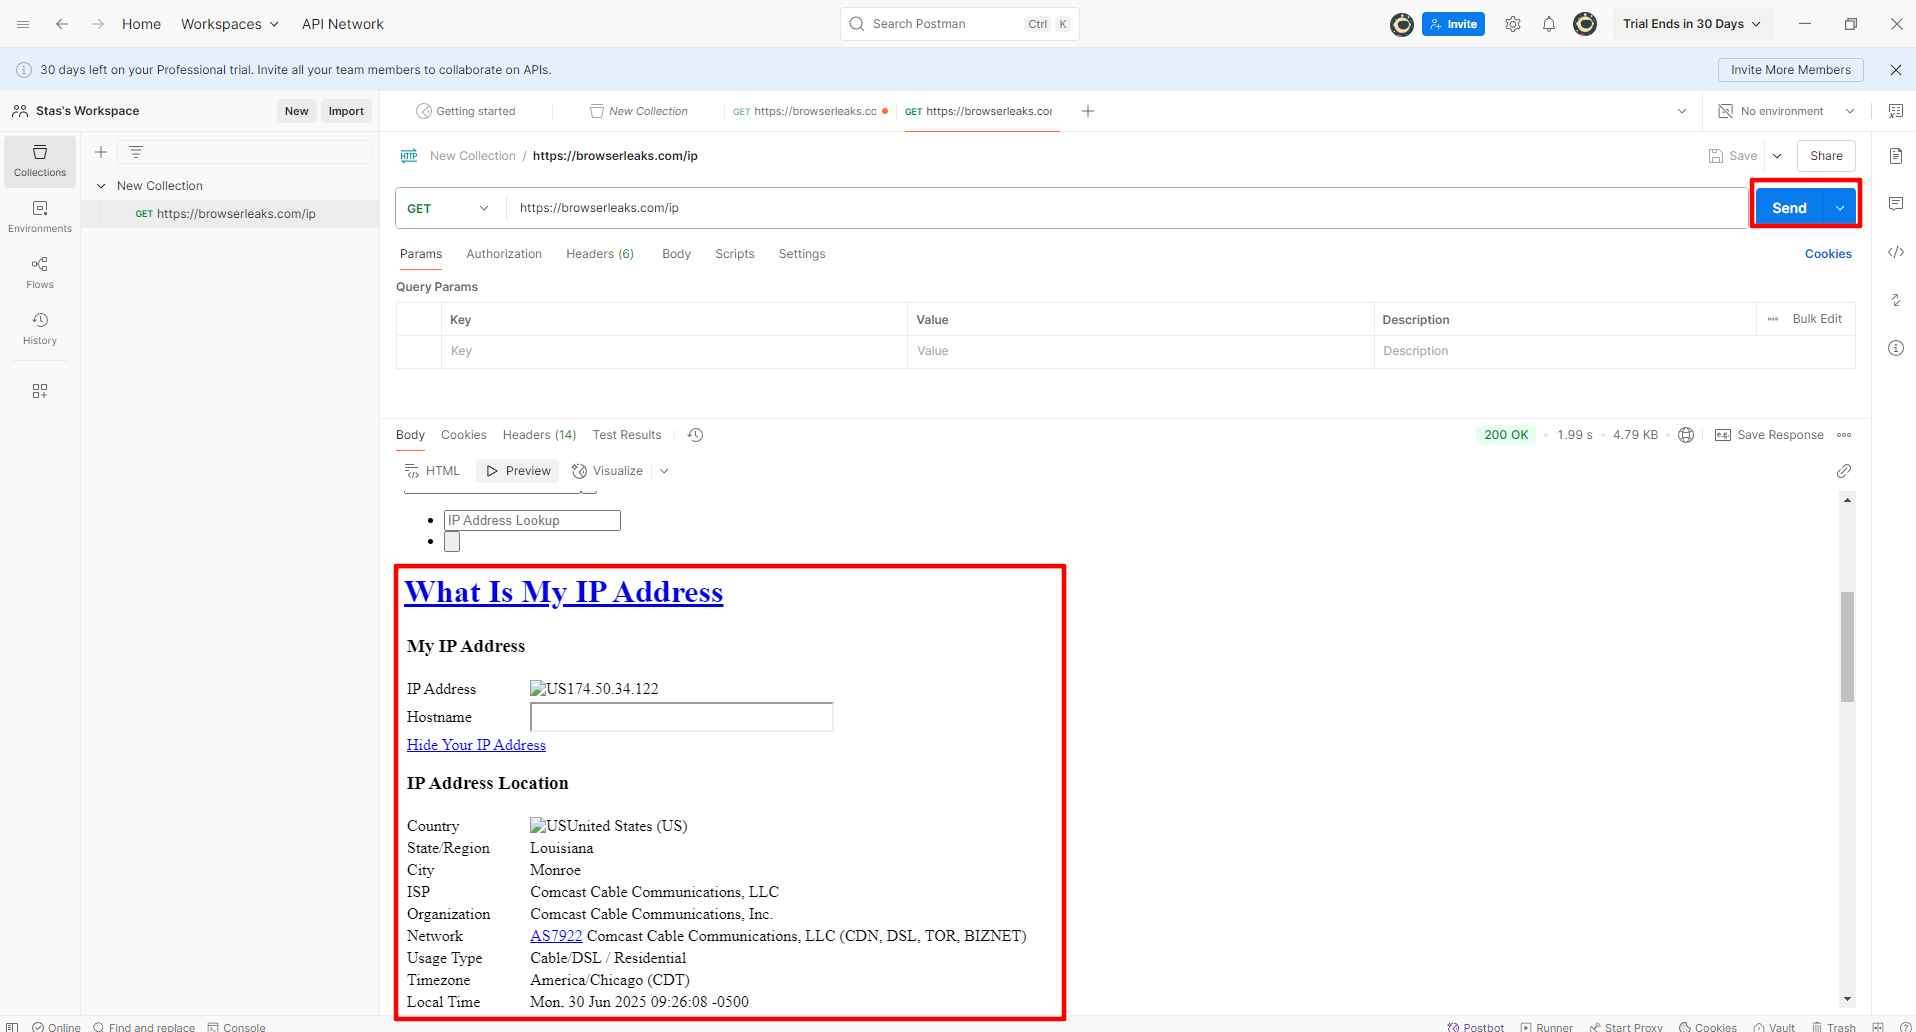 Fig. 5. The image displays the current connection IP address, confirming the successful operation of the configured proxy in Postman.
Conclusion
Using a proxy in Postman is an important skill for effective API development and testing.
- For load testing, use Datacenter Proxies.
- For localization validation and regional settings, use Residential Proxies.
You can find reliable tools for all types of testing in the CyberYozh App catalog. Stable connections and successful tests!
