
There are situations where a proxy is needed not for the entire system, but only for one specific program. For example, launching a game client from another country's IP address, opening a second browser profile with a unique IP, or "teleporting" your Telegram to another geolocation without affecting the main internet channel.
Setting up a VPN or a system-wide proxy for such pinpoint tasks is inconvenient and overkill. The solution? SocksCap64.
SocksCap64 is a free and powerful utility for Windows that allows you to "wrap" the traffic of any application into a proxy. You simply point the program to the .exe file and a proxy server, and SocksCap64 does all the magic, isolating that application's network traffic from the rest of the system.
Why do you need SocksCap64?
This tool is a real must-have for those who value flexibility and control.
- For gamers: Optimizes the connection by providing access to international game servers to reduce ping and improve network connection quality.
- 🕵️ For session management: You can run multiple copies of the same program (e.g., a browser or messenger), and each will work through its own proxy with a unique IP. Ideal for software testing in various network conditions and securely managing regional campaigns.
- ⚙️ For specific software: Many programs simply do not have built-in proxy settings. SocksCap64 solves this problem by allowing you to proxify almost any application.
- 🛡️ For security: You can route the traffic of a potentially unsafe application through a proxy to isolate it from your main network.
Which proxy to choose? Mobile and Residential SOCKS5 proxies are ideal for SocksCap64. They are more versatile than HTTP(S) because they support not only TCP but also UDP traffic, which is critical for games, streaming services, and some messengers.
Step-by-step SocksCap64 Setup
The process consists of four steps: installing SocksCap64, obtaining proxy settings, adding and checking the proxy, and then adding and launching the desired program.
Step 1: Installing SocksCap64
- Download the latest version of the program. It is best to do this from the official GitHub repository to avoid malware. https://github.com/bobo2334/sockscap64
- Install the program by following the installer's instructions.
Step 2: Collecting Proxy Credentials
The first and most important step is to ensure you have a complete set of data for authorization. These "keys" will allow your application or browser to connect to the proxy server and route traffic through it.
Be sure to prepare the following data:
- IP address (host server)
- Port for connection
- Login and password for authorization
- Protocol type (HTTP/HTTPS or SOCKS5)
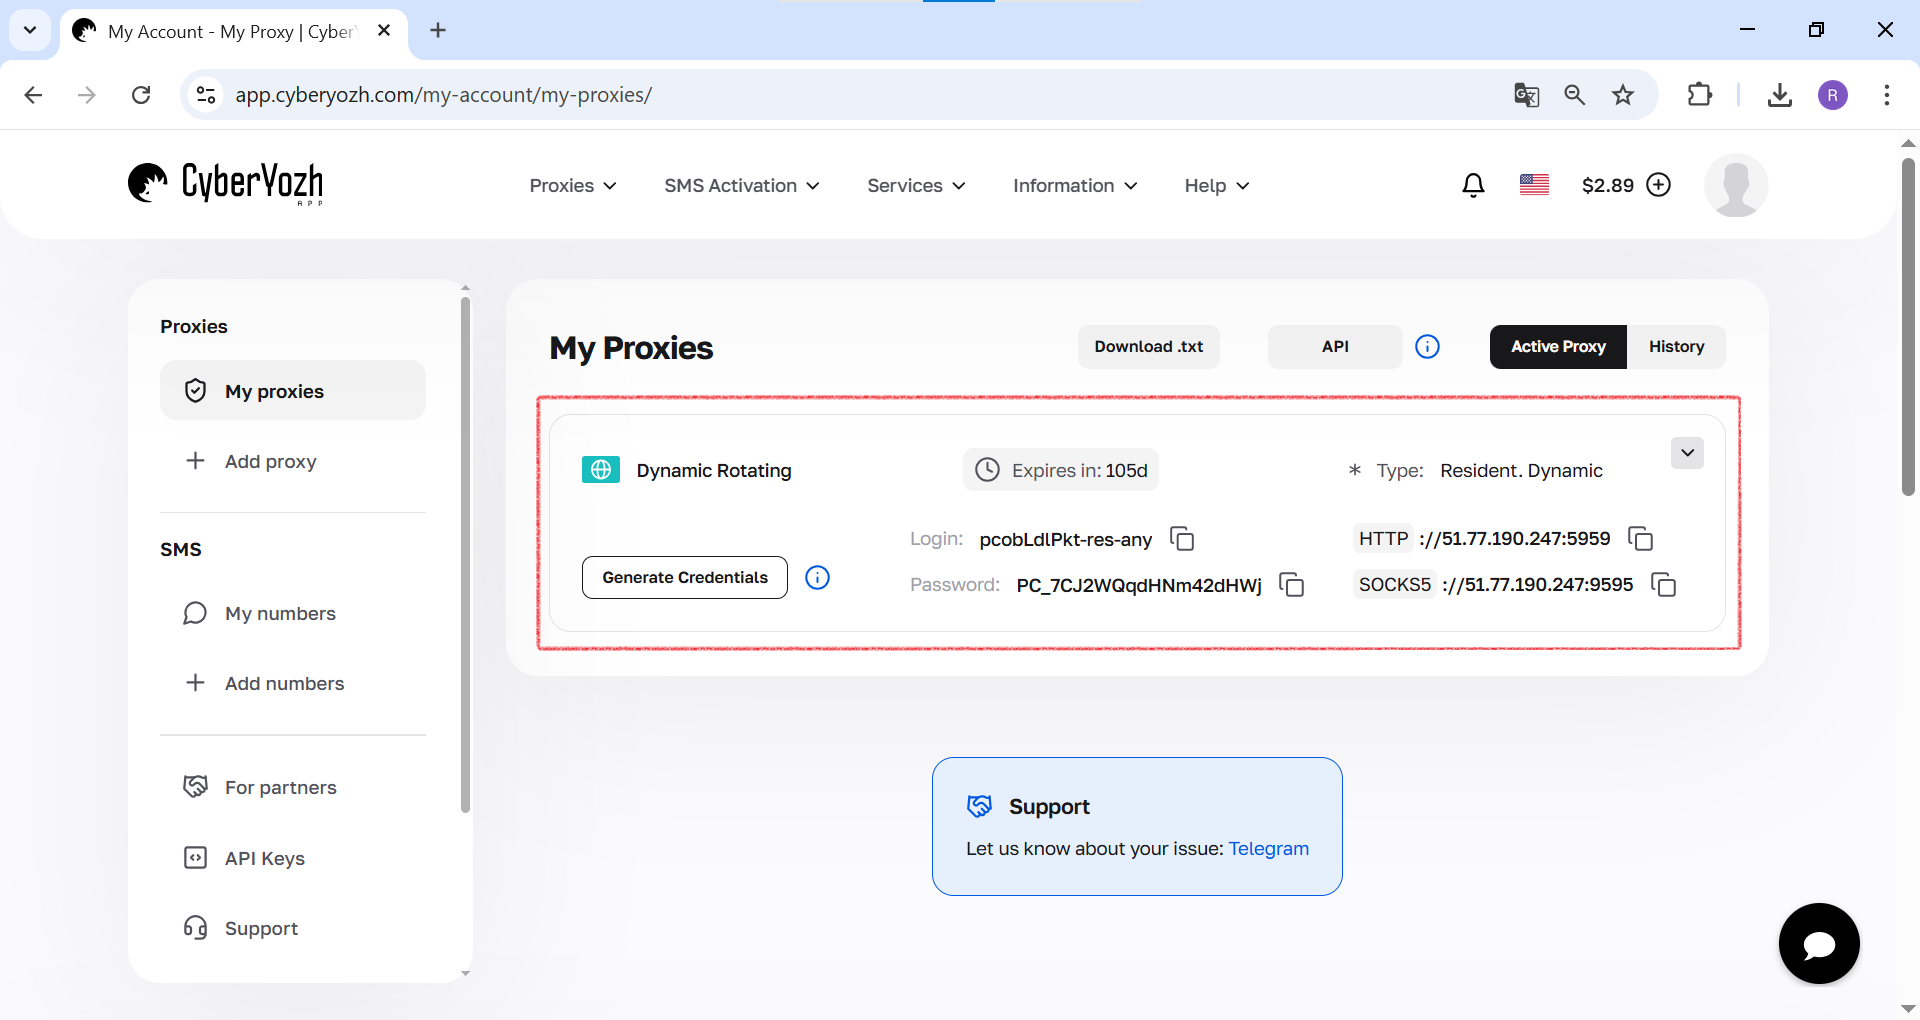
 Fig. 1. This screenshot shows where all the necessary fields for connecting to a proxy server are located in theCyberYozh Appdashboard.
Step 3: Adding and Verifying the Proxy
- Opening the Proxy Manager. In the SocksCap64 main window, click on the "Proxy" icon.
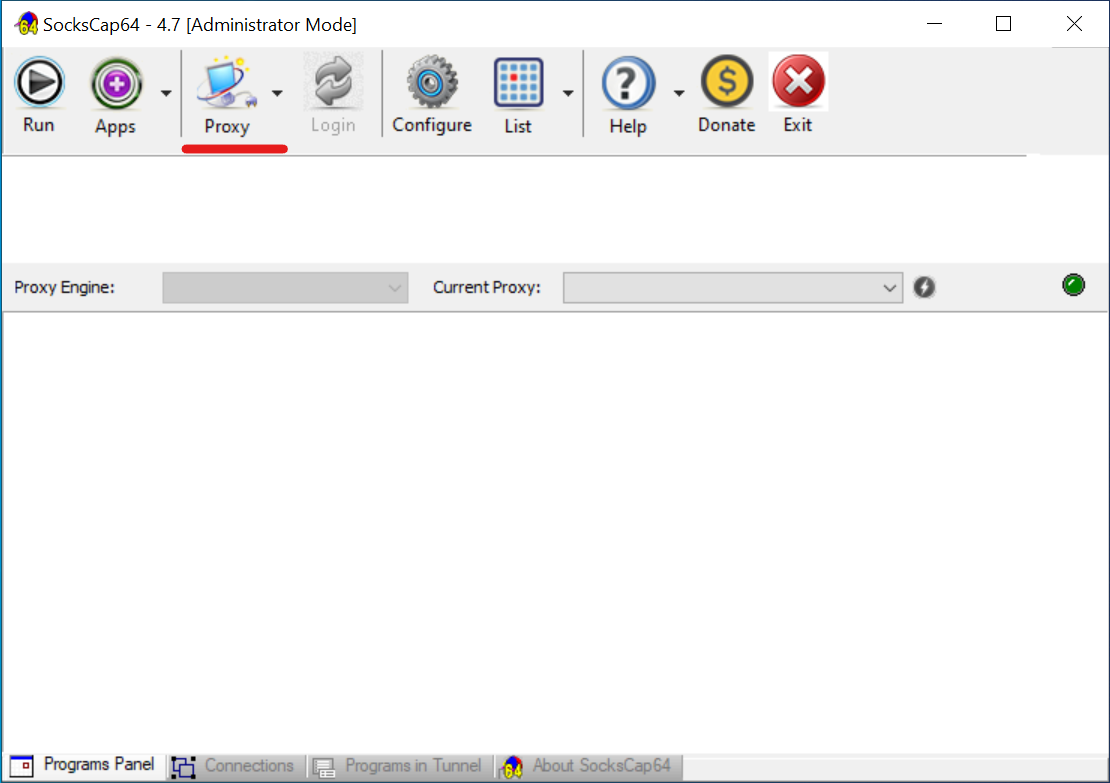 Fig. 2. Screenshot of the SocksCap64 main interface, showing the location of the "Proxy" button to access the proxy server settings.
- Adding a new proxy. In the "Proxy Manager" window that opens, click the "+" icon on the left toolbar to add a new row for settings.
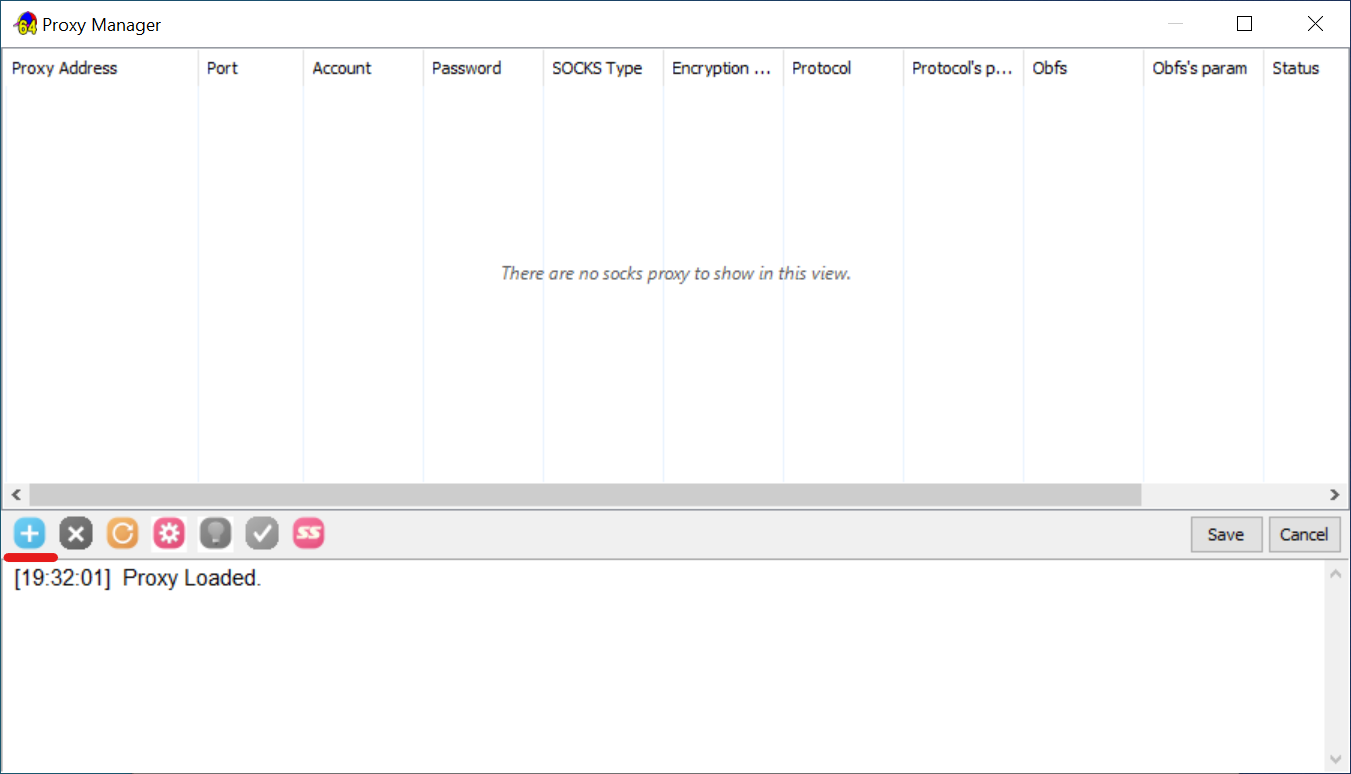 Fig. 3. Screenshot of the "Proxy Manager" window, demonstrating clicking the "+" icon to add a new proxy server to the list.
- Entering proxy data. Click on the fields in the new row and carefully enter your proxy server data: IP Address (Proxy Address), Port, Login (Account), and Password.
 Fig. 4. Screenshot of the "Proxy Manager" window, showing the process of entering connection data: IP address, port, login (Account), and password.
- Testing the connection. Select the row with your proxy and click the checkmark (Test) icon. A check log will appear at the bottom of the window. If everything is correct, "OK" will appear in the "Status" column.
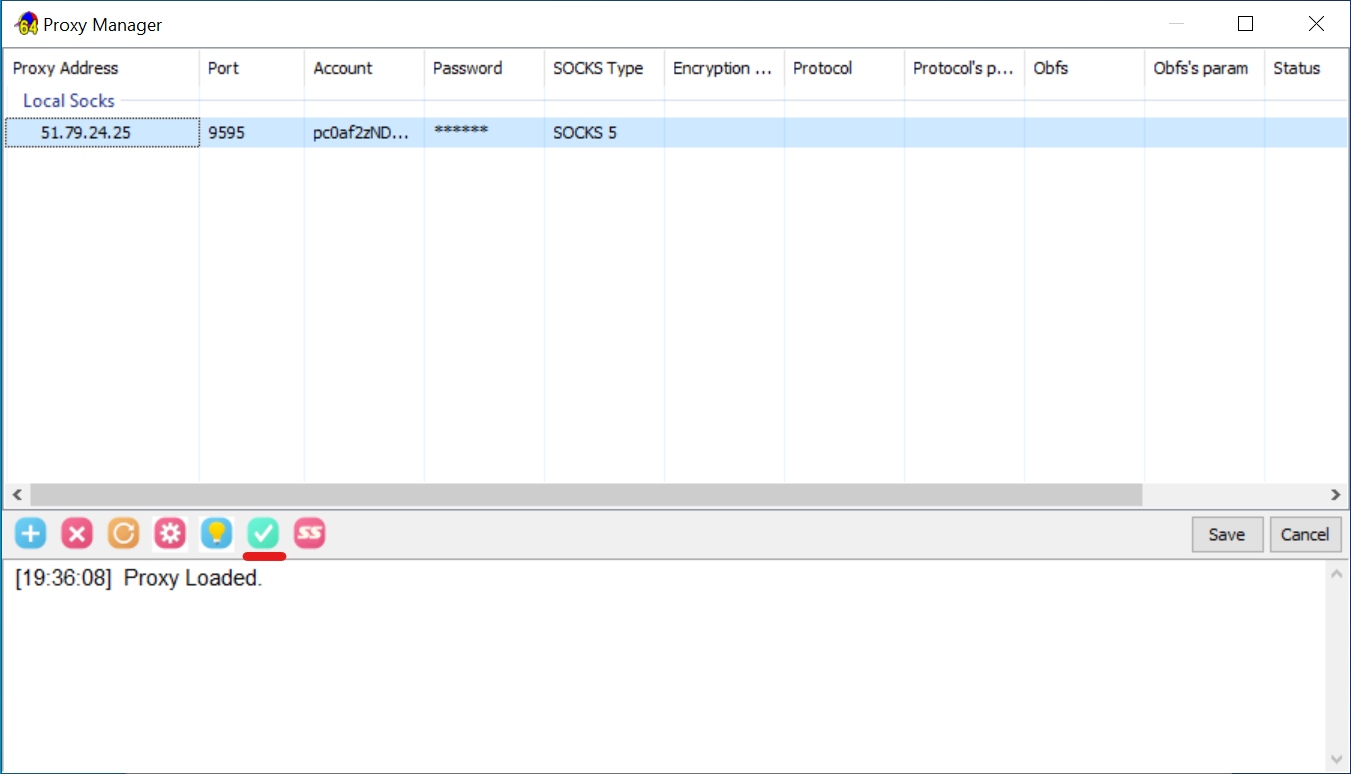 Fig. 5. Screenshot of the "Proxy Manager" window, showing the launch of a proxy server functionality check by clicking the testing icon (checkmark).
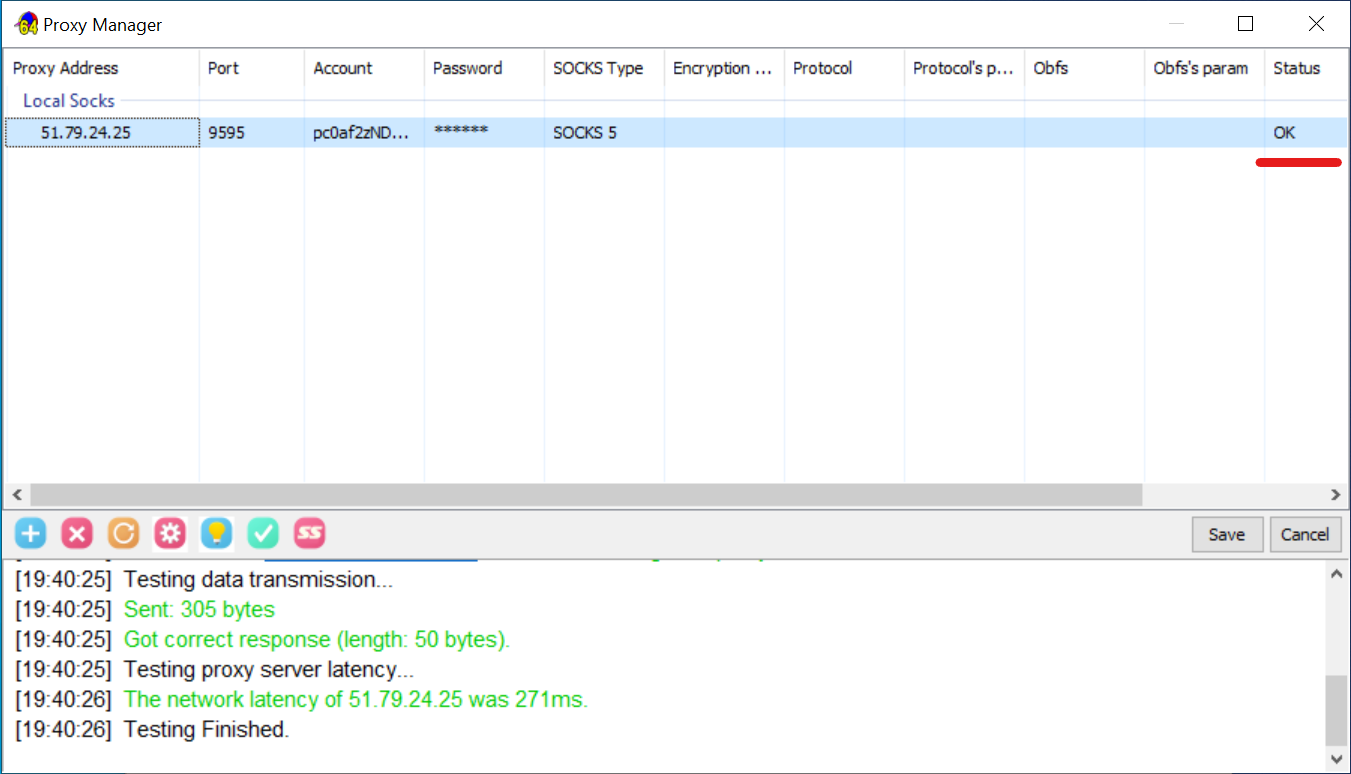 Fig. 6. Screenshot of the "Proxy Manager" window with a successful check result. The log displays a correct response from the server, and an "OK" mark appears in the "Status" column.
- Saving the proxy. Test passed—excellent! Now click the "Save" button.
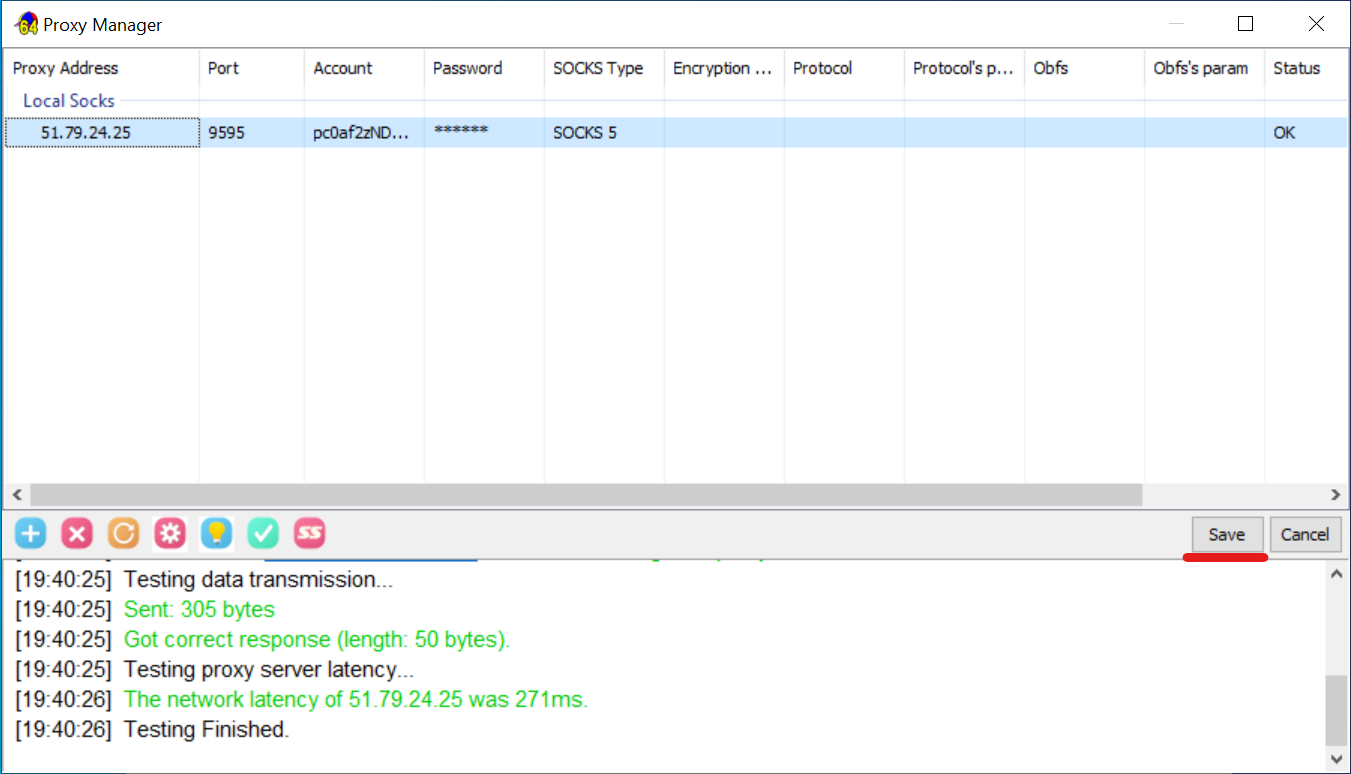 Fig. 7. Screenshot of the "Proxy Manager" window, showing the saving of proxy server settings by clicking the "Save" button.
Step 4: Adding and Running a Program
The proxy is configured and ready to go. Now you just need to specify which application will use it.
- Adding a program (manual method). This is the most reliable way. Right-click in the main window and select "Add an executable file...".
- In the window that appears, click "Browse...".
- Find the
.exefile of the desired program on your computer (for example,brave.exe), select it, and click "Open". - SocksCap64 will automatically fill in all paths. You just need to give the profile a name (e.g., "Brave Browser") and click "OK".
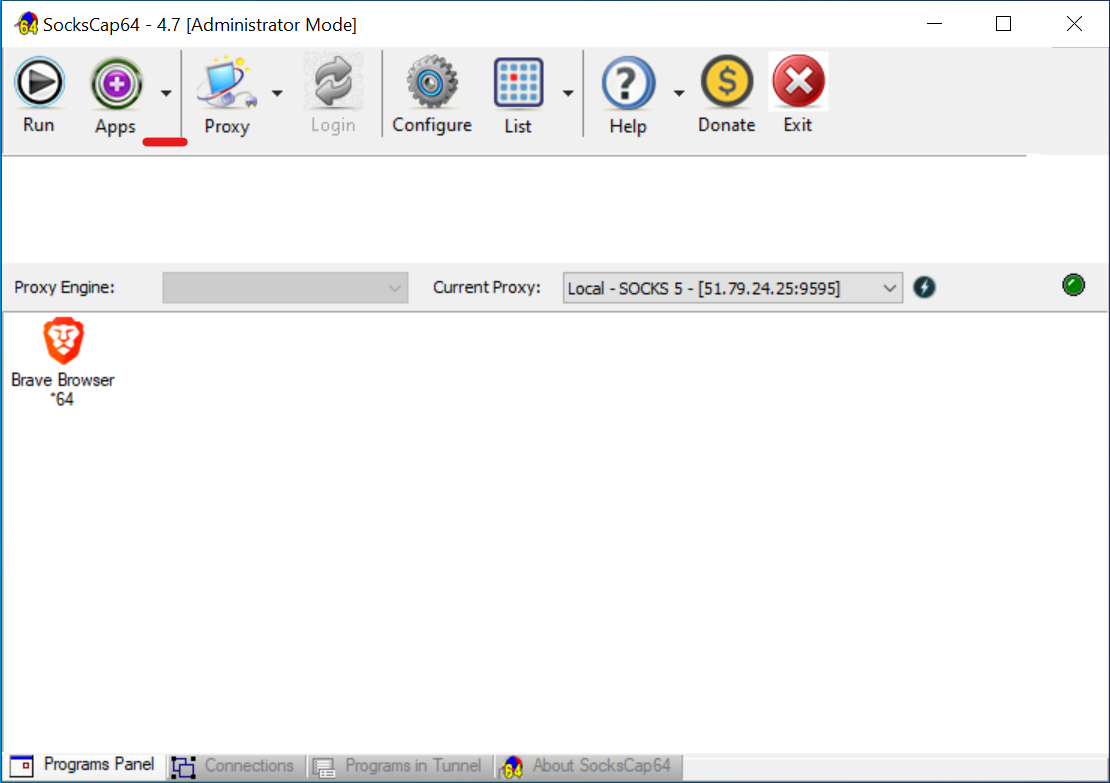 Fig. 8. Screenshot of the SocksCap64 main interface, showing the addition of a new application via the context menu.
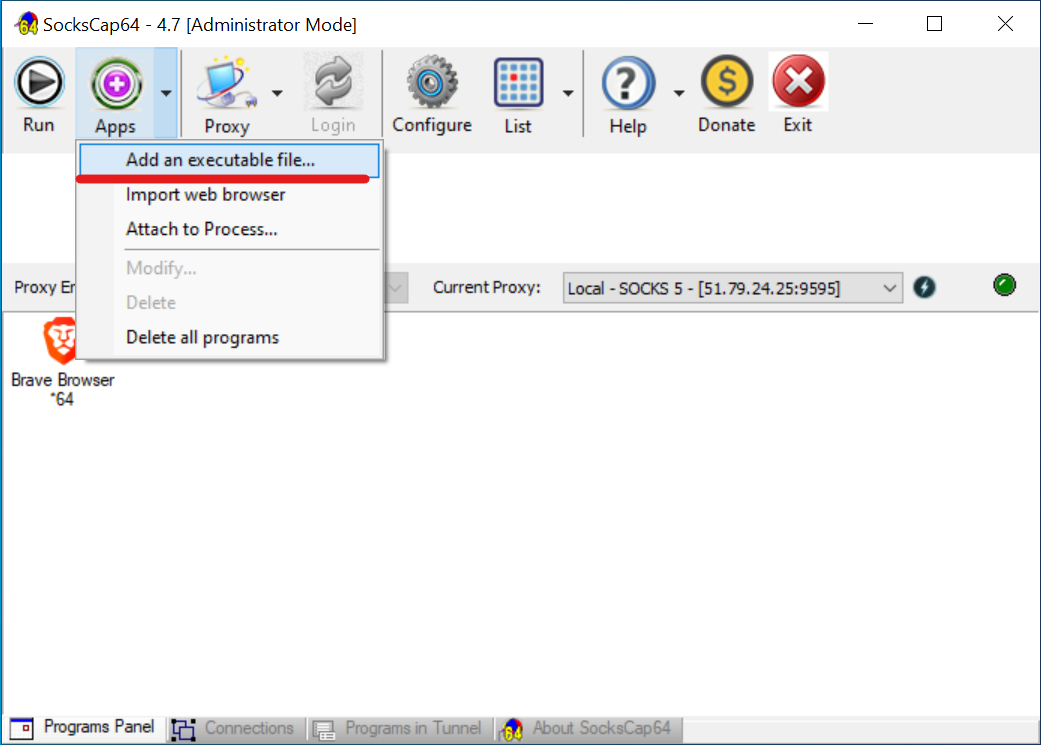 Fig. 9. Screenshot of the SocksCap64 main interface, showing the addition of a new application via the context menu and selecting the "Add an executable file..." item.
 Fig. 10. Screenshot of the "New Application Profile" window, showing the clicking of the "Browse..." button to manually select the program's executable
 .exe file.
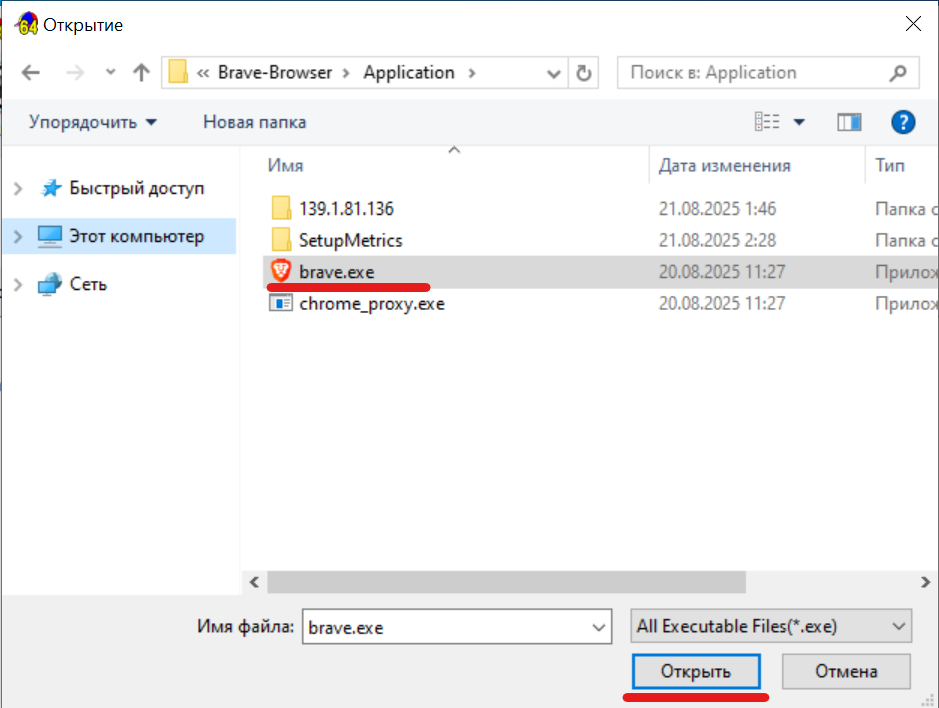 Fig. 11. Screenshot of the file manager window, showing the selection of the program's executable
 .exe file.
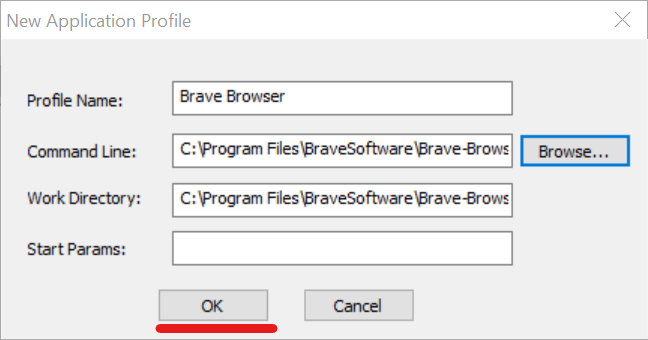 Fig. 12. Screenshot of the "New Application Profile" window after selecting the file. The "Command Line" and "Work Directory" fields are filled automatically; just click "OK" to save.
- Selecting the active proxy. Before launching, make sure that the proxy you configured is selected in the "Current Proxy" drop-down list.
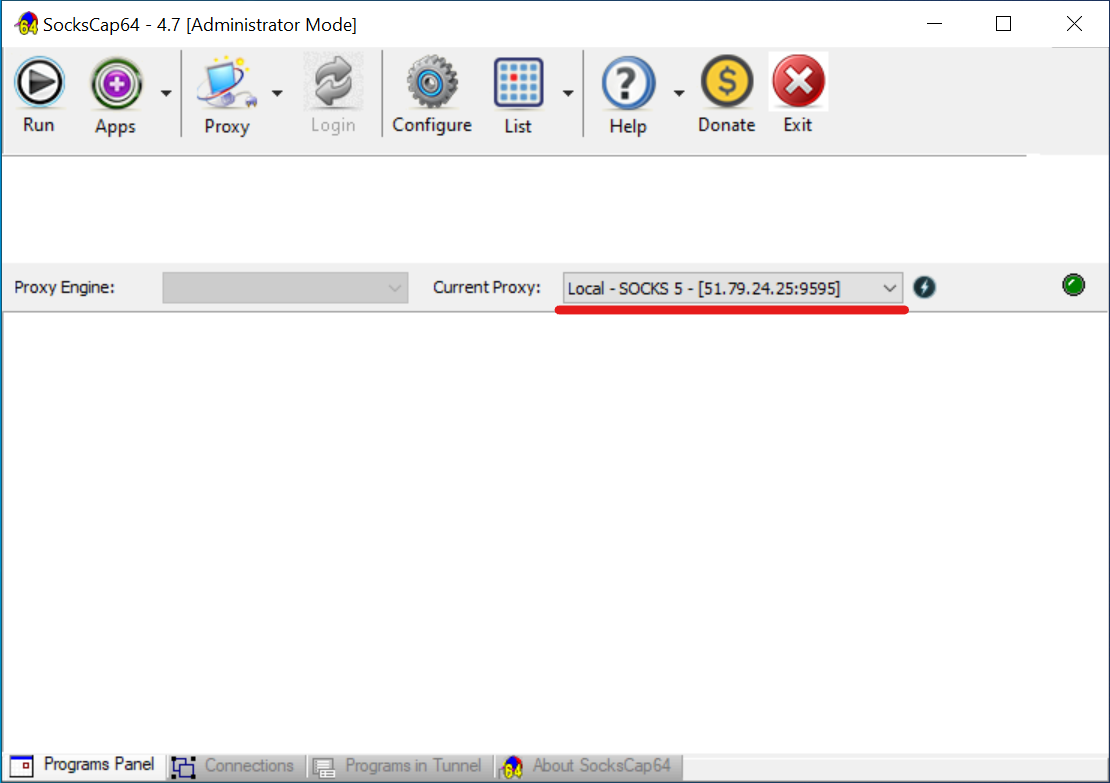 Fig. 13. Screenshot of the SocksCap64 main interface, showing the location of the proxy server drop-down list to verify settings.
- Launch! Select your program (Brave Browser) in the list and click the "Run" button on the main panel.
- Important: For the program to work through the proxy, it must be launched specifically from the SocksCap64 interface.
- To verify, open the website browserleaks.com/ip in the launched browser and ensure that your IP and geolocation match the proxy data.
 Fig. 14. Screenshot of the SocksCap64 main interface, showing the added application (Brave Browser) and the "Run" button for its subsequent launch through the configured proxy.
 Fig. 15. Screenshot of the Brave browser interface launched via SocksCap64, showing open tabs: the CyberYozh App proxy service and the browserleaks.com/ip website to verify the proxy is working correctly.
Conclusion
Great! Now you know how to isolate any application's traffic, opening up new opportunities for optimizing gaming connections, managing professional work environments, and enhancing network privacy. SocksCap64 paired with high-quality proxies is a powerful tool that should be in every advanced user's arsenal.
👉 Ready to take control of your traffic? All that's left is to choose a reliable proxy. Our residential and mobile SOCKS5 proxies are perfectly suited for SocksCap64, providing maximum speed, stability, and trust levels.
