
When it comes to proxying traffic on Windows, most users think of settings in a browser or individual programs. But what if you need to route all system traffic or traffic from an application that doesn't have its own settings through a proxy? The answer is to use a system proxy client. And one of the most flexible and powerful tools for this task is Win2Socks.
Win2Socks is a universal client that allows you to tunnel network connections for the entire system or specific programs through a proxy server. It supports many protocols, including SOCKS5, HTTP, Shadowsocks, and others, making it an indispensable tool for increasing online privacy and managing network rules.
In this guide, we will break down the entire process of setting up Win2Socks step-by-step: from adding a proxy server to creating rules for specific applications.
Why do you need Win2Socks?
- Global Proxying: Set it up once, and all your system traffic (including system services and updates) goes through the proxy, masking your IP address for increased privacy.
- Flexible Rules: Don't want to pass all traffic? No problem. Create rules to route only specific programs (e.g., a browser or a game client) through the proxy, while everything else works directly.
- Support for Complex Protocols: Unlike simple utilities, Win2Socks supports advanced protocols like Shadowsocks, which is particularly useful for optimizing network routing in challenging conditions.
- Improved Privacy: By managing outgoing traffic, you reduce the likelihood of your connection data being exposed.
Step-by-Step Win2Socks Setup
Step 1: Gathering Proxy Credentials
The first and most important step is to ensure you have a complete set of authorization data. These "keys" will allow your application or browser to connect to the proxy server and route traffic through it.
Be sure to prepare the following data:
- IP Address (host server)
- Port for connection
- Login and password for authorization
- Protocol type (HTTP or SOCKS5)
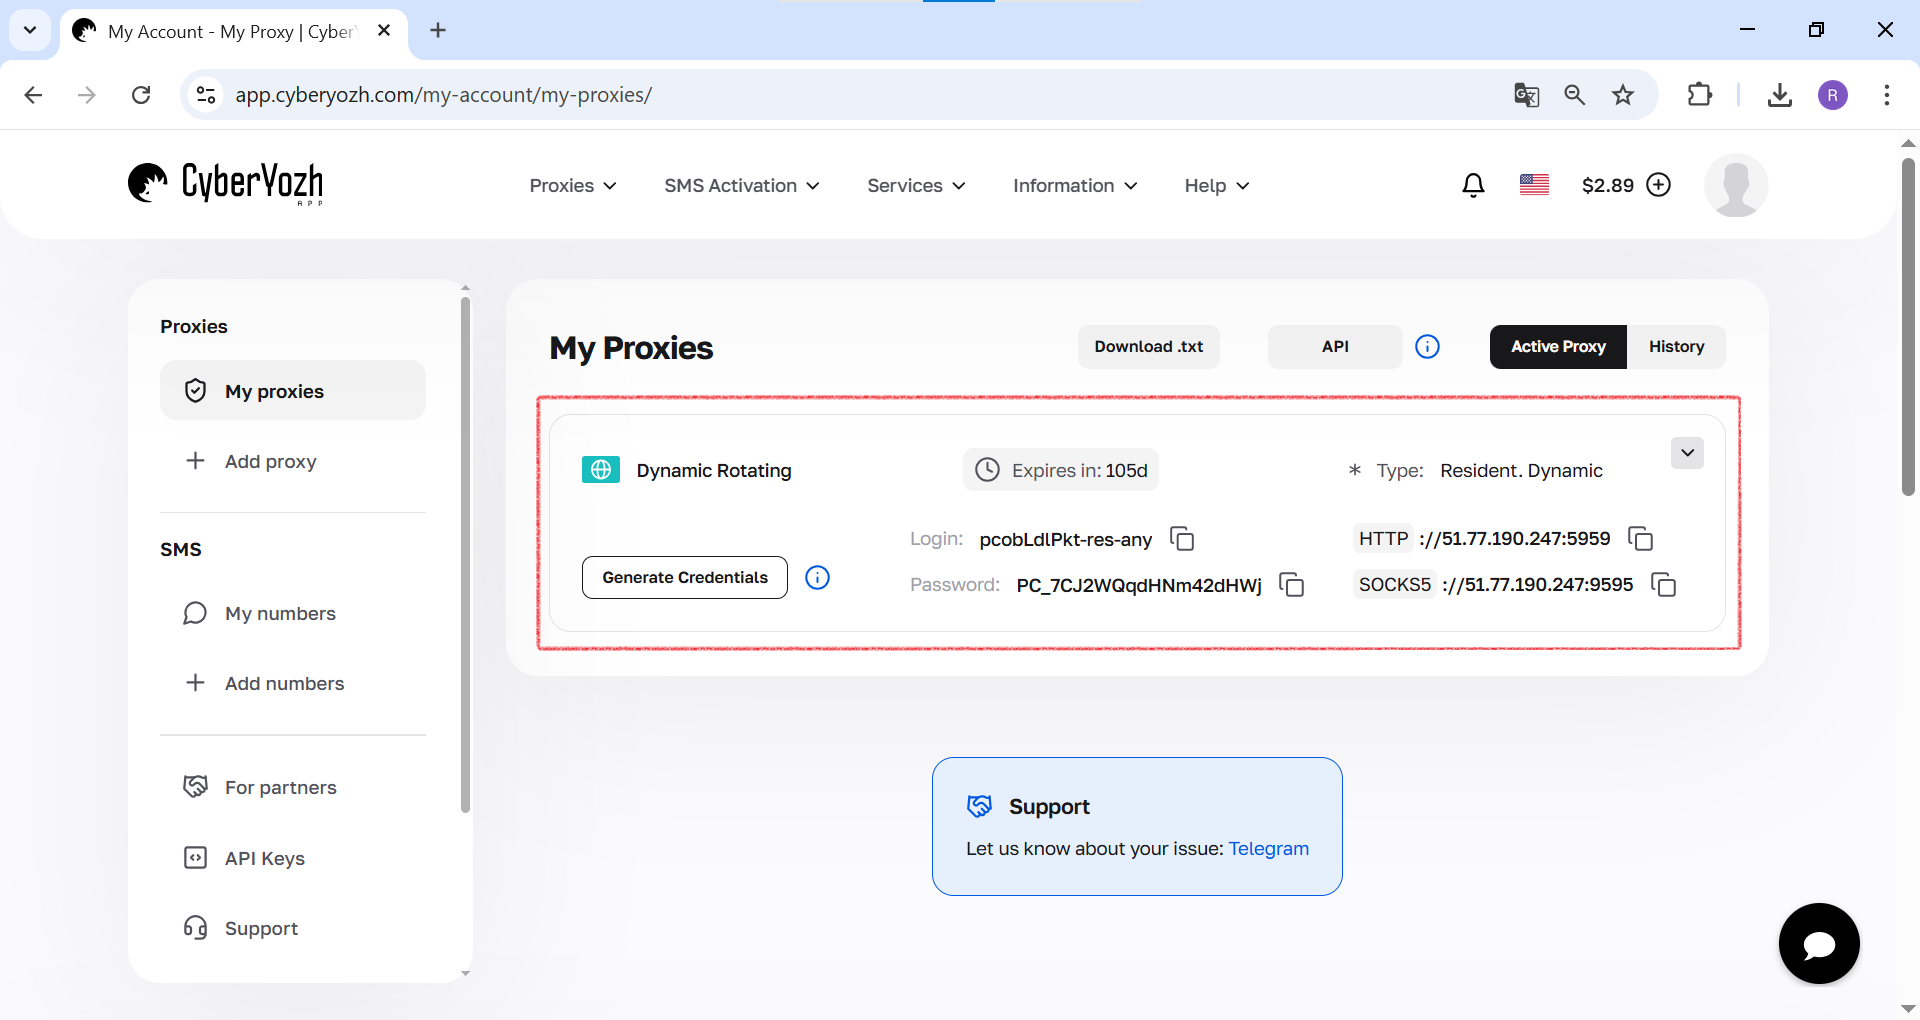 Fig. 1. This screenshot shows where all the necessary fields for connecting to a proxy server are located in theCyberYozh Apppersonal account.
Step 2: Configuring the Proxy Server
First, let's add our proxy server to the program.
- Getting Started. When you first launch Win2Socks, it will offer to use a setup wizard. For full control, we will skip it by clicking "Cancel".
 Fig. 1. This screenshot shows the Win2Socks initial setup wizard, which we skip by clicking "Cancel" to proceed to manual configuration.
- Adding a Server. In the main window, go to the server management section (the second icon from the top in the left menu) and click "Add Server".

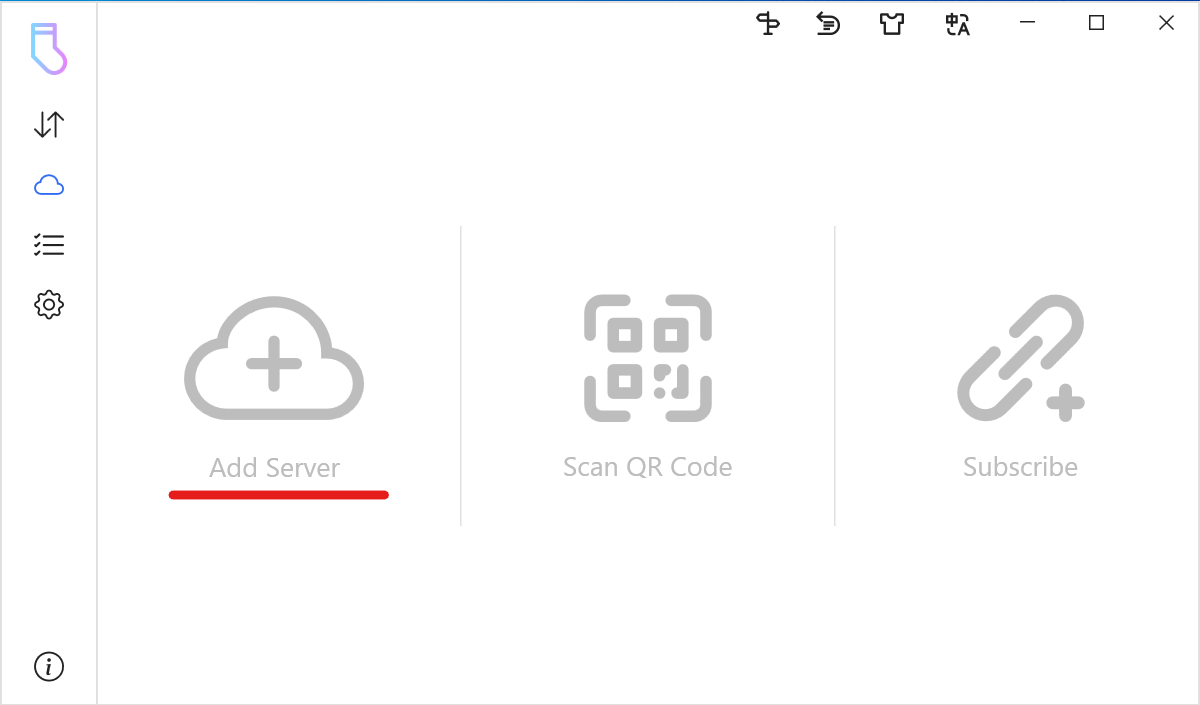 Fig. 2 and Fig. 3. These screenshots show the main window of the program, where you need to open the proxy server settings section and click the "Add Server" button to begin.
- Selecting Type and Entering Data. In the "Server Information" window:
- In the "Type" field, select SOCKS5.
- Give your connection a name, for example, "CyberYozh App".
- Enter the Host (IP address) and Port of your proxy.
 Fig. 4. Screenshot of the "Server Information" settings window.
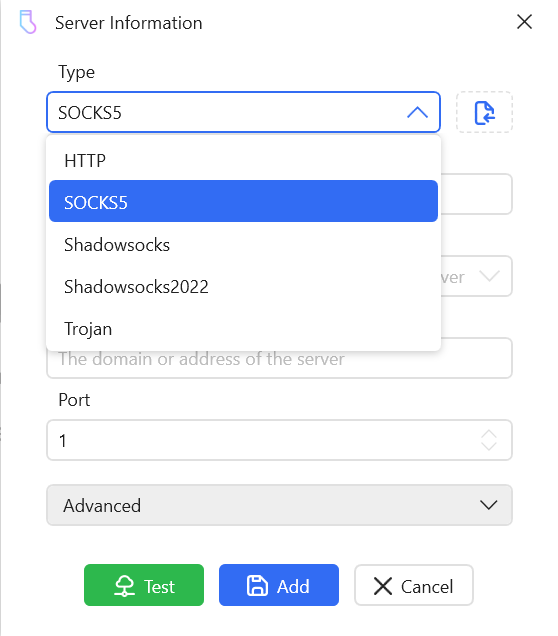 Fig. 5. This screenshot shows the "Server Information" window, where the proxy server type is selected from the "Type" drop-down list, in this case — SOCKS5.
- Authentication Setup. Expand the "Advanced" section and activate the "Authentication" toggle. Enter your login and password.
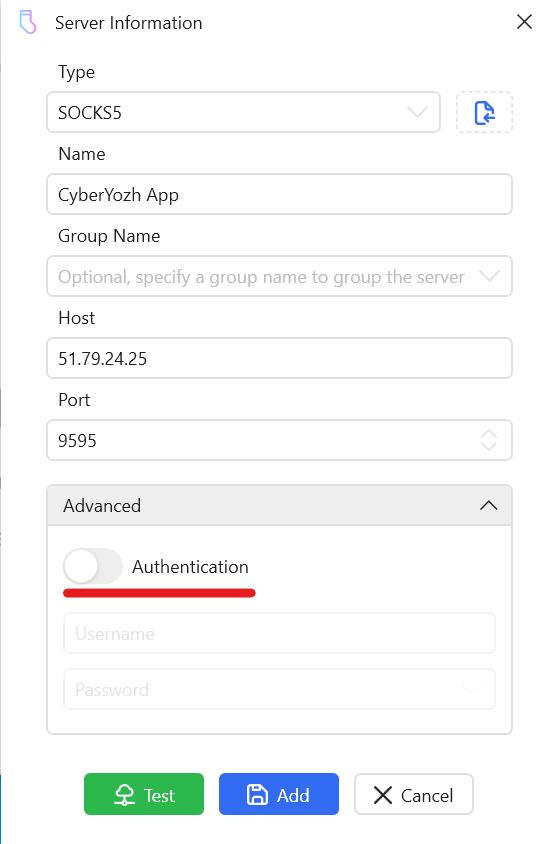 Fig. 6. Enabling login and password authentication mode in the "Advanced" section.
- Testing and Saving. Click the green "Test" button. Win2Socks will perform a detailed check. Ensure that the TCP test (or UDP) passes successfully (indicated by a green checkmark). After that, click the blue "Add" button to save the server.
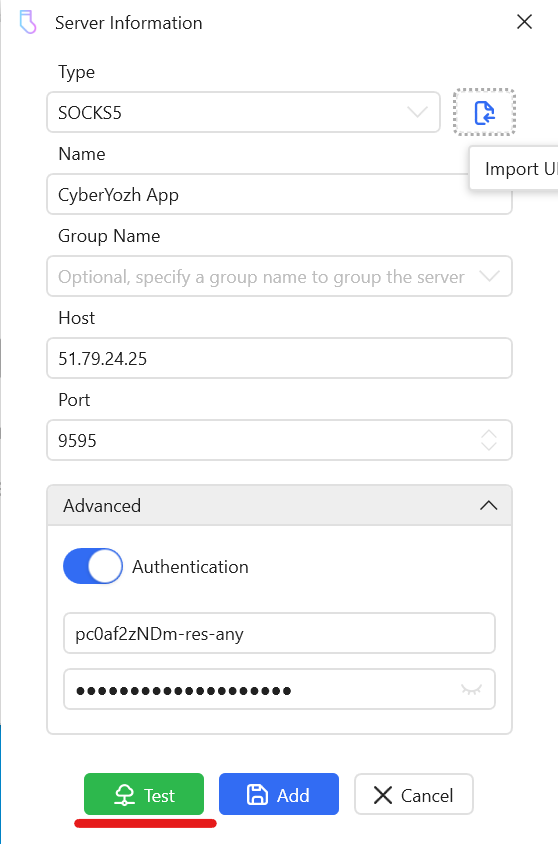 Fig. 7. This screenshot shows the process of entering authorization data (login and password) in the "Advanced" section and highlights the "Test" button for checking the connection.
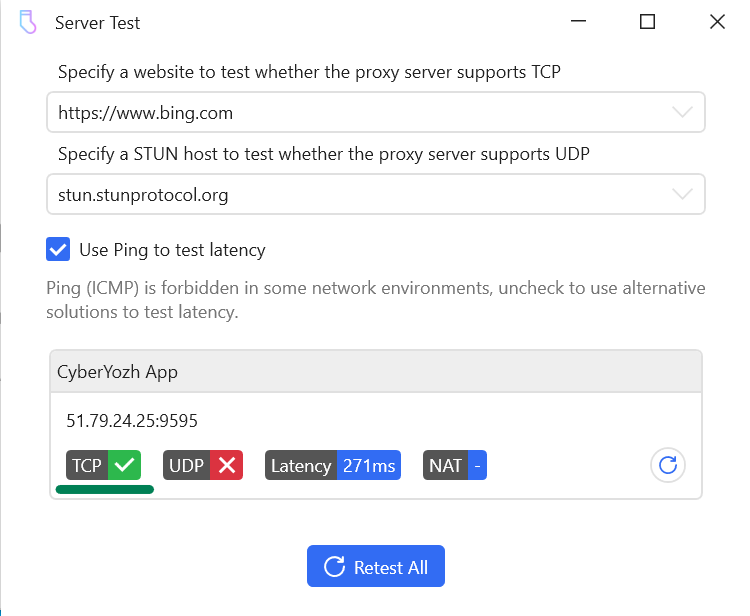 Fig. 8. This screenshot shows the "Server Test" window with the results: the TCP connection was established successfully, as confirmed by the green checkmark.
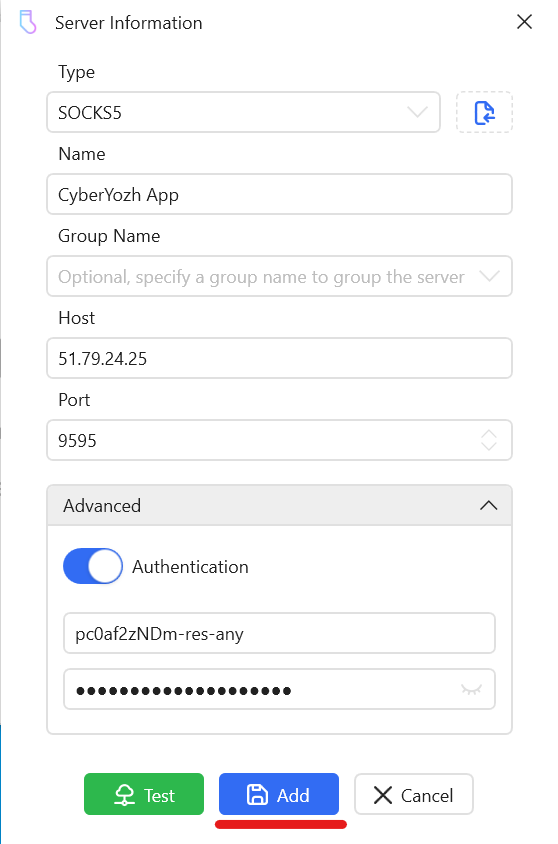 Fig. 9. This screenshot shows the "Server Information" window, where after a successful test, you must click the "Add" button to save the proxy server settings.
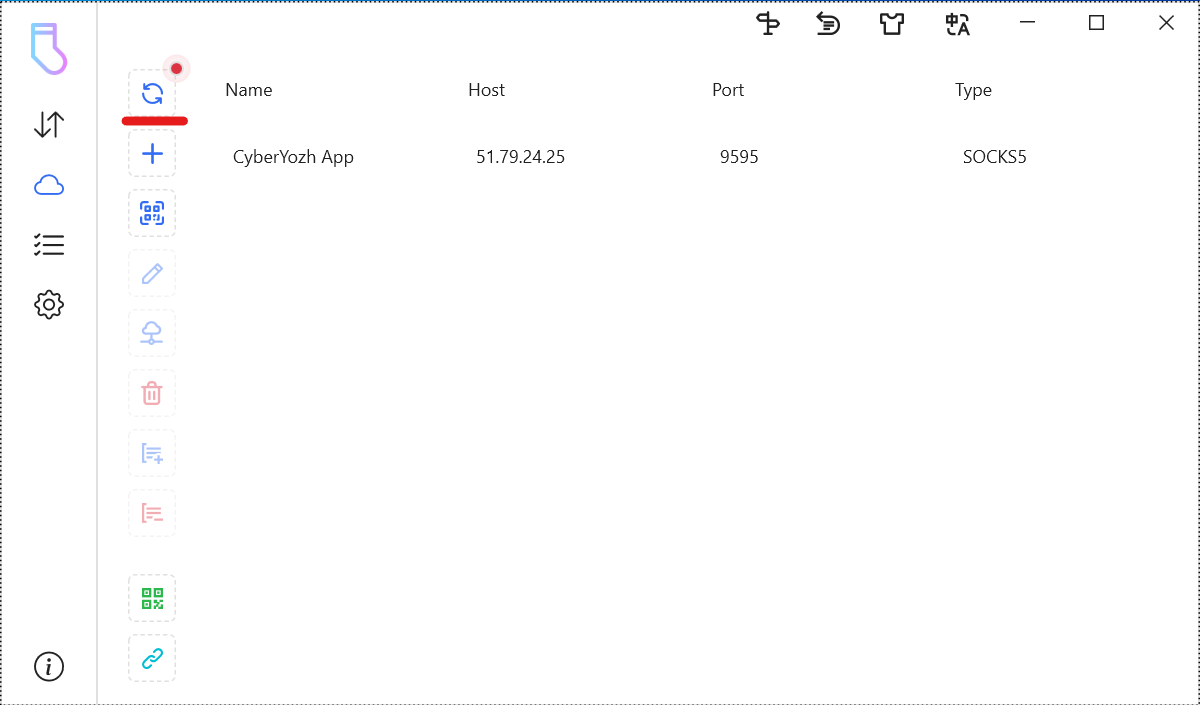 Fig. 10. This screenshot shows the list of servers in Win2Socks, displaying the newly added and configured "CyberYozh App" proxy server.
Step 3: Creating a Rule for an Application
Now that the server is added, let's create a rule that will force any application to access the network through our proxy.
- Navigating to the Rules Section. In the left menu, go to the "Rules" section (the fourth icon from the top).
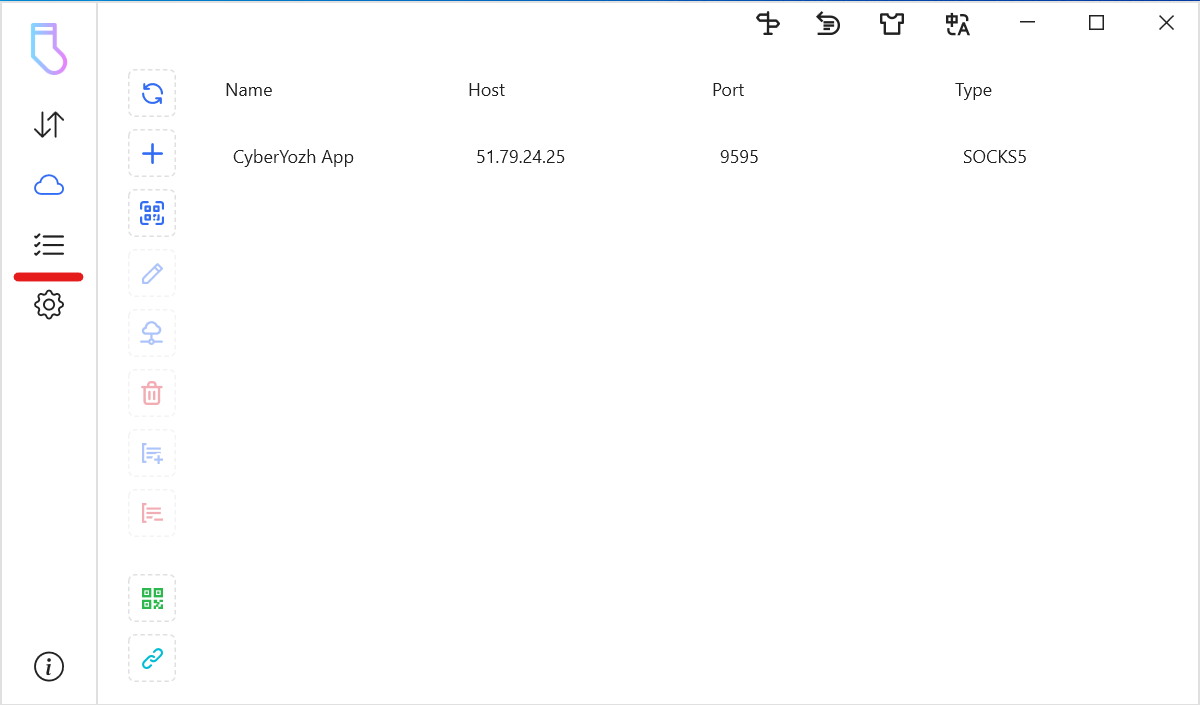 Fig. 11. This screenshot shows the left menu of the program, where you need to go to the "Rules" section (list icon) to create traffic routing rules.
- Creating a New Rule. Click "Add Rule" to open the configuration window.
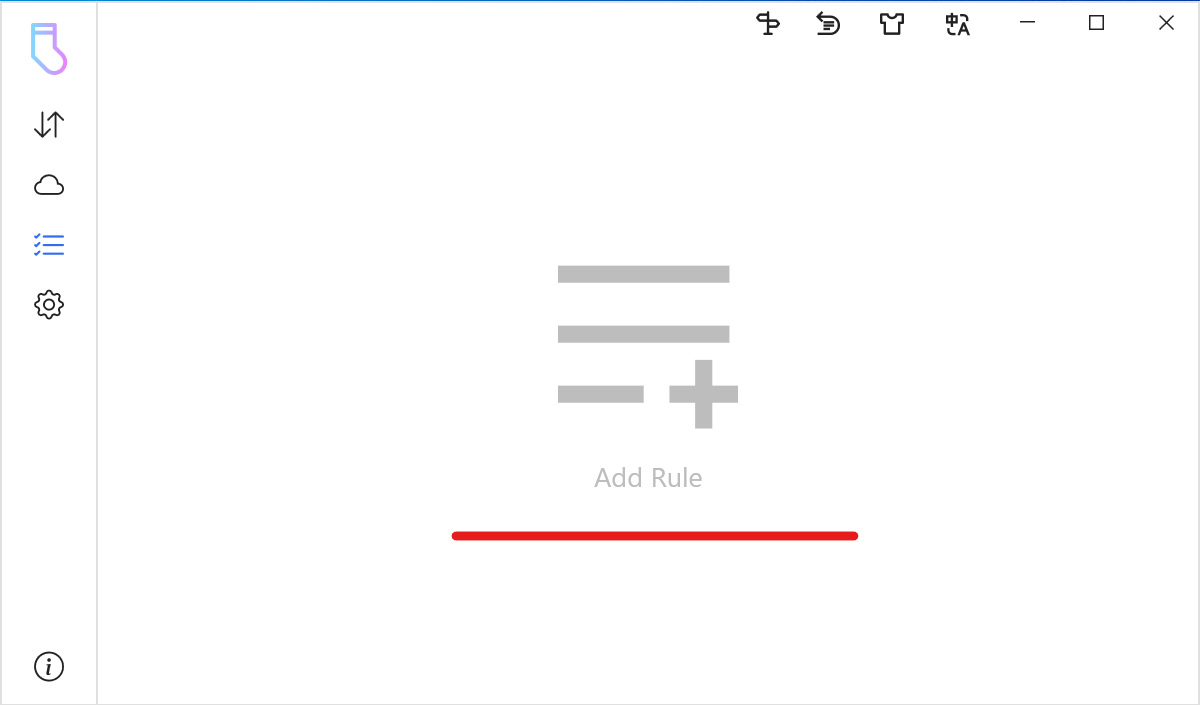 Fig. 12. This screenshot shows an empty "Rules" section, where you need to click the "Add Rule" button to create a new rule.
- Setting the Condition. Give the rule a name (e.g., "CyberYozh App"). Click "Add Condition" and select "Application".
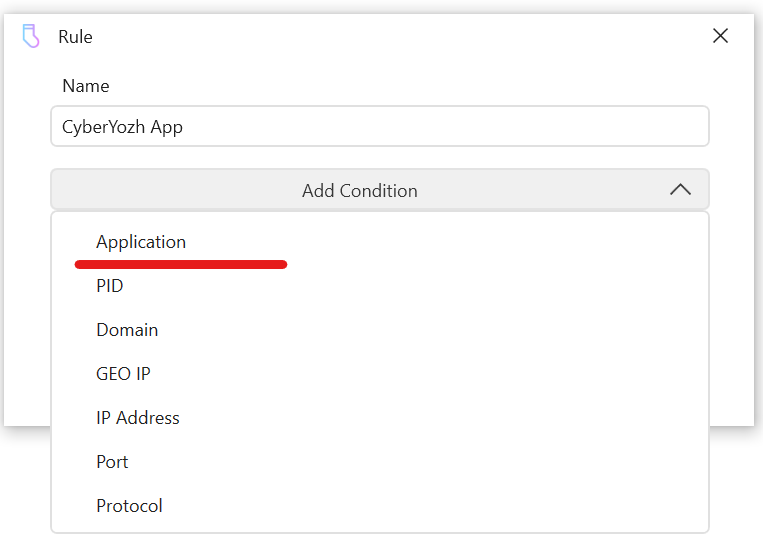 Fig. 13. This screenshot shows the rule creation window, where the "Application" condition is selected from the "Add Condition" drop-down list so that the rule applies to a specific program.
- Selecting the Application. Click on the file icon to select the
.exefile of the program (in our case,brave.exe).
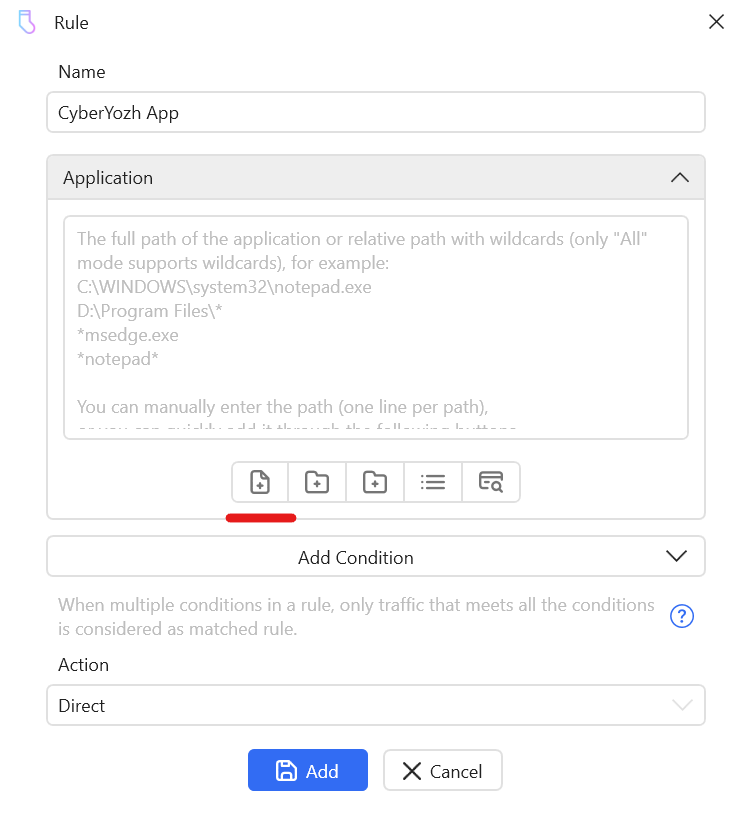 Fig. 14. This screenshot shows the button for adding an .exe file to the rules list.
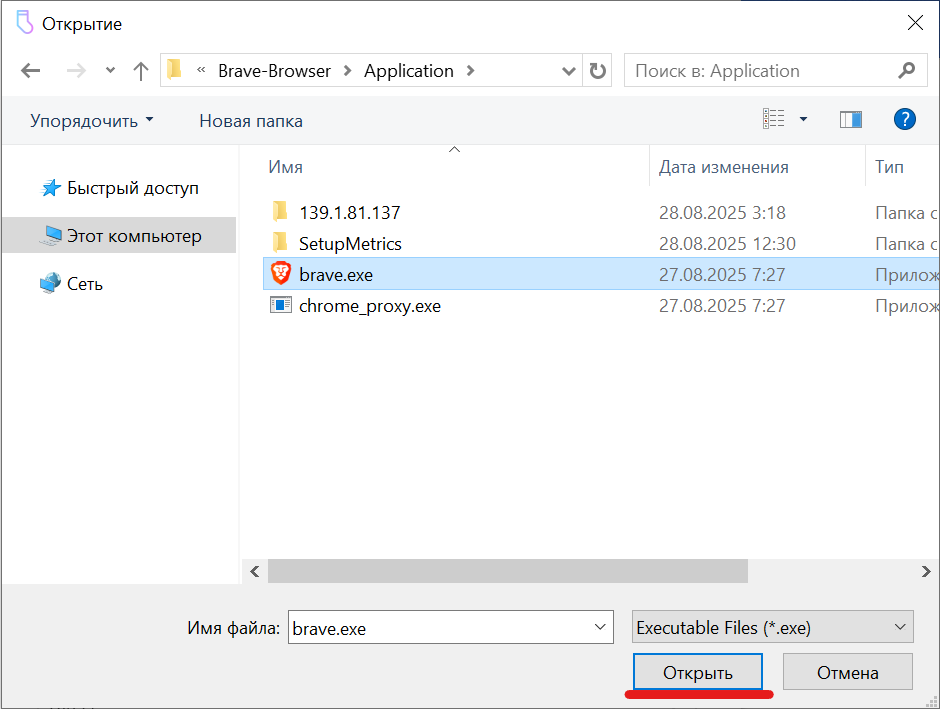 Fig. 15. This screenshot shows Windows Explorer opened to select the executable
 .exe file of the application (in this case, brave.exe), whose traffic will be routed through the proxy.
- Selecting Action and Saving. At the very bottom, in the "Action" field, select your previously configured proxy server ("CyberYozh App") from the list. Click "Add" to save the rule.
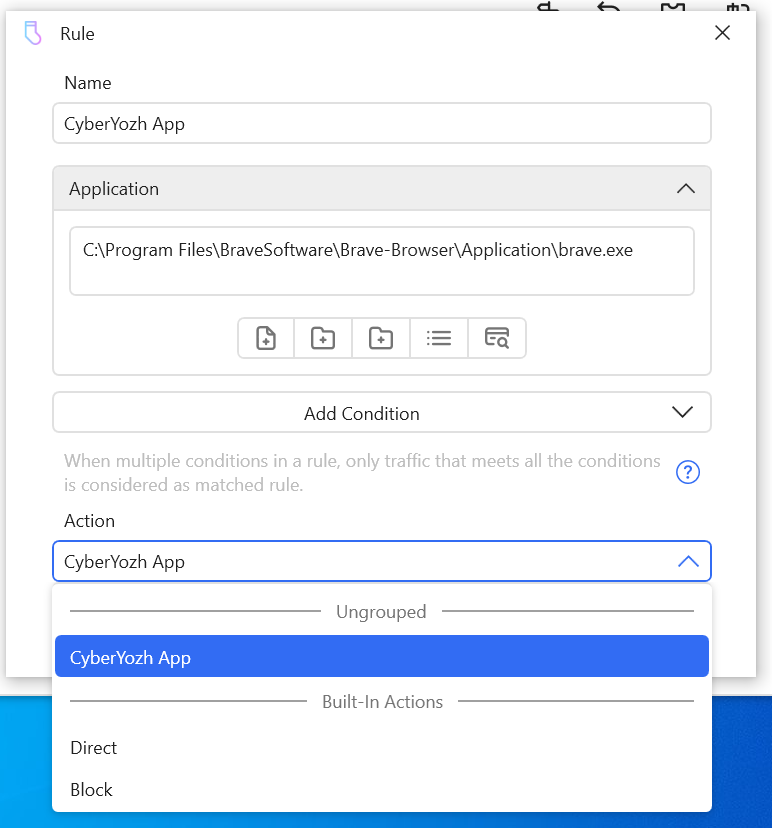 Fig. 16. This screenshot shows the action setup for the rule. The previously created "CyberYozh App" proxy server is selected from the "Action" drop-down list.
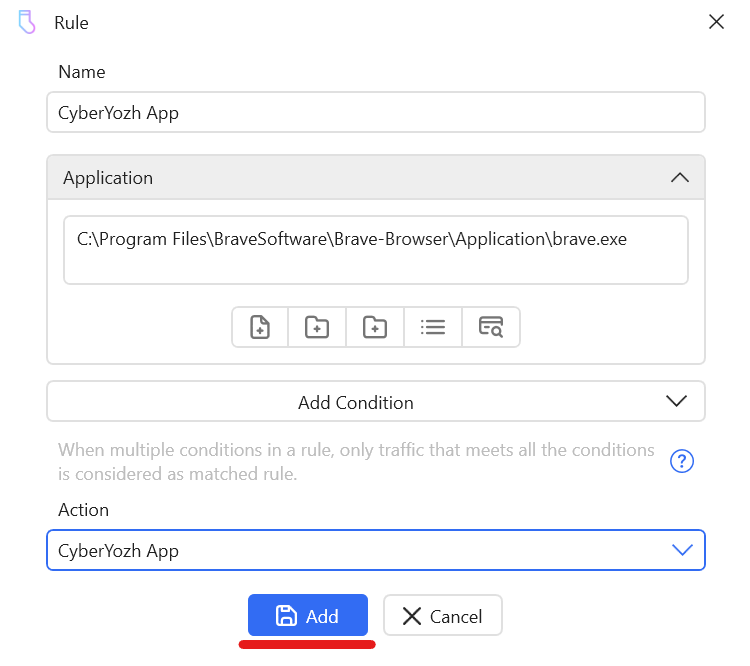 Fig. 17. This screenshot shows the final step of creating the rule, where after configuring all conditions and actions, you must click the "Add" button.
Step 4: Launch and Verification
- Activation. Ensure that the created rule is enabled (there is a blue checkmark next to it).
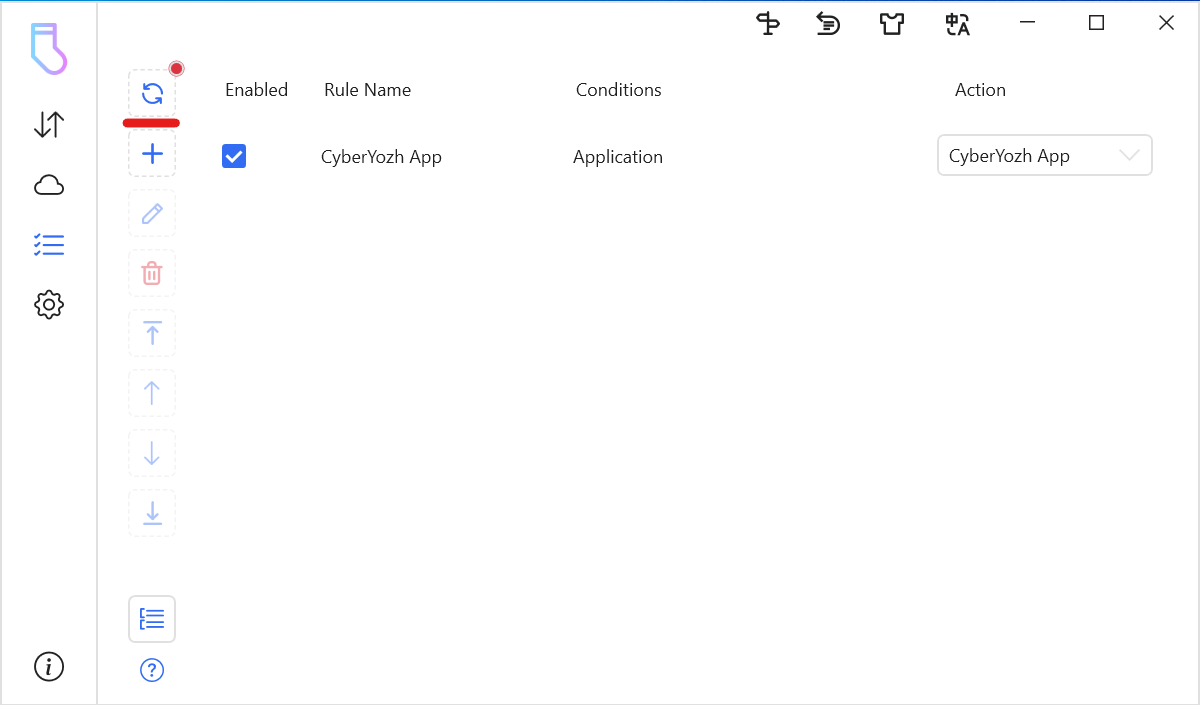 Fig. 18. This screenshot shows the "Rules" section with a list, displaying the created and active rule for the Brave application.
- Traffic Monitoring. Go to the main "Dashboard" section (the top-most icon in the menu). Launch Brave and start using the internet. You will see lines appearing in Win2Socks showing that traffic from
brave.exeis going through your rule.
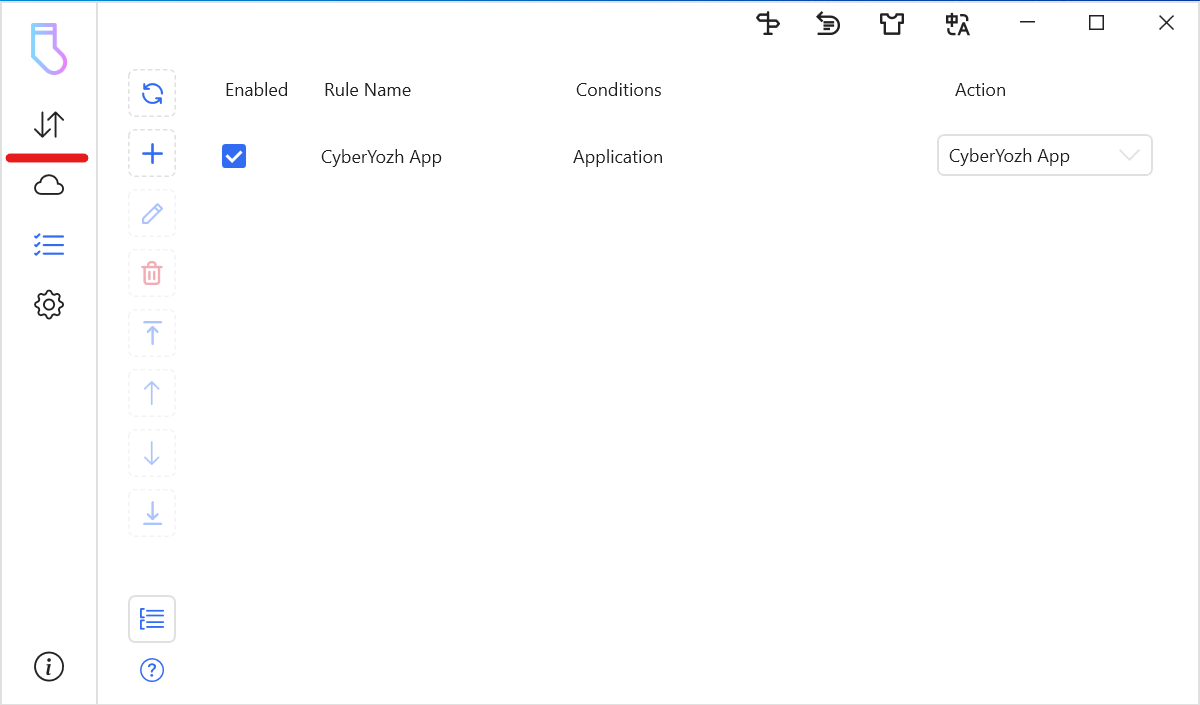 Fig. 19. This screenshot shows the location of the button to open the Win2Socks monitoring panel.
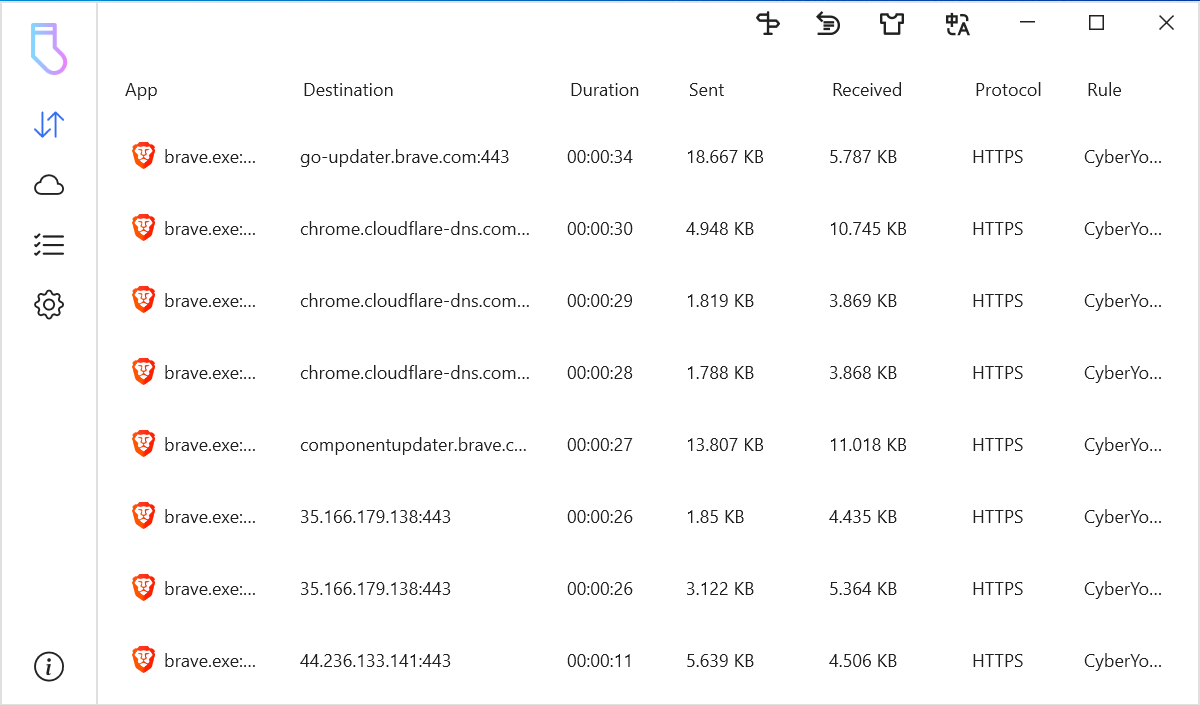 Fig. 20. This screenshot shows the Win2Socks monitoring panel, where active network connections from
 brave.exe going through the created rule are displayed in real-time.
- Final Check. In the Brave browser, which is now running through the proxy, visit any IP check website, for example,
browserleaks.com/ip. You should see the IP address and geolocation of your proxy server, not your real data.
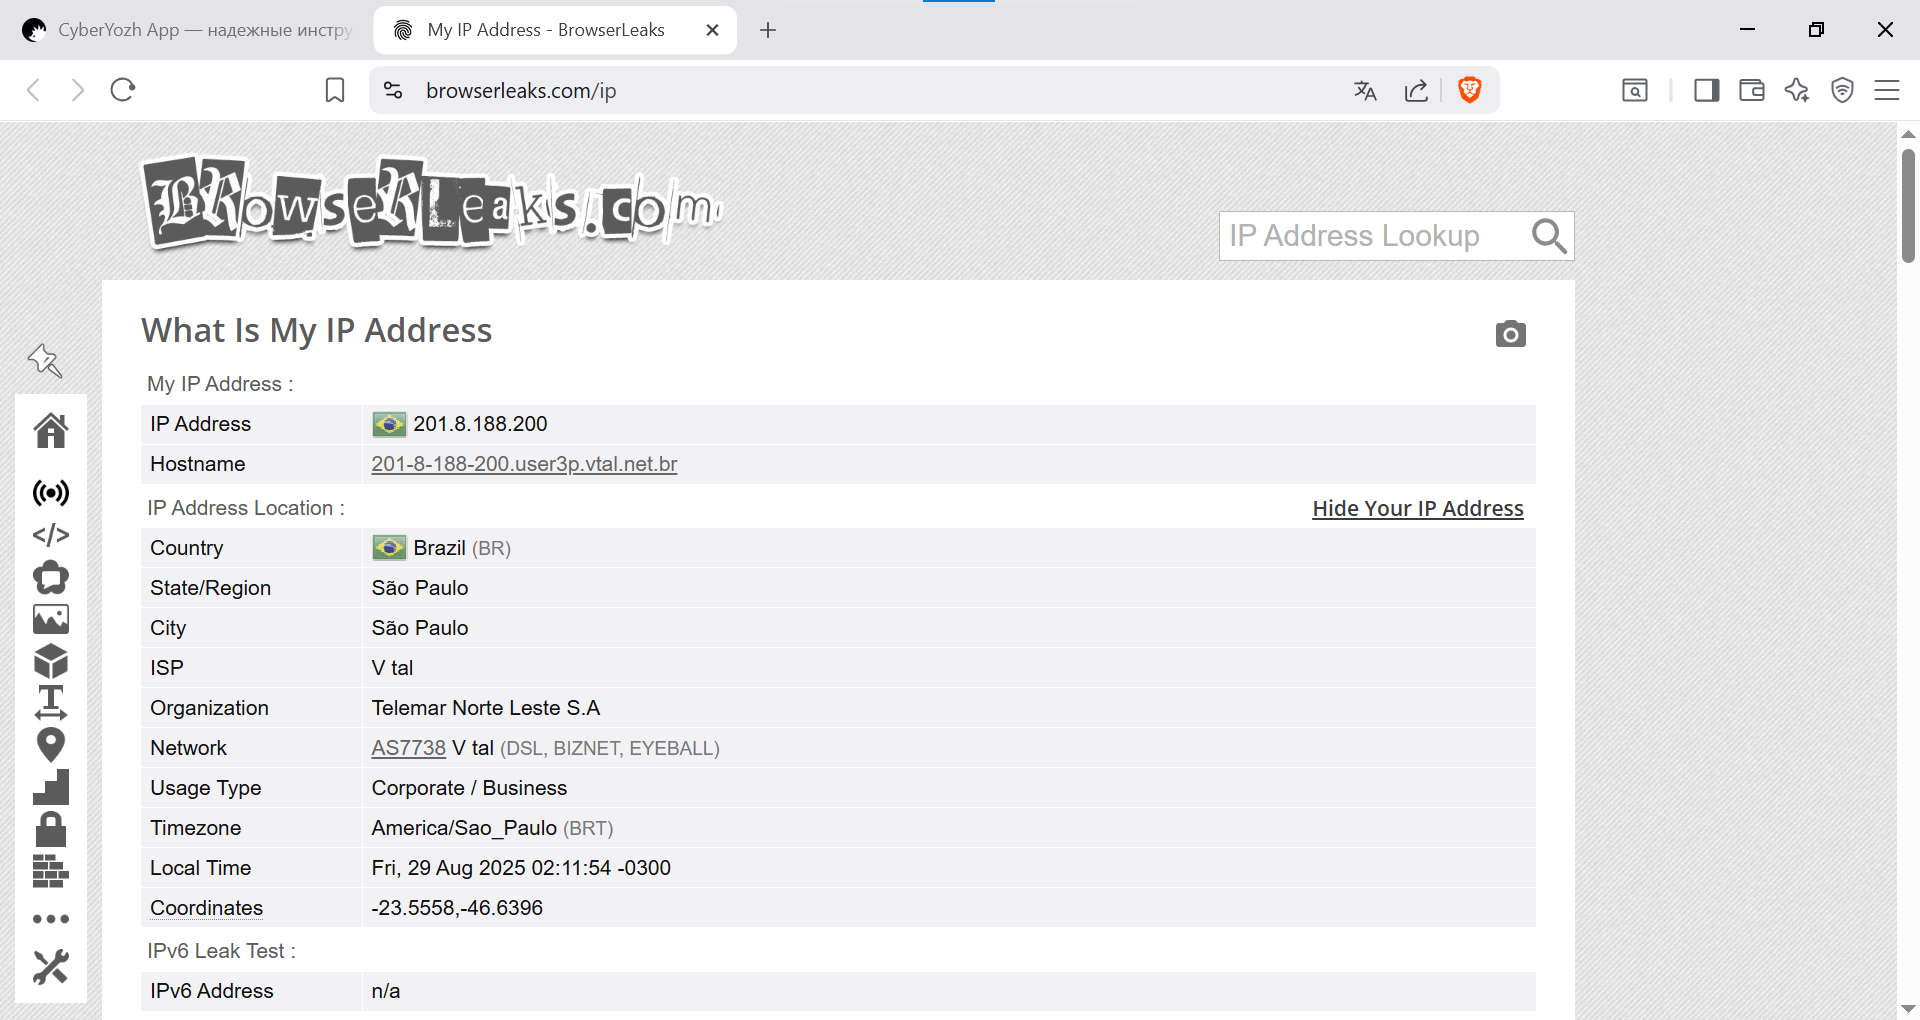 Fig. 21. This screenshot shows the final verification stage. In the Brave browser launched via Win2Socks, the
 browserleaks.com website displays the IP address and geolocation of the proxy server, confirming the correctness of the setup.
Conclusion
Excellent! You have successfully configured Win2Socks to manage the traffic of a specific application. This powerful tool, combined with high-quality proxies, gives you full control over your network activity, providing a high level of privacy and flexibility for various network tasks.
Need stable SOCKS5 proxies for Win2Socks? In our catalog, you will find reliable residential, mobile, and datacenter proxies, which are perfect for system proxying and guarantee stable operation.