
ProxyChains on Linux Mint / Ubuntu: A Complete Guide to Installation and Traffic Anonymization
In the Linux ecosystem, the command line is the center of the universe. Most powerful tools for network analysis, penetration testing, or development work here. But what if you need to force a console utility that has no built-in settings to work through a proxy server? Or route traffic from only one specific application without affecting the entire system?
There is an elegant and powerful solution for these tasks: ProxyChains.
ProxyChains is a utility that allows you to force TCP connections from any application to go through one or more proxy servers. It works as a “wrapper,” intercepting the program's network calls and redirecting them through a chain that you specify. This makes it an indispensable tool for cybersecurity professionals, developers, and anyone who values anonymity and flexibility in traffic management.
This guide will walk you through the entire process of installing, configuring, and using ProxyChains-NG on Debian-like systems such as Linux Mint and Ubuntu.
Part 1: Installing ProxyChains-NG
The installation process is simple and is done entirely through the terminal.
Step 1: Gathering Proxy Credentials
The first and most important step is to make sure you have a complete set of credentials for authorization. These “keys” will allow your application or browser to connect to the proxy server and route traffic through it.
Be sure to prepare the following data:
- IP address (host server)
- Port for connection
- Login and password for authorization
- Protocol type (HTTP/HTTPS or SOCKS5)
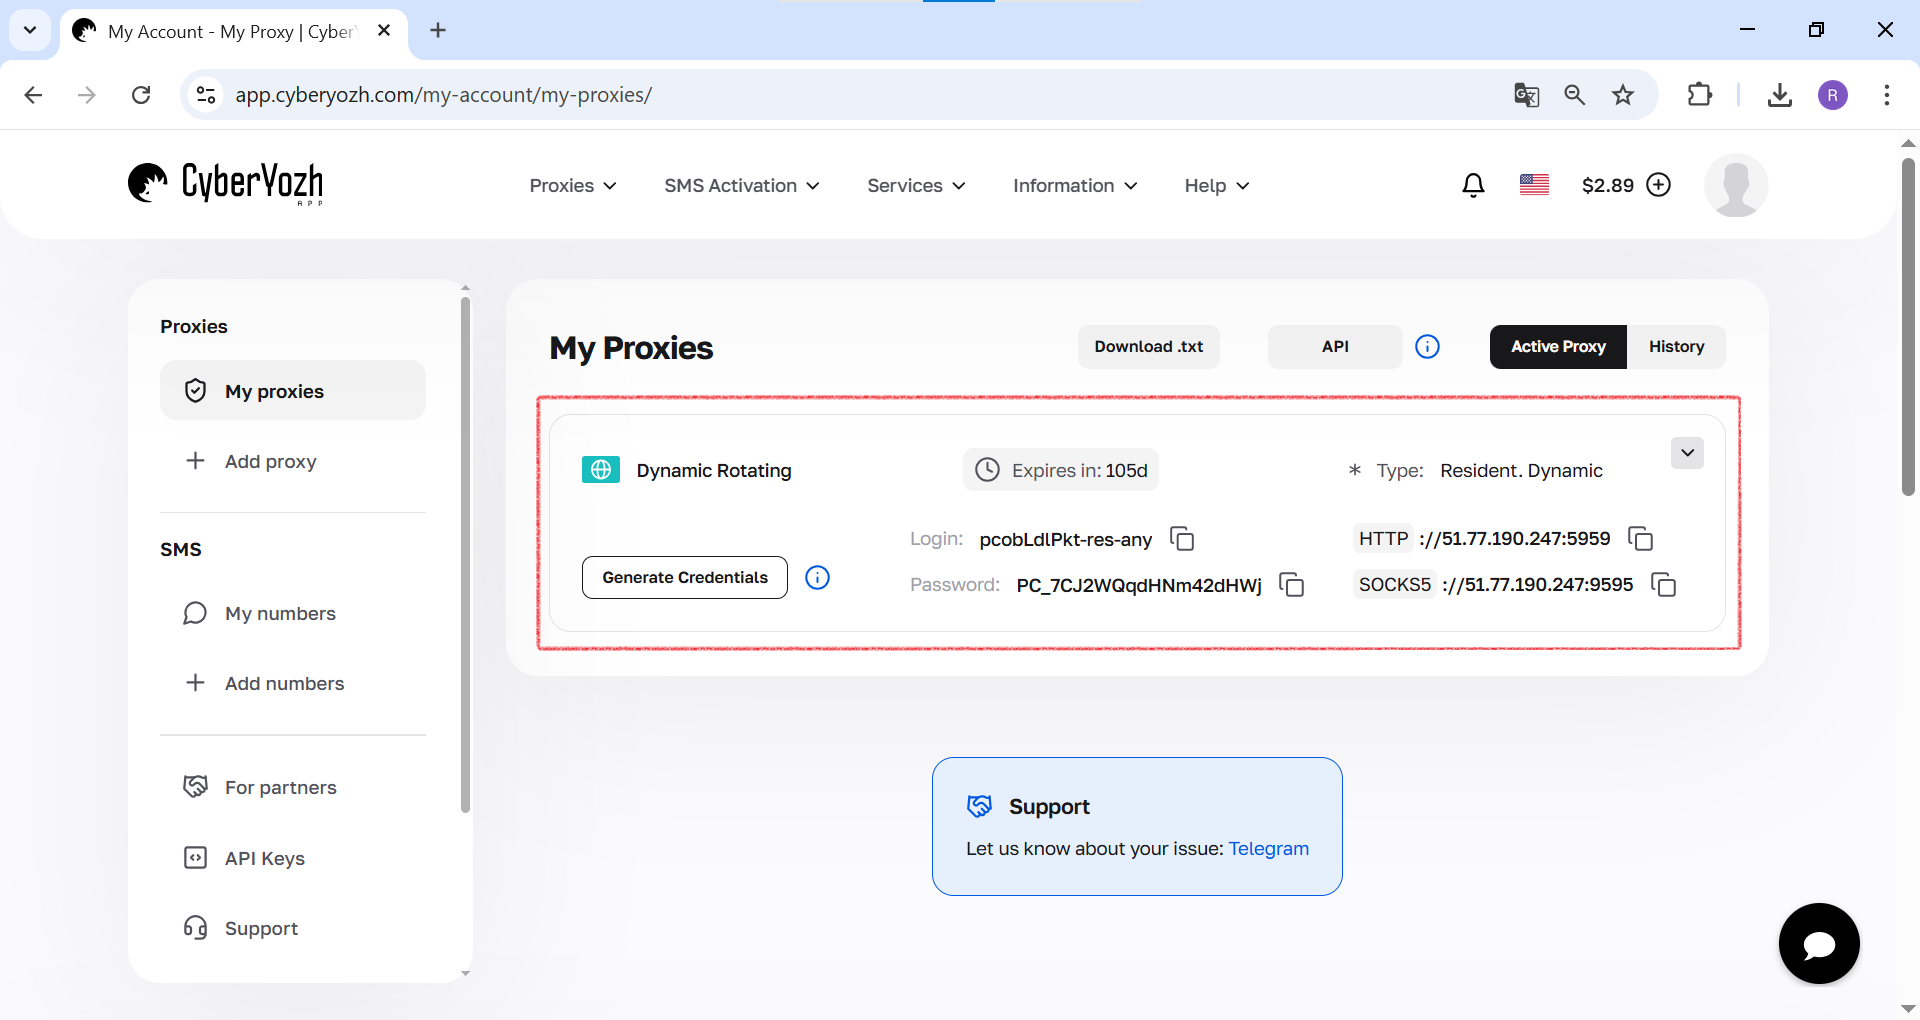 Fig. 1. This screenshot shows where all the necessary fields for connecting to a proxy server are located in yourCyberYozh Apppersonal account.
Step 2: Update package repositories
Before installing any software in Linux, the first and mandatory step is to synchronize the local package list with the central repositories. This ensures that you are installing the latest and most secure version.
Run the command: sudo apt update -y
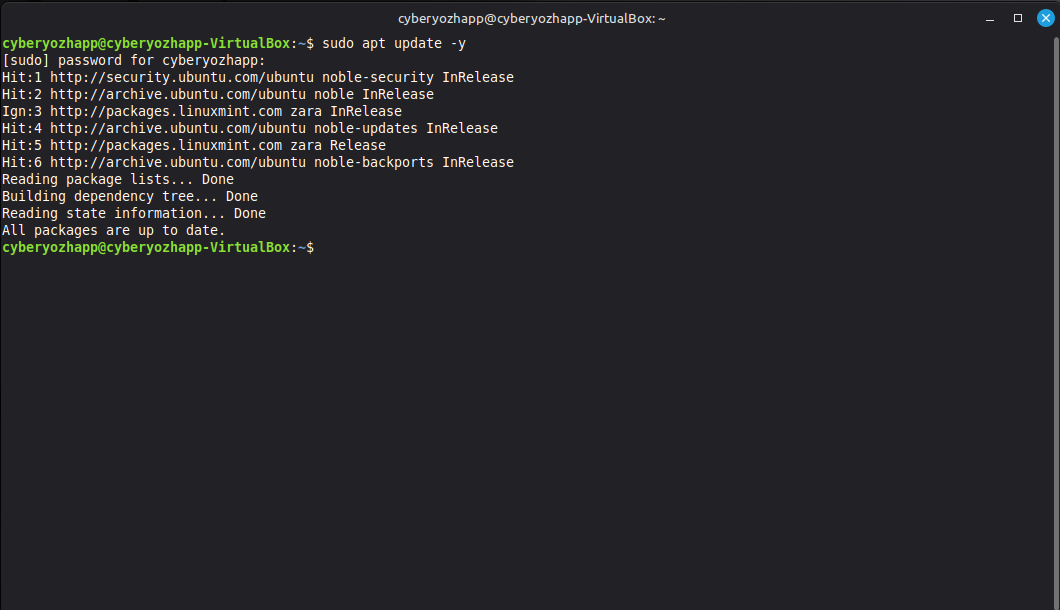 Fig. 2. This screenshot shows the process of updating package lists in the Linux Mint terminal using the command sudo apt update -y.
Step 3: Installing the package
Now let's install the utility itself. Please note that we are installing the proxychains4 package, which is a modern and actively supported version of ProxyChains-NG (Next Generation).
sudo apt install proxychains4
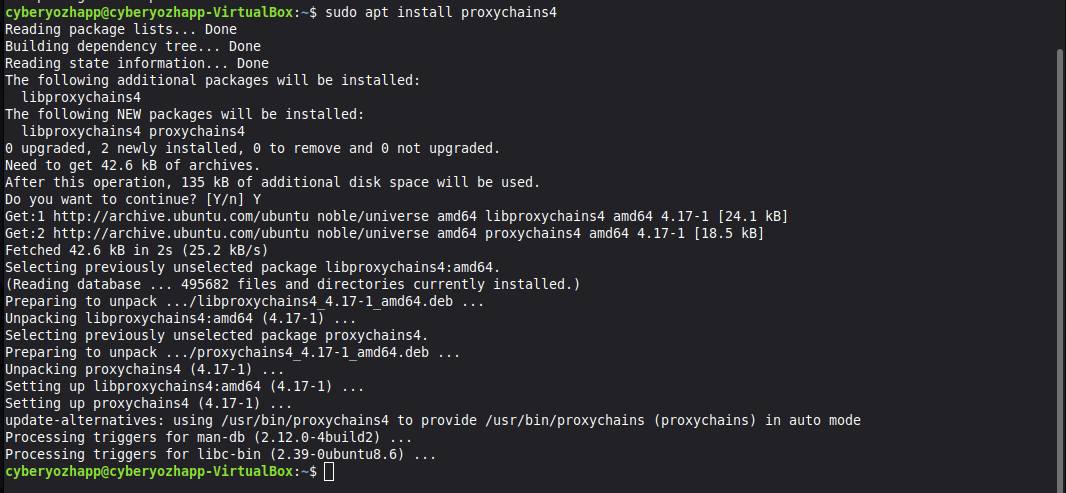 Fig. 3. This screenshot shows the installation of the proxychains4 package via the apt package manager using the command sudo apt install proxychains4.
The system will ask you to confirm the installation, enter “Y” and press Enter.
Step 4: Checking the installation
After the installation is complete, make sure that the tool is working correctly. Run the command without arguments:
proxychains4
If the installation was successful, you will see the program's help screen.
 Fig. 4. This screenshot shows the result of running the proxychains4 command without arguments, which displays help on how to use it and confirms successful installation.
Part 2: Configuration — the “brain” of ProxyChains
The entire logic of ProxyChains is defined by a single configuration file. This is where we will set the operating mode and add our proxy servers.
Step 5: Opening the configuration file
Open the configuration file with superuser privileges in any text editor, such as nano:
sudo nano /etc/proxychains4.conf
 Fig. 5. This screenshot shows the sudo nano /etc/proxychains4.conf command being entered to open the ProxyChains configuration file in the nano text editor.
Step 6: Selecting the chain mode
Inside the file, you will find several commented out (#) modes. You need to select one and uncomment it (remove the # at the beginning of the line).
dynamic_chain: The most reliable mode. Proxies in the chain are used sequentially, but if one of them is unavailable, it is skipped.strict_chain: Strict mode. All proxies are used in the specified order. If one of them does not work, the entire chain breaks.random_chain: Mode for increased anonymity. For each new connection, random servers are selected from the proxy list, creating a unique route.
We will select random_chain by uncommenting the corresponding line.
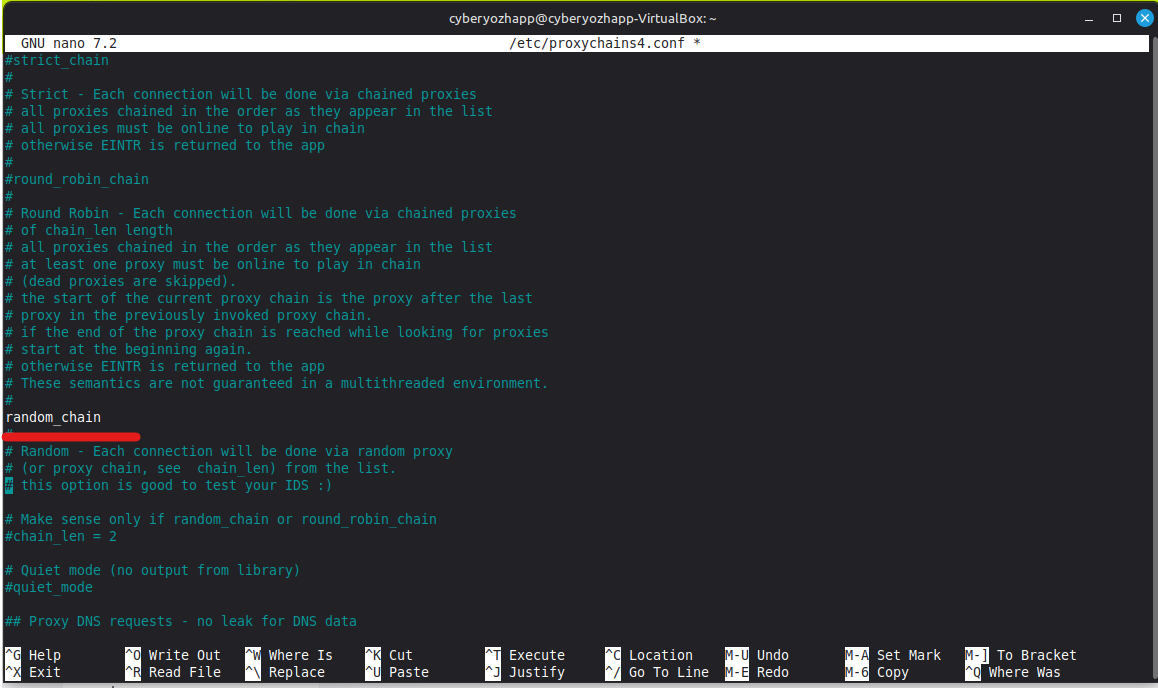 Fig. 6. This screenshot shows a fragment of the proxychains4.conf configuration file, where the random_chain line is uncommented to activate the random proxy chain mode.
Step 7: Adding a proxy list
Scroll to the very end of the configuration file to the [ProxyList] section. This section lists the servers that the utility will use. By default, there may be a proxy for Tor (socks4 127.0.0.1 9050). It should be commented out if you do not plan to use Tor.
Add your proxies in the following format: proxy_type ip_address port login password
- Proxy type:
http,socks4, orsocks5. - Login and password: Specify if your proxy requires authorization.
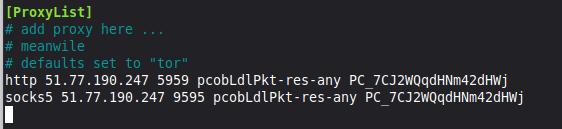 Fig. 7. This screenshot shows the [ProxyList] section in the configuration file, where two proxy servers (HTTP and SOCKS5) have been added with their addresses, ports, and authorization data specified.
How to save changes in nano
- Press Ctrl + X to start exiting the editor.
- A prompt to save the changes will appear at the bottom of the screen: “Save modified buffer?”. Press the Y key (for “Yes”).
- The editor will prompt you to save the file under its current name (
/etc/proxychains4.conf). Just pressEnterto confirm.
You will then return to the command line, and all changes to the file will be successfully saved.
Part 3: Testing and Practical Application
The configuration is complete. It's time to check everything in action.
Step 8: Checking the Source IP Address
First, let's check our real IP address using the curl utility.
curl ipinfo.io
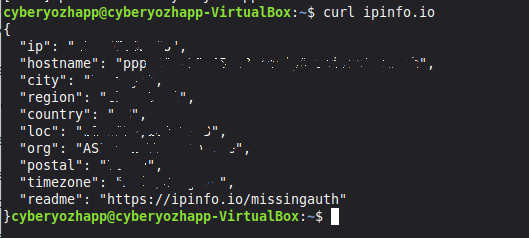 Fig. 8. This screenshot shows the result of running the curl ipinfo.io command, which displays the user's real IP address and geolocation before using ProxyChains.
Step 9: Test run through ProxyChains
Now let's run the same command, but “wrap” it in ProxyChains.
proxychains4 curl ipinfo.io
In the terminal output, you will see how ProxyChains builds a chain through the proxy you specified. As a result, ipinfo.io will show the IP address and geolocation of your proxy server, not your real data.
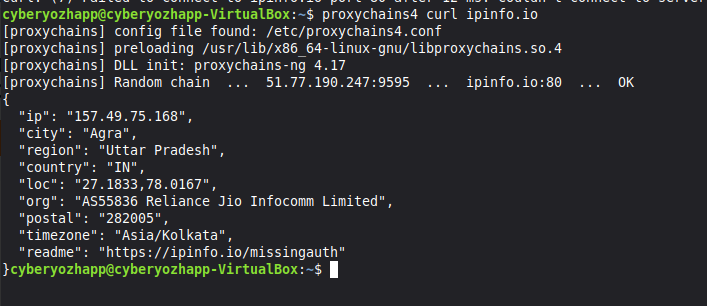 Fig. 9. This screenshot shows the result of a test run of the curl ipinfo.io command through ProxyChains, where you can see the connection log and the final IP address corresponding to the proxy server.
Step 10: Running graphical applications
The full power of ProxyChains is revealed in its ability to work with any programs, including graphical ones. For example, let's run the Firefox browser:
proxychains4 firefox
The terminal will start logging all network connections that the browser now establishes through your proxy chain.
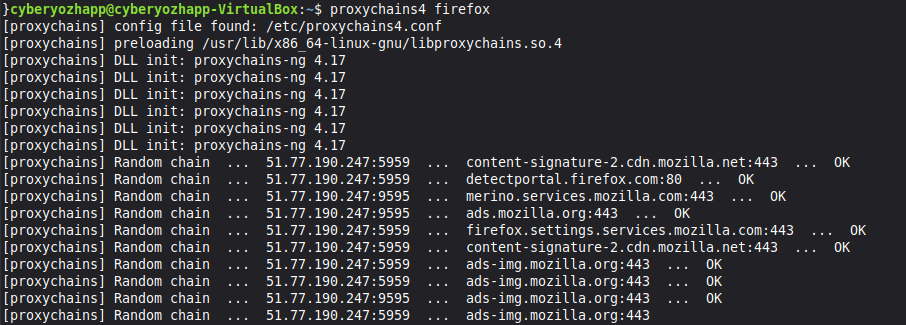 Fig. 10. This screenshot shows Firefox running through ProxyChains. The terminal displays a log of network connections that the utility redirects through the proxy.
Step 11: Final check in the browser
Open a website for detailed connection analysis, such as browserleaks.com/ip, in the browser launched through ProxyChains. You will see that all data about your location matches the proxy server data. This means that all browser traffic has been successfully anonymized.
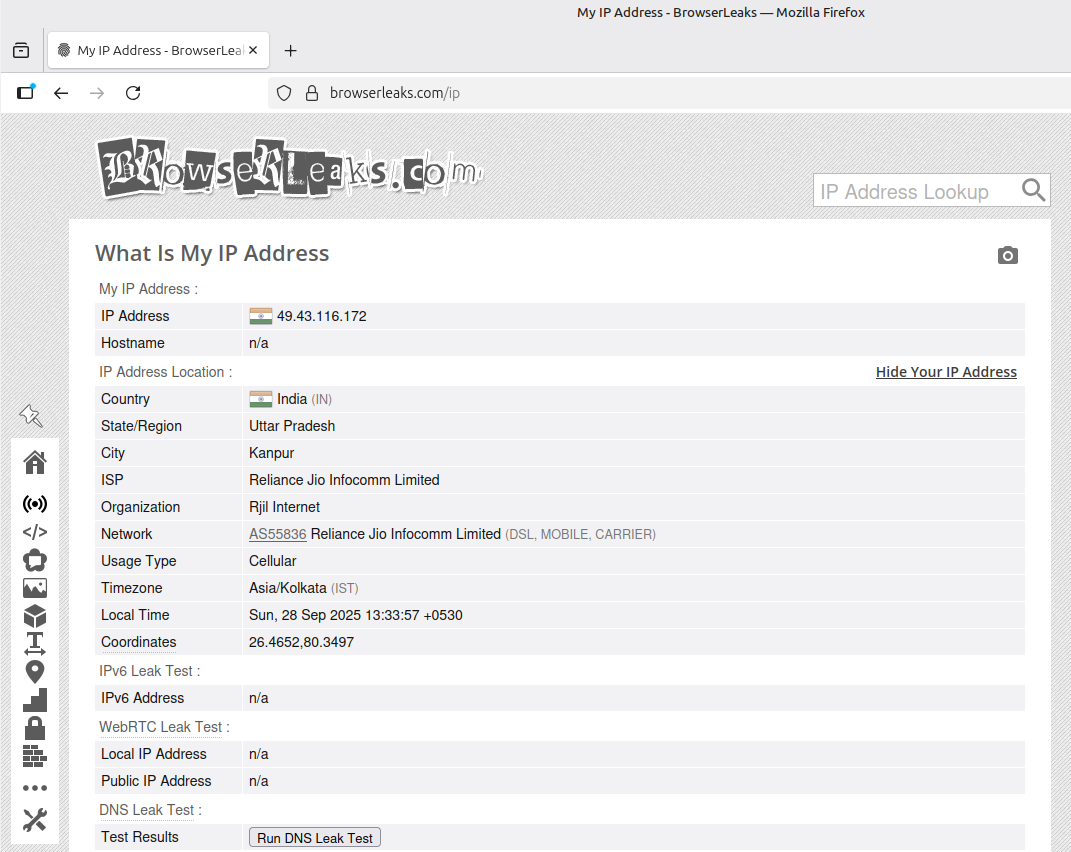 Fig. 11. This screenshot shows the final stage of verification. In Firefox, launched via ProxyChains, browserleaks.com confirms successful anonymization by displaying the proxy server's IP address.
Conclusion
Great! You have not only installed ProxyChains, but also learned how to configure and use it to anonymize traffic for both console and graphical applications in Linux. This powerful tool opens up a wide range of possibilities for testing, development, and ensuring your digital privacy.
Ready to take your work to the next level? Now that you have a customized tool, you need a reliable foundation—high-quality proxies. In our catalog, you will find high-speed HTTP(S) and SOCKS5 proxies that are ideal for working with ProxyChains.
