
ProxyCap — is an advanced tool that allows you to redirect the traffic of any program through a proxy server, even if the program itself has no network settings.
Unlike simple VPNs, ProxyCap provides surgical precision: you can run your browser through a US proxy, your messenger through Germany, and leave your online game running directly for low ping. It is the ideal choice for gamers, SMM specialists, and system administrators.
But the power of the tool is useless without high-quality "fuel." In this guide, we will break down which type of proxy to choose for your tasks and how to properly configure routing rules in ProxyCap.
Part 1. Strategy: Which Proxy Do You Need for ProxyCap?
The choice of proxy depends on the task you are solving with ProxyCap.
1. Datacenter Proxies — For gaming and speed
- What they are: High-speed IPs from data centers.
- Purpose: Auditing your own sites, checking client sites, working with resources without heavy protection.
- Pros: These are the fastest proxies. Low price.
2. Residential Proxies (ISP) — For work and software
- What they are: IPs from home internet service providers.
- Purpose: If you are setting up a proxy for a browser or automated network tools for the purpose of market research and secure platform management.
- Why: High connection reliability and stable network performance.
3. Mobile Proxies (4G/5G) — For automation
- What they are: IPs from mobile carriers.
- Purpose: If you are running software through ProxyCap for automated data processing, network testing, or corporate management.
- Why: Mobile IPs provide high stability and connection continuity for your tasks.
- 👉 You can read more about mobile proxies here
Part 2. Data Preparation
For ProxyCap, we recommend using private channels from CyberYozh App. We guarantee UDP support (which is critical for ProxyCap) and SOCKS5.
After purchase, you will receive:
- IP (Host):
172.98.60.180 - Port:
58763 - Login / Password: Authorization data.
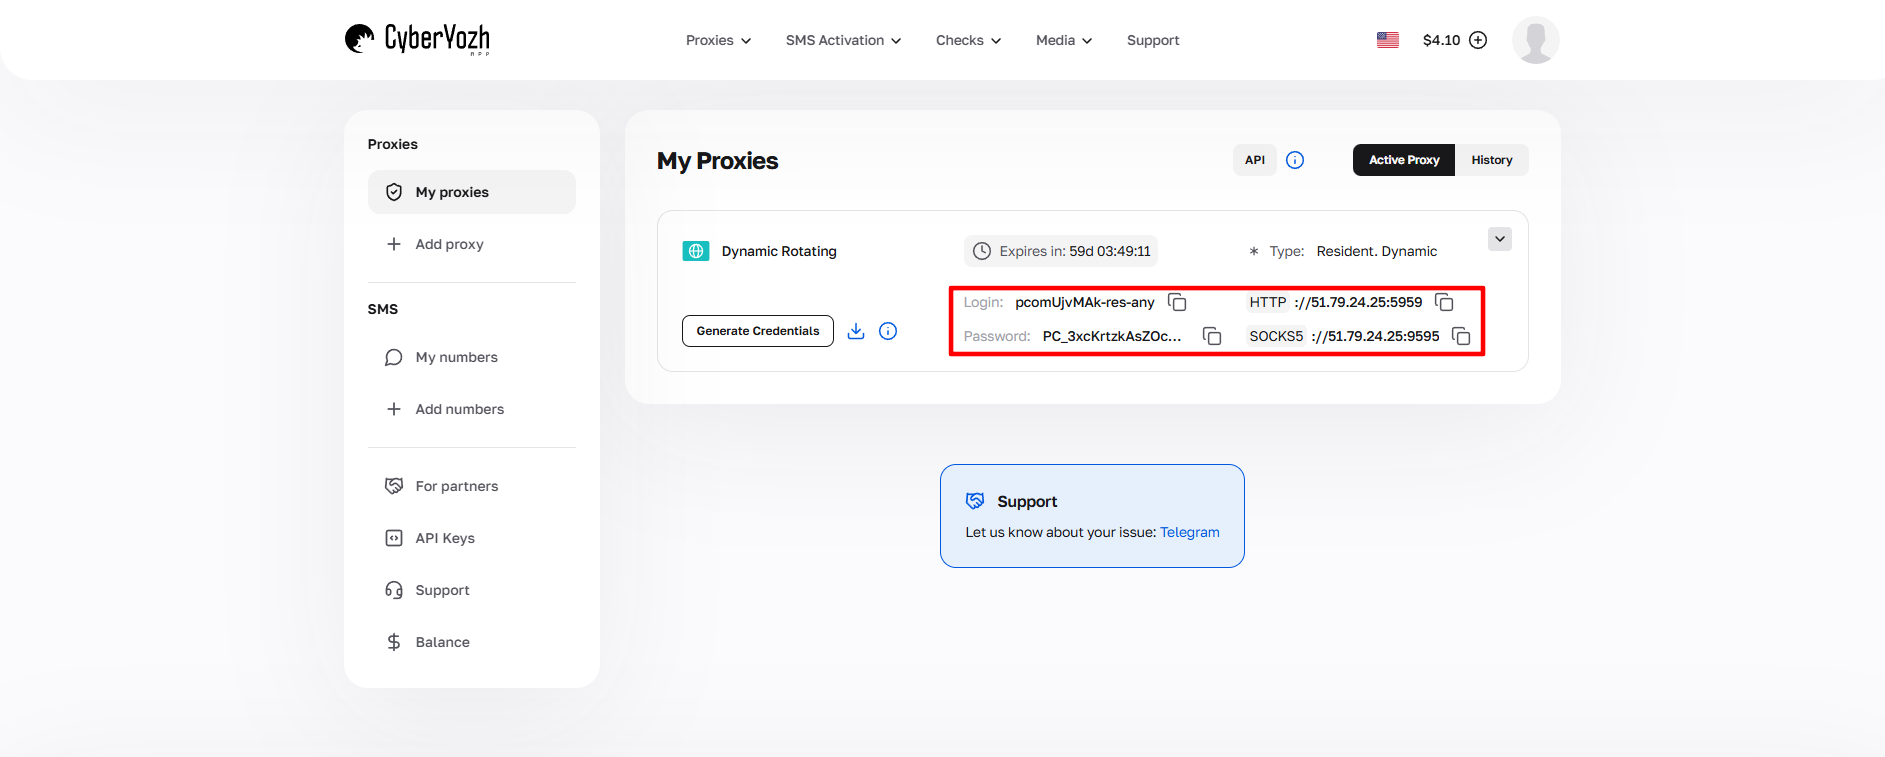 Fig. 1. Screenshot of the CyberYozh App platform interface, showing the location of the data for connecting to the proxy server. The image displays fields for IP address (Host), port (Port), username (Proxy Username), and password (Proxy Password).
Part 3. Configuring ProxyCap (Step-by-Step)
Step 1. Installation and Launch
Download ProxyCap from the official website and install it. After launching, the program will minimize to the system tray (near the clock).
- Find the ProxyCap icon in the tray.
- Right-click it -> Configuration.
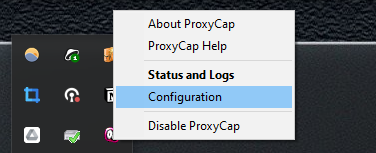 Fig. 2. The image demonstrates the ProxyCap context menu interface, accessible via the icon in the Windows system tray. The menu displays the "Configuration" option, which is used to access the main program settings.
Step 2. Adding Proxies
- In the left menu, select the Proxies section.
Click the New Proxy Server button (star icon).
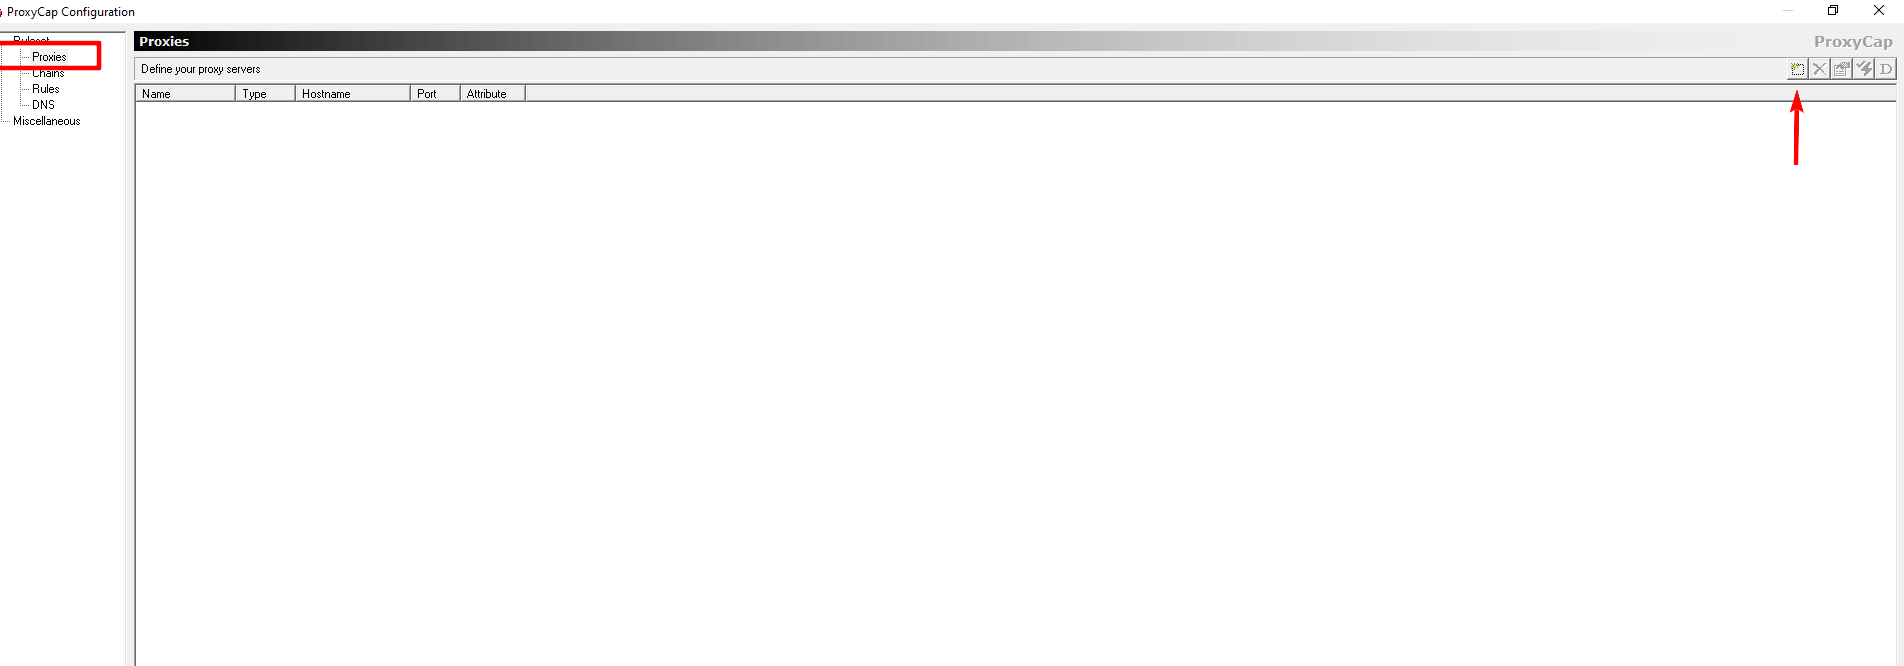 Fig. 3. Screenshot demonstrates the main settings window of the ProxyCap program, showing the interface for adding a new proxy server. On the left side of the screen is the "Proxies" panel, and in the center is the "New proxy server" button to create a new connection.
Fill in the data:
- Type: Select SOCKS5. This is the most reliable protocol, supporting authentication and UDP.
- Hostname: Your IP.
- Port: Your port.
Proxy requires authentication: Check the box and enter your Login/Password.
 Fig. 4. Proxy server configuration dialog box in ProxyCap. The image shows the configuration interface with fields for entering connection parameters, including host address, port, proxy type, and authentication credentials.
Click OK.
- Verification: Highlight the created proxy and click the Check Proxy Server button (checkmark icon). If you see
Success— everything is great.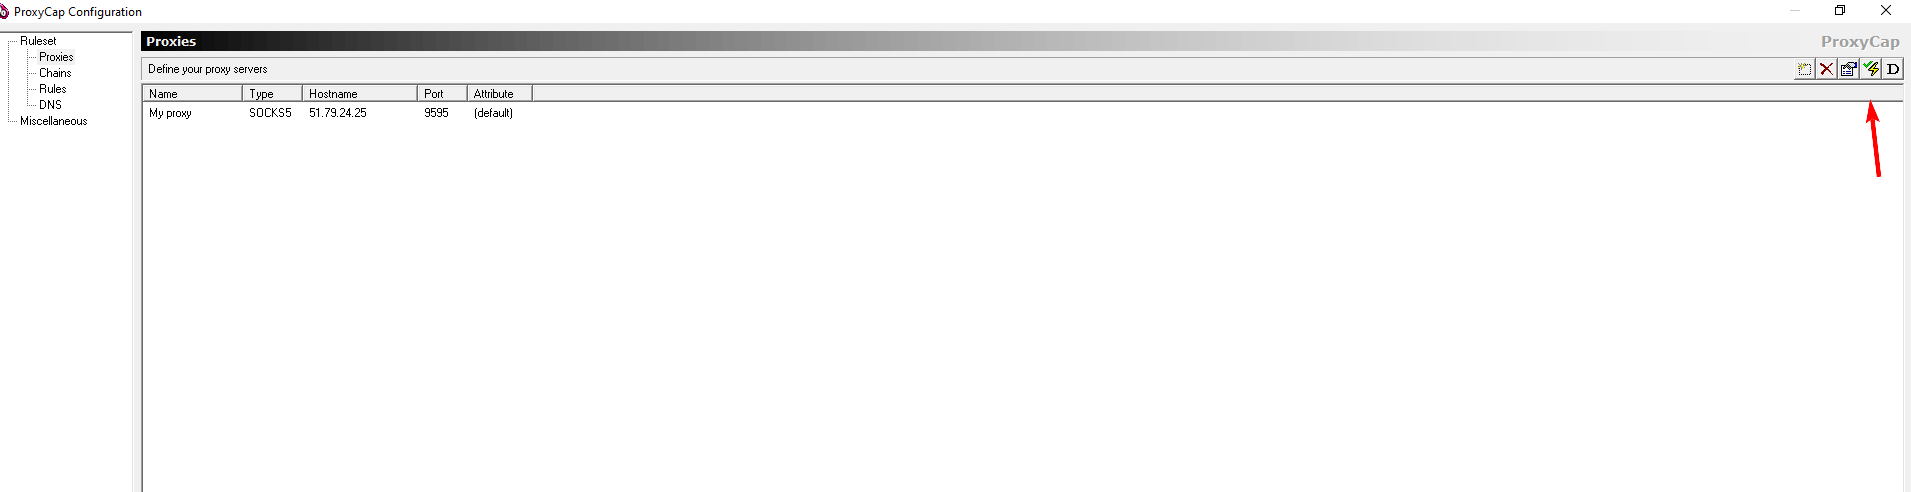 Fig. 5. The image shows the ProxyCap interface, demonstrating the result of checking the connection to the proxy server.
 Fig. 6. The image shows the proxy server status check dialog box in ProxyCap. The interface displays a test results panel where "Success" or "Failed" statuses can be shown, indicating the success or failure of establishing a connection with the configured proxy server.
Step 3. Configuring Rules
This is the brain of the program. Here we decide who goes through the proxy.
- In the left menu, select the Rules section.
Click the New Rule button (star icon).
 Fig. 7. Main ProxyCap settings window with the "New rule" button highlighted for creating a new routing rule. The interface displays the toolbar and the main configuration area where the user can define traffic redirection rule parameters.
Configure the rule:
- Rule Action: Select
Redirect through proxy. - Proxy: Select your proxy from the list.
- Resolve names remotely: Be sure to check this box! This protects you from DNS leaks (queries will go through the proxy).
Transports: Check TCP and UDP (for full support).
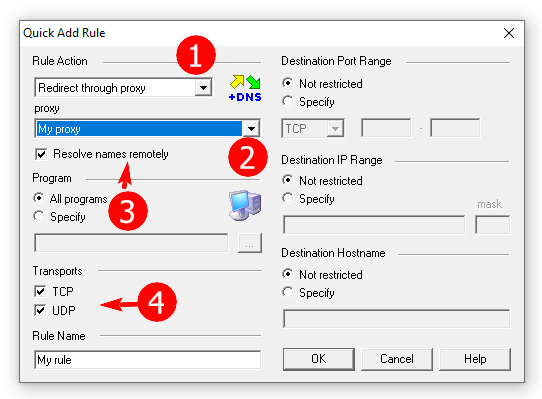 Fig. 8. Rule configuration dialog box in ProxyCap, showing the traffic redirection configuration through a proxy server. The interface presents the main setup parameters, including rule action selection ("Rule Action"), proxy server settings, DNS resolution options, and selection of data transfer protocols (TCP/UDP).
Program Selection: In the Programs block, select Specify and click the
...button. Specify the path to the.exefile of the program you want to proxy (e.g.,opera.exeorgame.exe).If you leave it as "All programs," the entire computer will go through the proxy.
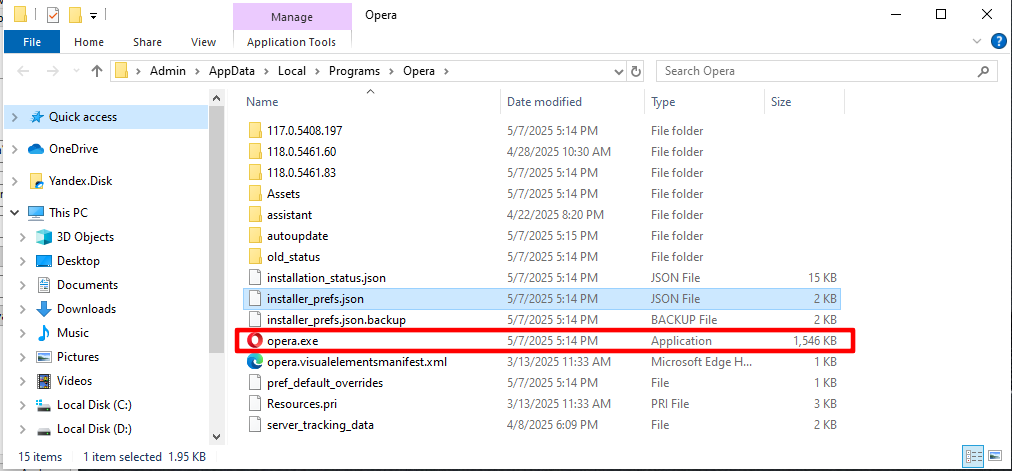 Fig. 9. Program configuration interface in ProxyCap, demonstrating the path specification to the .exe file of the desired application.
Give the rule a name (Rule Name) and click OK.
 Fig. 10. ProxyCap interface for routing rule configuration. The image shows the rule setup dialog box where the user can set the rule name in the special "Rule name" field.
Part 4. Verification and Launch
Save the settings by clicking OK in the main window. ProxyCap will start working.
Launch the target program (e.g., a browser).
- Go to
browserleaks.com/iporwhoer.net. - Ensure that the IP has changed and the DNS matches the proxy country.
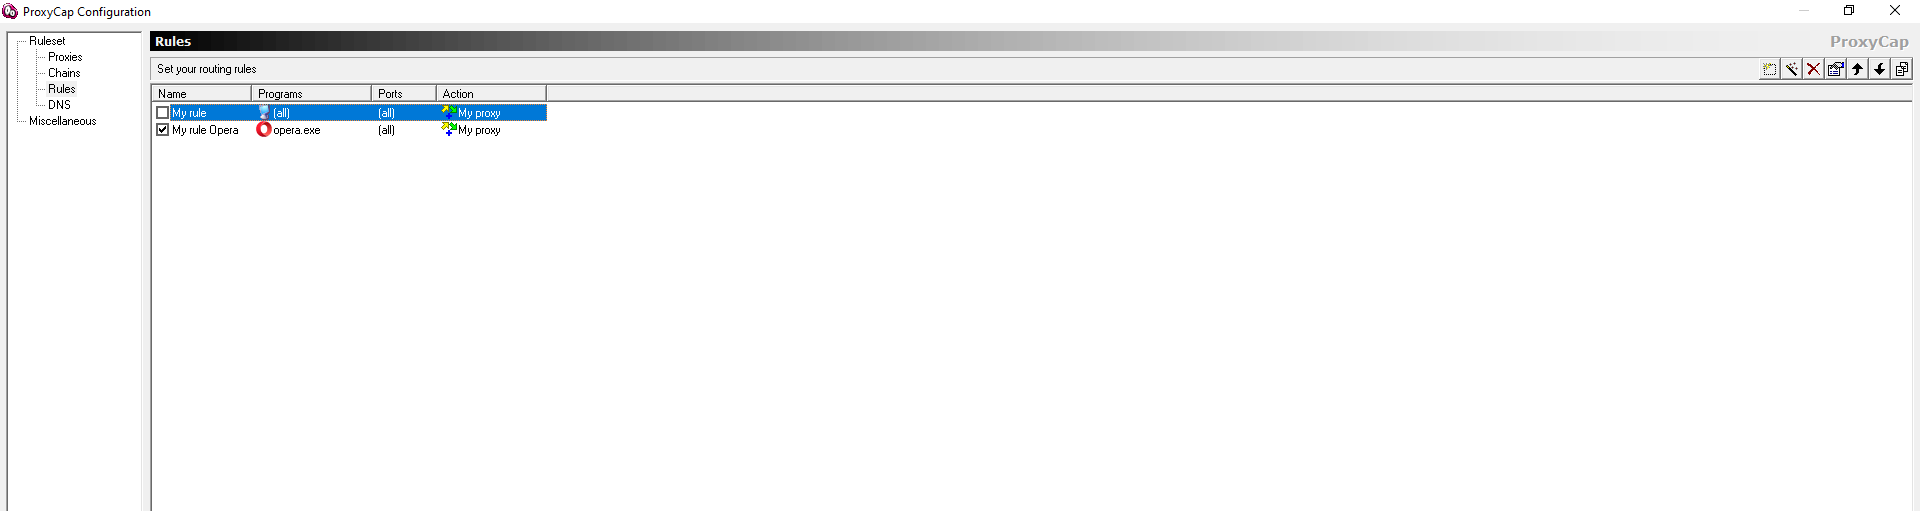 Fig. 11. The image shows the user interface and the selection of the required profile.
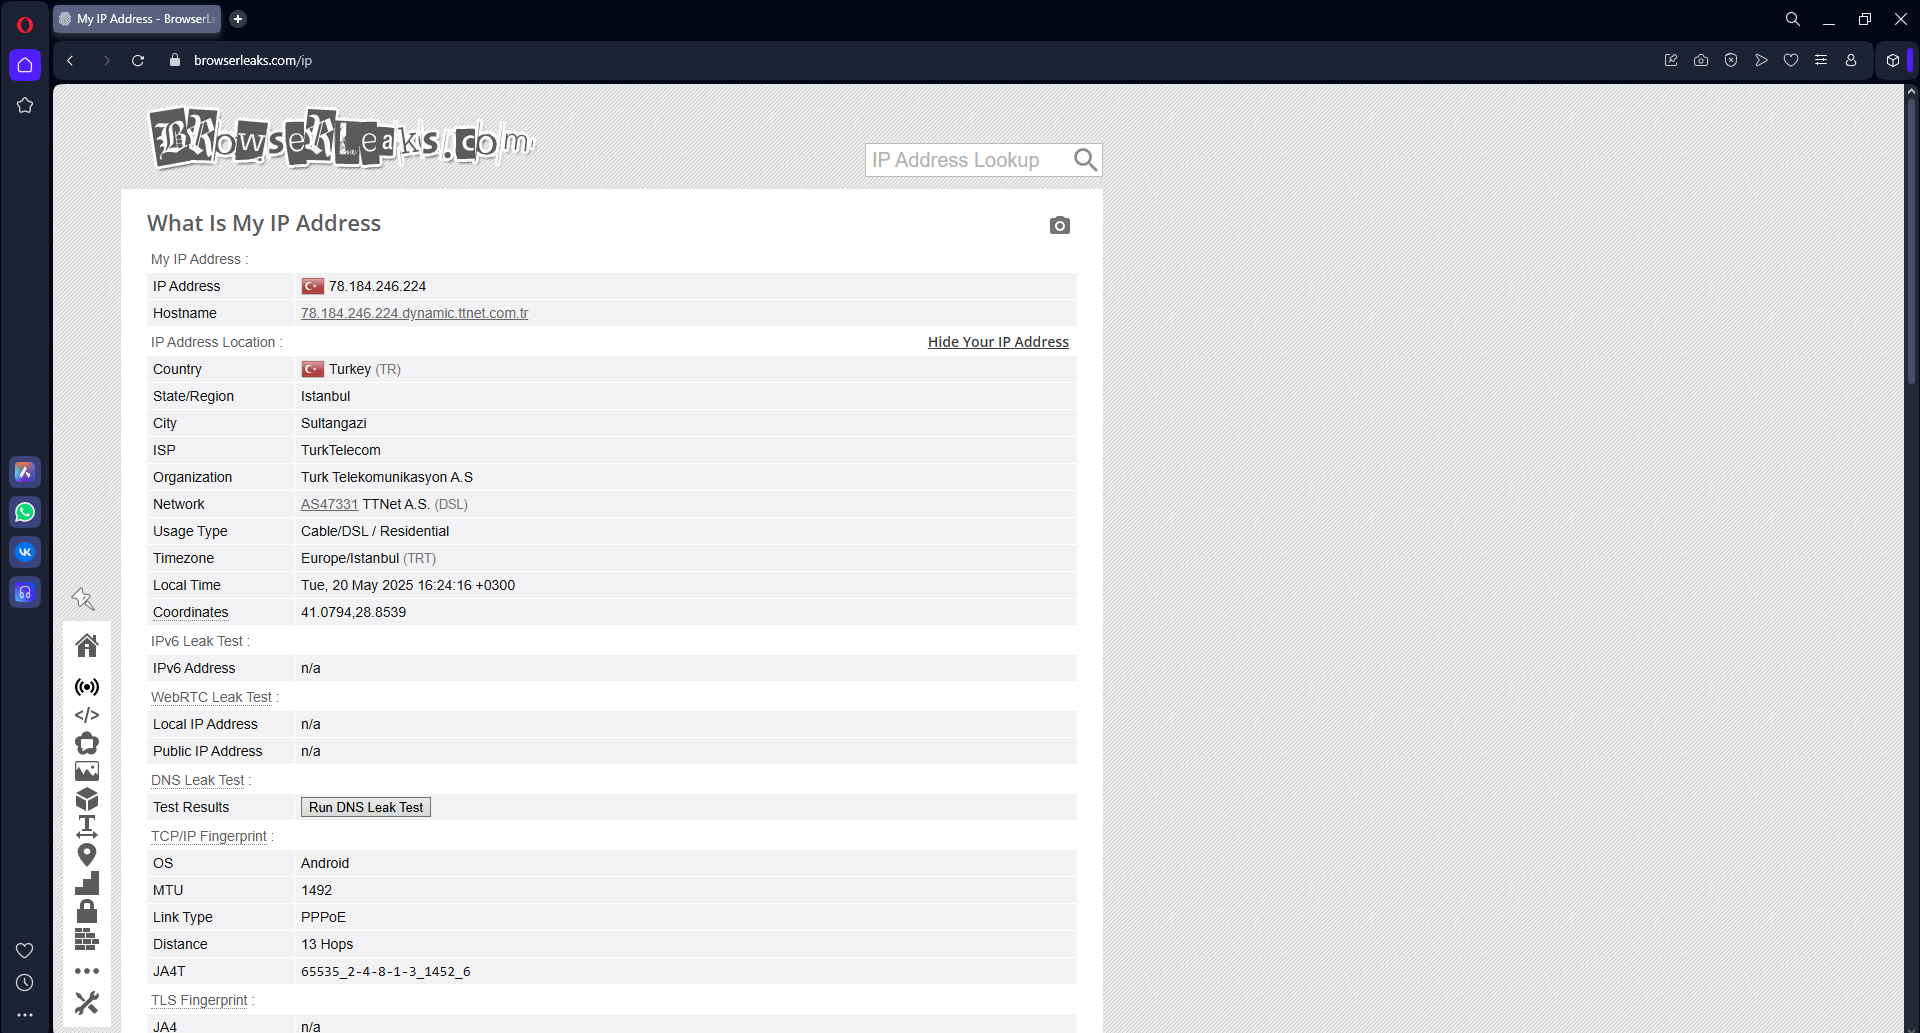 Fig. 12. The image shows the final stage of ProxyCap configuration, confirming the successful completion of the proxy server setup and the application of routing rules.
Conclusion
ProxyCap is a powerful tool for those who want to control their traffic.
- For gaming, use Datacenter SOCKS5 and configure the rule only for the game.
- For work, use Residential or Mobile proxies.
You can find reliable SOCKS5 proxies with UDP support in the CyberYozh App catalog.
