
MoreLogin — is an anti-detect browser that has quickly gained popularity among crypto enthusiasts and affiliate marketers. Its main features include the "Real Canvas" fingerprint spoofing technology and verified security (audited by SlowMist). It also features built-in ScamSniffer anti-phishing protection, which is critical when working with wallets.
A reliable browser works best with high-quality IP addresses. Proxies are a guarantee of a stable and secure connection for your tasks.
In this guide, we will analyze which type of proxy to choose for specific tasks (for safe management of professional profiles on various platforms) and how to correctly configure them in MoreLogin.
Part 1. Strategy: What proxy do you need for MoreLogin?
The choice of proxy depends on exactly what you plan to do. A mistake at this stage could cost you the loss of assets.
1. Residential Proxies (ISP)
- What they are: IP addresses of home internet service providers.
- Use case: Ideal for Cryptocurrencies (Airdrops, CoinList, exchanges), E-commerce (Amazon, eBay), and payment systems.
- Why: Stability of connection is a priority for these services. Using a static residential IP ensures uninterrupted operation and reduces the likelihood of session timeouts. Use static IPs.
2. Mobile Proxies (4G/5G)
- What they are: Dynamic IPs of cellular operators.
- Use case: Social networks (Facebook, TikTok, Twitter/X), mass registrations (Discord, Gmail).
- Why: Social networks trust mobile traffic the most (CGNAT technology). If you need to manage many marketing or work profiles on platforms like Twitter or Discord, private mobile proxies with rotation via an IP change link are the best choice.
3. Datacenter Proxies
- What they are: IPs from hosting providers.
- Verdict: Suitable only for technical tasks or sites with low protection. We do not recommend them for serious projects in MoreLogin.
Part 2. Data Preparation
For maximum security and speed, we recommend using private channels from CyberYozh App.
After purchasing, you will receive connection data in your personal account. You will need:
- Host: IP address (e.g.,
172.98.60.180) - Port: Port (e.g.,
58763) - Username: Login
- Password: Password
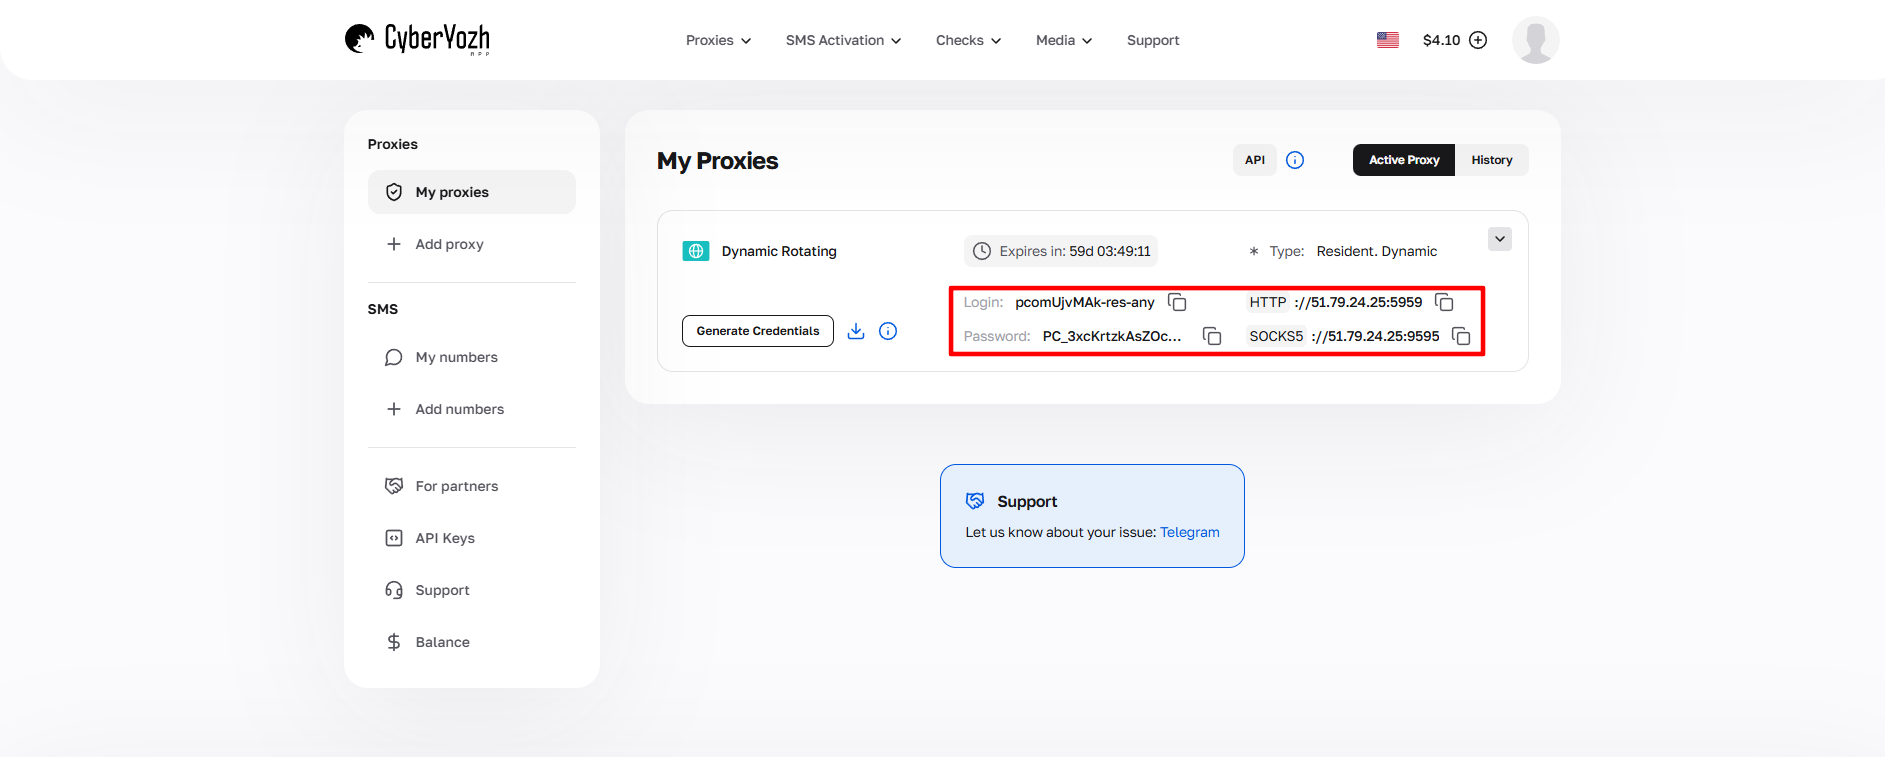 Fig. 1. Screenshot of the CyberYozh platform interface, showing the location of the proxy server connection data. The image displays fields for IP address (Host), port (Port), Username, and Password.
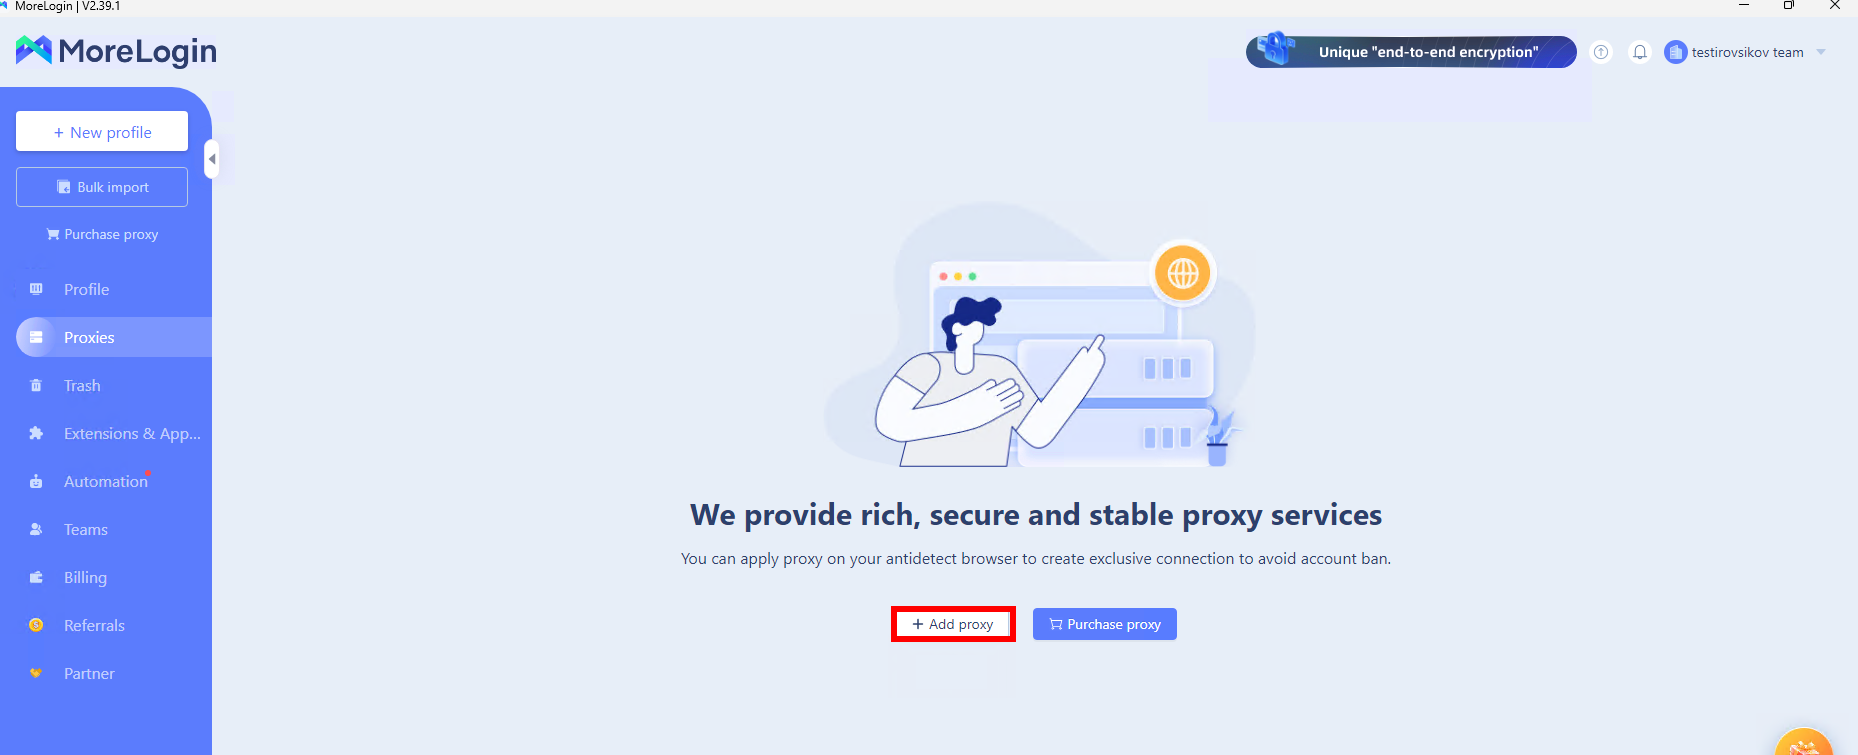
Part 3. Configuring Proxy in MoreLogin
MoreLogin has a convenient proxy manager that allows you to add an IP once and then quickly assign it to different profiles.
Step 1. Creating a Profile
Launch MoreLogin and click the «+ New Profile» button. Tip: Use «Advanced Create» for full control over settings instead of «Quick Create».
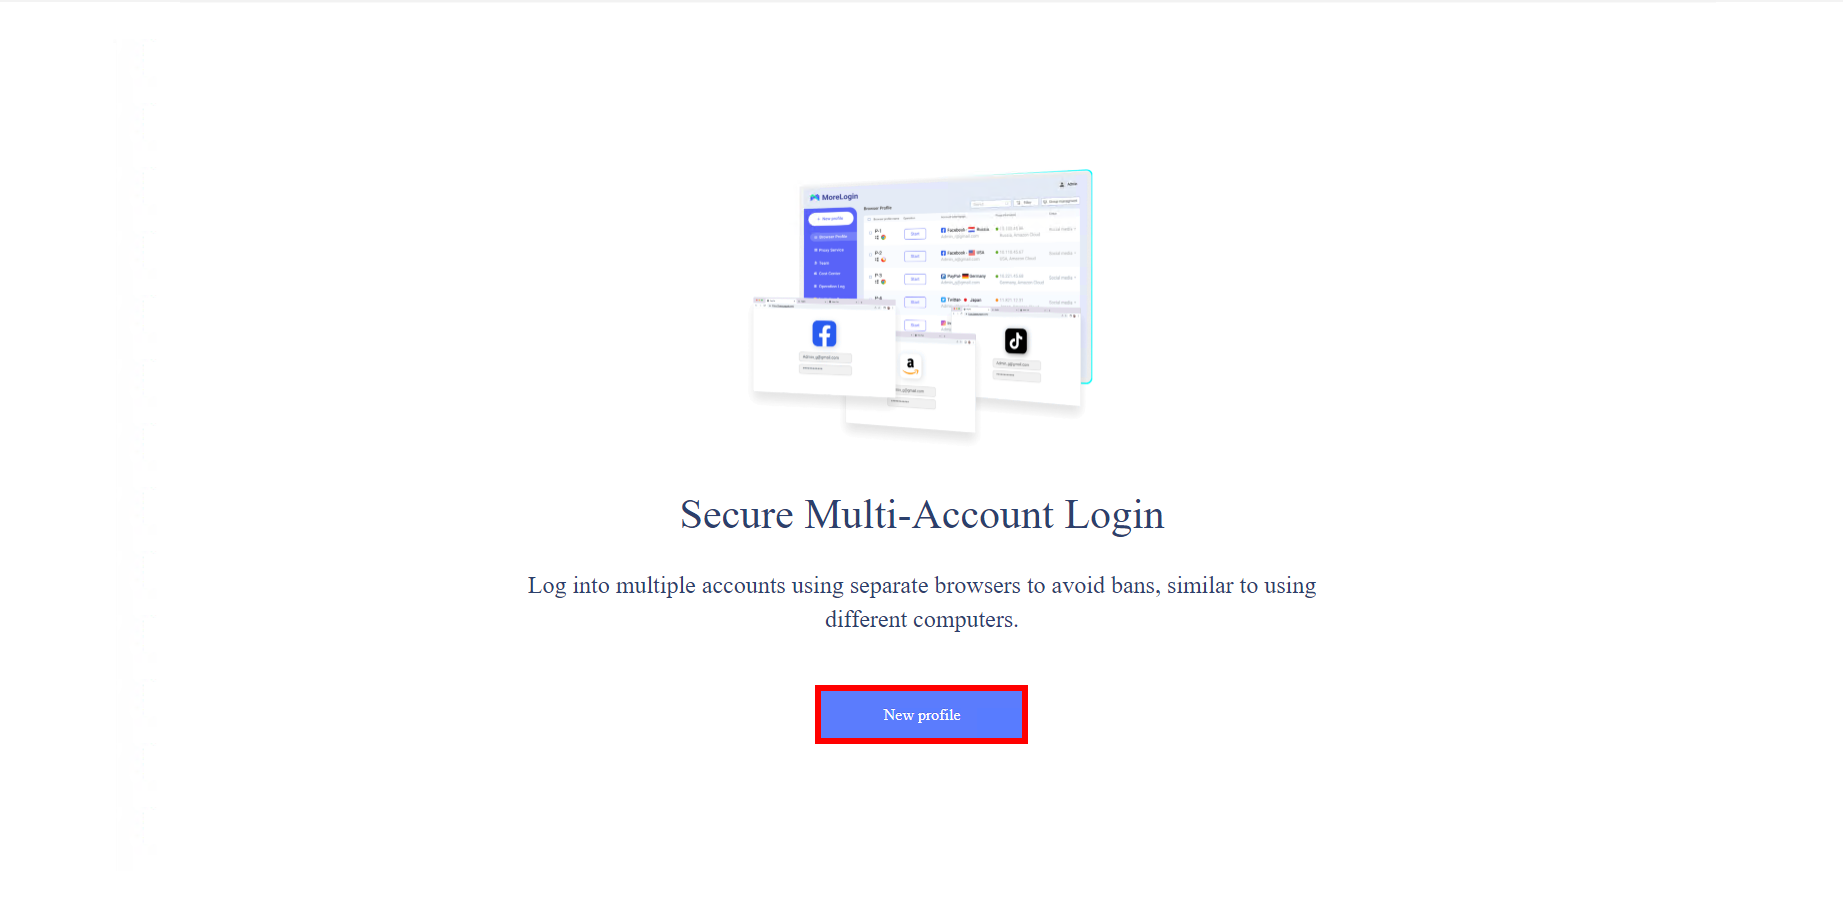 Fig. 2. MoreLogin anti-detect browser interface
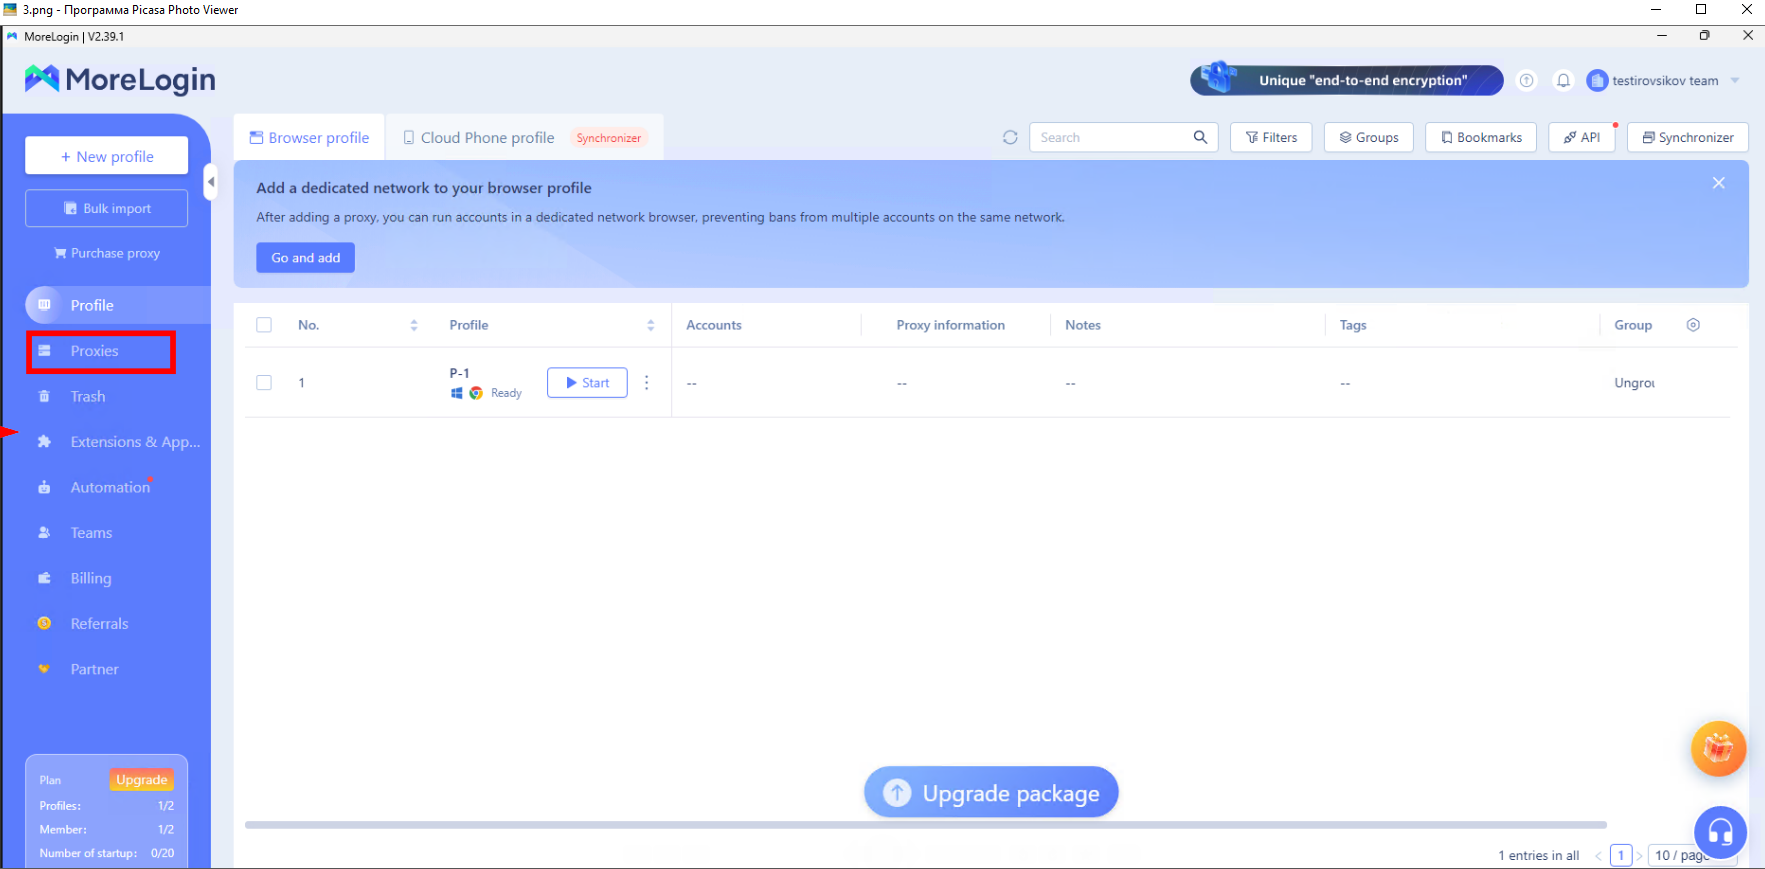 Fig. 3. MoreLogin anti-detect browser interface, showing the main profile selection window.
Step 2. Adding a Proxy to the Database
You can enter the proxy directly in the profile settings, but it is better to add it to the manager first.
- In the profile creation window, find the Proxy section.
- Click the «Proxy Management» button (or Add Proxy depending on the version).
- The adding window will open.
 ) Fig. 4. Proxy settings interface in MoreLogin anti-detect browser, start screen.
Step 3. Entering Data
Fill in the fields with data from your provider's dashboard:
- Proxy Type: Select SOCKS5. This is the most reliable protocol, supporting UDP (important for speed and privacy).
- Proxy Host: Your IP.
- Proxy Port: Your port.
- Username / Password: Your authorization data.
After entering the data, click the «Proxy detection» button. If the test is successful, click Confirm (Add).
 Fig. 5. Proxy settings interface in MoreLogin anti-detect browser. Examples of filling in the fields are displayed, demonstrating the correct format for entering data to connect to the proxy server.
Step 4. Binding Proxy to a Profile
Return to profile creation.
- In the Proxy Option section, select the «Saved Proxy» tab.
- Select the proxy you just added from the list.
- Click OK or Confirm.
Now this IP address is strictly bound to this profile.
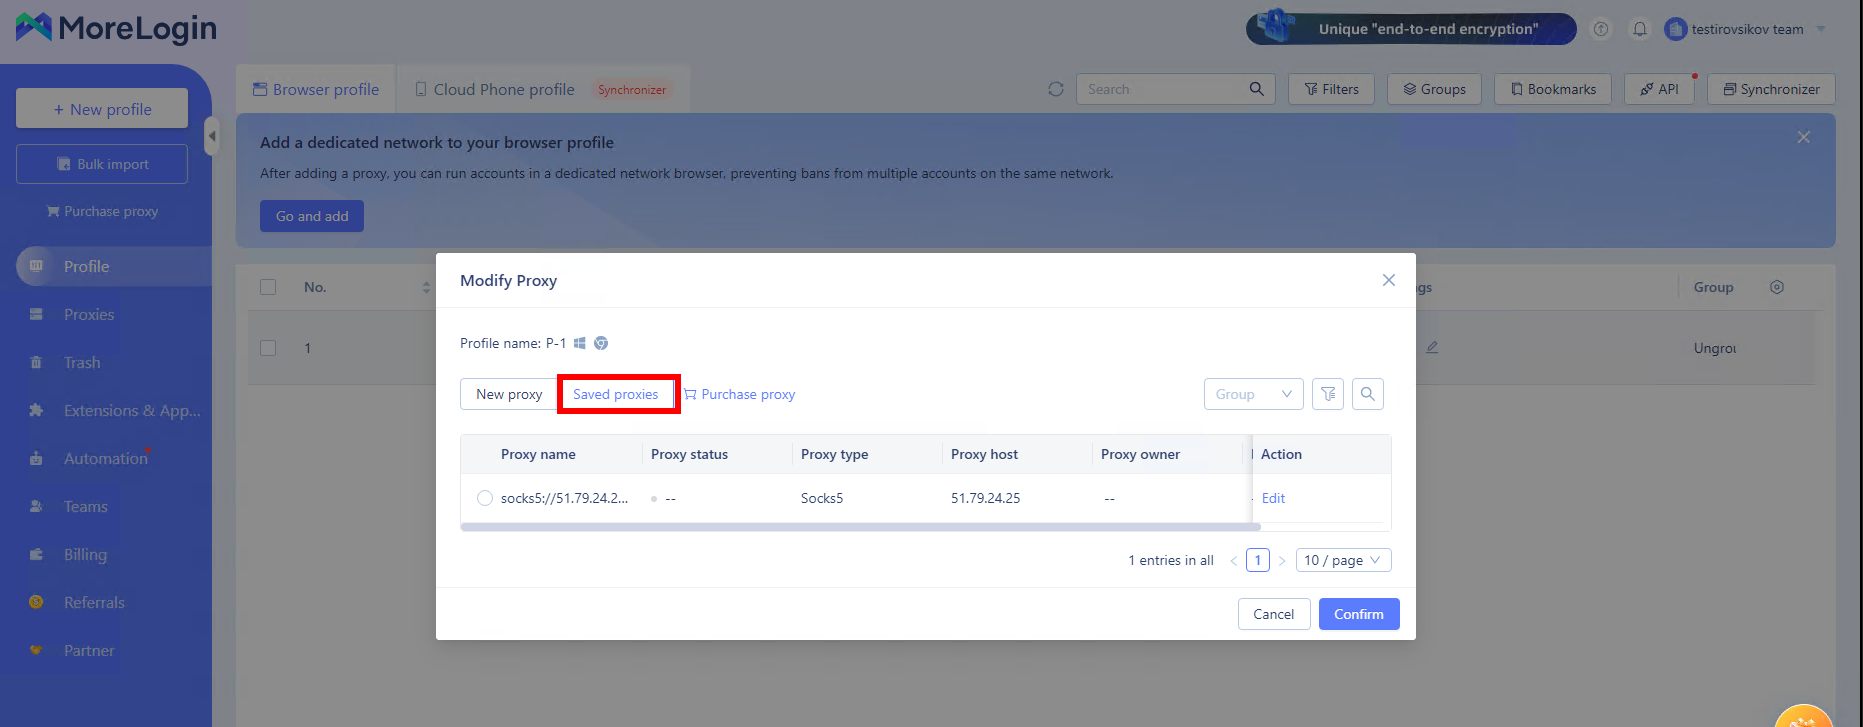 Fig. 6. MoreLogin anti-detect browser interface, showing the window for assigning a proxy to a profile. The image shows the "Saved proxies" tab containing previously saved proxy server settings, with the option to select and confirm via the "Confirm" button.
Part 4. Launch and Verification
Click Start next to the created profile in the general list.
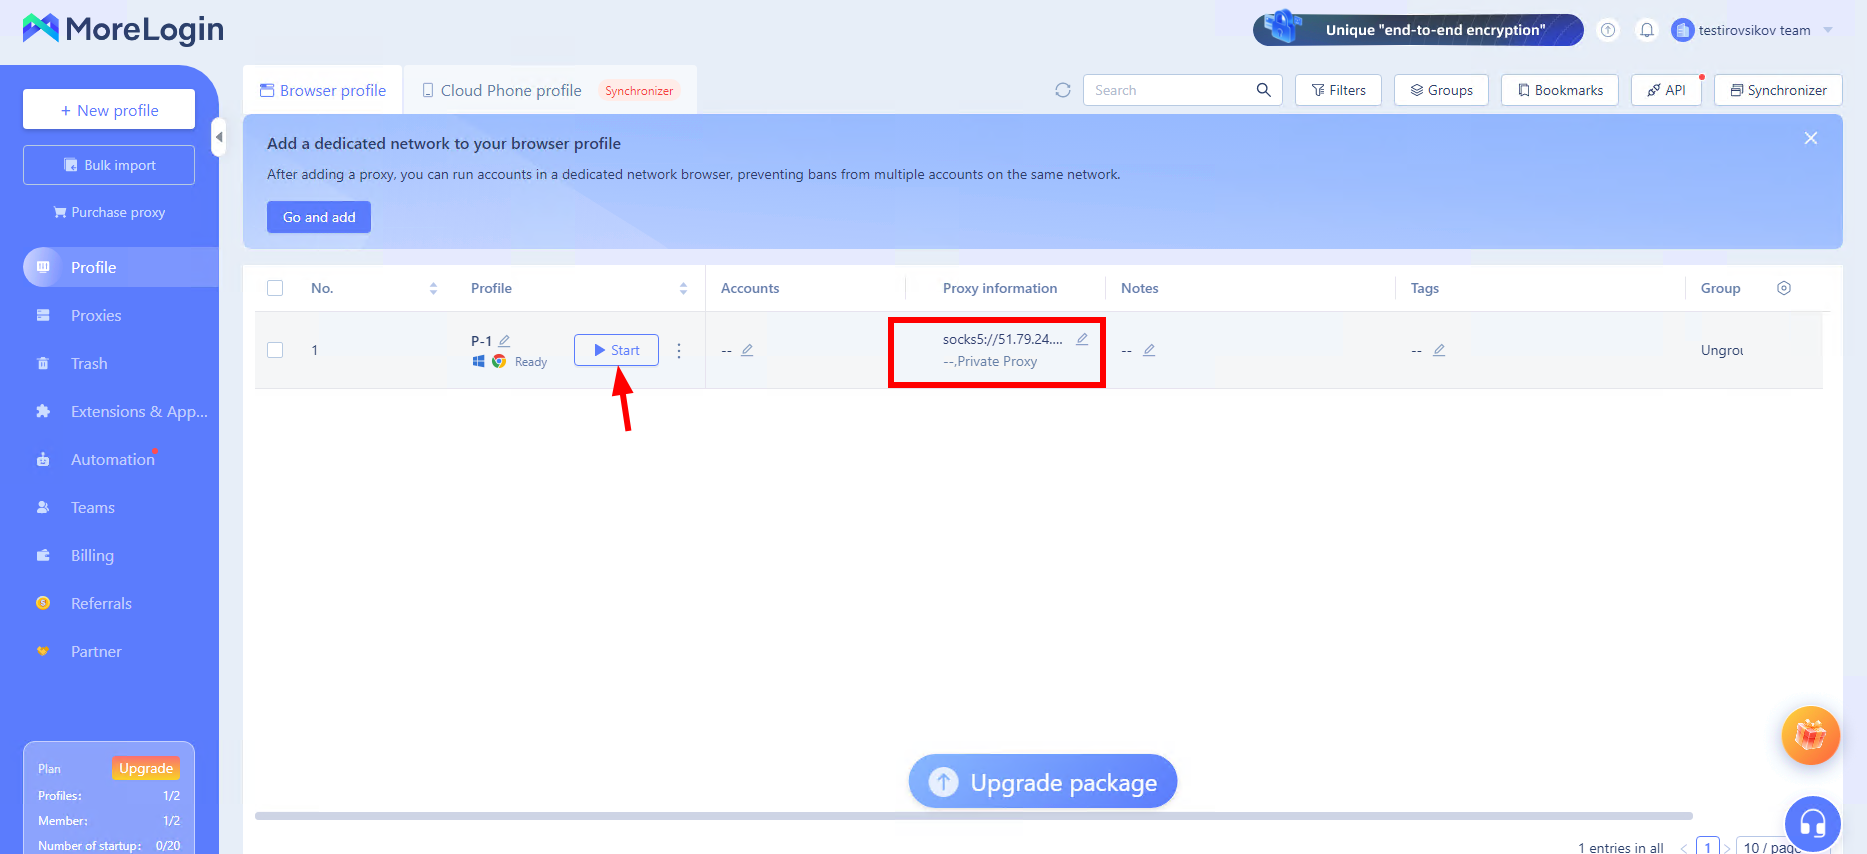 Fig. 7. MoreLogin anti-detect browser interface, showing a successfully configured profile with a connected proxy server.
A browser window will open. Before logging into wallets or social networks, make sure that the privacy and network settings are applied correctly. Go to browserleaks.com/ip or whoer.net.
Security Checklist:
- IP Address: Must match the purchased proxy.
- WebRTC: Must not reveal your real local IP.
- Geolocation: Must match the country flag of the proxy.
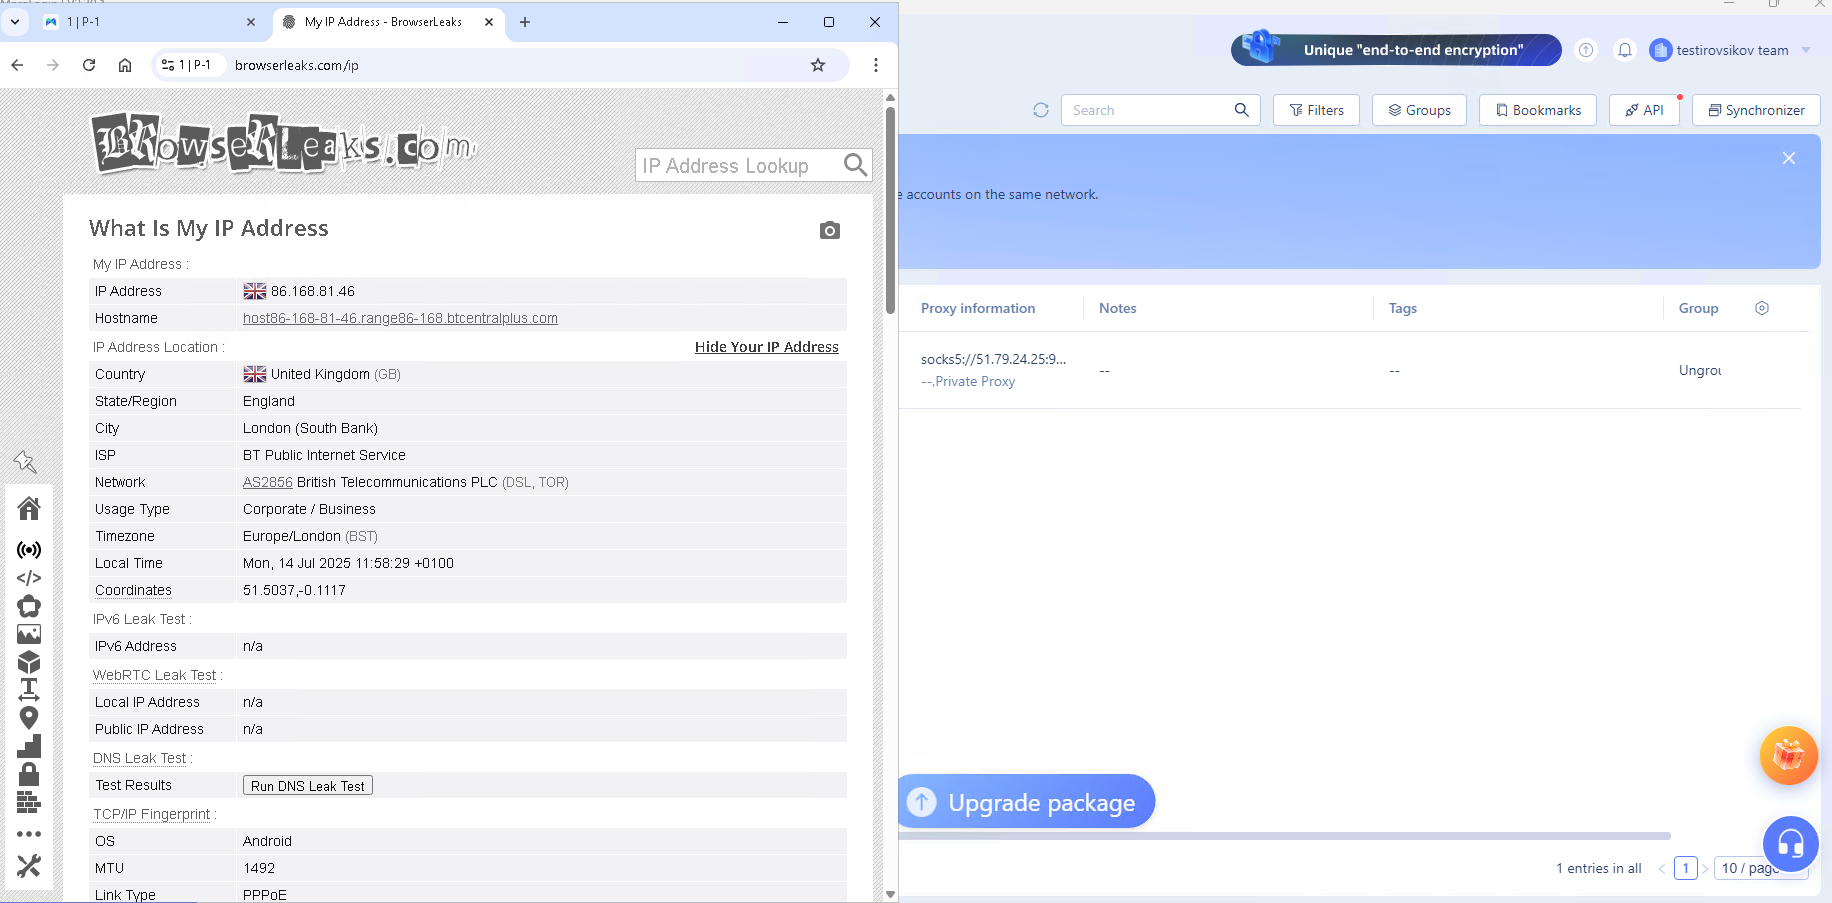 Fig. 8. BrowserLeaks website interface, displaying the results of checking the configured proxy connection.
If all parameters are normal — you are fully protected.
Conclusion
MoreLogin is an excellent tool for asset protection, but its effectiveness depends on the quality of your IPs.
- For crypto and shops, use Residential Proxies.
- For social networks, use Mobile Proxies.
You will find reliable and fast proxies for any MoreLogin tasks in the CyberYozh App catalog. Safe working!