
In this article, we will explain and demonstrate how the private multi-profile Octo Browser works. This tool allows you to:
- Manage advertising campaigns.
- Work with multiple accounts simultaneously.
- Isolate browser profiles to increase privacy and perform safe testing.
- Securely manage multiple verified accounts for digital marketing and SMM.
Octo Browser provides an exceptionally high level of privacy protection while browsing the internet, shielding corporate and personal data from leaks. Using a proxy is a critical component for ensuring maximum security, especially when managing multiple accounts at once. Properly selected and configured proxy servers not only strengthen data protection but also help maintain stable access and secure sessions during multi-accounting, enabling effective work in the long term.
Let’s take a detailed look at the process of setting up proxy servers and the core functionality of Octo Browser so that you can use all the program's features as effectively as possible. In this step-by-step guide, we will work with the English version of the software, as English is the international standard and the most widely used language in technical documentation. This will also help you navigate more easily when referring to official documentation or searching for solutions online. You can choose your preferred language in the program settings.
Part 1. Choosing a Proxy: The Foundation of Security
Before opening the browser, you need to decide on the type of IP address. Octo Browser works perfectly with all types, but they serve different purposes.
1. Mobile Proxies (Mobile 4G/5G)
- What they are: IP addresses of real cellular operators.
- What they are for: Ideal for social networks (Facebook, Instagram, TikTok) and securely managing business accounts. Social networks have high trust in mobile IPs due to CGNAT technology.
- Feature in Octo: If you have mobile proxies with rotation (IP change), be sure to configure the “Change IP URL” field in Octo Browser. This will allow you to change the IP with one button directly from the browser interface without logging into the provider's dashboard.
2. Residential Proxies (Residential)
- What they are: IP addresses of home Internet Service Providers (ISP), just like regular users.
- What they are for: The best choice for E-commerce (Amazon, eBay), payment gateways, and financial platforms.
- Feature in Octo: Use “sticky” sessions. One Octo profile should be strictly linked to one residential IP for the entire duration of working with the account.
3. Datacenter Proxies (Datacenter)
- What they are: IP addresses of hosting providers. Cheap and fast.
- What they are for: For working with open data, technical tasks, or basic web surfing. They are not recommended for platforms with strict requirements for IP reputation.
Where to get high-quality proxies? For stable operation, we recommend using private solutions from CyberYozh App. We provide reliable mobile and residential IPs that ensure a high trust score and integrate easily into Octo Browser profiles.
Part 2. Creating a Profile in Octo Browser
After launching the browser, two convenient functions are immediately noticeable:
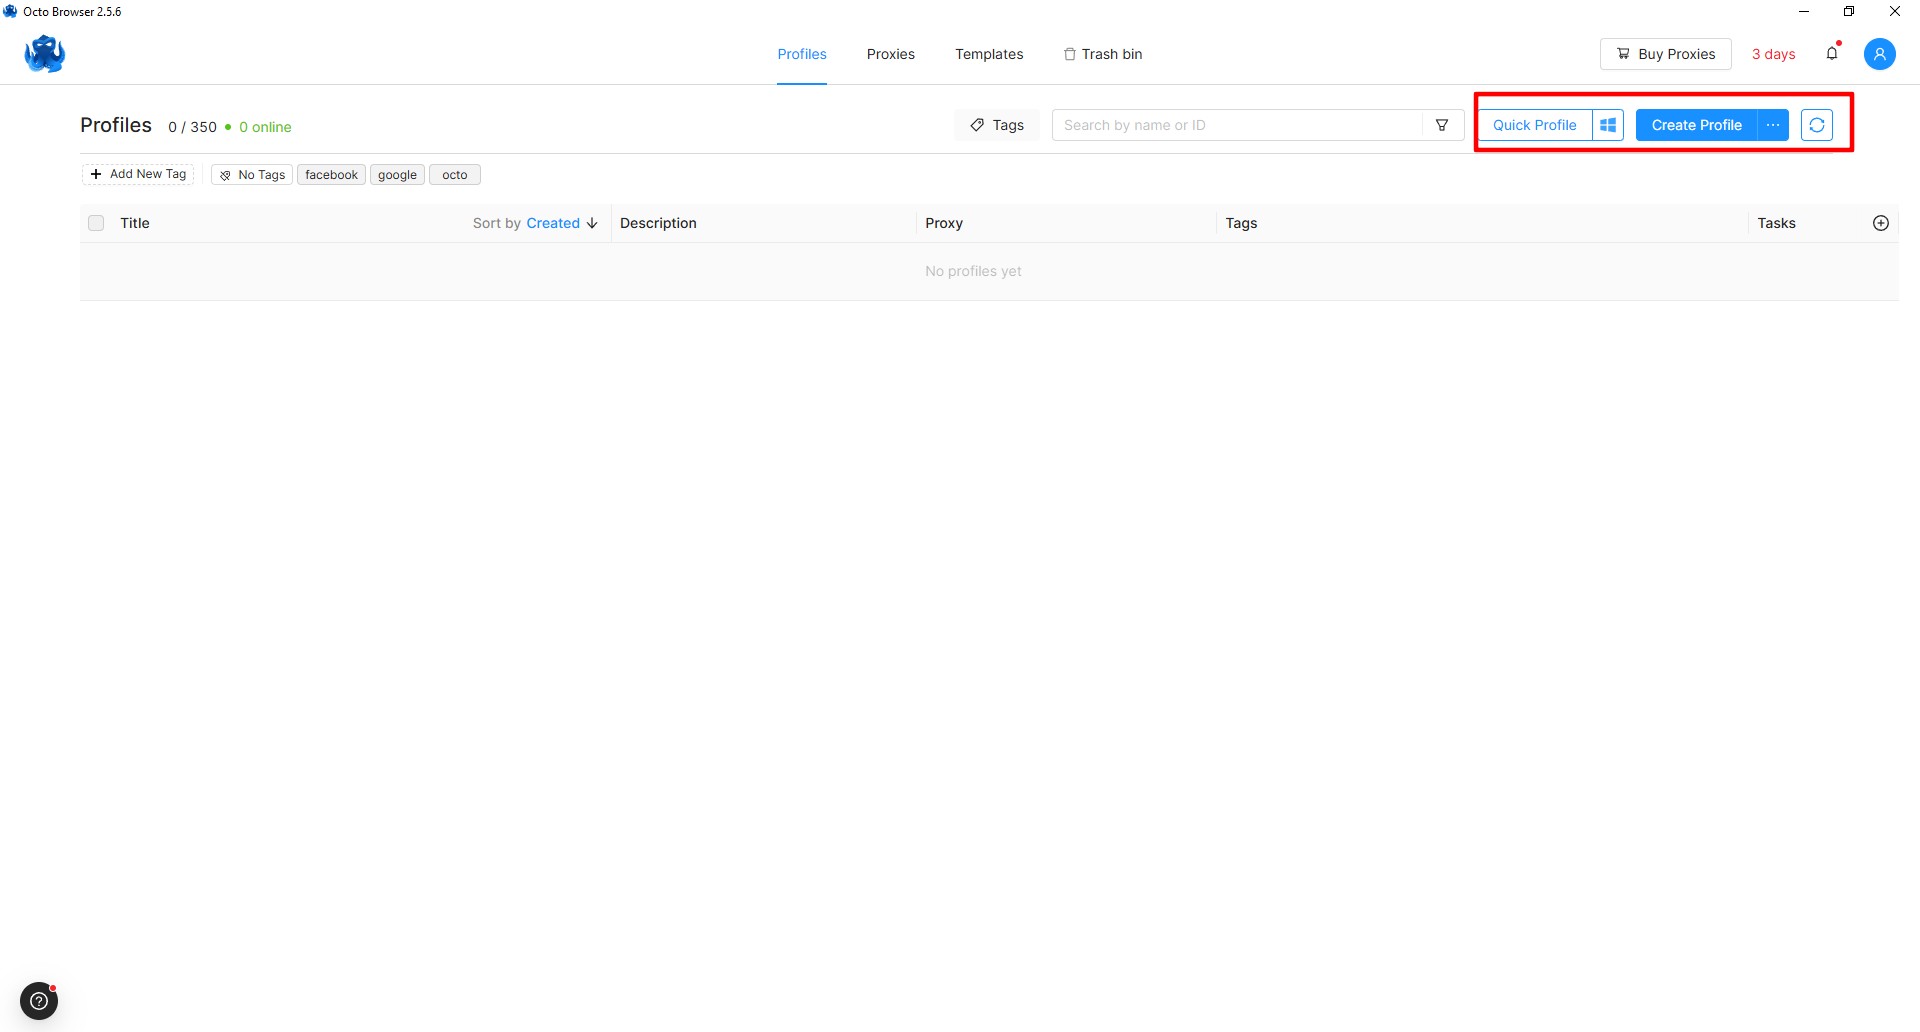 Fig. 1. Octo Browser main screen interface after launch, demonstrating two main functions: "Quick Profile" and "New Profile".
- Quick Profile – allows you to create a workspace in one click.
- New Profile – more detailed profile configuration.
If you are a beginner and don't know which settings to choose, create a Quick Profile.
Part 3. Connecting a Proxy
The program supports three main protocols for connecting a proxy:
• HTTP (HyperText Transfer Protocol) — the most common protocol for data transfer on the internet • SOCKS5 — a universal tunneling protocol with authentication support • SSH (Secure Shell) — a protocol with an additional layer of data encryption
In this manual, we will break down the connection via the SOCKS5 protocol in detail, as it provides a reliable connection. Configuration principles for HTTP and SSH protocols are similar.
Method 1: Adding via Proxy Manager
This method is convenient if you want to save the proxy to the database and use it later for different profiles.
- Go to the Proxies tab.
- Click Add Proxy.
- In the window that opens, enter the data (received from your proxy provider's dashboard):
- Host: IP address
- Port: Port
- Login: Username
- Password: Password
- Click Check Proxy. If the IP turns green, the proxy is working.
- Click Confirm to save.
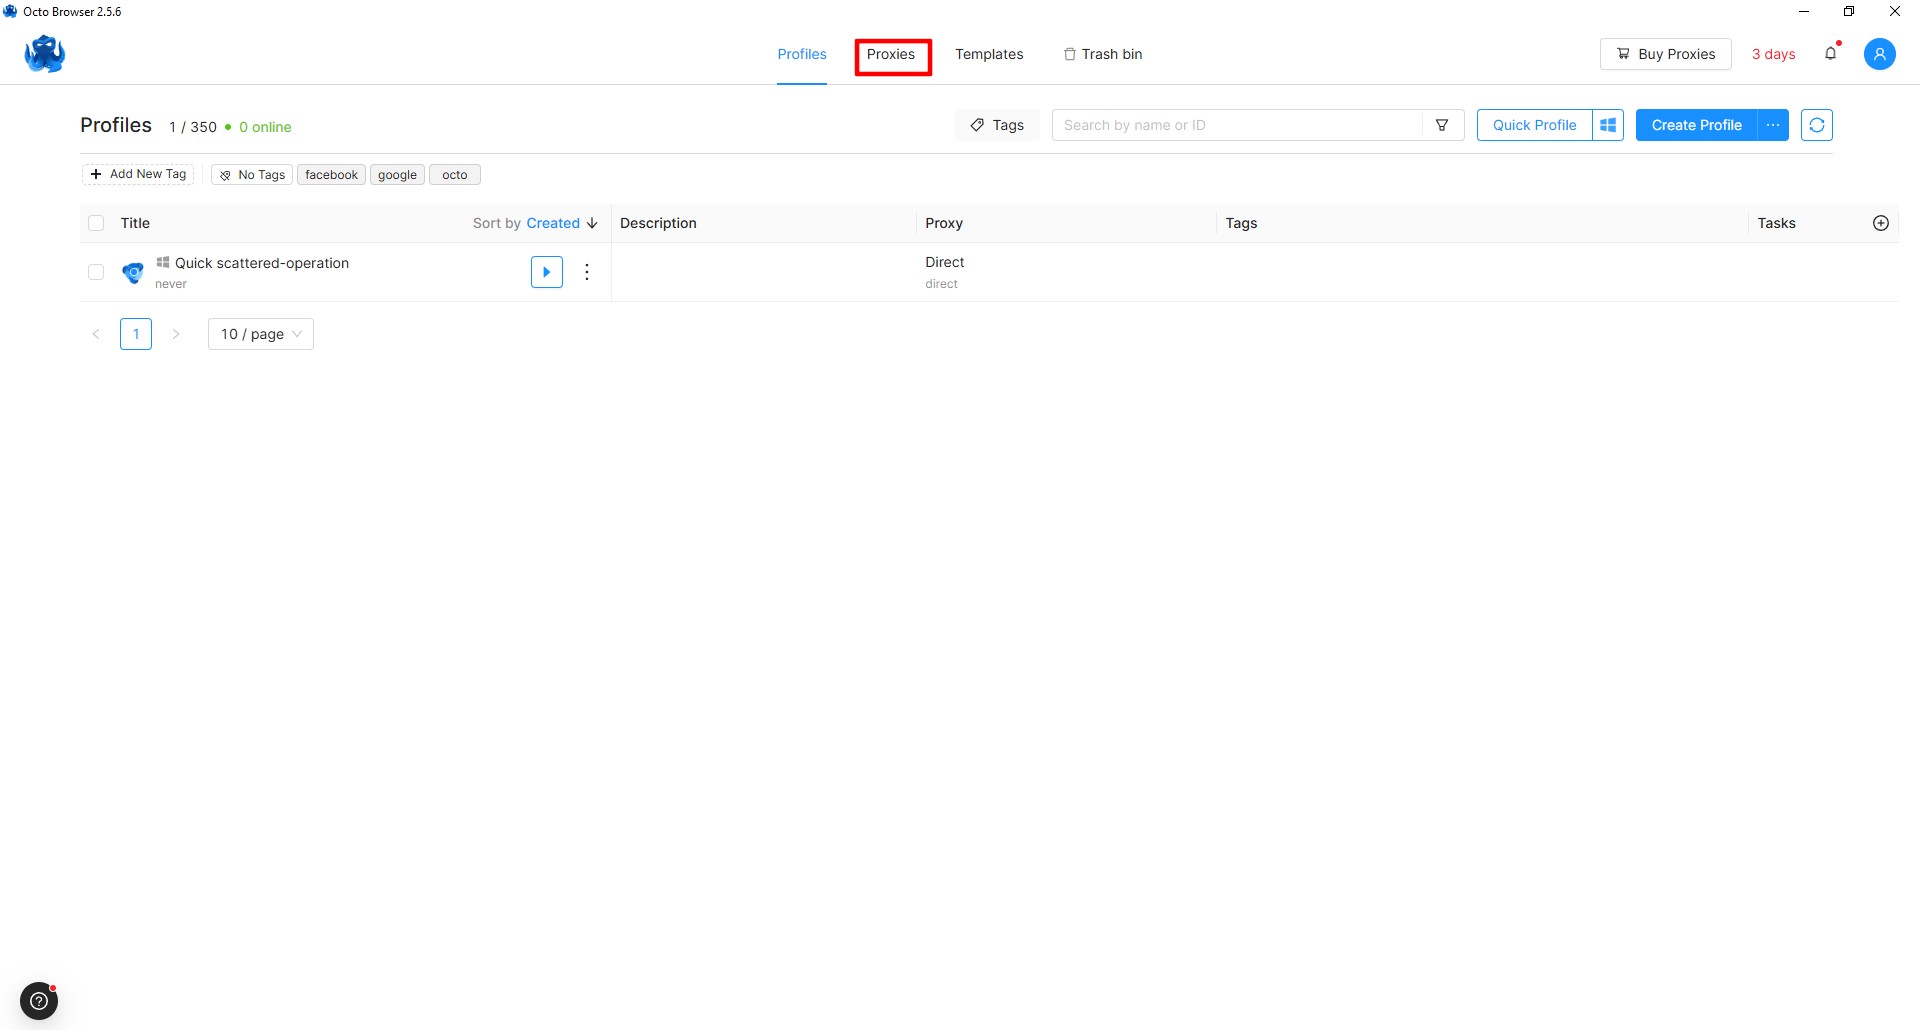 Fig. 2. Proxy management panel interface in Octo Browser with options for adding and importing proxy configurations.
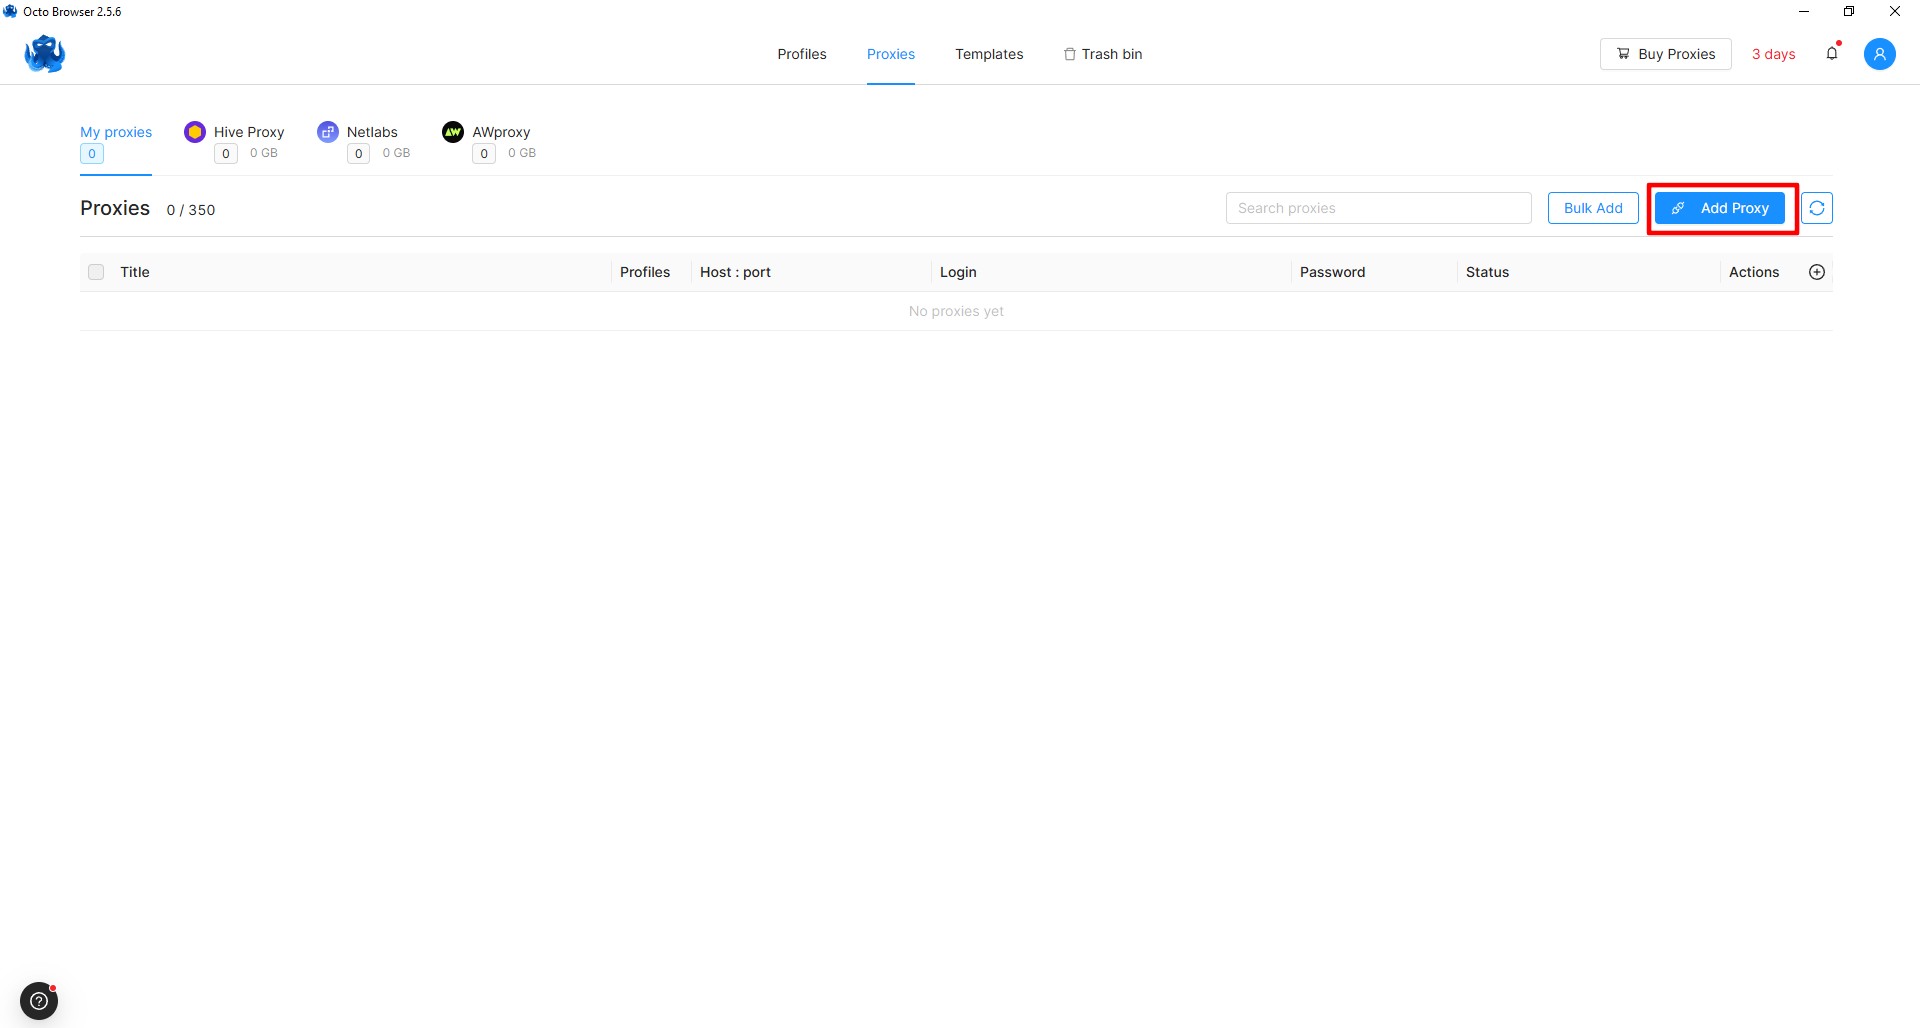 Fig. 3. Proxy server configuration panel in the Octo Browser interface.
Method 2: Adding Directly to the Profile (Fast)
When creating a new profile, go to the Connection tab.
- Paste the connection string into the field. Octo understands formats like
ip:port:login:pass. - Important for mobile proxies: In the Change IP URL field, paste the link for changing the IP (if your provider provides one). This will add an IP change button directly to the profile management interface.
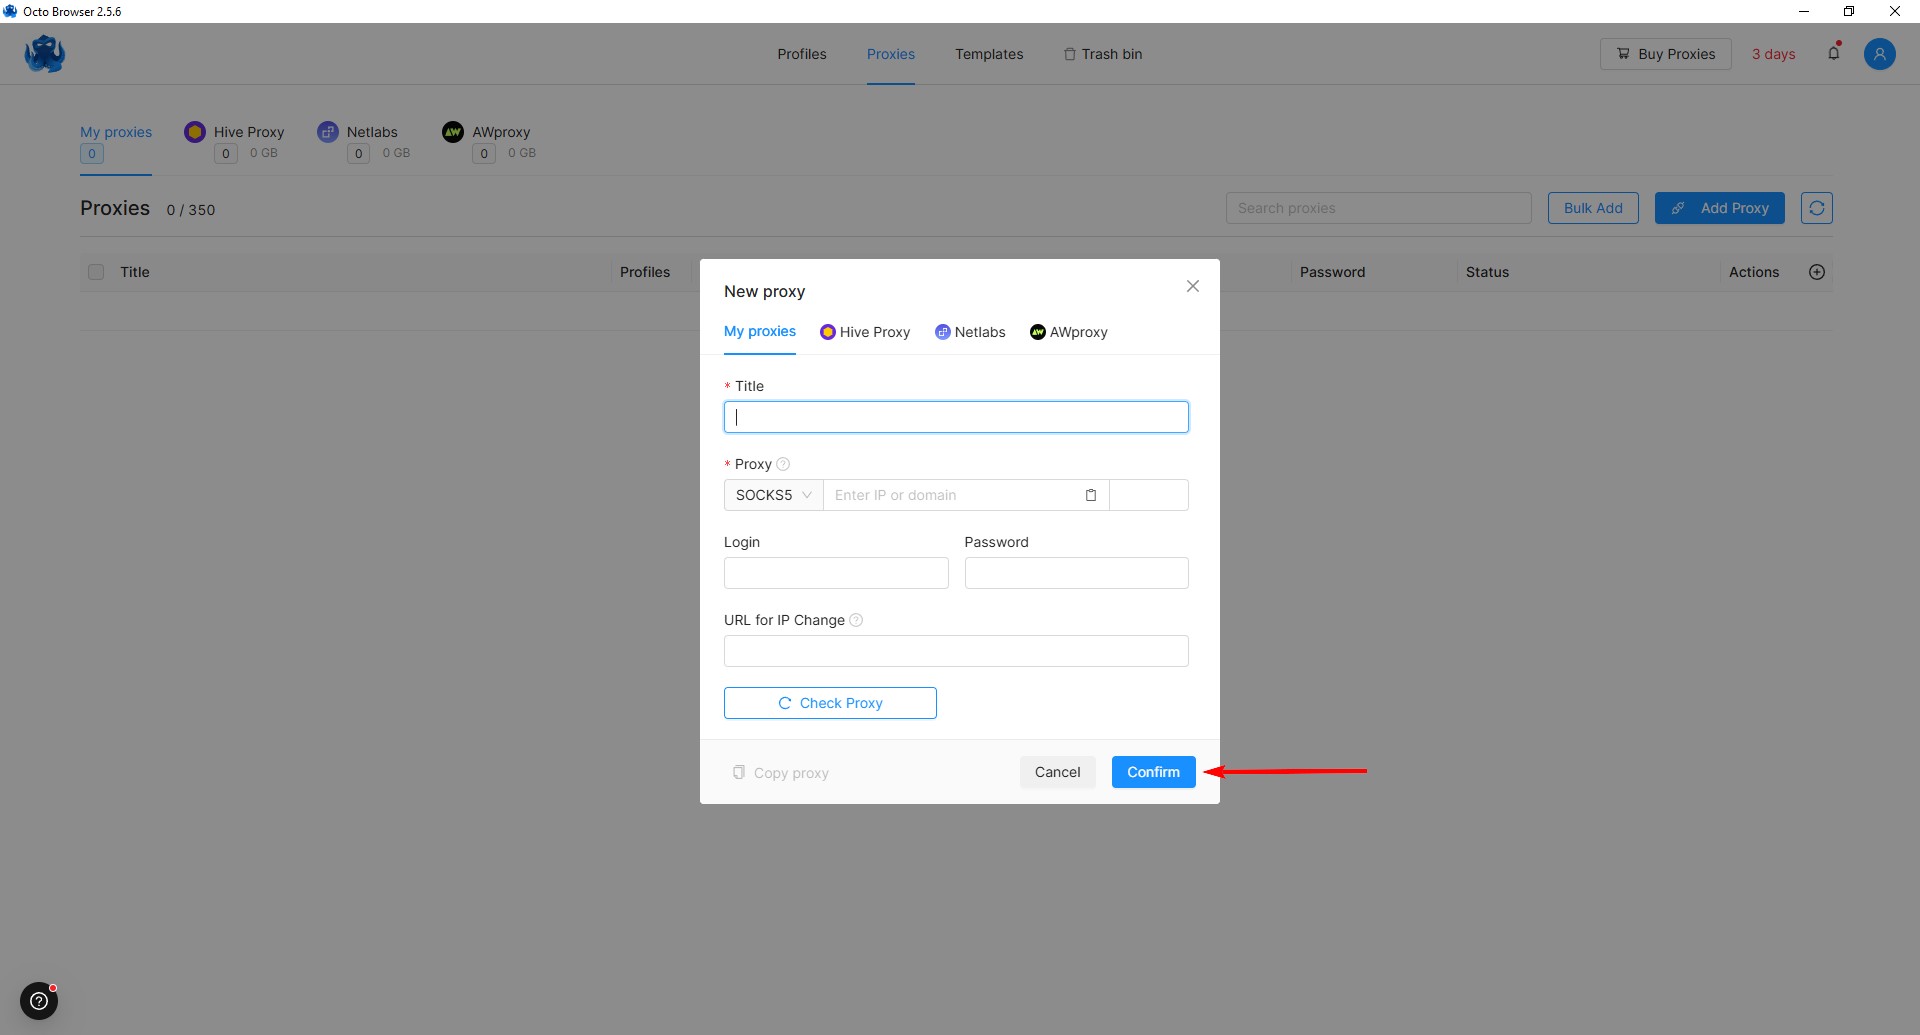 Fig. 4. Proxy configuration form in Octo Browser with fields for entering connection parameters (IP address, port, credentials) and selecting a protocol.
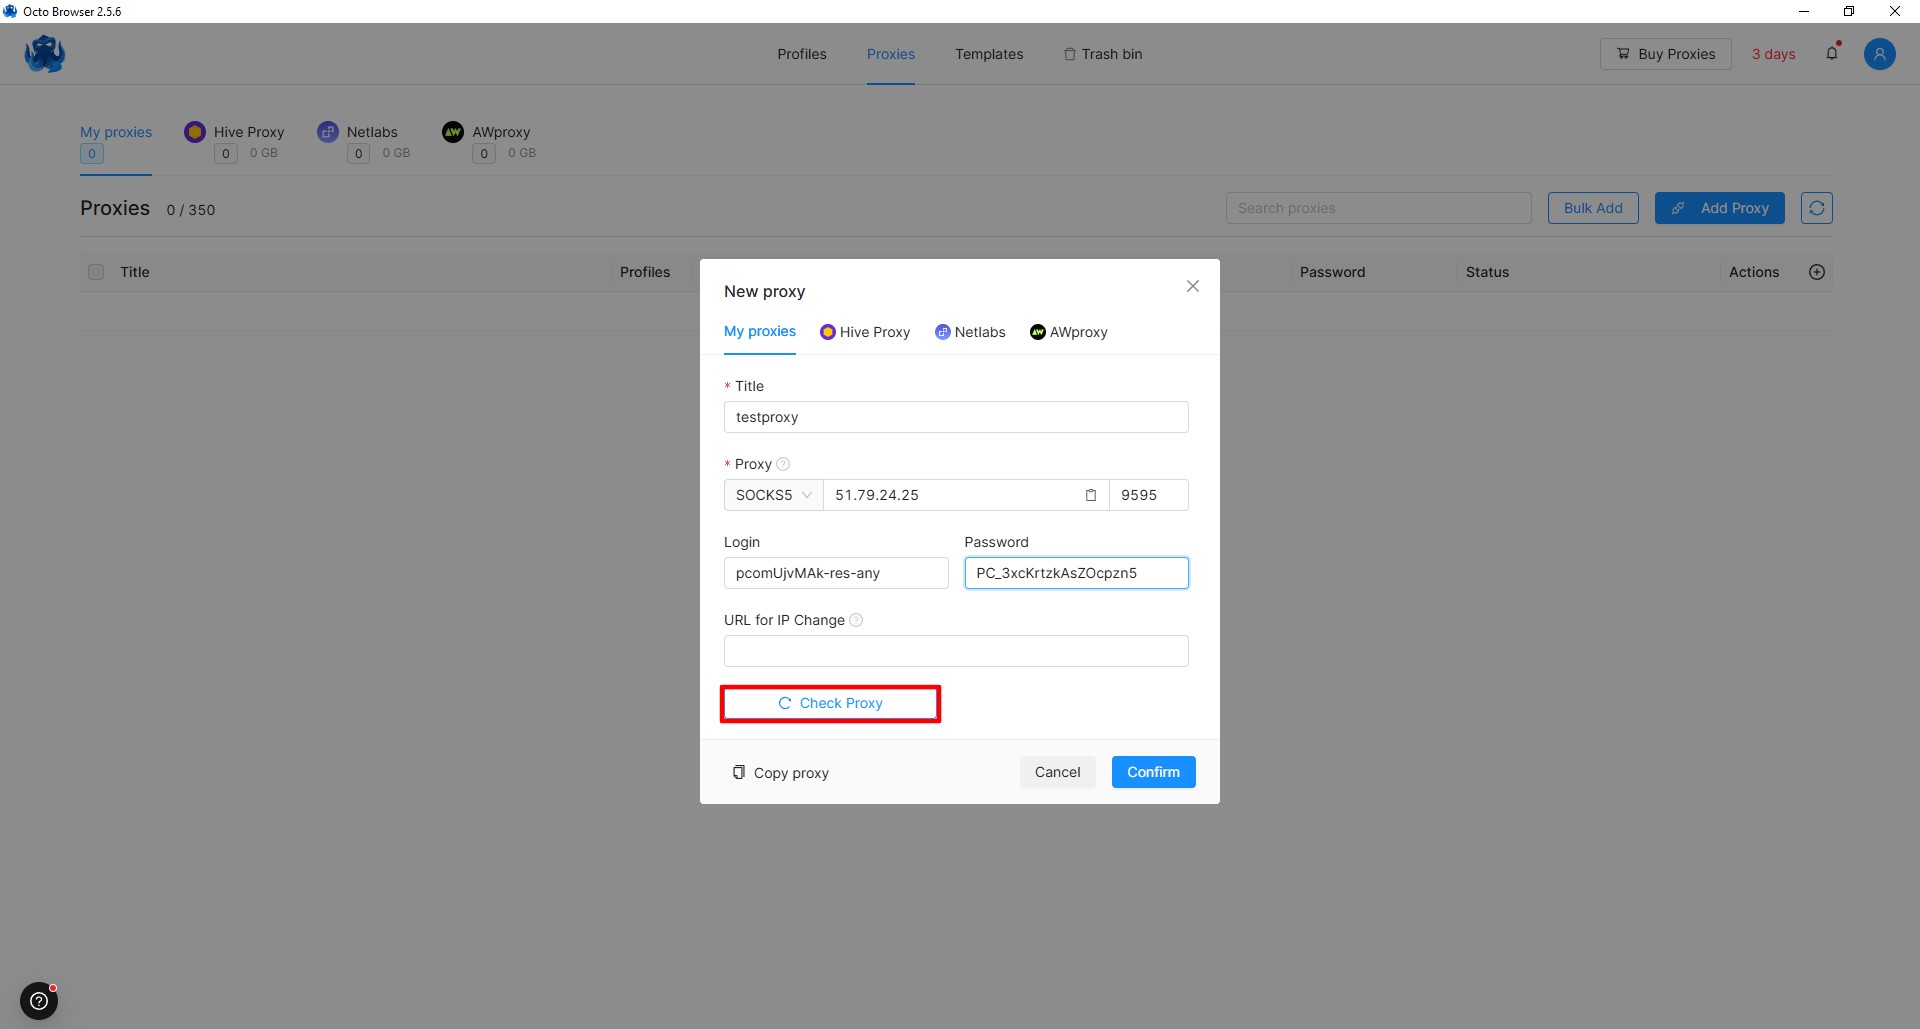 Fig. 5. Result of the proxy server settings check in the Octo Browser interface, showing connection status and the functionality of the configured proxy connection.
If everything is configured correctly, the proxy status will be displayed in the workspace (Fig. 6).
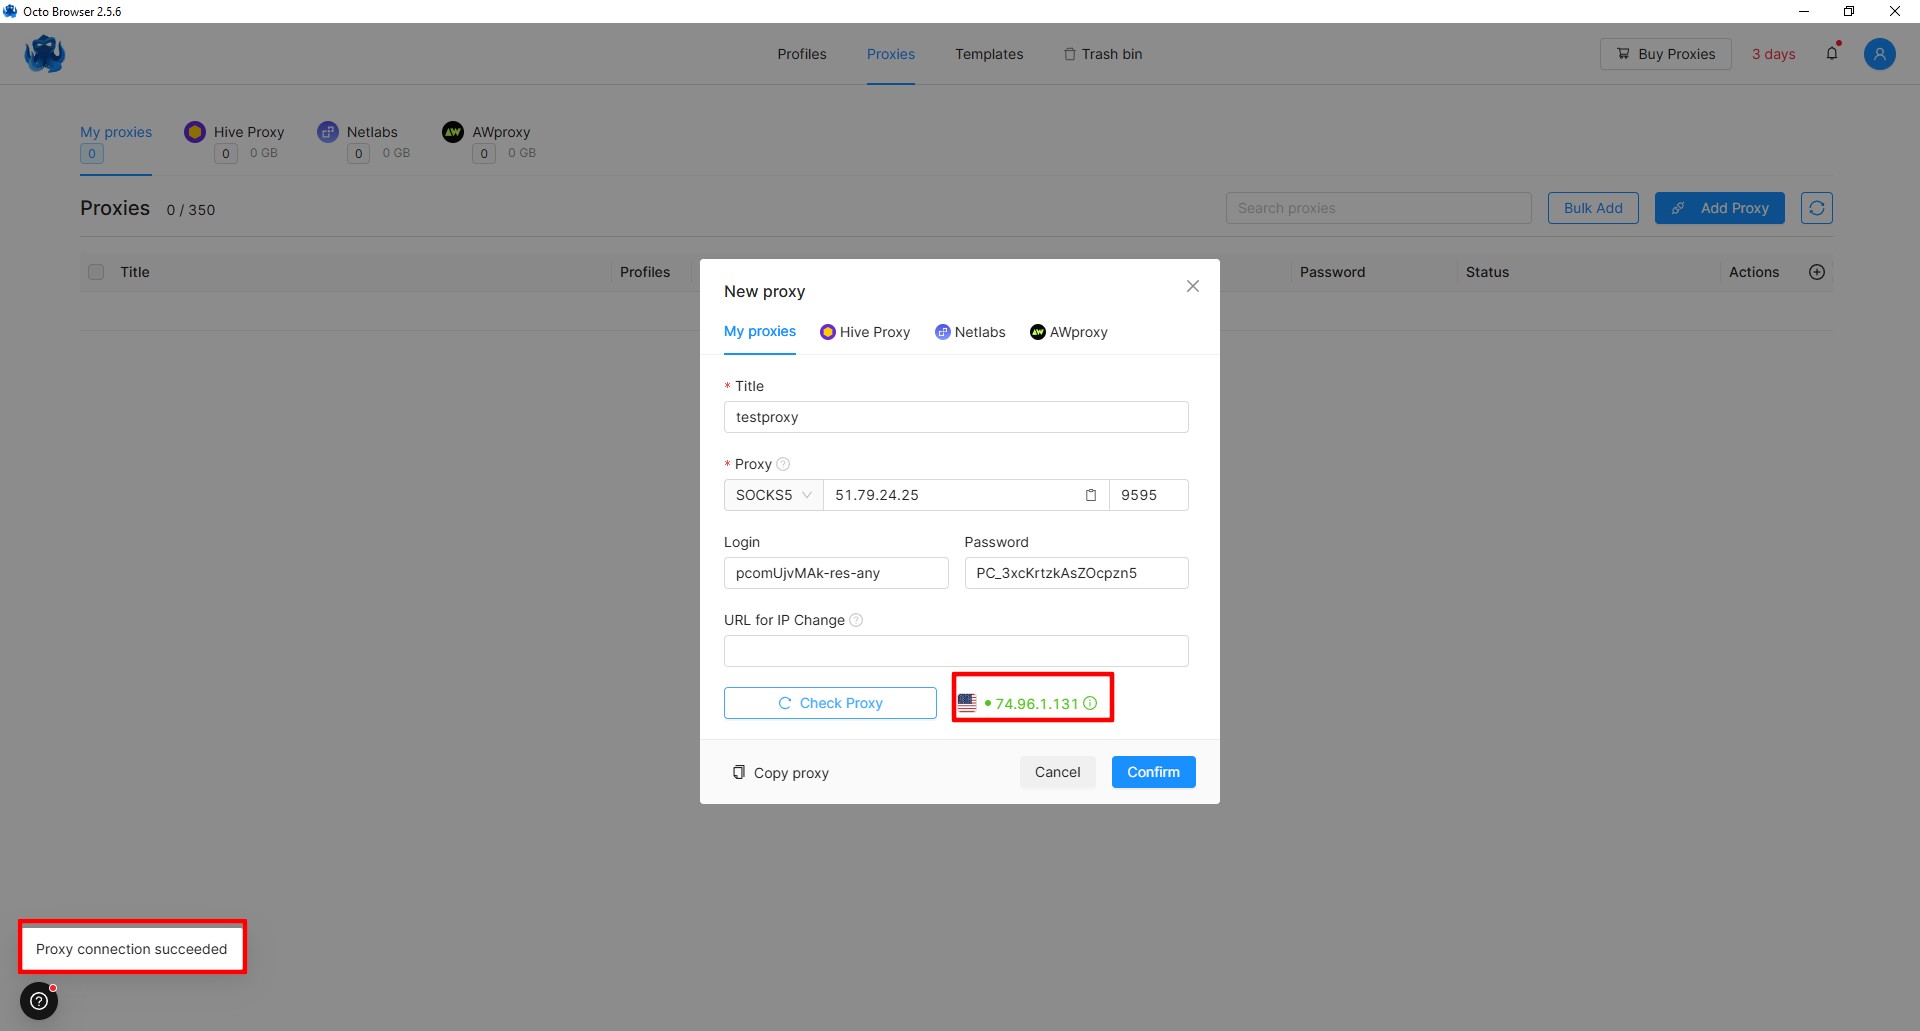 Fig. 6. Visualization of the active proxy connection status in the Octo Browser interface.
Part 4. Launching and Checking Status
- After configuration, click Create Profile.
- In the profile list, click the Start button.
- A browser window will open. First, go to the website
browserleaks.com.
What to look for:
- Your IP should match the purchased proxy.
- The geolocation should match the proxy's country.
- WebRTC should not reveal your local IP (Octo Browser automatically isolates WebRTC settings to prevent leaks, but a check doesn't hurt).
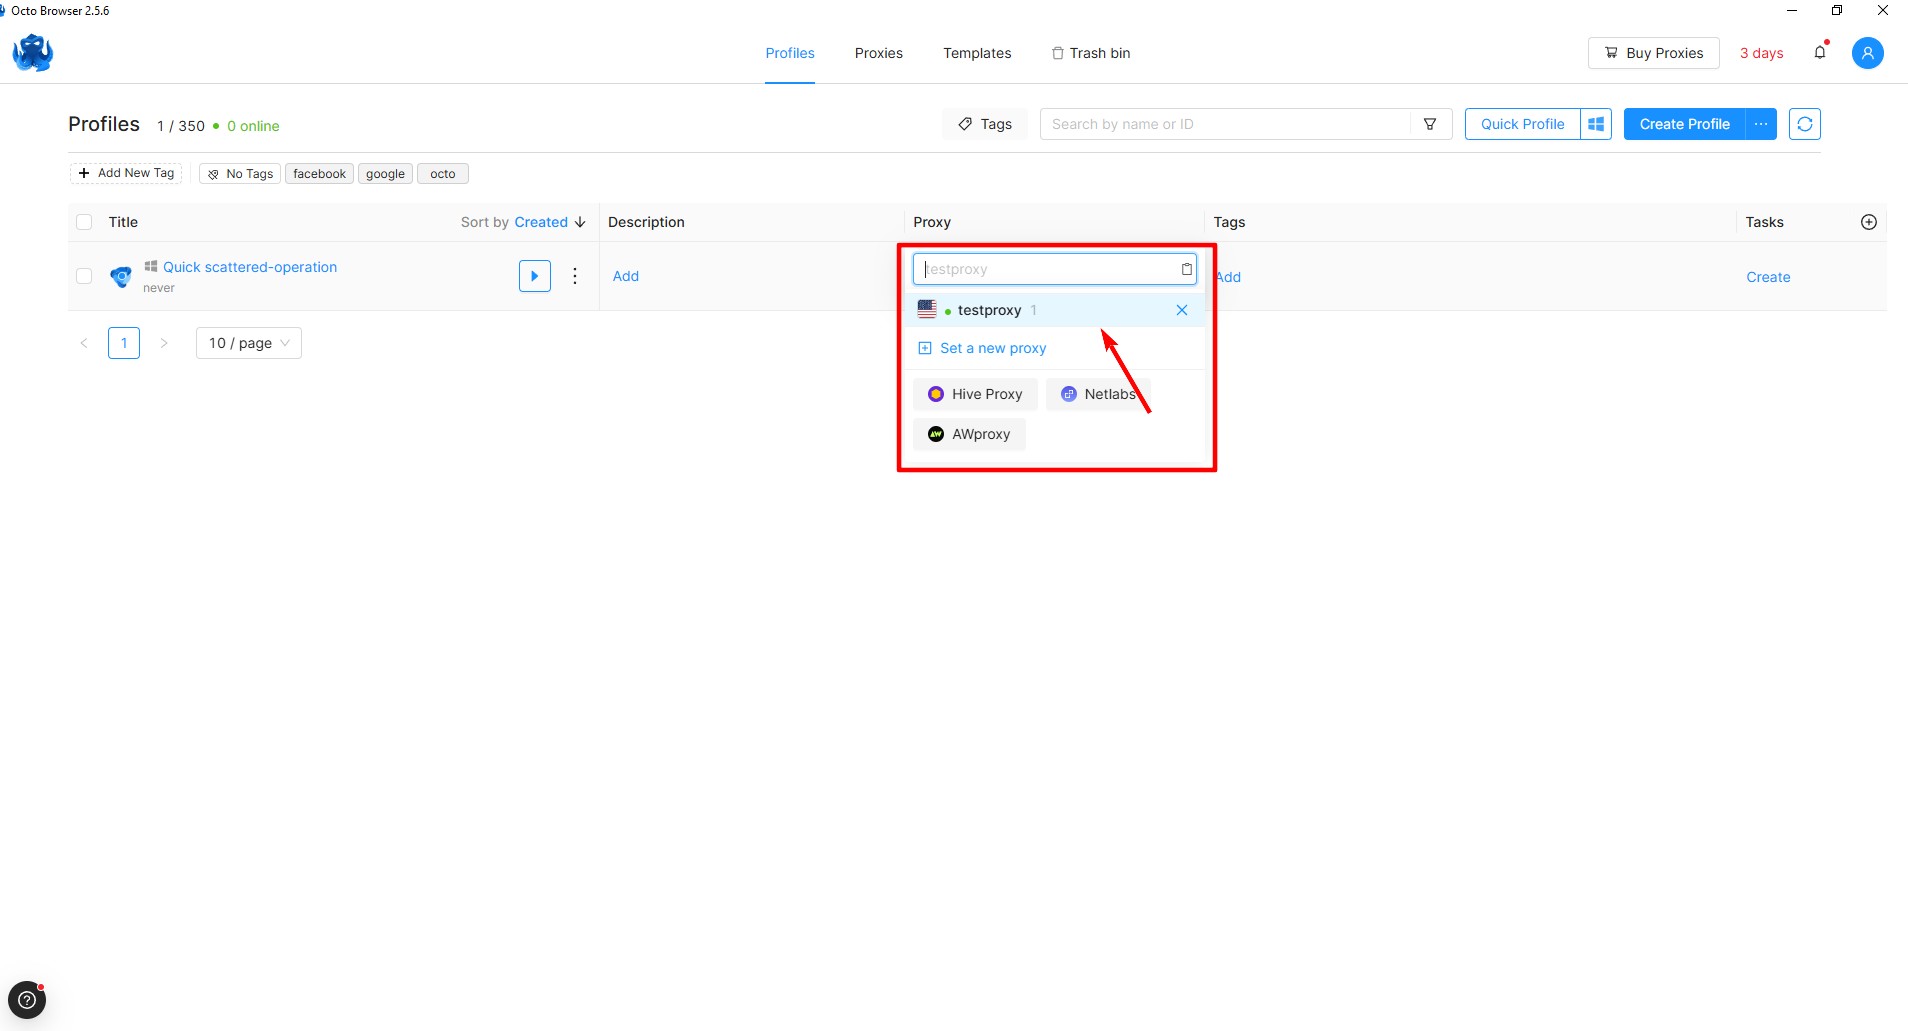 Fig. 7. Demonstration of the profile launch interface in Octo Browser, showing the workspace after successful setup and activation of a user profile with specified proxy connection parameters.
Let's check our current IP and launch the browser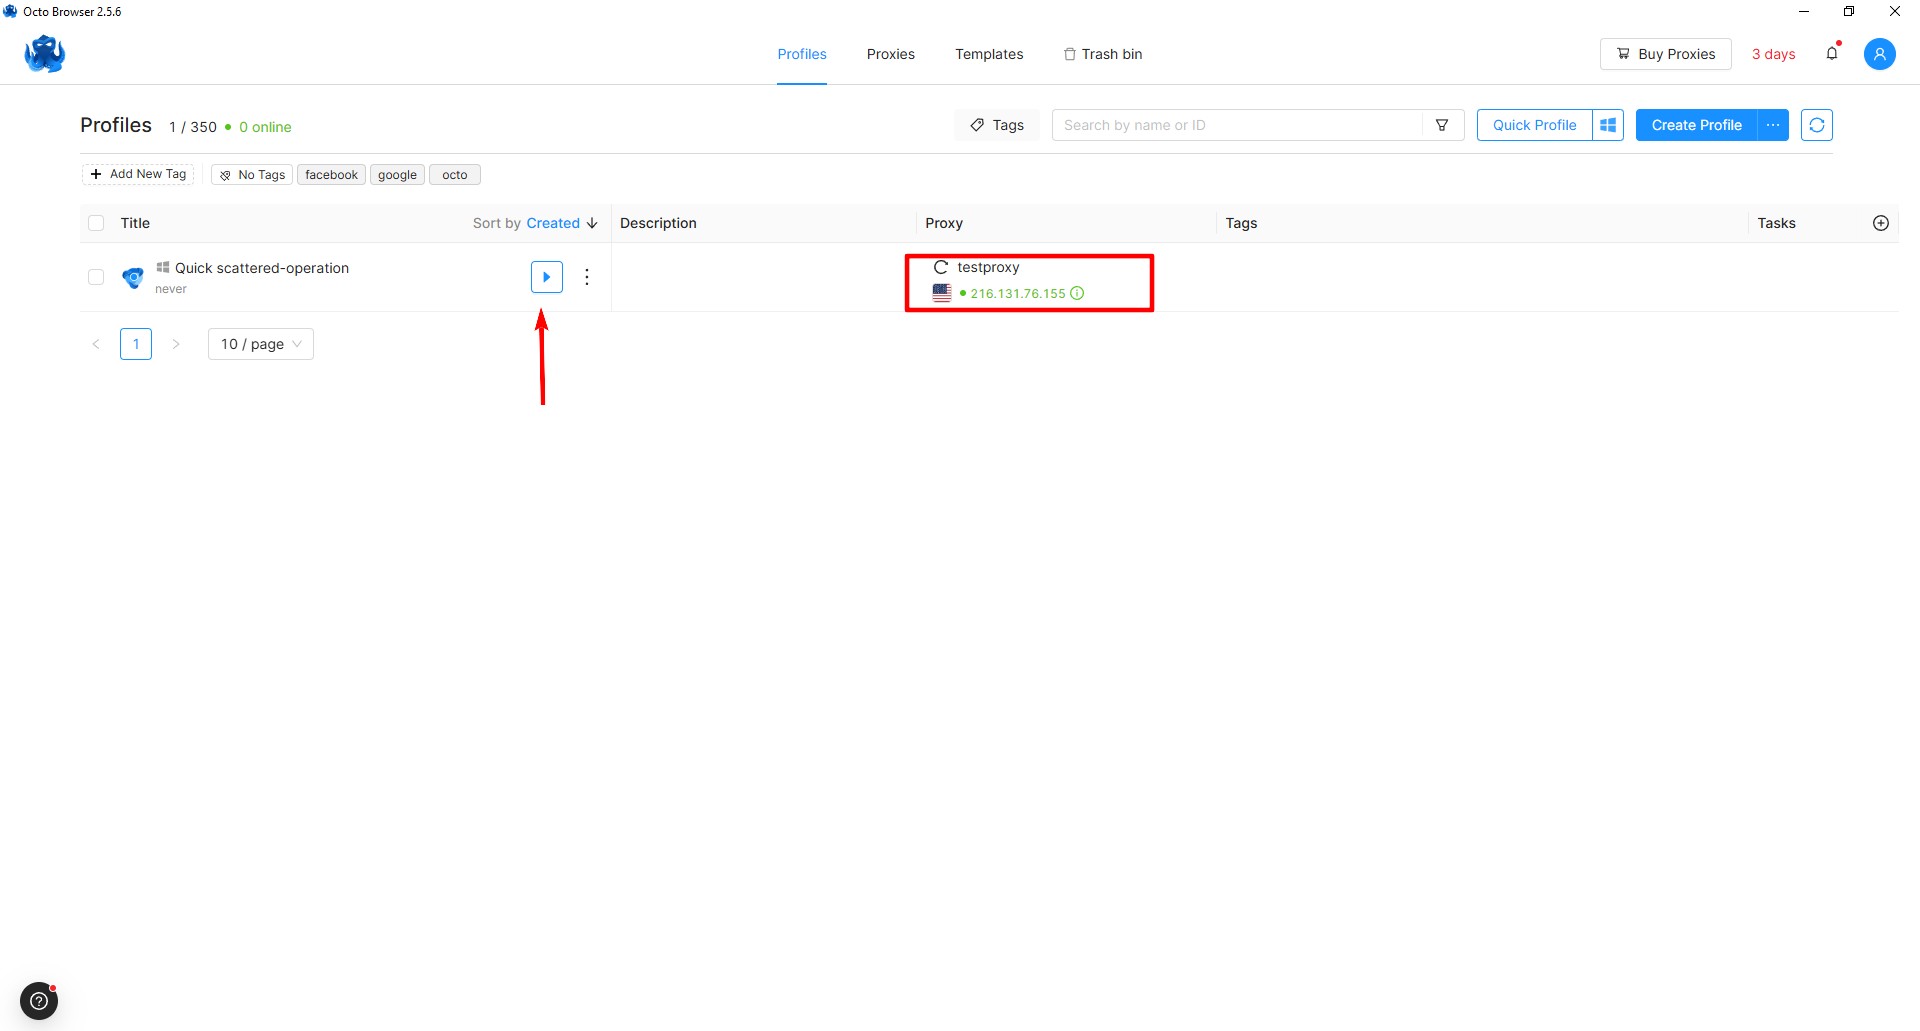 Fig. 8. Octo Browser window visualization, demonstrating current IP address verification and the browser launch interface with activated proxy settings.
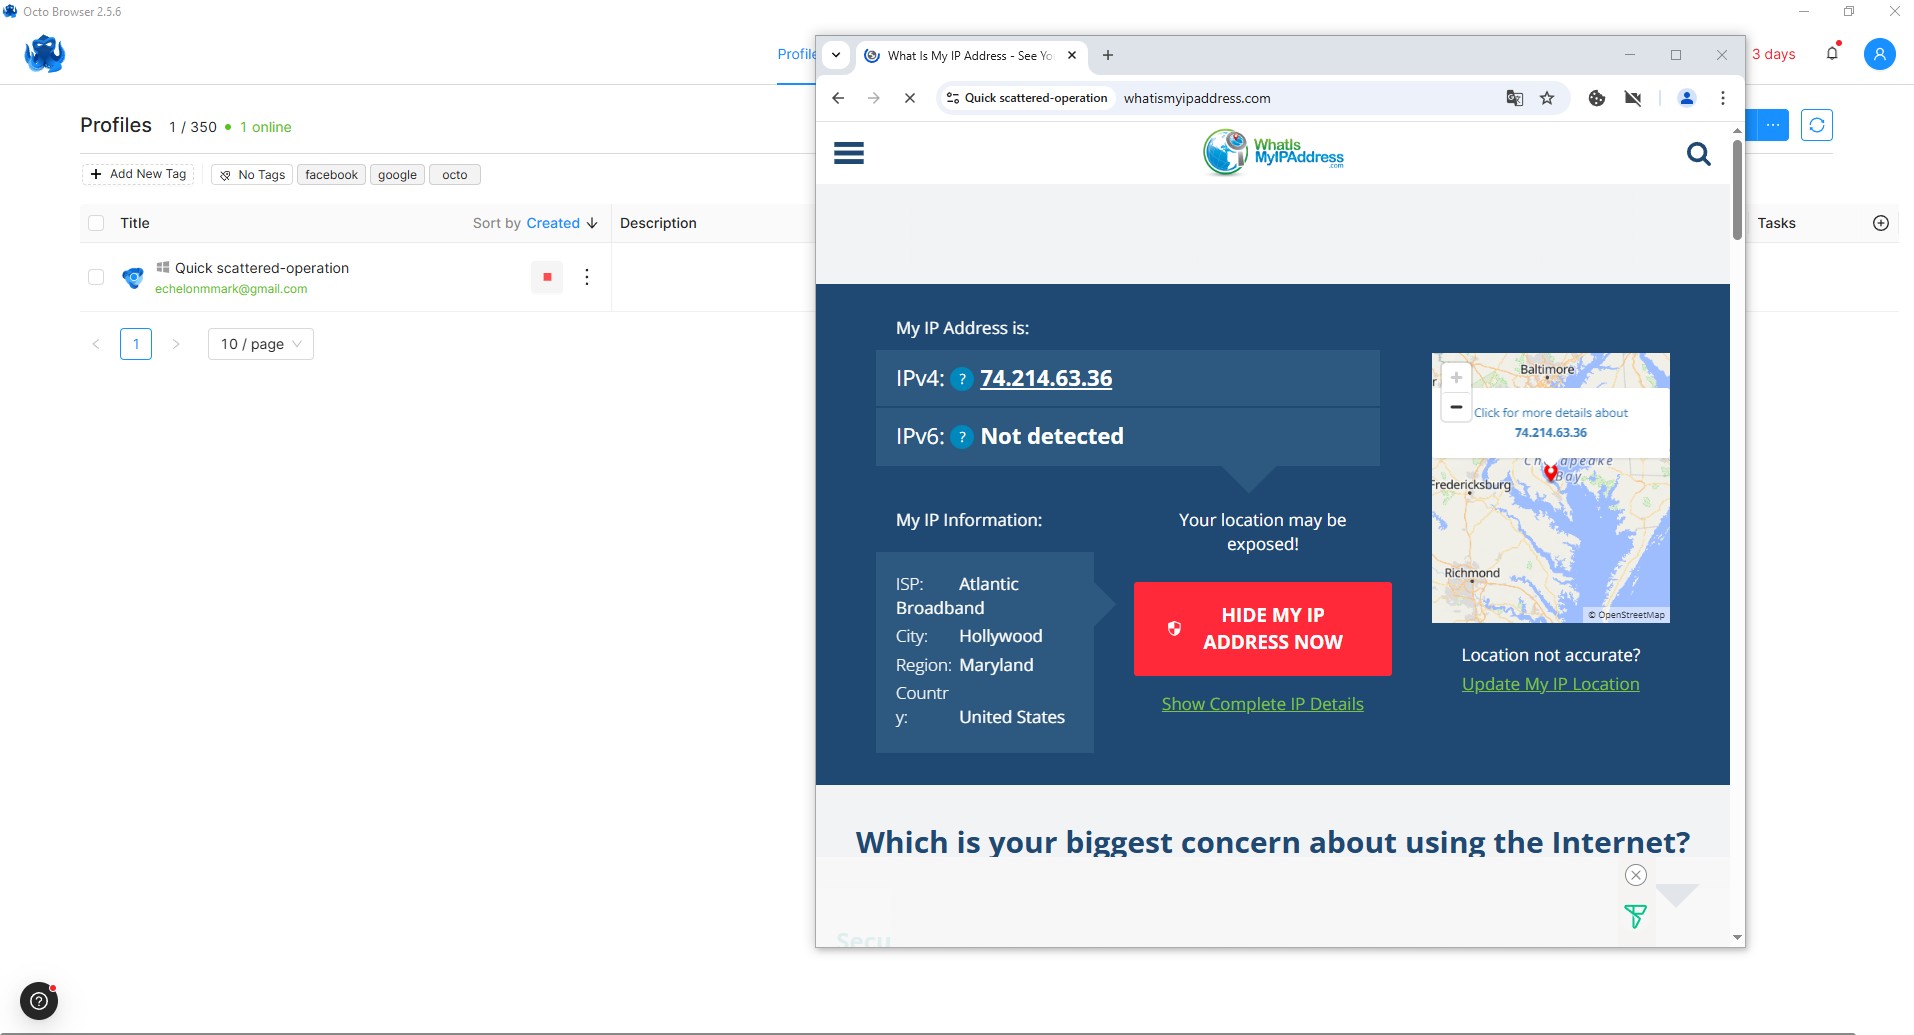 Fig. 9: Visualization of the IP address check in the Octo Browser interface with an activated proxy connection.
Conclusion
Congratulations! You have successfully set up a profile and connected a proxy in the multi-profile Octo Browser. You are now ready for secure web browsing using all the features of this tool.
Octo Browser is a powerful tool for digital marketing and secure work with multiple corporate accounts. It provides a high level of data protection, a user-friendly interface, and flexible settings. You can get a 30% discount on your first Octo Browser subscription purchase using the promo code CYBERYOZH30. If you have any questions, feel free to write them in the comments. Good luck with your work!