
GoLogin — is an advanced browser that allows you to create and manage hundreds of unique profiles in the cloud. Its main feature is the Orbita technology, which effectively manages your digital fingerprint for the maximum level of online privacy.
But no matter how powerful the browser is, it only protects your "digital fingerprint." Your "location" is protected by proxies. If you use low-quality or incorrectly selected IPs, connection stability and privacy may be at risk.
In this guide, we will break down which type of proxy to choose for your tasks (to ensure a stable and secure connection) and how to correctly configure them in GoLogin.
Part 1. Strategy: Which proxy do you need for GoLogin?
Before creating a profile, you need to choose the right proxy. Choosing the wrong proxy type is the most common cause of unstable performance.
1. Mobile Proxies (4G/5G)
- Purpose: Managing social media (Facebook, TikTok, Instagram), digital agency work, and professional profile management.
- The Core: Dynamic IPs from mobile operators. Thanks to CGNAT technology, social networks trust them the most.
- Feature in GoLogin: Use them with rotation. In the GoLogin proxy settings, there is a special field "Change IP URL" — paste the link for changing the IP there, and you will be able to change the address with one click directly from the browser.
2. Residential Proxies (ISP)
- Purpose: E-commerce (Amazon, eBay, Etsy), CoinList, crypto exchanges, payment systems (PayPal).
- The Core: Static IPs from home internet service providers.
- Feature in GoLogin: Use static sessions. One profile should be strictly tied to one IP. Changing the IP in the middle of a session can cause a connection drop or trigger re-verification on platforms like Amazon.
3. Datacenter Proxies
- Purpose: Technical tasks, parsing, software testing.
- Limitations: Using them for managing complex advertising campaigns on Facebook or Google Ads is not recommended due to potential compatibility issues.
Part 2. Data Preparation
For professional work, we recommend using private channels from CyberYozh App. We guarantee UDP support (important for SOCKS5) and clean IPs.
After purchasing, you will receive the data in your personal dashboard.
- Host: IP address (e.g.,
172.98.60.180) - Port: Port (e.g.,
58763) - Login / Password: Authorization data.
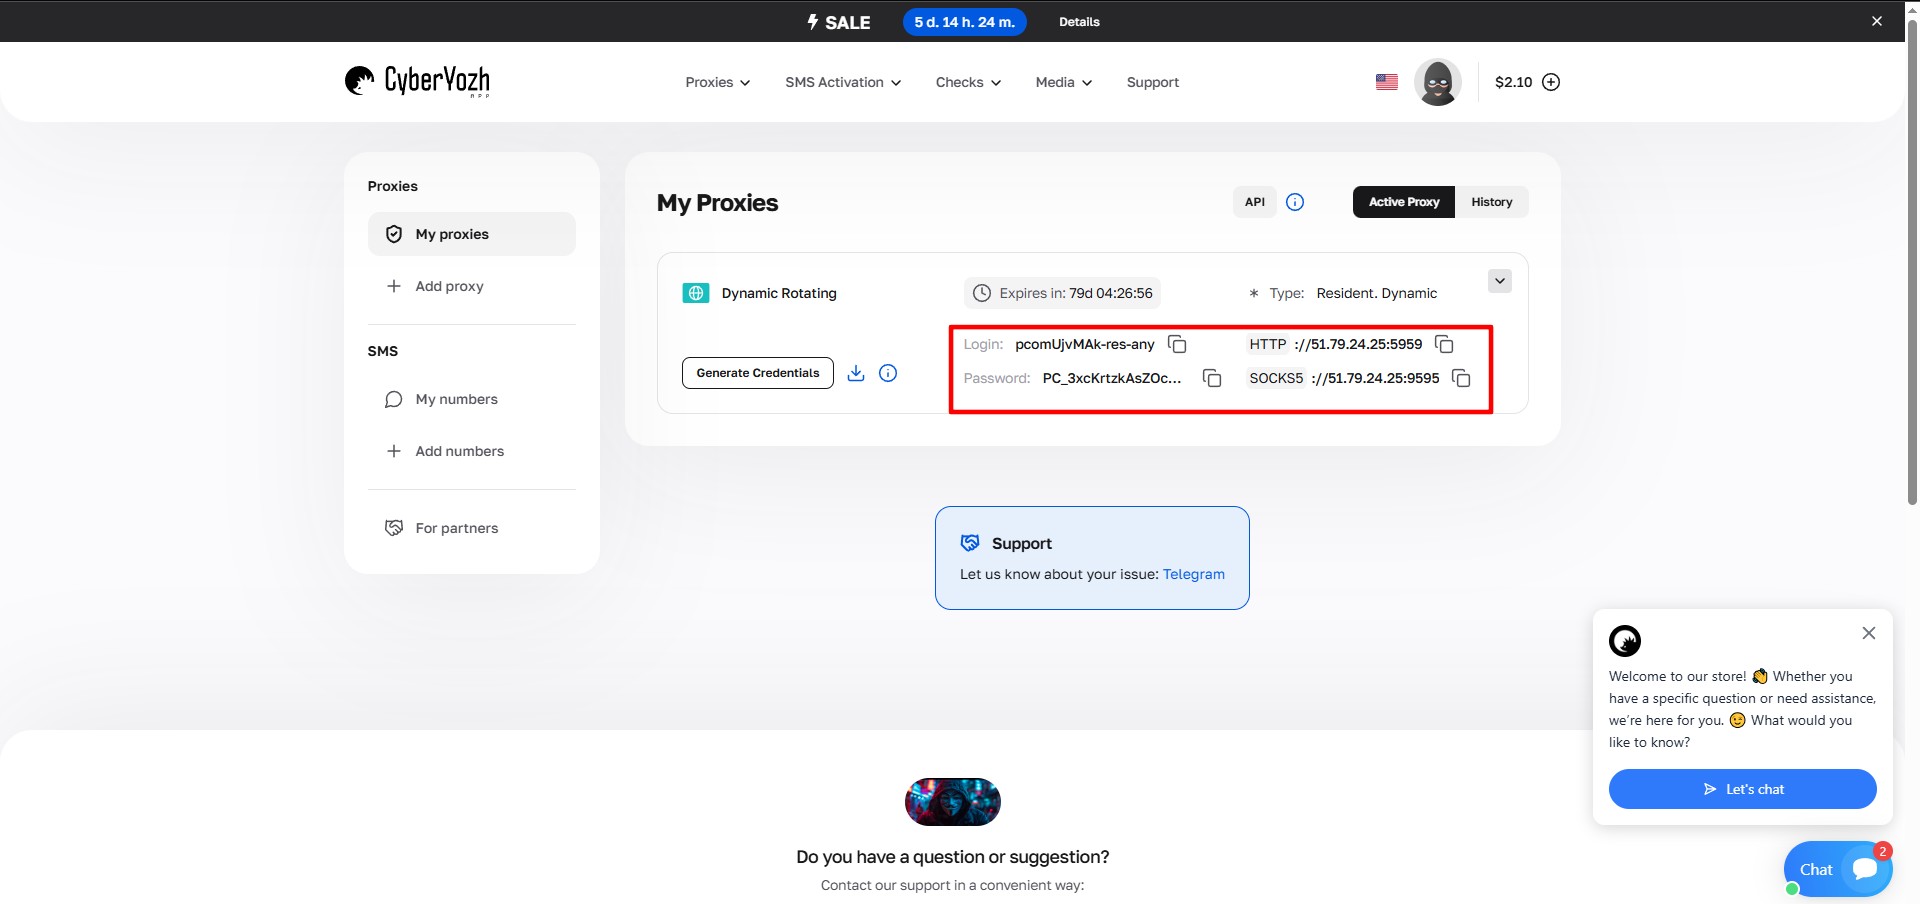 Fig. 1. Screenshot of the CyberYozh platform interface, showing the location of the data for connecting a proxy server. The image displays fields for IP address (Host), Port (Port), Proxy Username, and Proxy Password.
Part 3. Profile Creation and Proxy Connection
Step 1. Profile Creation
Launch GoLogin. In the top panel, click the Add Profile button. A detailed settings window will open.
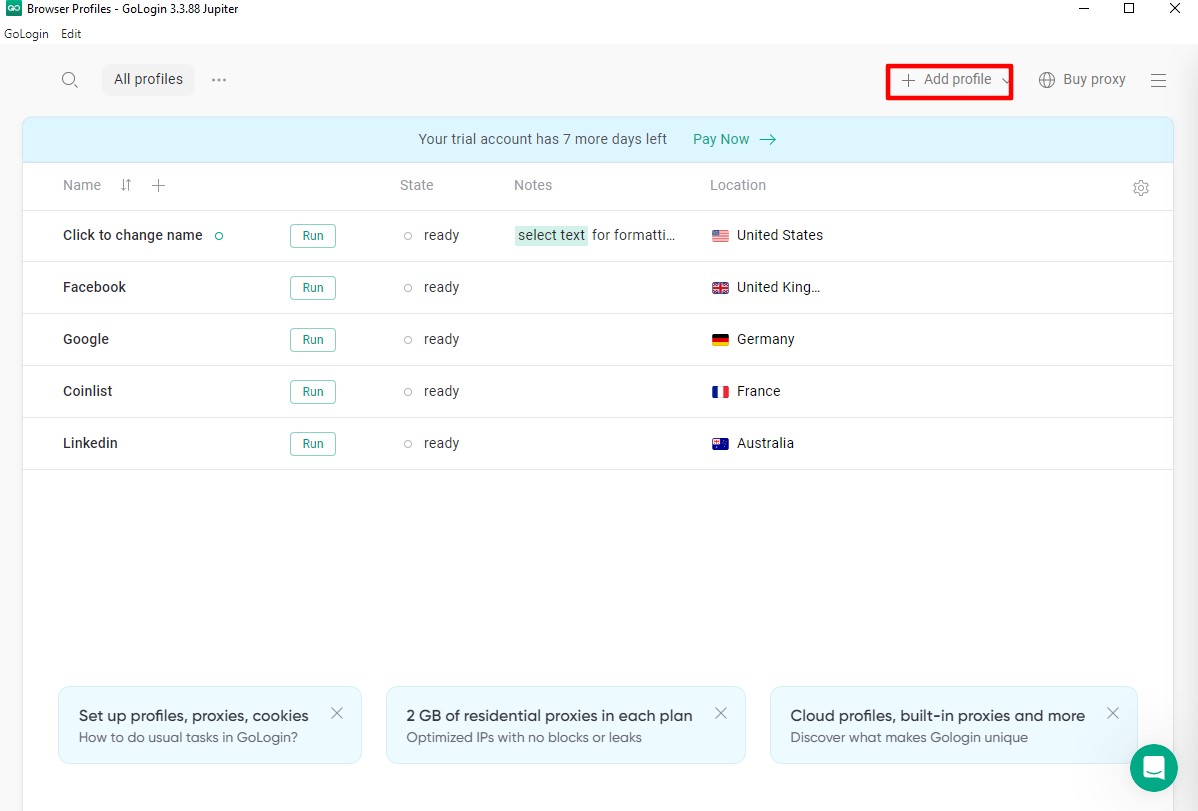 Fig. 2. GoLogin interface showing the main profile management controls, including the "Add Profile" and "Profile" buttons at the top of the screen.
Step 2. Main Settings (Overview)
- Profile Name: Set a name (e.g.,
FB_Farm_01). - Operating System: This is critical. Select the OS that is actually installed on your computer.
- If you have Windows — choose Windows.
- If you have macOS — choose macOS.
- Why: Matching the profile to your real operating system helps maintain a stable and secure environment for work.
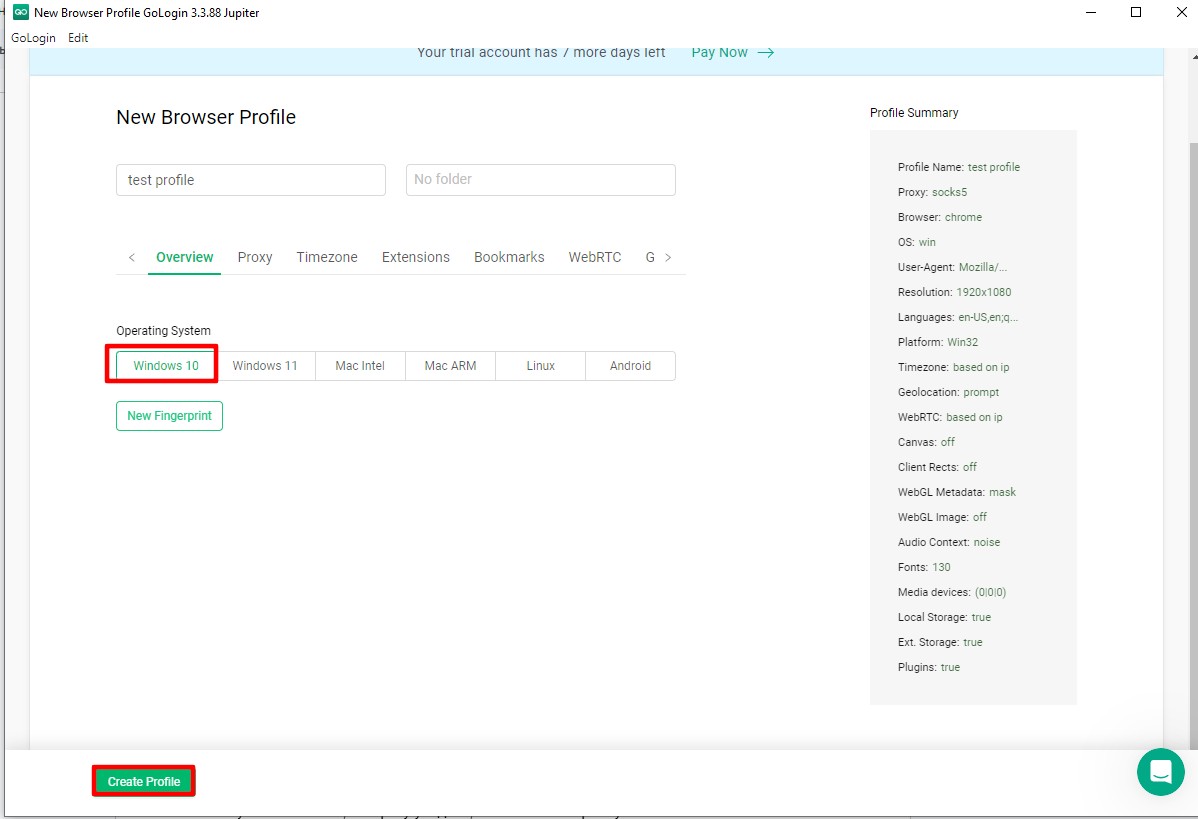 Fig. 3. Setting window for a new GoLogin profile with the browser fingerprint parameter selection interface, including OS settings and the "New Fingerprint" button for generating unique identifiers.
Step 3. Proxy Configuration
Go to the Proxy tab. This is where the connection magic happens.
- Connection Type: Select the protocol.
- Our choice — SOCKS5. This is a more modern and universal protocol than HTTP. It supports UDP and provides better anonymity.
- Proxy Host & Port: Enter the IP and Port.
- Login & Password: Enter the authorization data.
- Change IP URL (For mobile proxies): If you have a mobile proxy with rotation via a link, paste that link here. This will allow you to change the IP without visiting the provider's dashboard.
 Fig. 4. Proxy server configuration window in the GoLogin interface, displaying fields for entering connection parameters.
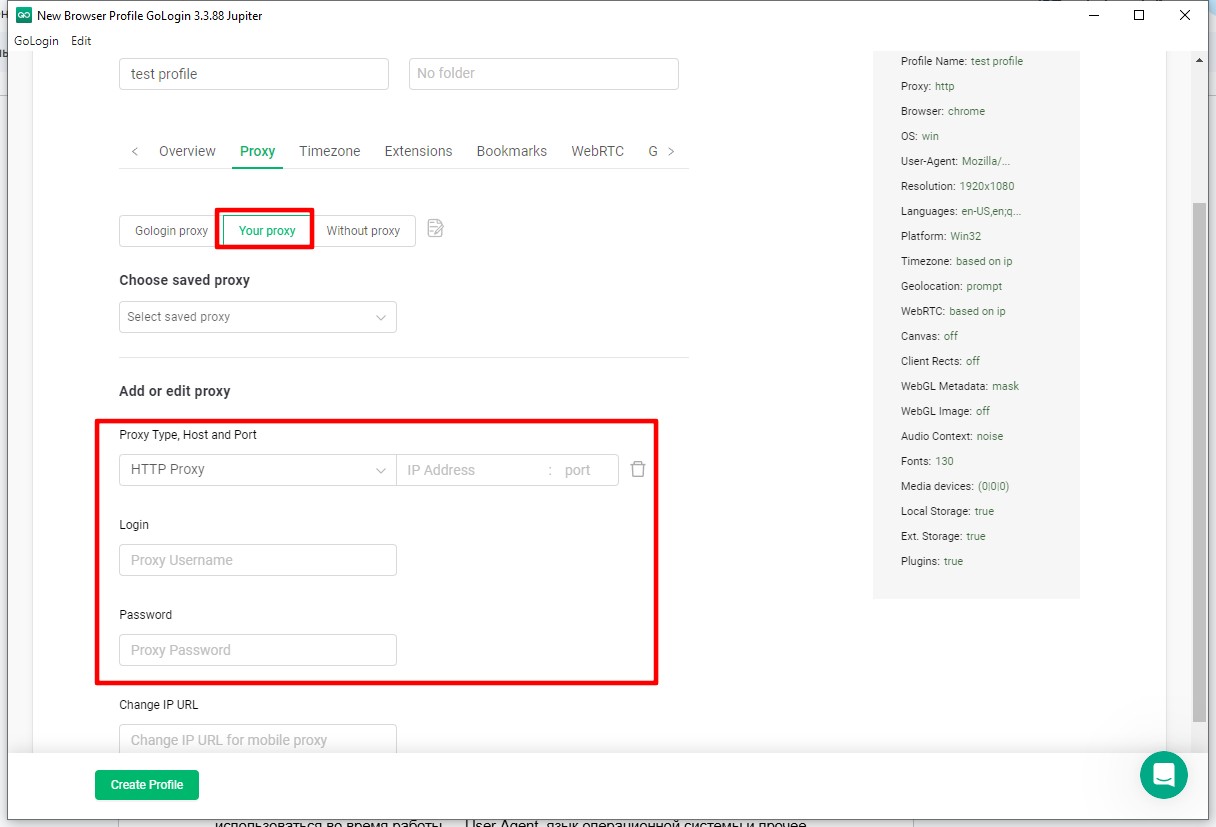 Fig. 5. Custom proxy server configuration interface in GoLogin, demonstrating fields for entering connection parameters, including proxy type, IP address, port, login, and password.
Step 4. Connection Check
Do not save the profile blindly. Click the Check Proxy button.
- If the data is entered correctly, you will see a green indicator, ping, and the proxy country.
- If there is an error — check the input format or your balance.
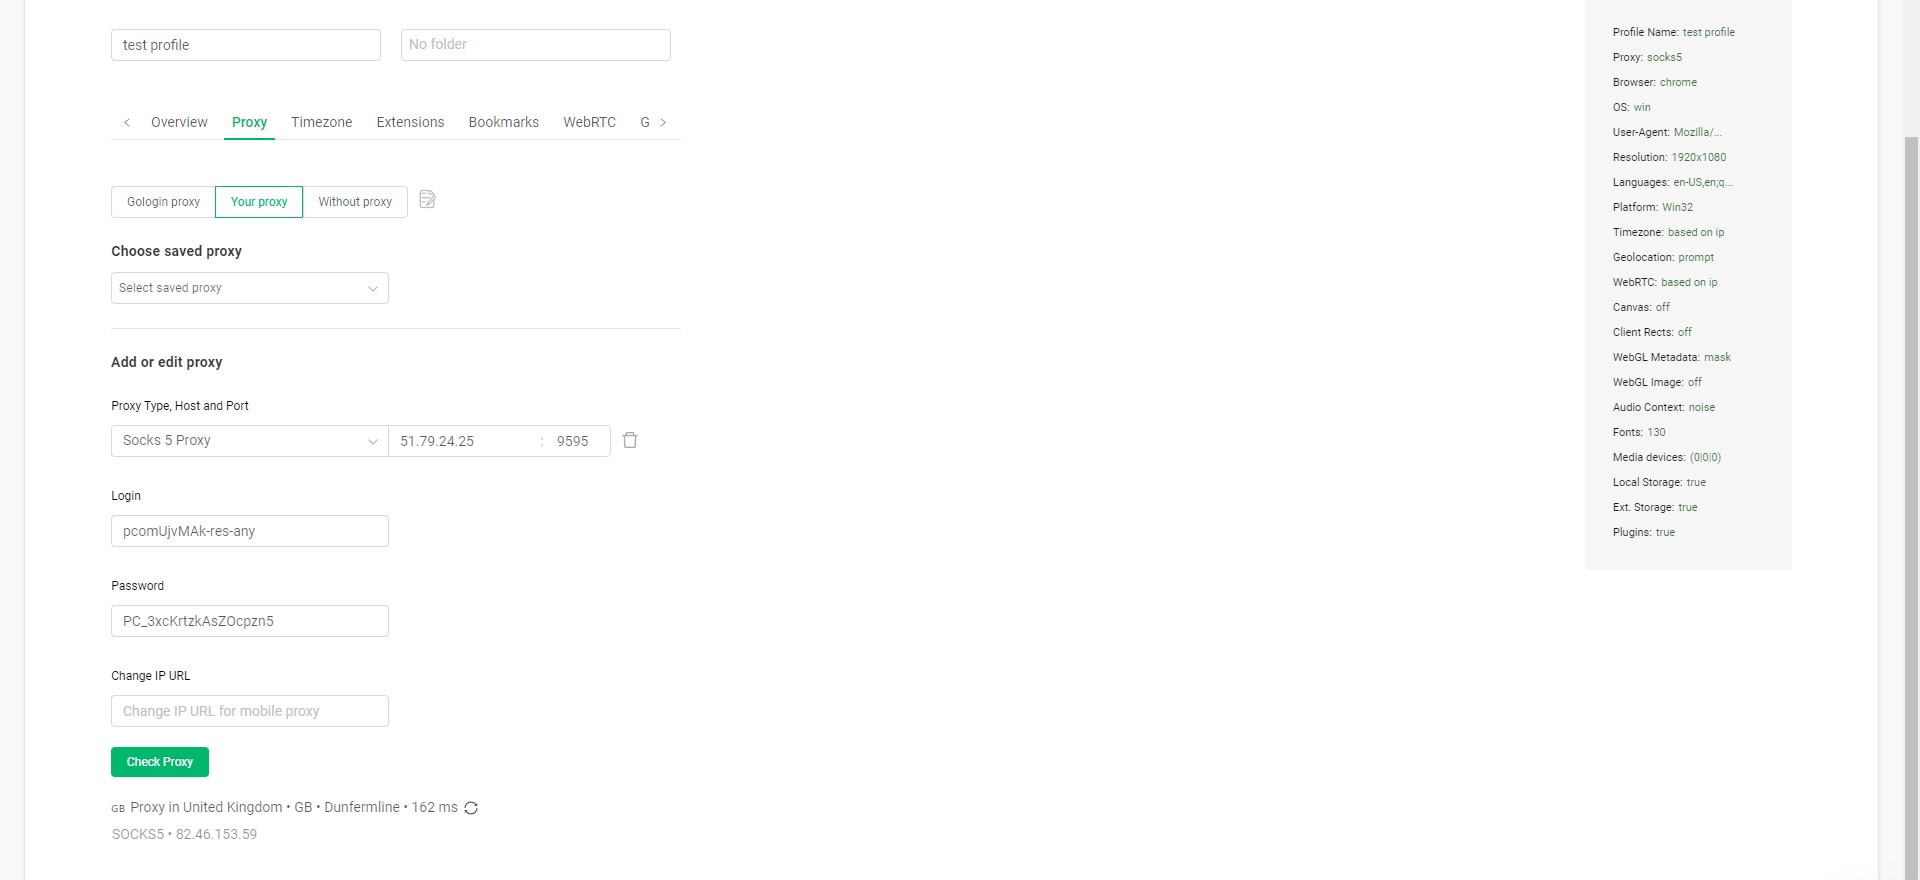 Fig. 6. Proxy connection check interface in GoLogin, demonstrating connection test results after clicking the "Check" button. After a successful check, the IP address of the proxy server being used is displayed.
Step 5. Creation
Click Create Profile at the bottom of the window.
Part 4. Launch and Anonymity Check
Your profile has appeared in the list. Click the Run button.
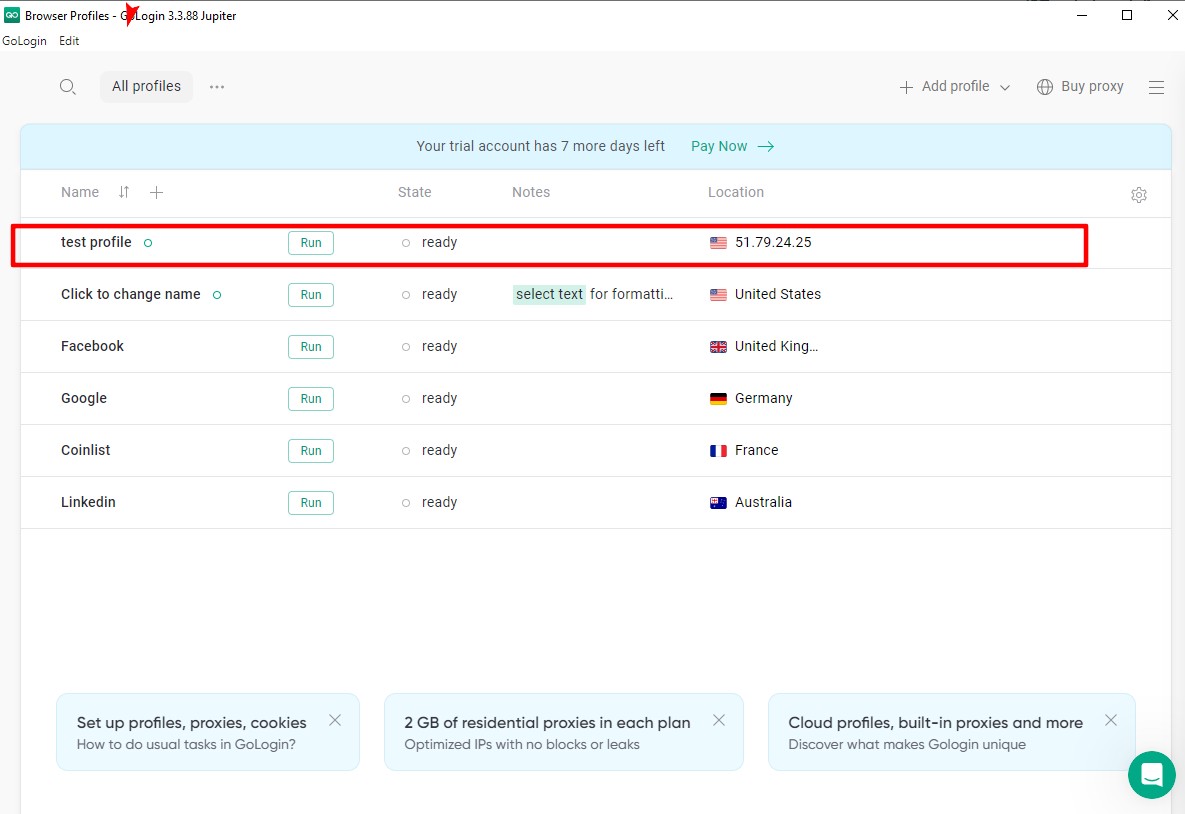 Fig. 7. Launching a created GoLogin profile.
The Orbita browser window will open. Before starting work (logging into Facebook or Amazon), it is mandatory to check how the network sees you. Go to whoer.net or browserleaks.com/ip.
Verification Checklist:
- IP: Must match the one purchased.
- GEO: The country must match.
- WebRTC: Must reliably hide your local IP address for maximum digital privacy. GoLogin spoofs it automatically, but double-checking doesn't hurt.
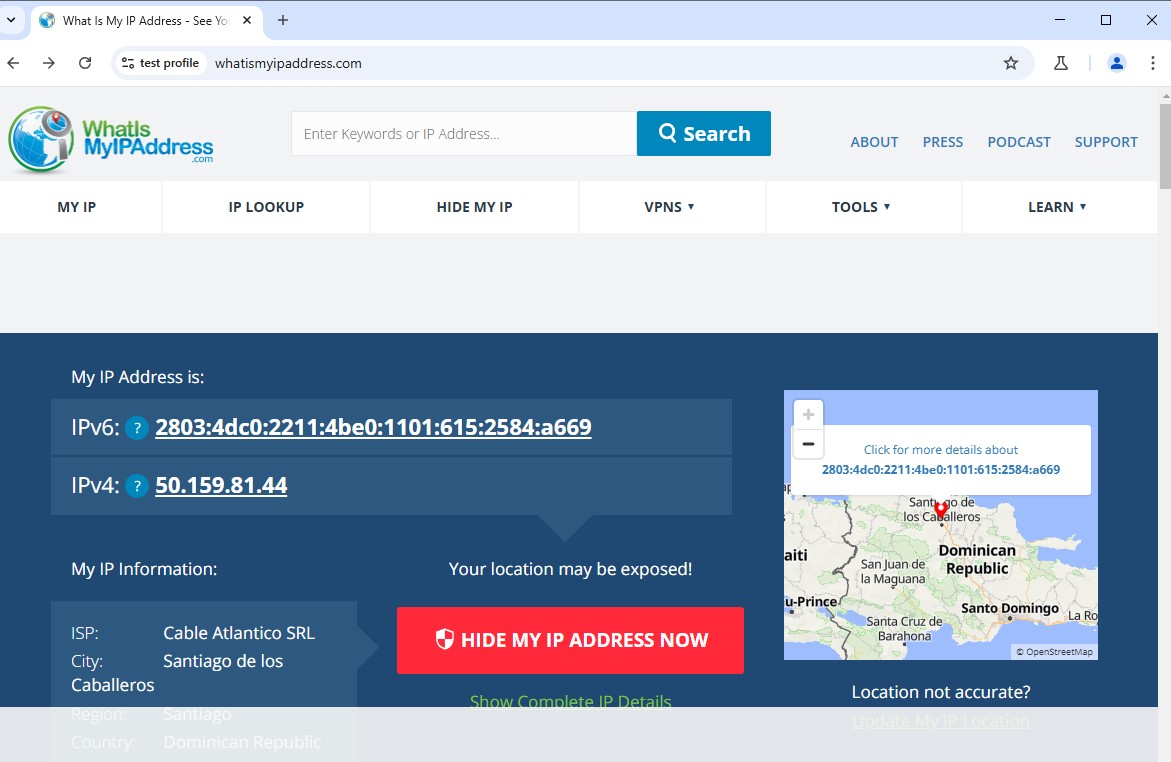 Fig. 8. Results of checking anonymity settings in the whatismyipaddress.com service, demonstrating the effectiveness of IP address masking through a configured GoLogin proxy server.
Conclusion
GoLogin combined with the right proxies is a reliable tool for professional work.
- Managing multiple client accounts as an SMM agency? Get Mobile Proxies with rotation.
- Need to manage stores on Amazon? Get Residential Proxies with static IPs.
Reliable proxies for any GoLogin tasks can always be found in the CyberYoz App catalog. Good luck with your work!
