
Indigo — is a professional browser designed for digital marketers and SMM specialists. It doesn't just manage User-Agent parameters; it creates a completely isolated digital environment based on two unique engines: Mimic (Chrome-based) and Stealthfox (Firefox-based).
However, even the most precise profile configuration will be ineffective if you use unstable IP addresses. When working with major platforms, your IP is a key factor in connection stability and corporate data protection.
In this guide, we will break down which type of proxy to choose for your tasks (to ensure a smooth and reliable connection from the start) and how to properly configure the connection in Indigo.
Part 1. Strategy: Which Proxy Do You Need for Indigo?
Indigo is most often used for serious tasks: managing social networks, running advertising campaigns, and e-commerce projects. Choosing a proxy here is the foundation for secure and continuous profile management.
1. Mobile Proxies (4G/5G)
- Purpose: SMM management on Facebook, Instagram, TikTok, Google Ads. Managing client campaigns.
- The Essence: These are dynamic IPs from mobile operators. Social networks recognize them as connections from regular mobile users.
- In Indigo: Use private mobile proxies with a rotation by link feature. This allows marketing agencies to securely manage multiple client profiles by assigning unique network settings to each.
2. Residential Proxies (ISP)
- Purpose: E-commerce (Amazon/eBay), testing international markets, corporate tasks.
- The Essence: These are static IPs from home internet service providers. They look like regular home Wi-Fi.
- In Indigo: The "1 Profile = 1 Static IP" rule is important here. The IP should not change during operation to maintain session continuity and prevent sudden connection drops or additional verifications.
3. Datacenter Proxies
- Purpose: Technical tasks, parsing, website load testing.
- Important: Using them for social media management or advertising campaigns is not recommended, as it may lead to connection instability or requests for additional security checks.
Part 2. Data Preparation
For working with Indigo, we recommend using private channels from CyberYozh App. We guarantee clean IP pools and support for popular protocols.
After purchasing, you will receive the data in your personal account.
- Host: IP address (e.g.,
172.98.60.180) - Port: Port (e.g.,
58763) - Username / Password: Login and password.
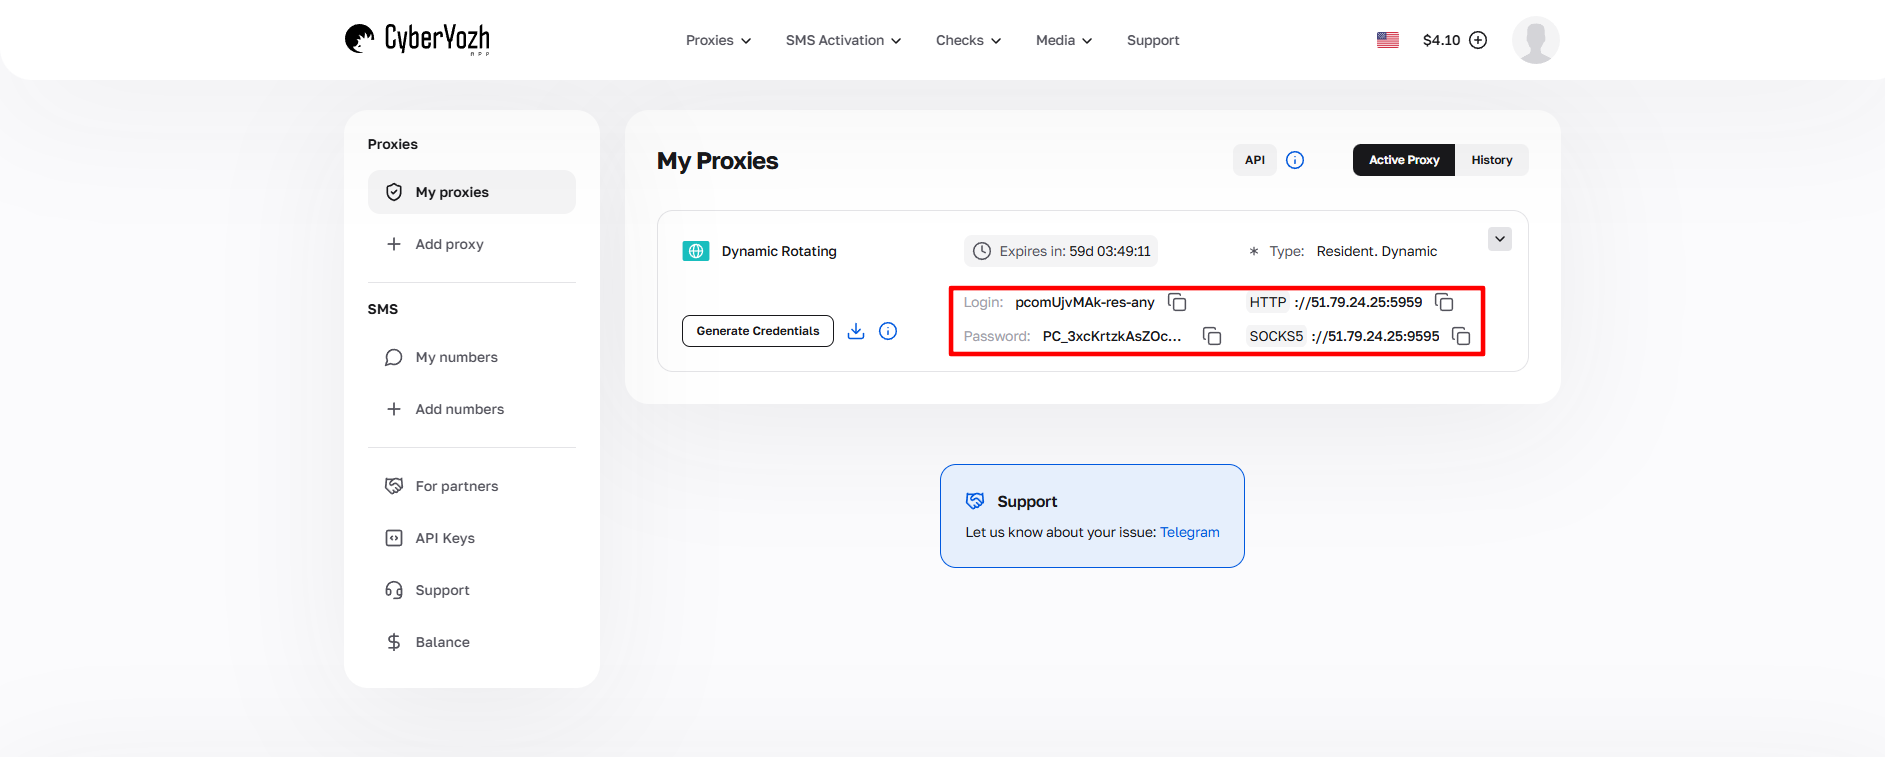 Fig. 1. Screenshot of the CyberYozh platform interface, showing the location of proxy connection data. The image displays fields for IP address (Host), port (Port), Username, and Password.
Part 3. Profile Creation and Connection
Step 1. Creating a Profile
Launch Indigo. In the main menu, click the green New Profile button.
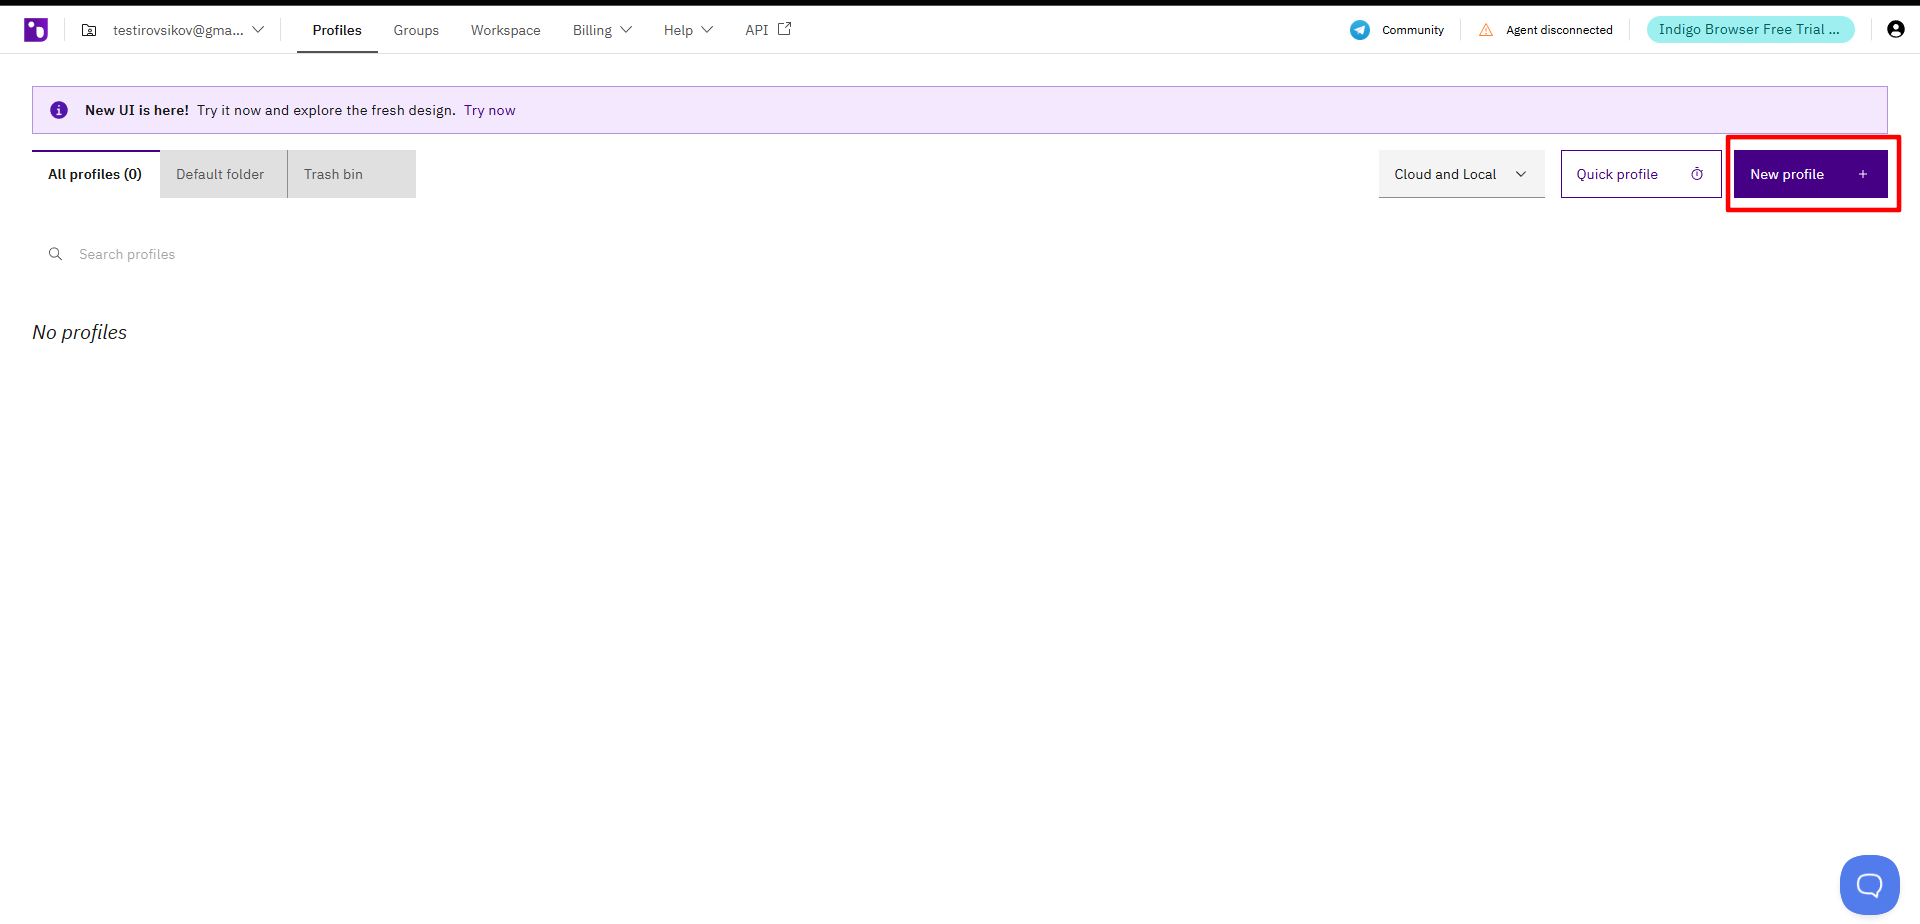 Fig. 2. Indigo user interface showing the new profile creation window. The image shows the "New Profile" button to start setting up a new browser profile.
Step 2. Choosing Parameters
- Name: Set a name for the profile.
- OS (Operating System): An important point. Choose the OS that is actually on your PC (Windows to Windows, macOS to macOS). This makes the environment settings as natural as possible.
- Browser: Choose an engine:
- Mimic (Chrome): Ideal for Google services and most marketing tasks.
- Stealthfox (Firefox): Good if you need variety or specific work with web resources.
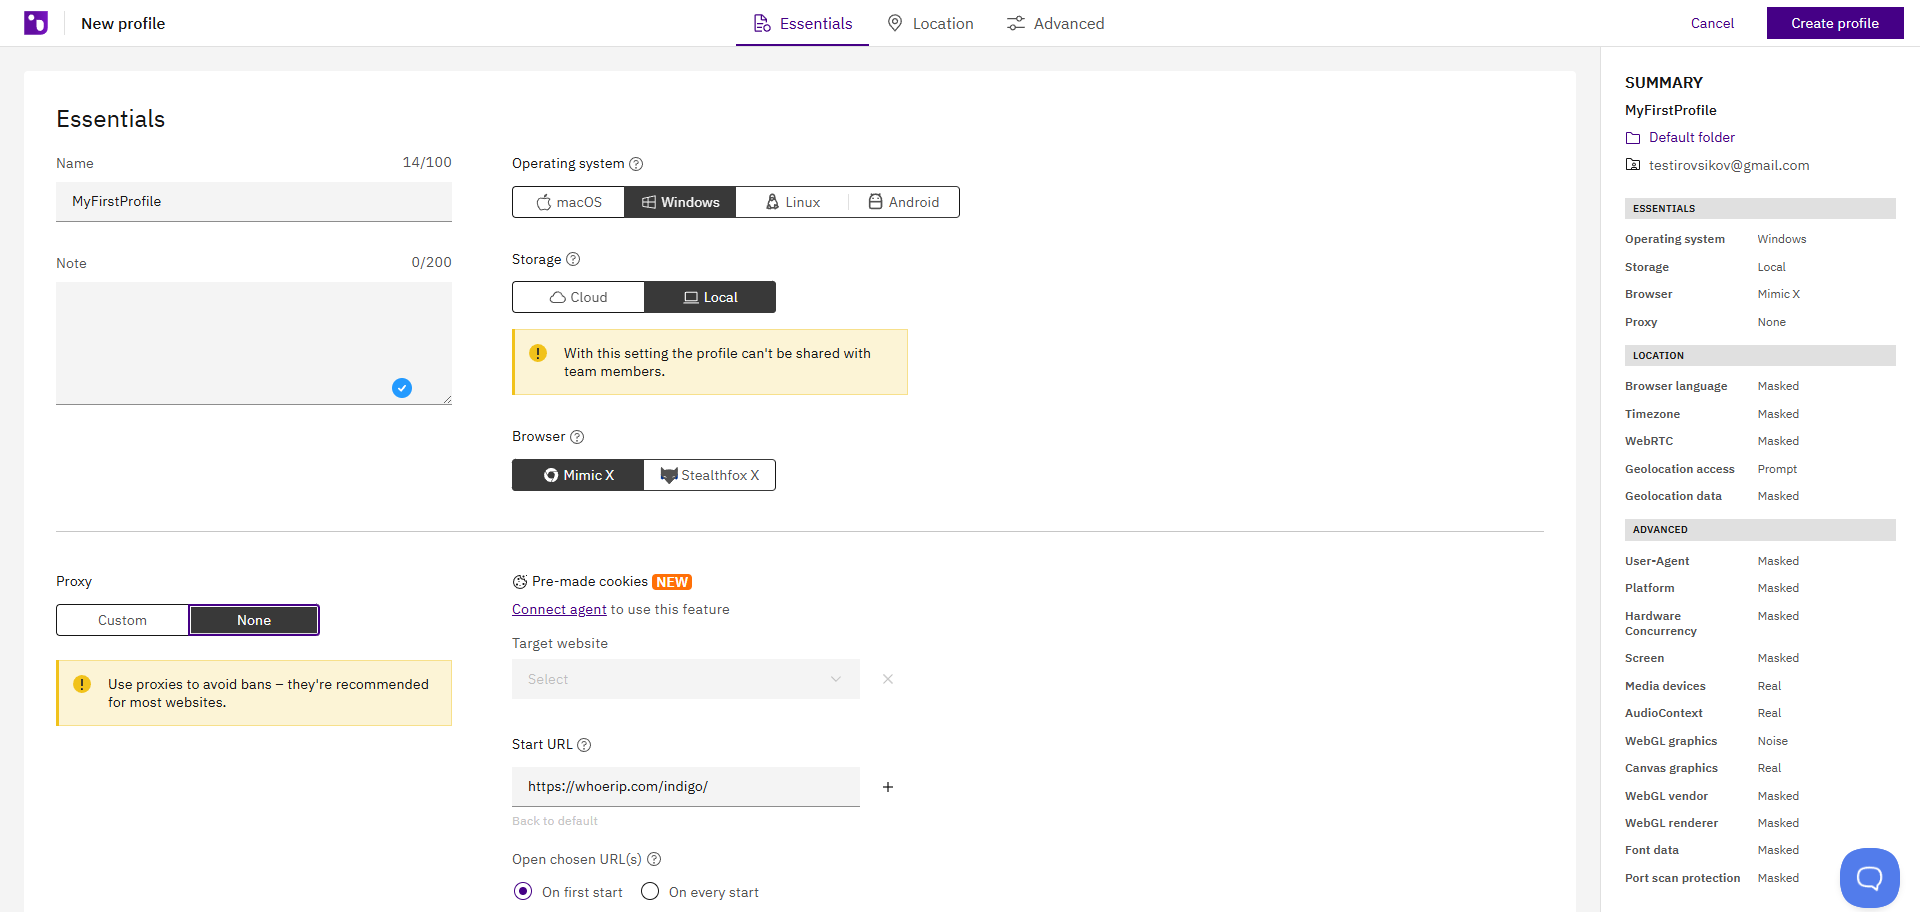 Fig. 3. Indigo program interface during browser profile setup. The image presents the main fields for profile configuration, including browser settings, operating system, and user agent.
Step 3. Proxy Configuration (Edit Proxy Settings)
Click the Edit proxy settings button. The configuration menu will open.
- Connection type: Select the protocol. We recommend SOCKS5. It works faster with media content and supports UDP, which is important for WebRTC.
- Enter your proxy data:
- Proxy Host (IP)
- Port
- Login & Password
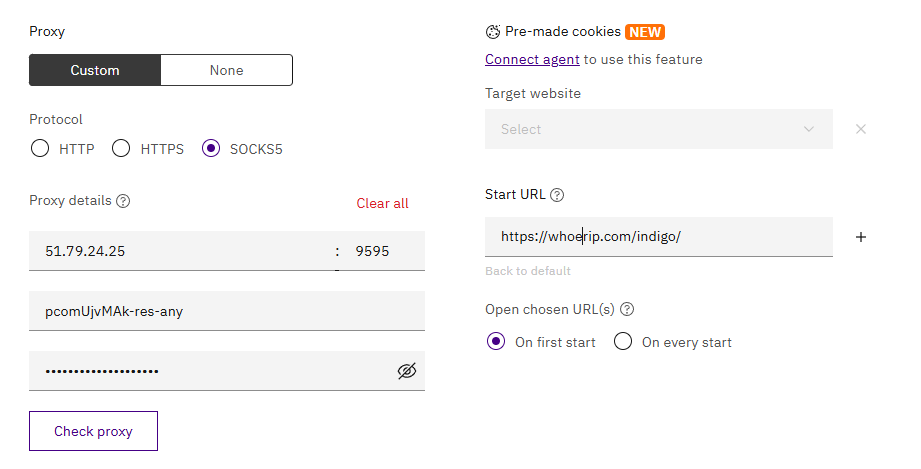 Fig. 4. Proxy configuration window in Indigo with fields for entering proxy server parameters: host, port, proxy type, and authentication data.
Step 4. Connection Check
Be sure to click the Check Proxy button before saving.
- Indigo will check the server availability and determine the geolocation (Country, City, Timezone).
- If the check is successful (green checkmark), the profile's timezone and geolocation will adjust to the proxy automatically.
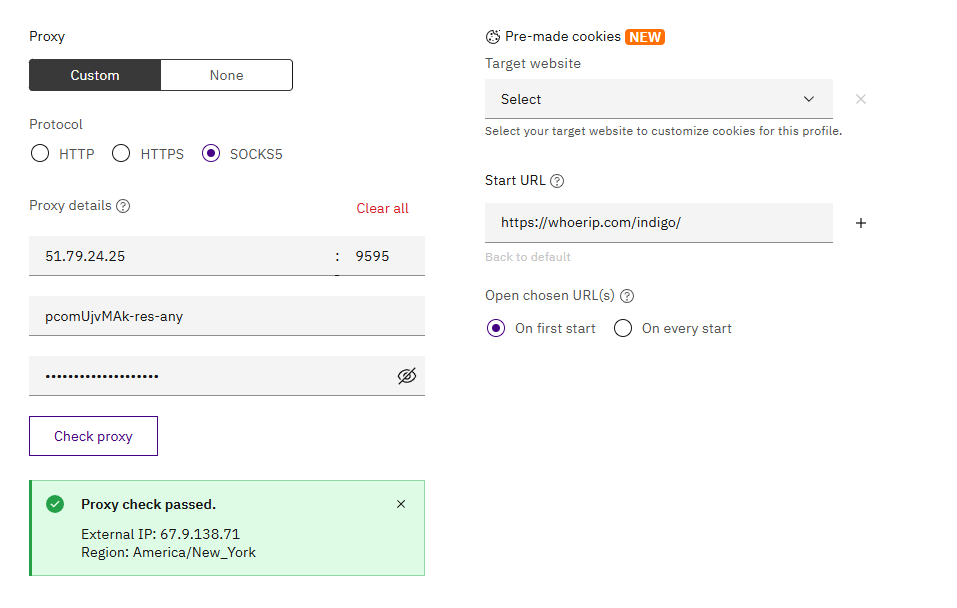 Fig. 5. Proxy connection check dialog box in Indigo. The image shows the "Check Proxy" button and the check status indicator.
Click Get new fingerprint and then Create Profile to complete the setup.
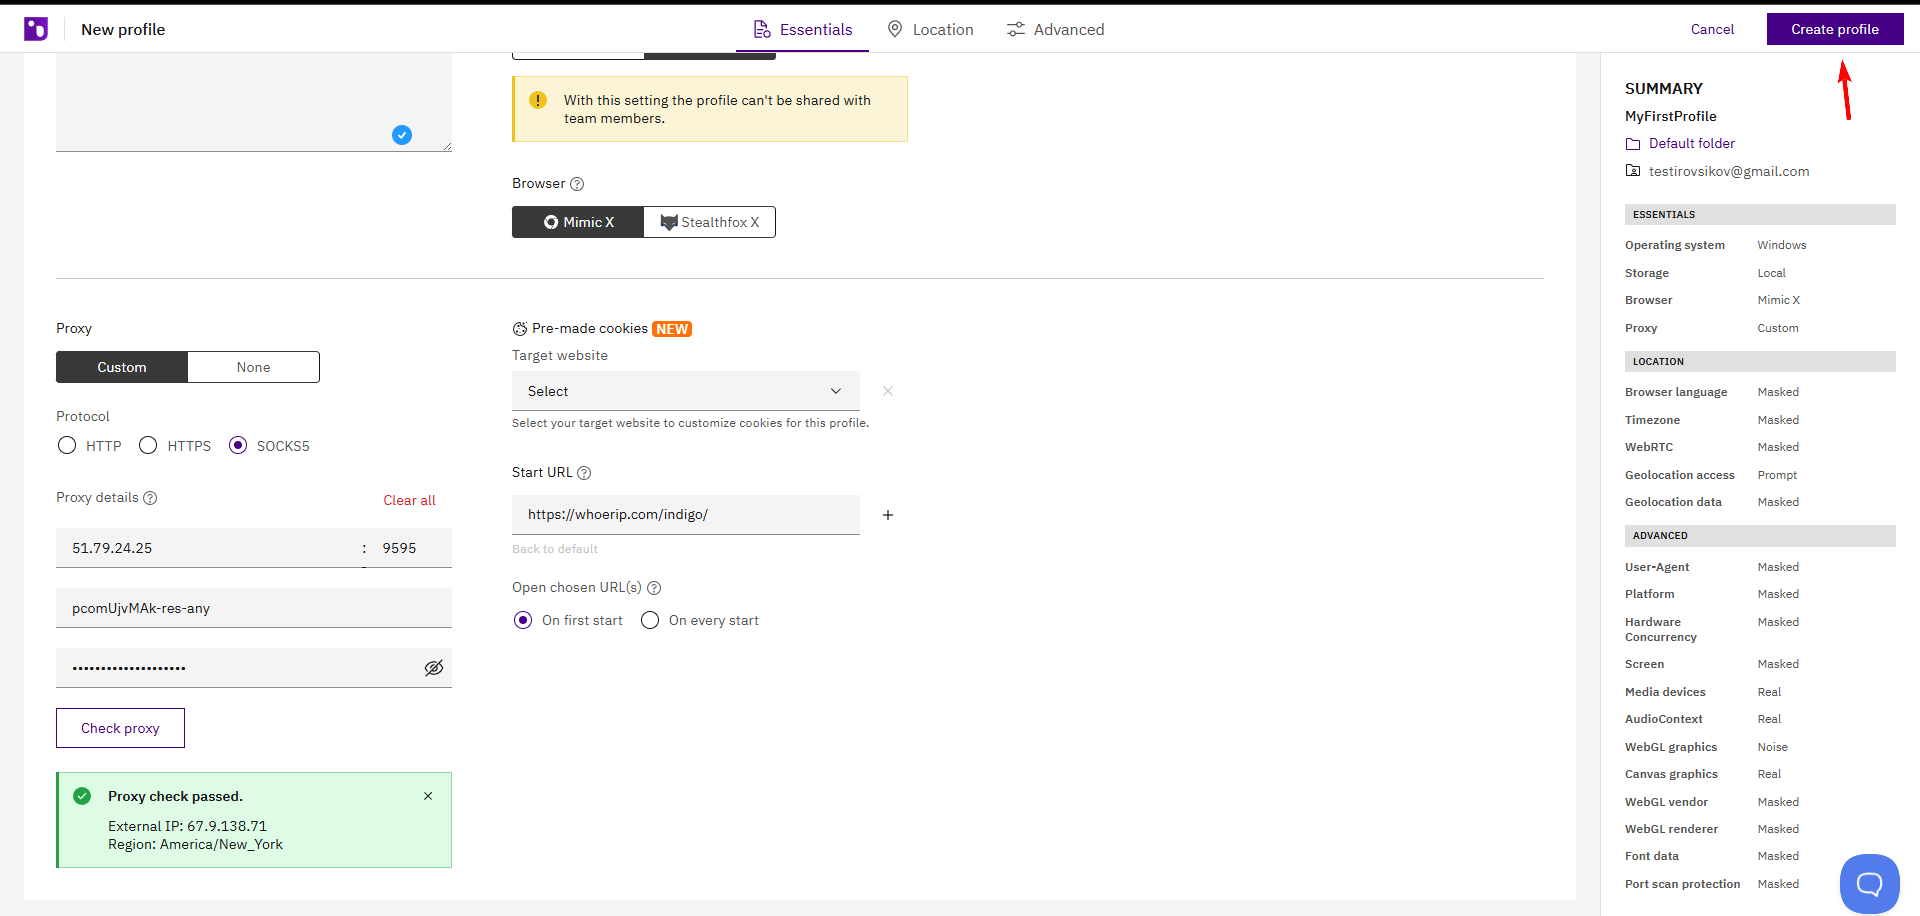 Fig. 6. Indigo interface at the final stage of profile creation. The "Create Profile" button finishes the setup process for the new profile.
Part 4. Launch and Configuration Check
In the profile list, click the Start button next to the created profile.
 Fig. 7: Launching the profile after proxy configuration. The image shows the list of profiles with control elements.
A browser window will open. Before you start working with the required platforms, make sure your privacy settings and network configurations are applied correctly. Go to browserleaks.com/ip or whoer.net.
What to look for:
- Is your real IP hidden?
- Does WebRTC show your local IP?
- Does the DNS match the proxy country?
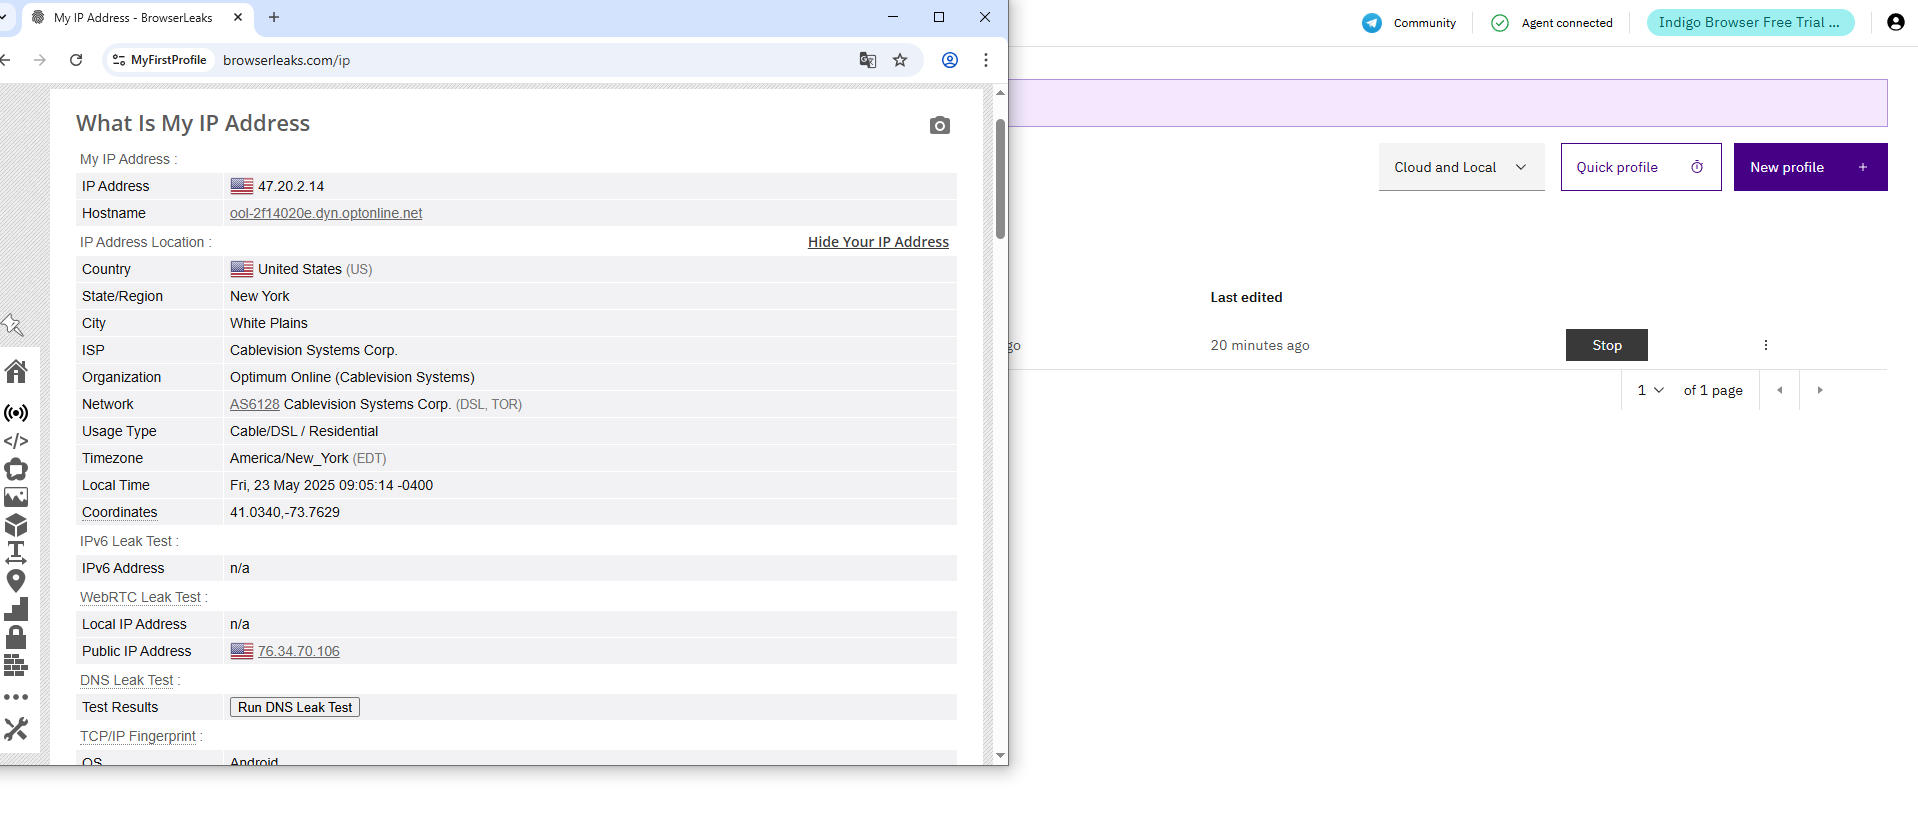 Fig. 8. IP check service webpage showing the results of proxy connection testing in the Indigo profile.
If all points differ from your real IP, Fingerprints, and WebRTC — you are ready to work.
Conclusion
Indigo is a professional tool, and it requires high-quality network solutions.
- For marketing campaigns and SMM, use Private Mobile Proxies.
- For e-commerce and corporate testing, use Static Residential Proxies.
You can always find reliable proxies with UDP support and high trust in the CyberYozh App catalog.
