
Linken Sphere — is not just an antidetect browser; it is a powerhouse for professionals obsessed with security. Unlike many competitors, it offers advanced fingerprinting protection mechanisms and a completely isolated environment for work. It is the #1 choice for secure remote work, privacy testing, and digital asset management.
However, even "Sphere" requires careful attention to network settings: to maintain confidentiality, it is necessary to use high-quality IP addresses with a high level of trust.
In this guide, we will break down which type of proxy to choose for your tasks (so you don't waste your budget) and how to properly configure the connection in Linken Sphere.
Part 1. Strategy: Which proxy do you need for Linken Sphere?
Before creating a session, you need to choose the right proxy. An error in choosing the proxy type is the most common cause of blocks.
1. Residential Proxies (ISP)
- What for: Secure access to regional web services, corporate marketing research, and privacy testing.
- The Essence: Static IP addresses from home internet service providers.
- Why in Linken Sphere: "Sphere" is often used for tasks requiring high trust. A residential IP lets the system know that you are a regular home user. It is important to use static IPs so the address does not change during the session.
2. Mobile Proxies (4G/5G)
- What for: Managing professional advertising campaigns, SMM, and digital marketing.
- The Essence: Dynamic IPs from cellular operators with rotation capabilities.
- Why in Linken Sphere: If you use the browser to manage ads or SMM projects, mobile proxies provide a high level of trust and dynamic IP rotation thanks to CGNAT technology, but you can also set up rotation for private mobile proxies via an IP change link.
3. Datacenter Proxies (Server)
- Verdict: Use only for technical tasks or simple websites. For serious work in Linken Sphere (where the license is not cheap), saving on proxies and taking server ones is illogical and risky.
Part 2. Data Preparation
For maximum security, we recommend using verified proxies from CyberYozh App. We guarantee clean IPs and support for popular protocols.
After purchase, you will receive the following data in your personal account:
- IP (Host):
172.98.60.180 - Port:
58763 - Login / Password: Authorization data.
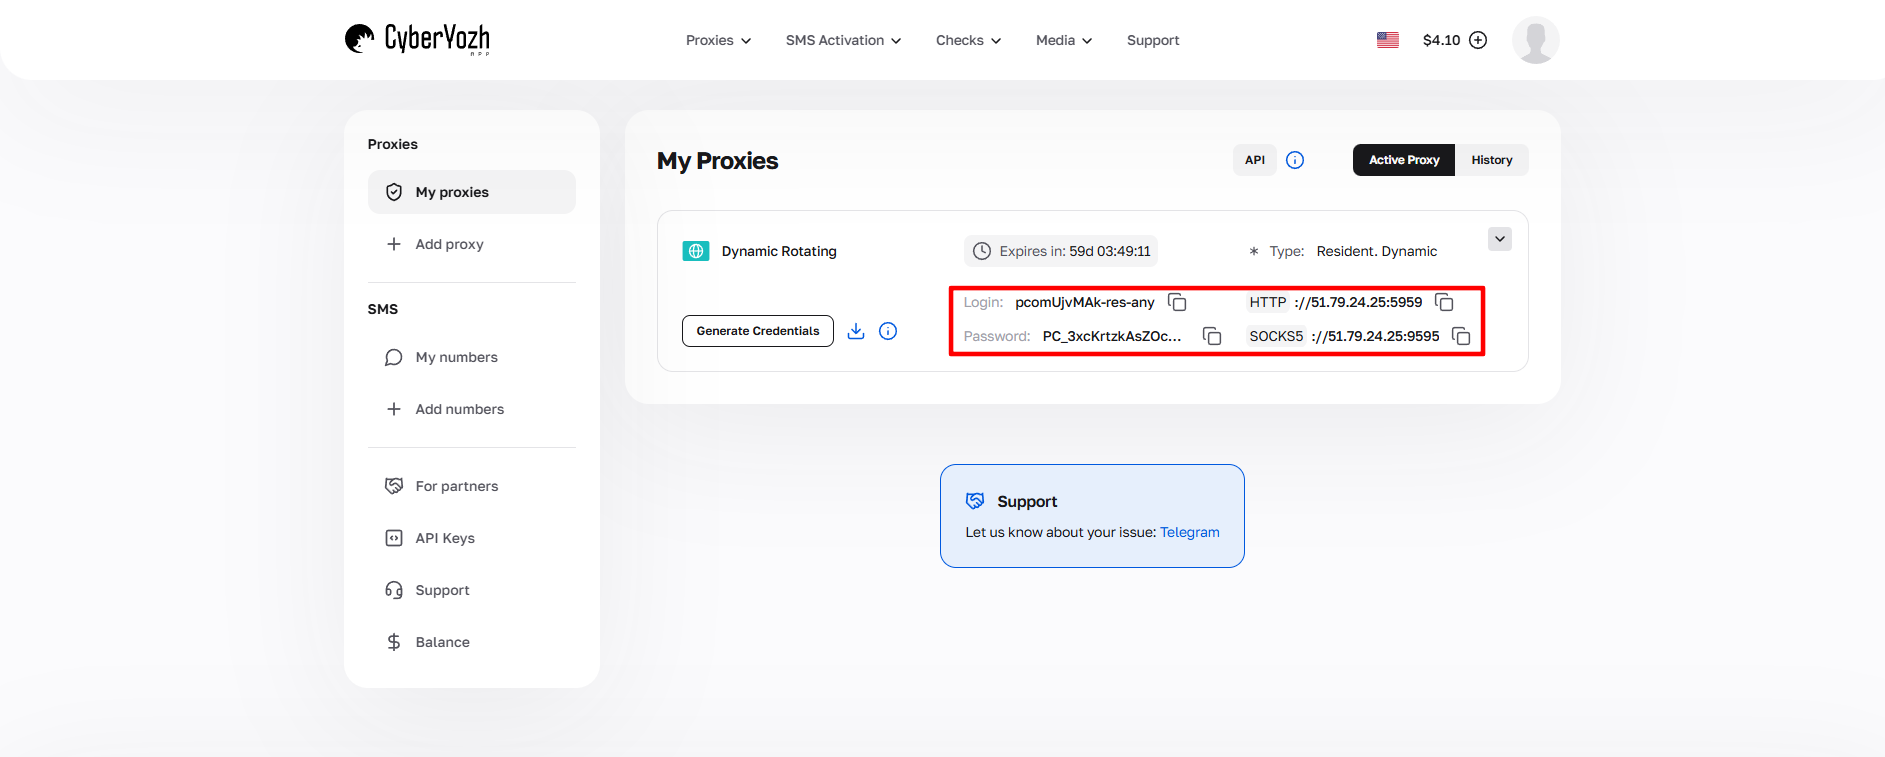 Fig. 1. Screenshot of the CyberYozh platform interface, demonstrating the location of data for connecting to the proxy server. The image shows fields for IP address (Host), port (Port), username (Proxy Username), and password (Proxy Password).
Part 3. Configuring Proxy in Linken Sphere (Step-by-Step)
Note: We use the English interface, as it is the standard in the Linken Sphere community.
Step 1. Creating a New Session
- Launch the browser.
- Click the “Set up new session” button (or “New identity” in older versions).
- The session setup window (Session provider) will open.
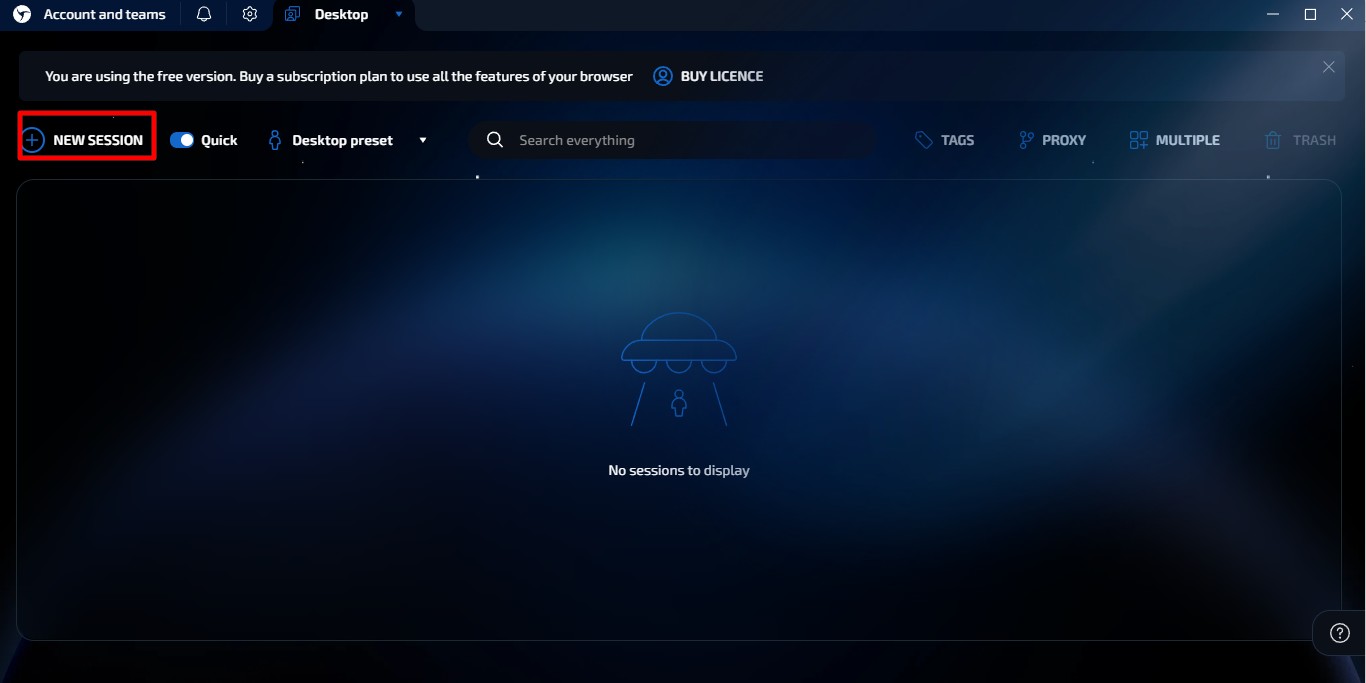 Fig. 2. Interface for setting up a new session in Linken Sphere.
Step 2. Choosing and Configuring the Proxy
In the network settings block, find the connection menu. Linken Sphere supports HTTP, SOCKS5, and SSH.
- Our choice — SOCKS5. This is the most secure and fastest protocol for Linken Sphere tasks. It supports UDP and provides better anonymity.
- Click “Set proxy”.
- In the window that opens, enter the data:
- Type: SOCKS5
- IP / Host: Your address.
- Port: Port.
- Login / Password: Your credentials.
 Fig. 3. New session creation window in Linken Sphere with main profile setting controls.
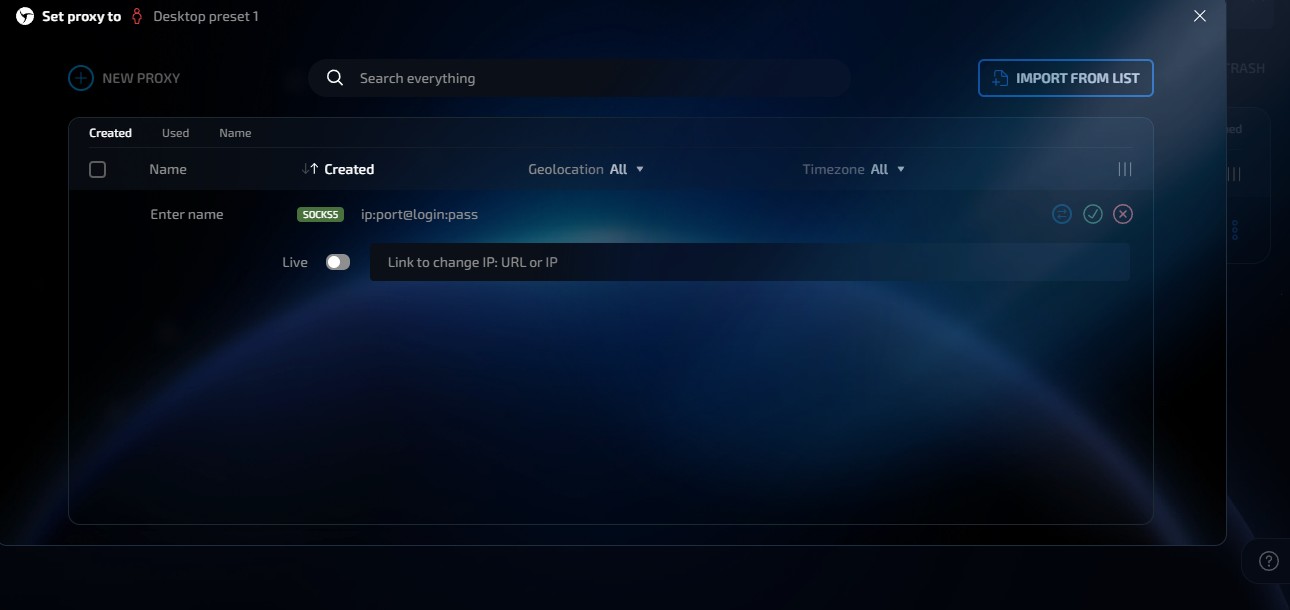 Fig. 4. Proxy server configuration dialog box in Linken Sphere, showing input fields for connection setup.
Pro Tip (Bulk Import): If you manage many authorized profiles, use the “Import from list” button. Linken Sphere understands ip:port:login:pass formats perfectly, allowing you to upload proxy data instantly.
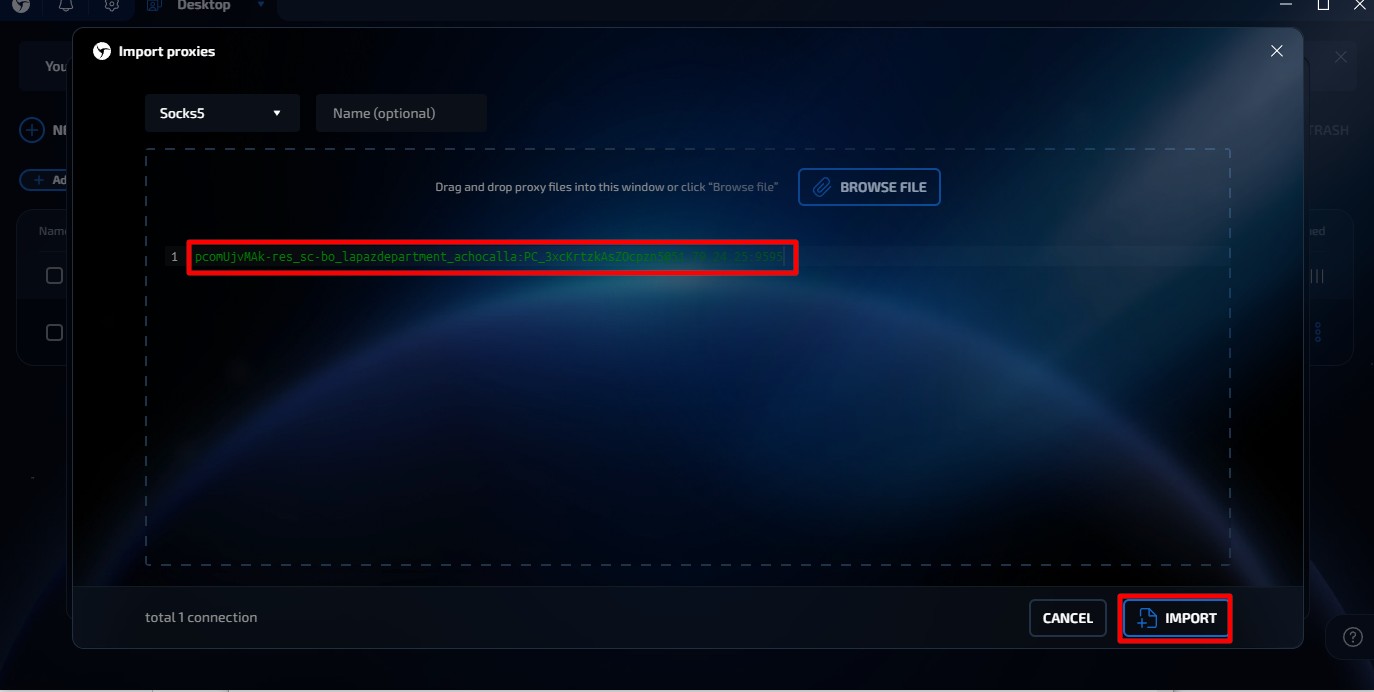 Fig. 5. Screenshot of the interface for adding proxies via Import from list in the Linken Sphere browser.
Step 3. Connection Check (Check Proxy)
Never start a session without checking.
- Click the “Check Proxy” button (or the check icon).
- If the proxy is working and the data is entered correctly, you will see a green message with GEO information (country, city).
- If the message is red — check your balance, input format, or change the IP (if it’s a mobile proxy).
 Fig. 6. Screenshot of the proxy settings interface in the Linken Sphere browser.
 Fig. 7. Visual representation of the proxy connection check interface in the Linken Sphere browser.
Step 4. Finalizing Setup
After a successful proxy check, configure the other session parameters (User-Agent, screen resolution, language). Linken Sphere usually adjusts these automatically based on your proxy's GEO. Click “Save” or “Launch”.
Part 4. Launching and Verifying Anonymity
Select the protocol for which you configured the proxy.
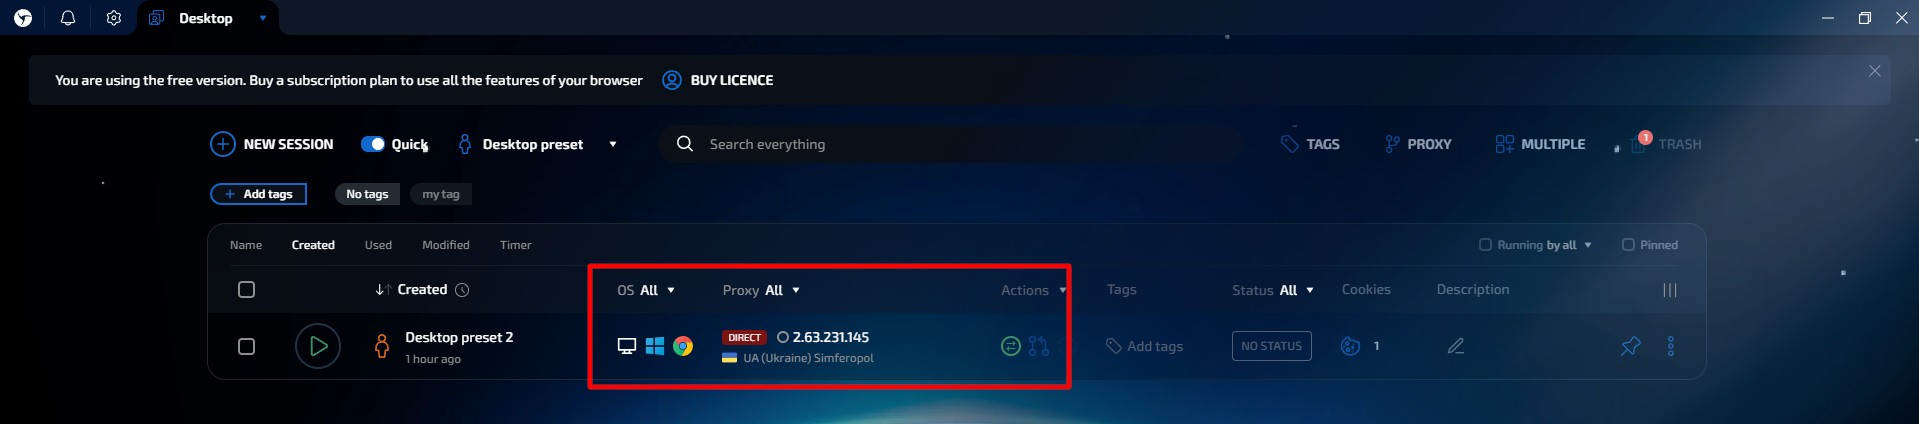

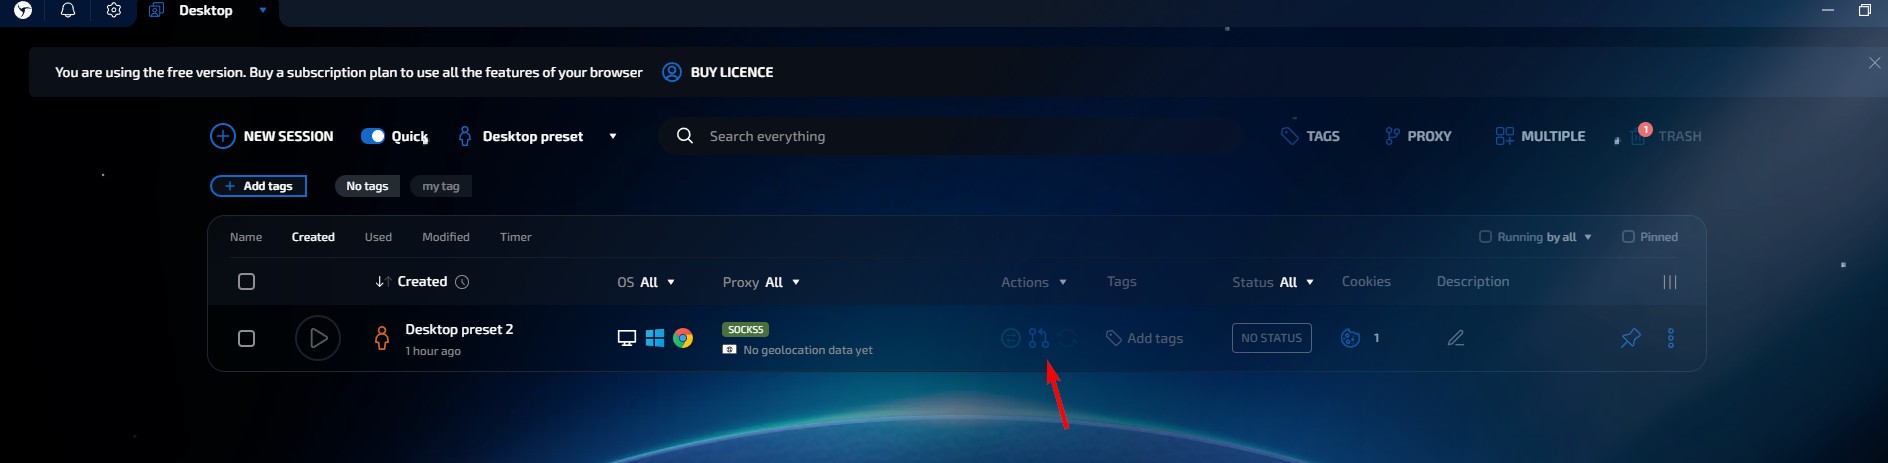
 Fig. 8, 9, 10, 11. Interface for selecting the proxy connection protocol in Linken Sphere.
Before logging into a payment system or advertising account, ensure your safety. Launch the configured profile and go to browserleaks.com/ip or whoer.net.
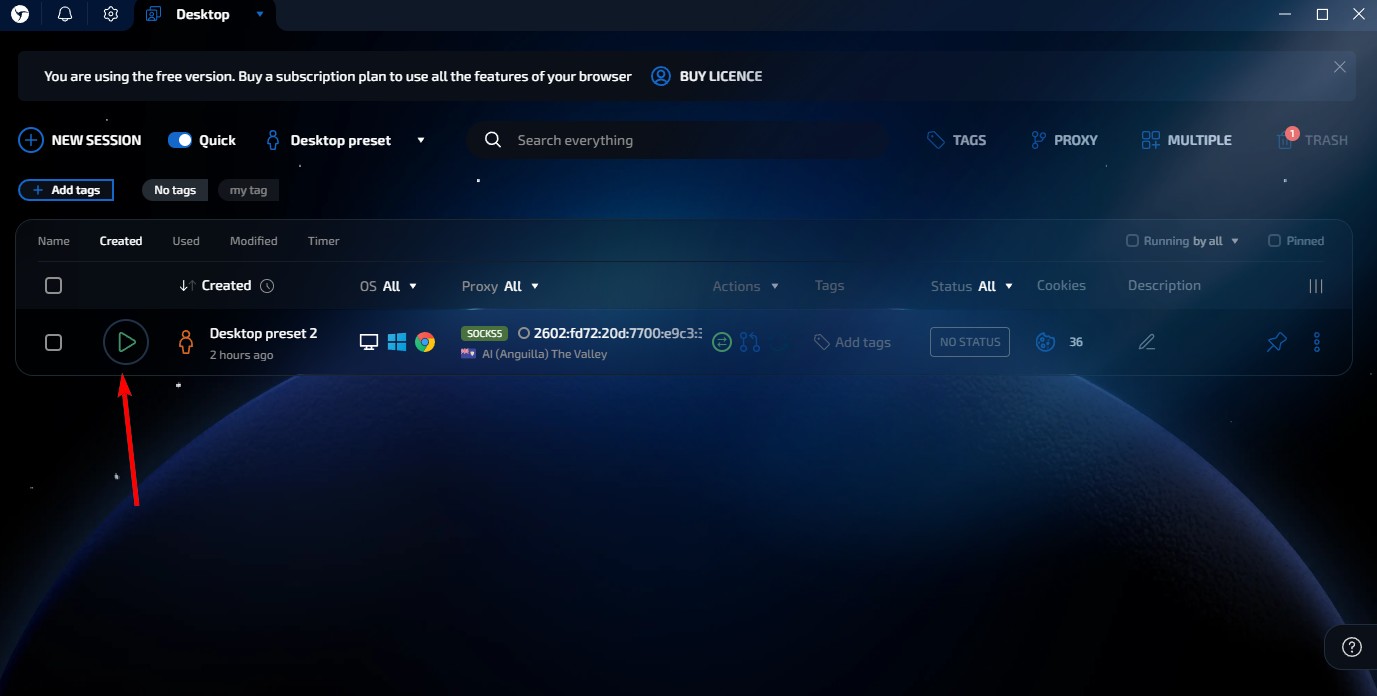 Fig. 12. Screenshot demonstrating the profile launch.
The session is launched. A browser window will open.
Security Checklist:
- IP Address: Must match the one purchased.
- DNS: Must not "leak" (showing your real provider). Linken Sphere is famous for shielding DNS well, but with a high-quality SOCKS5, it works even more reliably.
- Geo: The system's time zone must match the proxy's time zone.
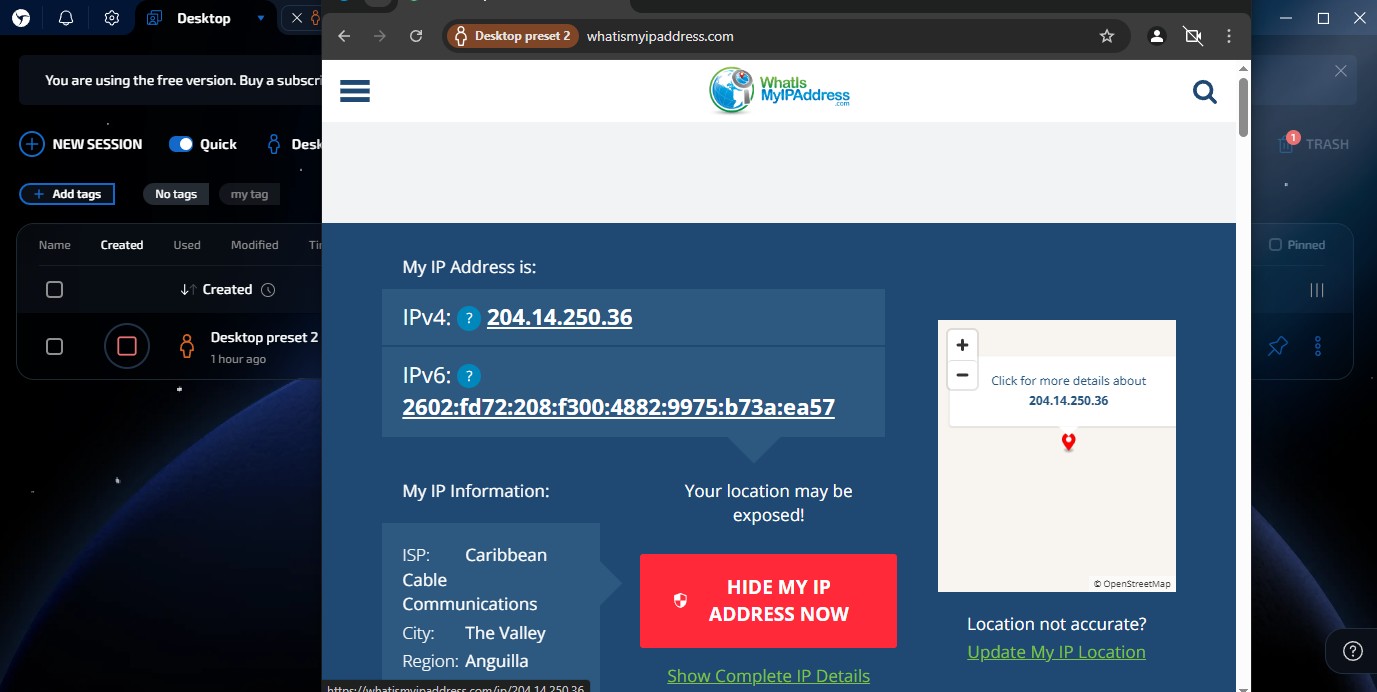 Fig. 13. Screenshot of the IP address verification dialog box in Linken Sphere, showing the results of the current network connection check via the proxy server.
If all checks are passed — your connection is completely secure, and your confidentiality is reliably protected.
Conclusion
Linken Sphere — is a tool for those who do not tolerate compromises in security.
- For digital asset management and corporate tasks, use Residential proxies.
- For digital marketing and SMM, use Mobile proxies.
You can find the most reliable private proxies for the high requirements of Linken Sphere in the CyberYozh App catalog. Wishing you successful and safe work!
