
Mozilla Firefox — is one of the few browsers that allows you to configure a proxy separately from the entire operating system. This is a killer feature for those who want to route browser traffic through a secure channel (e.g., USA) while keeping games and messengers working directly (for low ping).
In this guide, we will break down two configuration methods (built-in and via FoxyProxy) and, most importantly, explain what type of proxy you need for your tasks.
Part 1. Which proxy to choose for Firefox?
Before diving into the settings, choose the right "fuel." Firefox is a versatile browser, and its tasks can vary.
1. Datacenter Proxies — For content and speed
- What it is: IP addresses of hosting providers.
- What it's for: Secure access to international content (YouTube, Netflix, LinkedIn), file downloading, and protected web surfing.
- Pro: They are the cheapest and fastest. Ideal for regular web surfing.
2. Residential Proxies (ISP) — For shopping and work
- What it is: IP addresses of home internet providers.
- What it's for: Shopping in foreign stores (iHerb, Amazon, Nike), working with payment systems, and registering accounts.
- Pro: You look like a regular home user, which ensures high reliability and connection stability.
3. Mobile Proxies (4G/5G) — For SMM and social media
- What it is: IPs of mobile operators.
- What it's for: Securely managing your social media presence or separating work and personal profiles.
- Nuance: It's best to use them with privacy extensions to manage your digital footprint and increase anonymity.
- 👉 You can read more about mobile proxies here
Part 2. Data Preparation
For the setup, we will need data from a reliable provider. We recommend CyberYozh App — we provide proxies with UDP support.
After purchasing, you will receive:
- IP (Host):
172.98.60.180 - Port:
58763 - Login / Password: Authorization data.
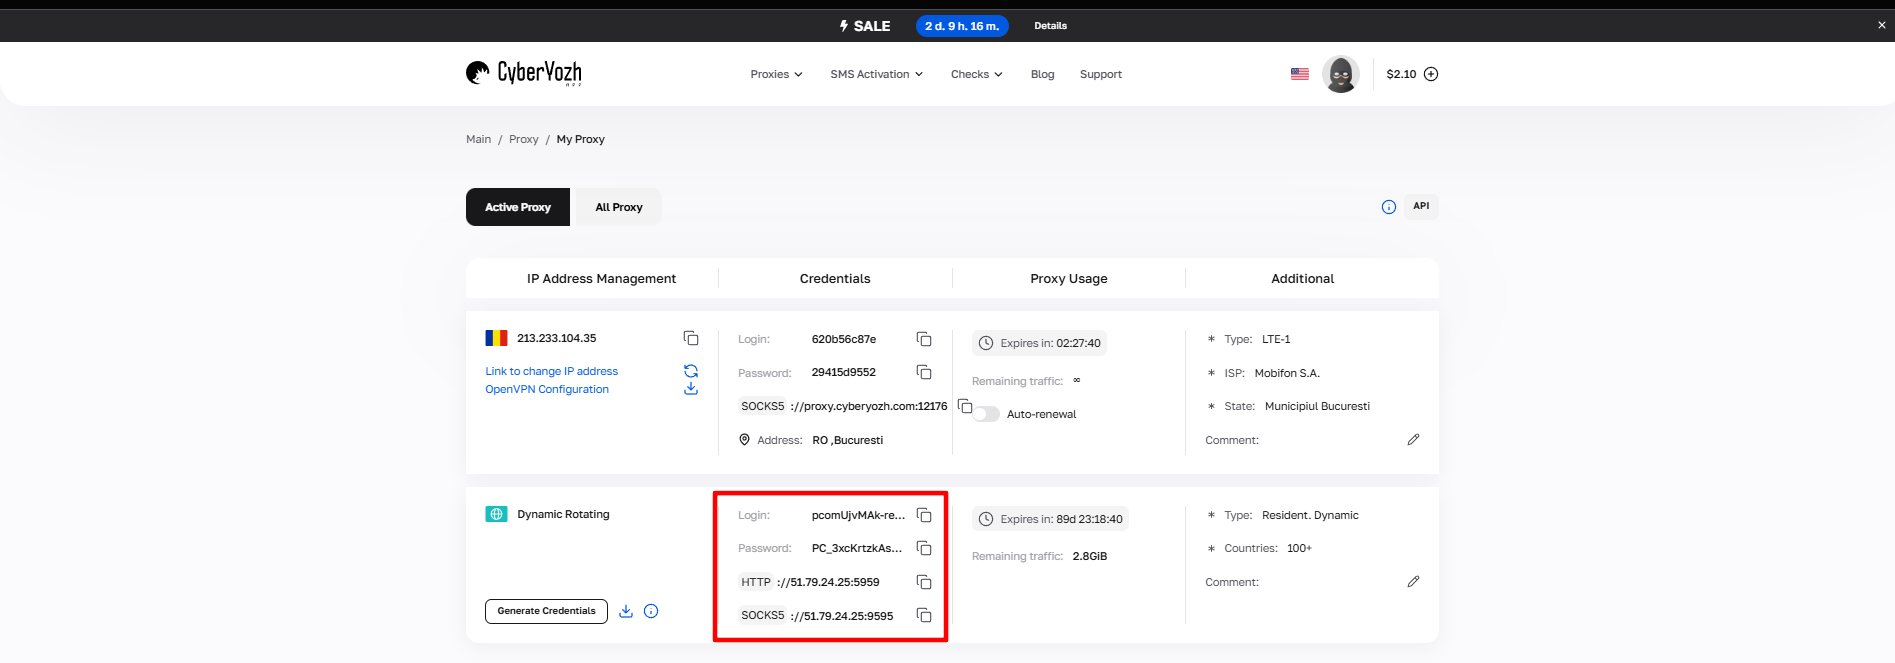 Fig. 1. Screenshot of the CyberYozh platform interface, showing the location of data for connecting to the proxy server. The image displays fields for IP address (Host), port (Port), username (Proxy Username), and password (Proxy Password).
Part 3. Method 1: Built-in Browser Configuration (No extensions)
This method is suitable if you have one proxy and want to use it constantly.
Open the Firefox menu (three bars in the upper right corner) -> Settings.
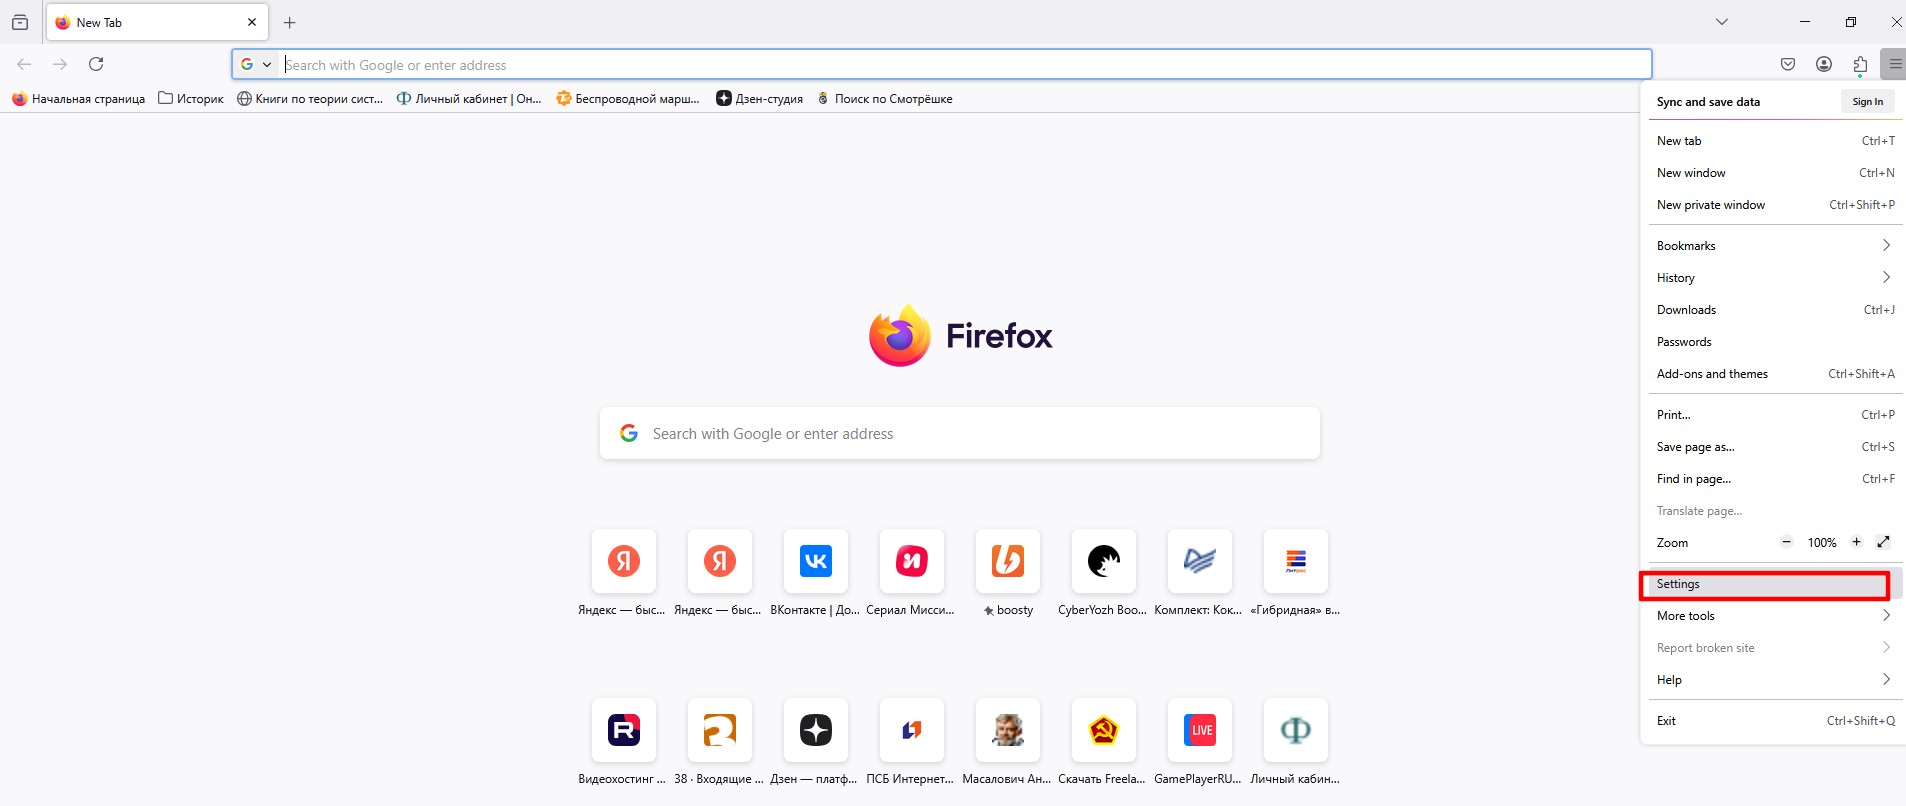 Fig. 2. Mozilla Firefox browser interface with the settings menu highlighted, located in the upper right corner as a button with three horizontal bars.
Scroll to the bottom of the page to the Network Settings section and click the Settings... button.
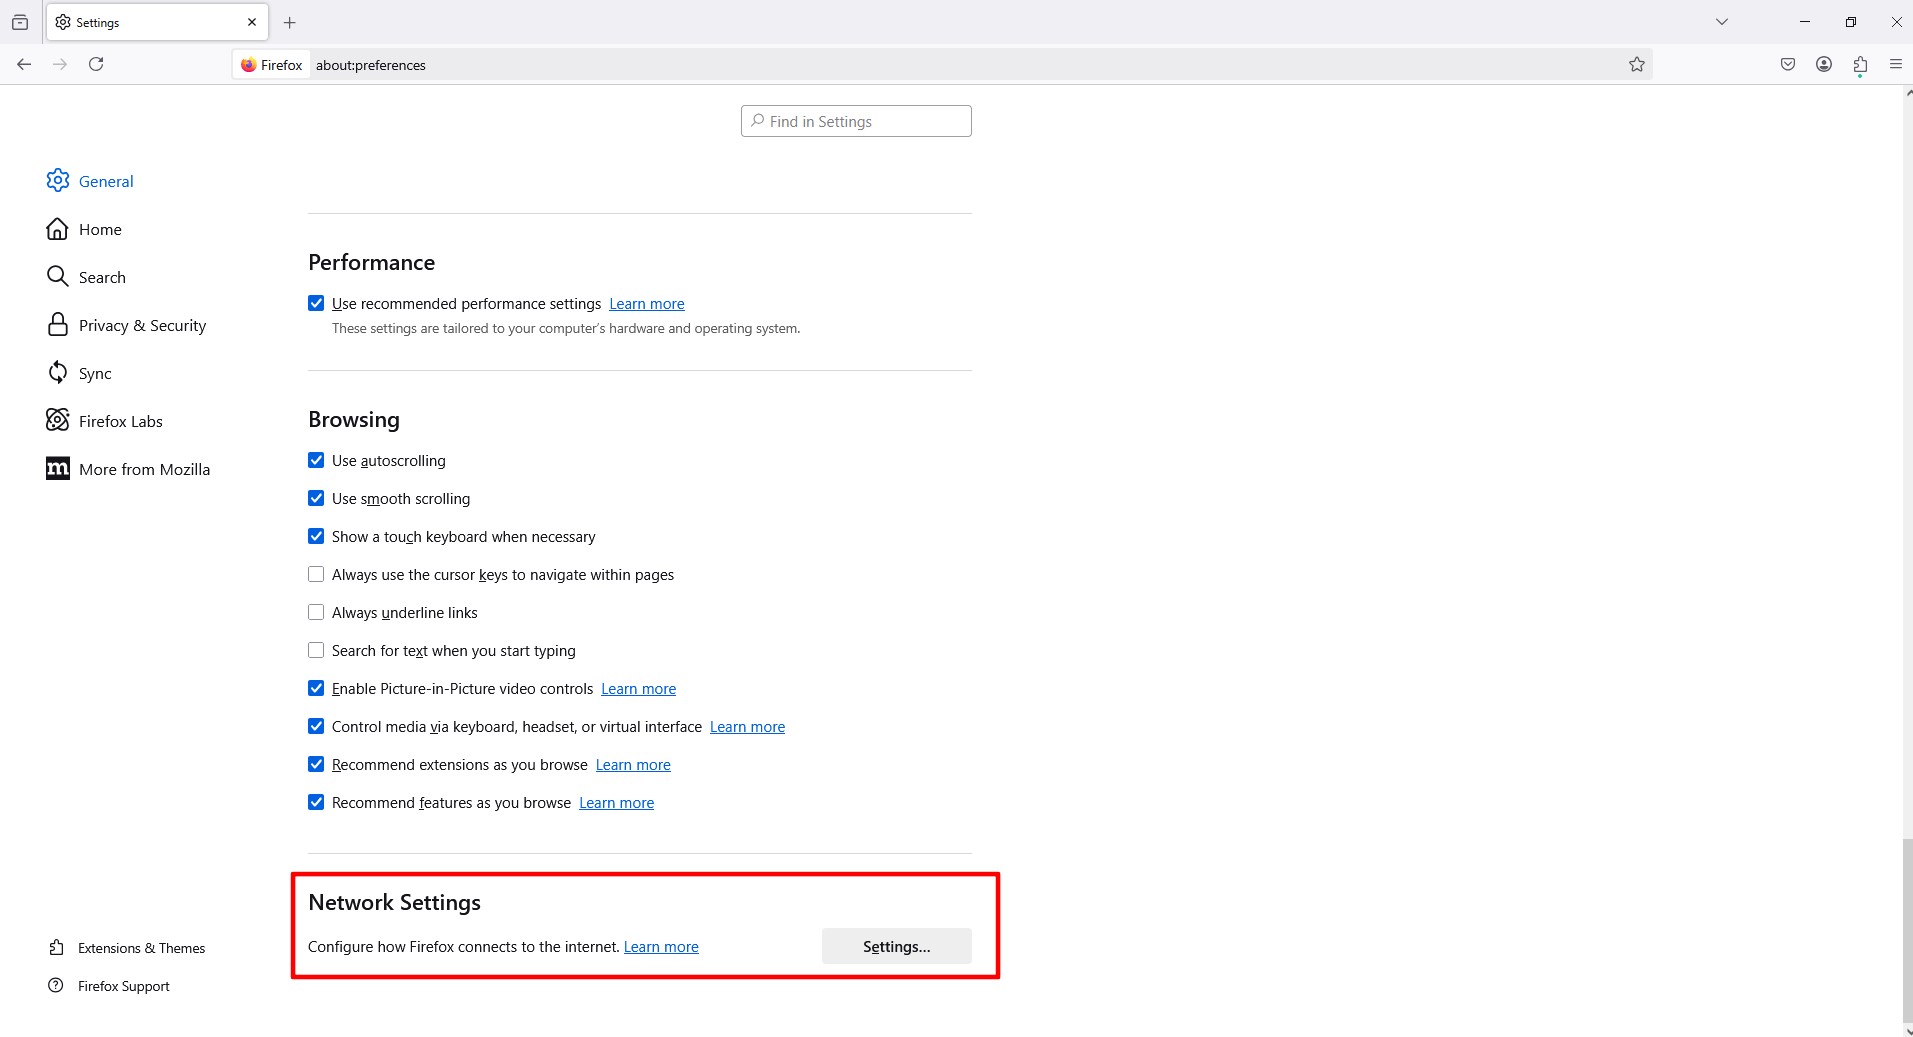 Fig. 3. Firefox network settings section with the "Settings..." button for configuring proxy connection parameters.
In the window that opens, select Manual proxy configuration.
- For HTTP proxy: Enter the IP and Port in the HTTP Proxy field. Check the box "Also use this proxy for HTTPS".
- For SOCKS5 (Recommended): Enter the IP and Port in the SOCKS Host field. Select the SOCKS v5 radio button.
- Important: In the "No proxy for" field, delete everything unnecessary if you want to proxy absolutely everything. And check the box "Proxy DNS when using SOCKS v5" — this will protect you from DNS leaks.
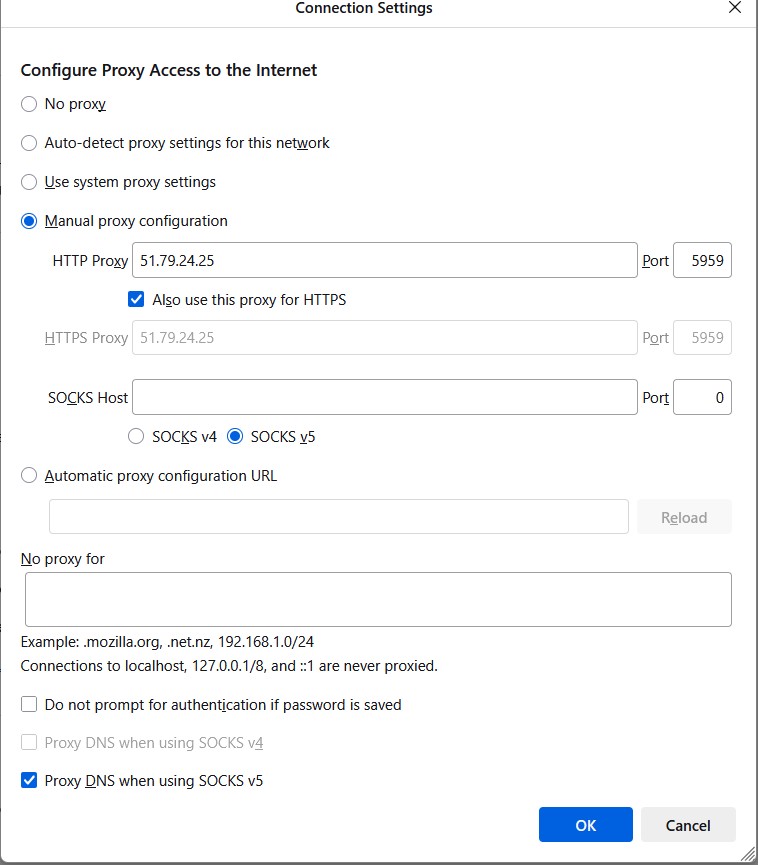 Fig. 4. Firefox proxy configuration settings dialog box with the "Manual proxy configuration" option highlighted, allowing manual entry of proxy server parameters.
Click OK.
- Try opening any website. The browser will ask for a Login and Password. Enter the data from your personal account.
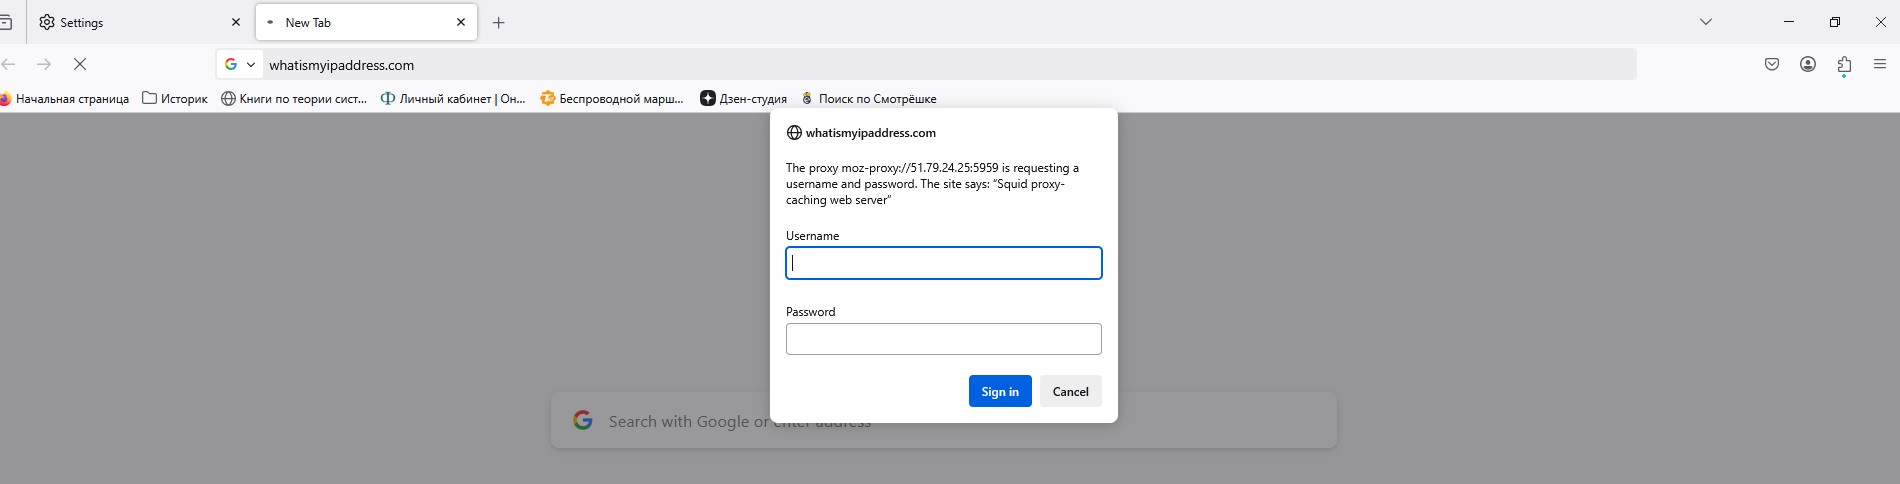 Fig. 5. Proxy server authorization dialog box in Firefox, designed for entering credentials (login and password) to authenticate on the proxy server.
Verification: Go to whoer.net or browserleaks.com and make sure the IP has changed.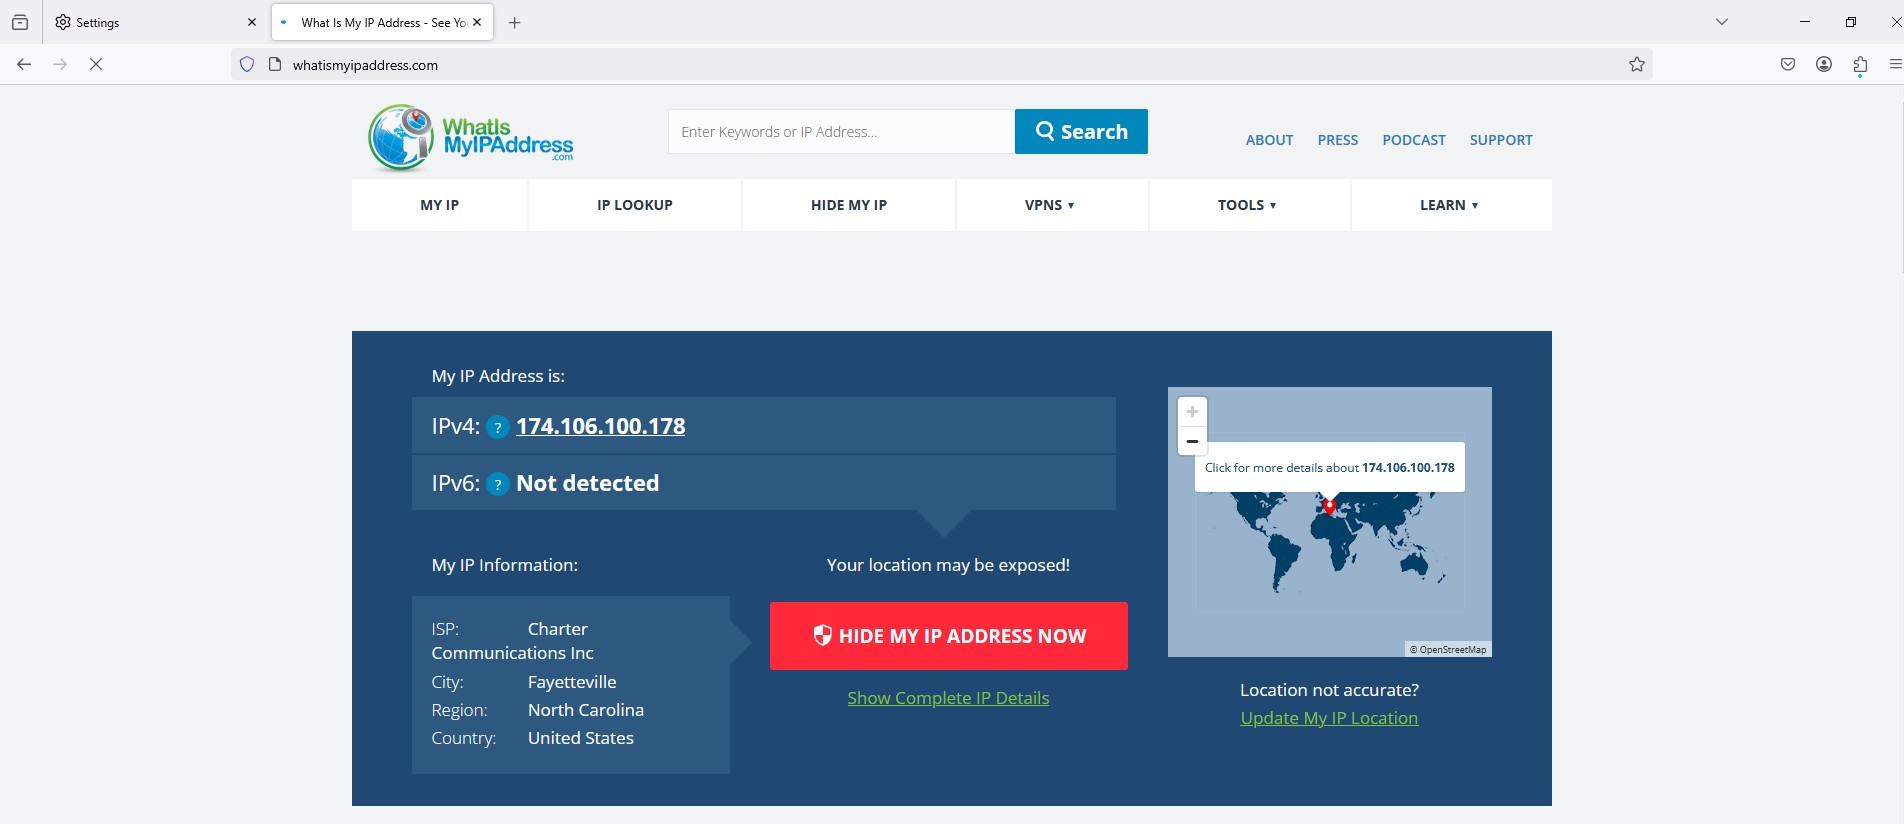 Fig. 6. Illustration of checking proxy connection settings in Mozilla Firefox, showing the interface for verifying a successful connection to the proxy server and checking the correctness of network parameter configuration.
Part 4. Method 2: Configuration via FoxyProxy
If you have several proxies or need to switch between countries quickly, built-in settings are inconvenient. It is better to use the FoxyProxy Standard extension.
Step 1. Installation
Go to the Firefox Add-ons store.
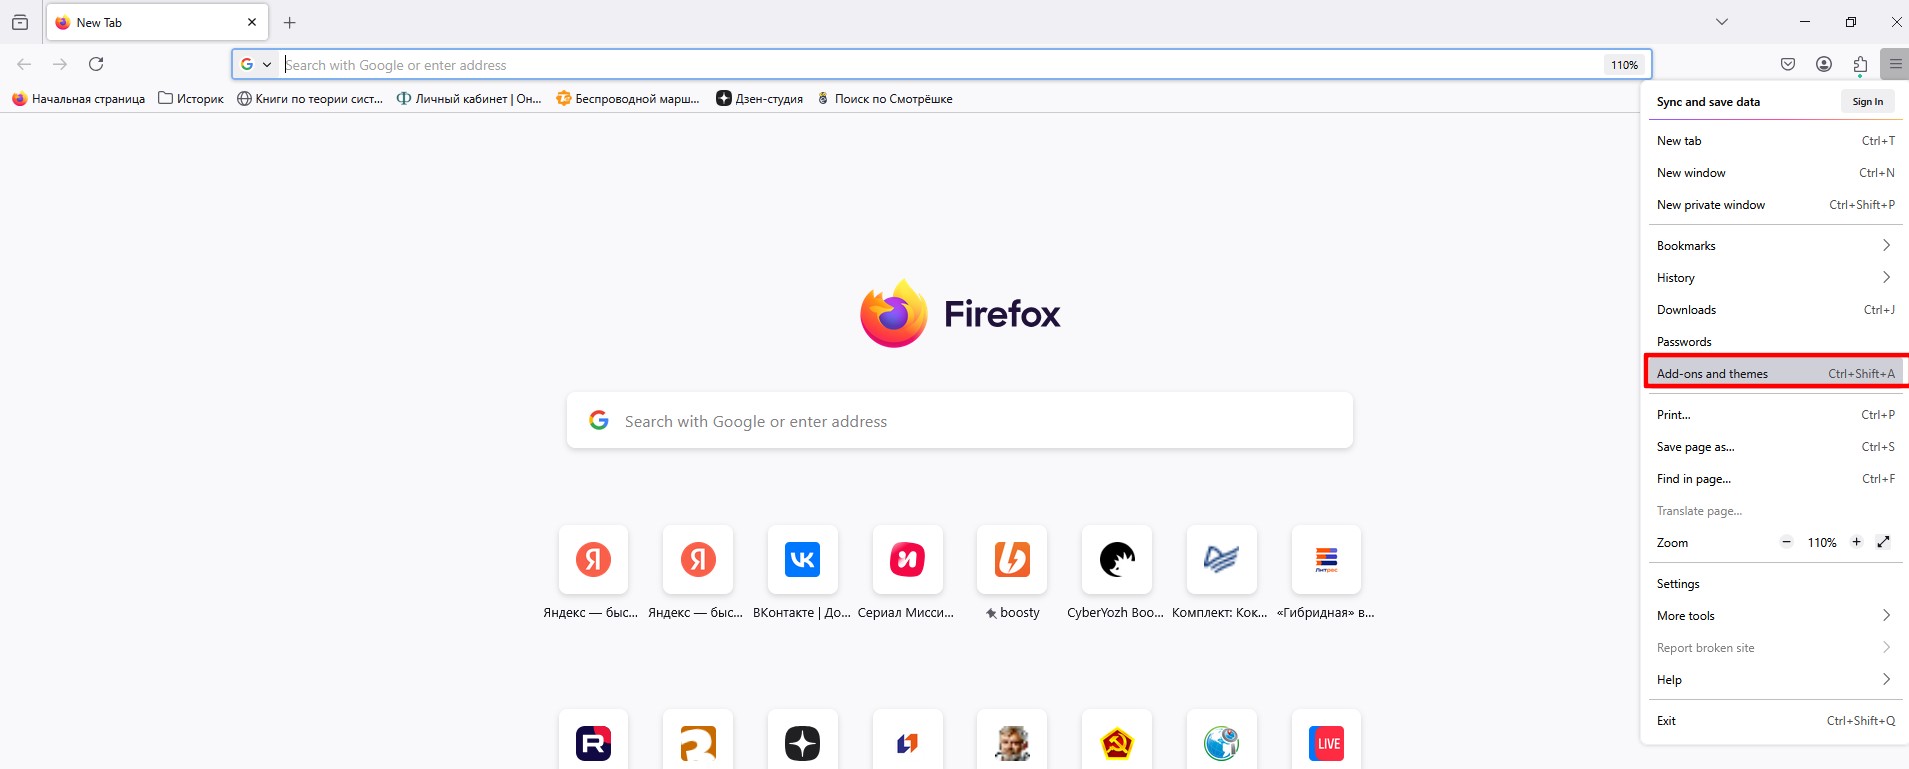 Fig. 7. Navigating to the Mozilla Firefox Add-ons store.
Search for FoxyProxy Standard and click "Add to Firefox".
 Fig. 8. Mozilla Firefox Add-ons store user interface, showing search results for "FoxyProxy Standard" with an extension card containing the name, description, and installation button.
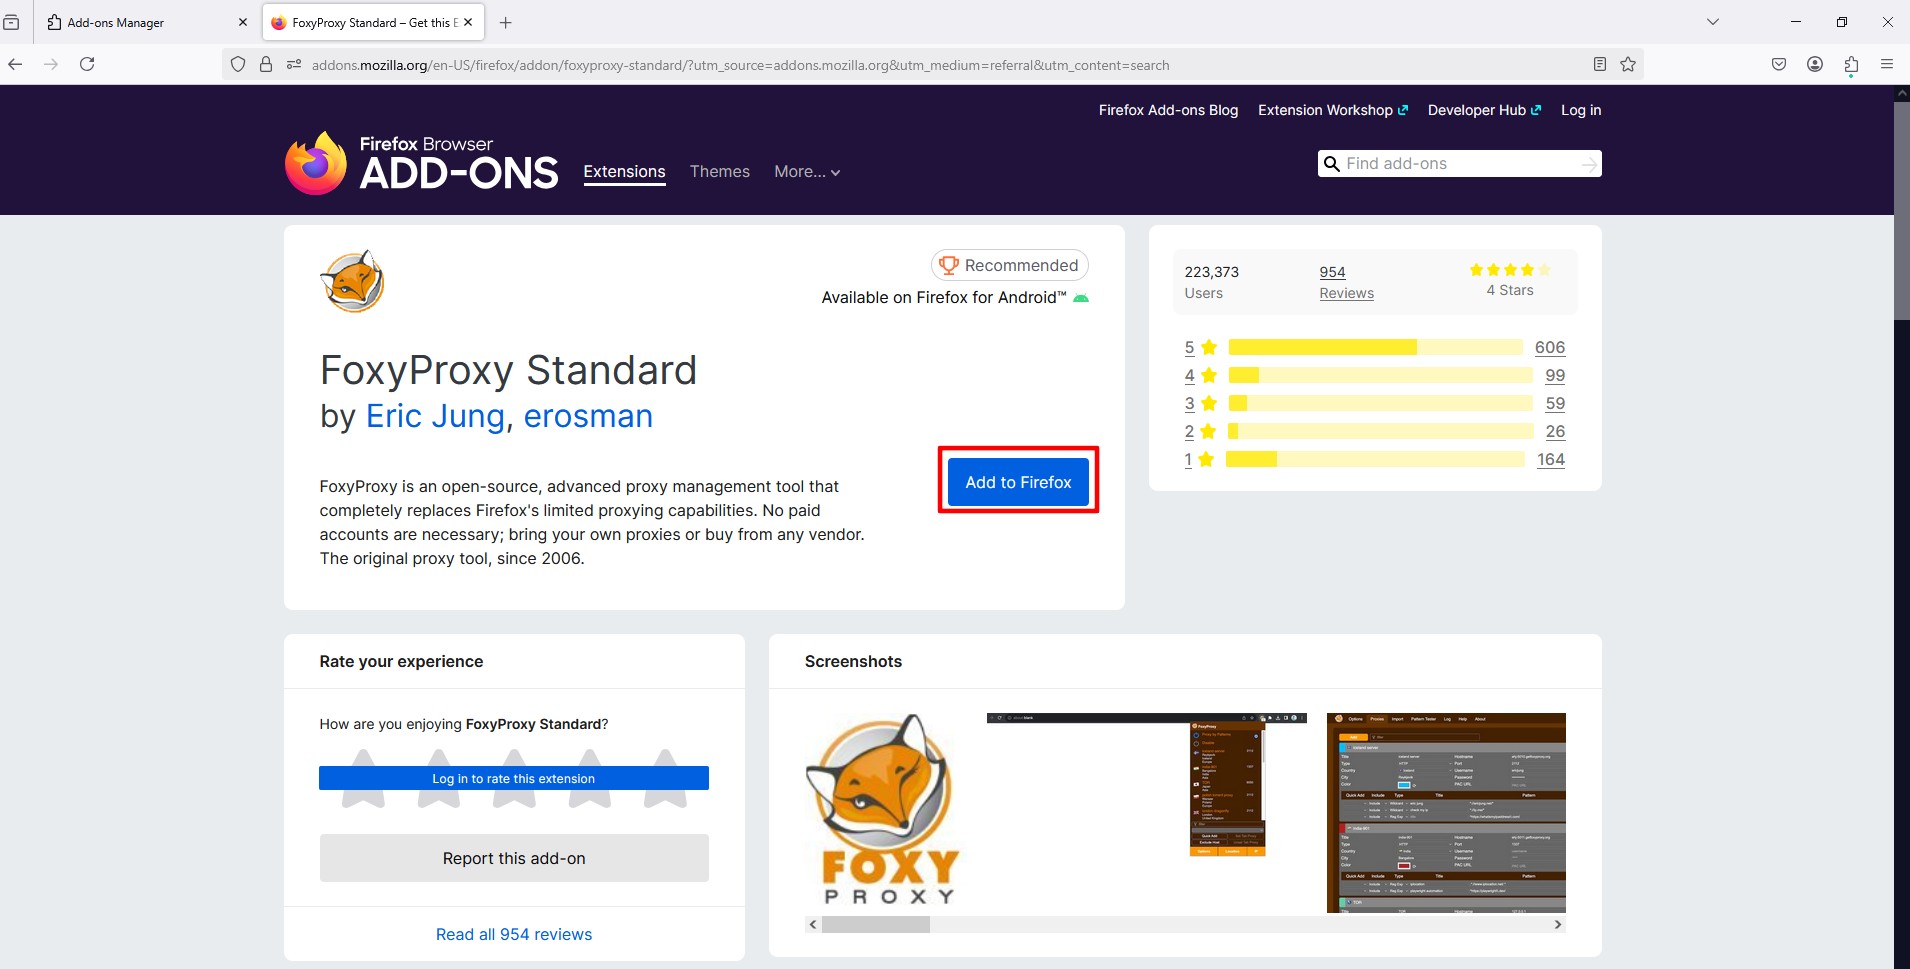 Fig. 9. Confirmation dialog box for installing the FoxyProxy Standard extension in the Mozilla Firefox browser with the add button and information about requested permissions.
Step 2. Adding a Proxy
Click on the "Fox" icon in the toolbar -> Options.
 Fig. 10. Mozilla Firefox interface showing the FoxyProxy extension icon in the browser toolbar. The icon is located on the right side of the toolbar among other installed extensions, providing quick access to proxy connection management.
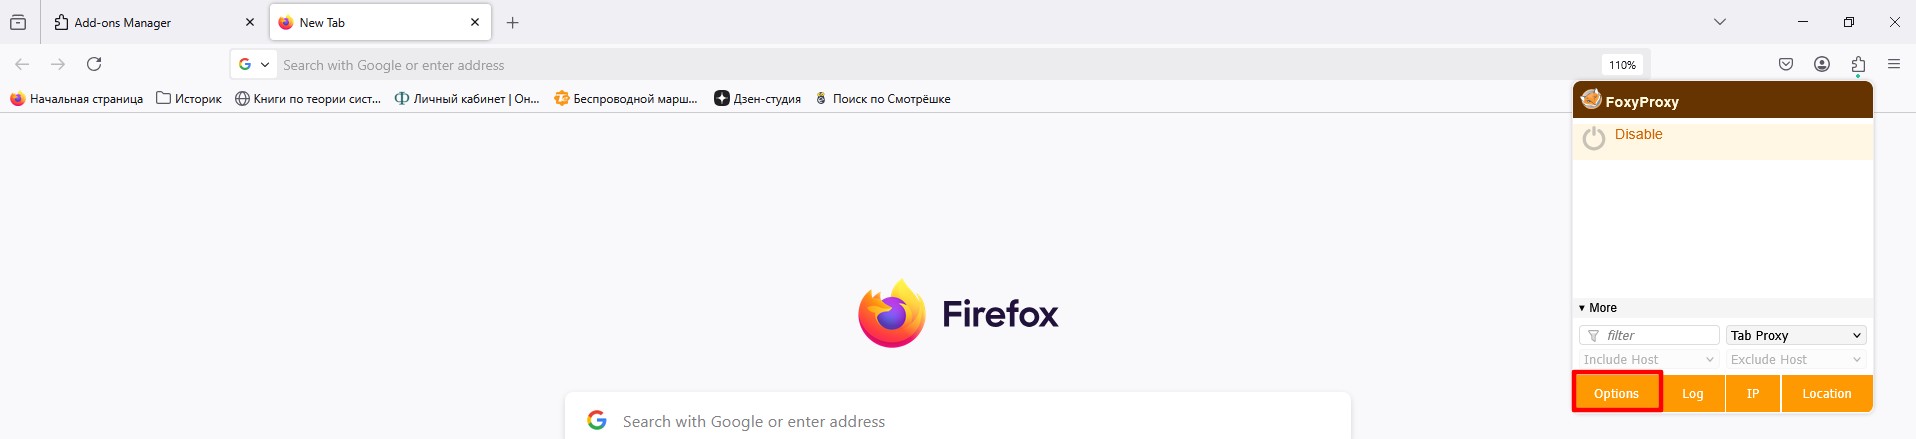 Fig. 11. FoxyProxy Standard extension context menu in Mozilla Firefox, demonstrating main proxy connection management options, including "Options" for accessing advanced settings.
Click Add or Add New Proxy.
 Fig. 12. FoxyProxy Standard extension settings window in the Mozilla Firefox browser, showing the interface for adding a new proxy connection. At the top of the window is a navigation bar with the active "Proxies" tab, under which is the "Add New Proxy" button.
Step 3. Entering Data
- Proxy Type: Select SOCKS5 (the most reliable) or HTTP.
- IP Address / Port: Enter your data.
- Username / Password: Enter your login and password.
- Click Save.
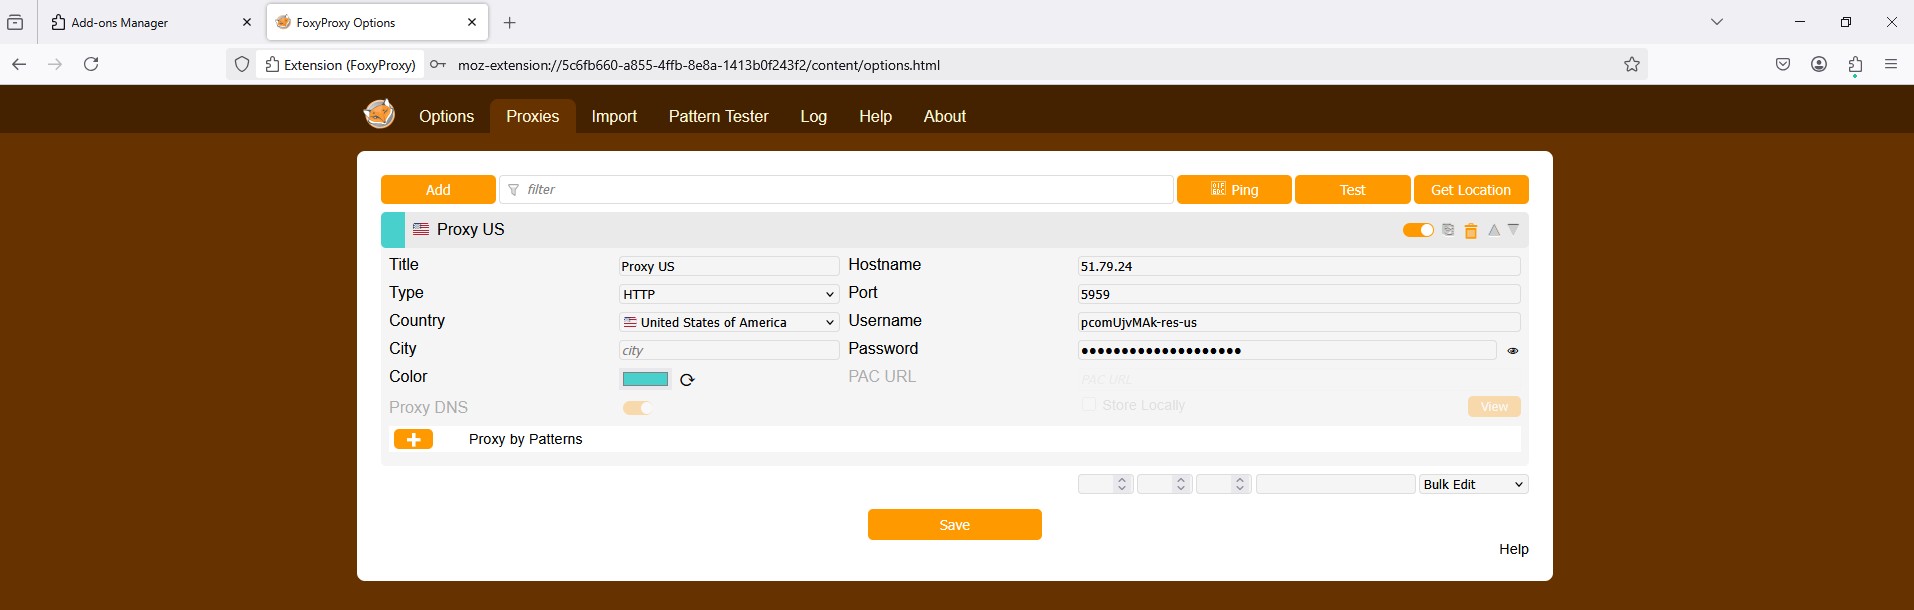 Fig. 13. FoxyProxy Standard extension dialog box, showing the proxy server configuration form with fields for entering main connection parameters: proxy type, IP address/domain, port, and optional authentication fields (username/password).
Step 4. Enabling
Now click on the FoxyProxy icon and select the created profile (e.g., "USA Residential") from the drop-down list. The icon will change color, and traffic will go through the proxy. To disable it, select "Turn Off".
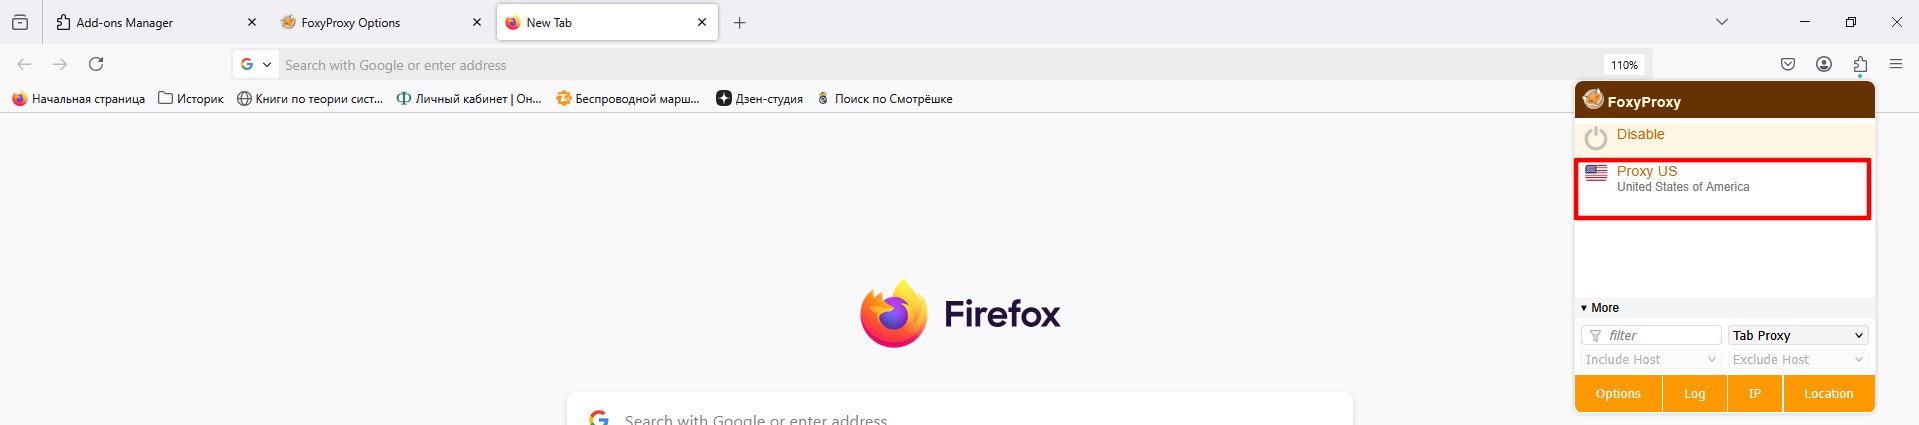 Fig. 14. FoxyProxy Standard graphical interface in Mozilla Firefox, showing the drop-down menu for selecting a proxy server from configured profiles.
Conclusion
You have set up secure surfing in Firefox.
- For basic privacy and free surfing, use Method 1 and Datacenter Proxies.
- For work and shopping, use Method 2 (FoxyProxy) and Residential or Mobile Proxies.
You can find reliable proxies for any task in the CyberYozh App catalog.
