
Ghost Browser — is a productivity tool for those who are tired of switching between ten different browsers. Its killer feature is "Identities". You can open 10 tabs in one window, and each of them will have its own separate cookies, cache, and, most importantly, its own proxy.
This is the ideal solution for SMM managers, QA testers, and web developers. However, cookie isolation is useless if all your tabs access the network from the same IP.
In this guide, we will break down which type of proxy to choose for your tasks and how to correctly configure the Ghost Proxy Control extension.
Part 1. Strategy: Which Proxy Do You Need for Ghost Browser?
Ghost Browser is often used for tasks that require speed and convenience rather than deep hardware spoofing. The choice of proxy depends on the goal.
1. Mobile Proxies (4G/5G)
- Purpose: SMM (managing multiple client accounts), posting, market research.
- Essence: Dynamic IPs from cellular operators.
- In Ghost Browser: Each colored tab (Identity) can be assigned to its own mobile proxy. This ensures a stable and secure connection for managing professional accounts on Instagram or TikTok.
- 👉 You can read more about mobile proxies here
2. Static Residential Proxies (ISP)
- Purpose: E-commerce, competitor analysis, working with marketplaces, SEO analysis of search results in a specific city.
- Essence: Static IPs from home internet service providers.
- In Ghost Browser: Use them if you need a tab to "remember" its user and not change the IP. This is crucial for Amazon and Google.
3. Datacenter Proxies (Server)
- Purpose: QA testing (checking site layout from different countries), viewing content, simple tasks.
- Why they are appropriate here: Ghost Browser is frequently used by testers. To check how your site opens in Germany, a cheap datacenter proxy is quite sufficient. However, they are not suitable for Facebook.
Part 2. Data Preparation
For stable performance, we recommend using private channels from CyberYozh App.
After purchase, you will receive the data in your personal account.
- IP (Host):
172.98.60.180 - Port:
58763 - Username / Password: Authorization credentials.
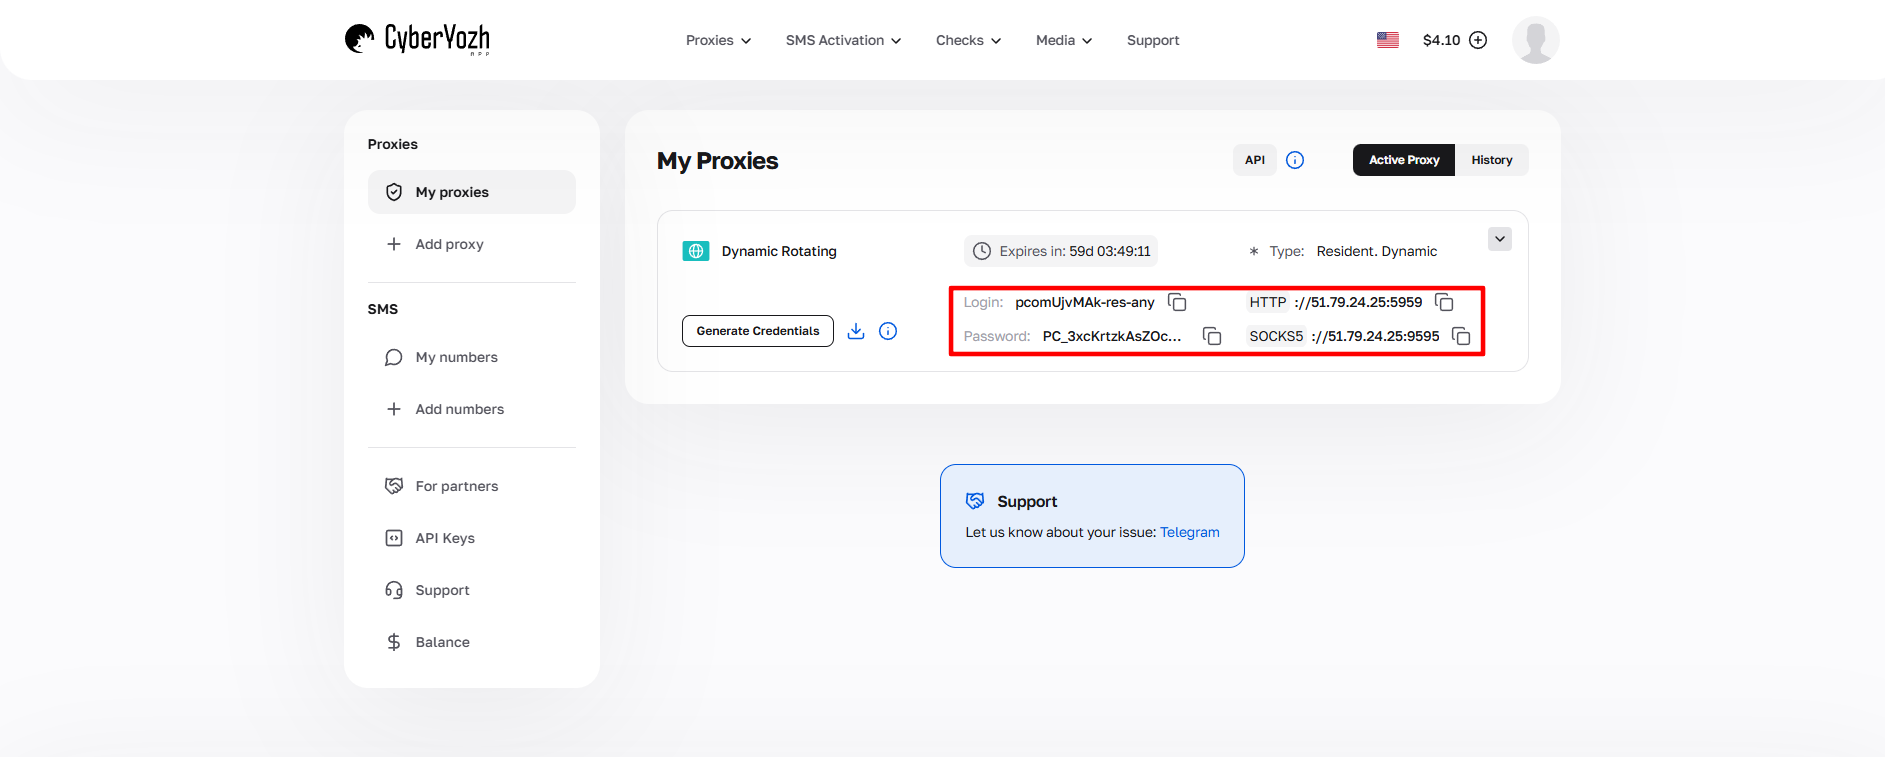 Fig. 1. Screenshot of the CyberYozh platform interface, showing the location of the proxy server connection data. The image displays fields for IP address (Host), port (Port), username (Proxy Username), and password (Proxy Password).
Part 3. Configuring Ghost Proxy Control
Ghost Browser does not have "profile settings" in the traditional sense. Proxy management is handled through the built-in Ghost Proxy Control extension.
Step 1. Opening the Control Panel
- Launch Ghost Browser.
- In the top right corner (on the extension panel), click on the ghost icon (Ghost Proxy Control).
- Click the “Add/Edit Proxies” button.
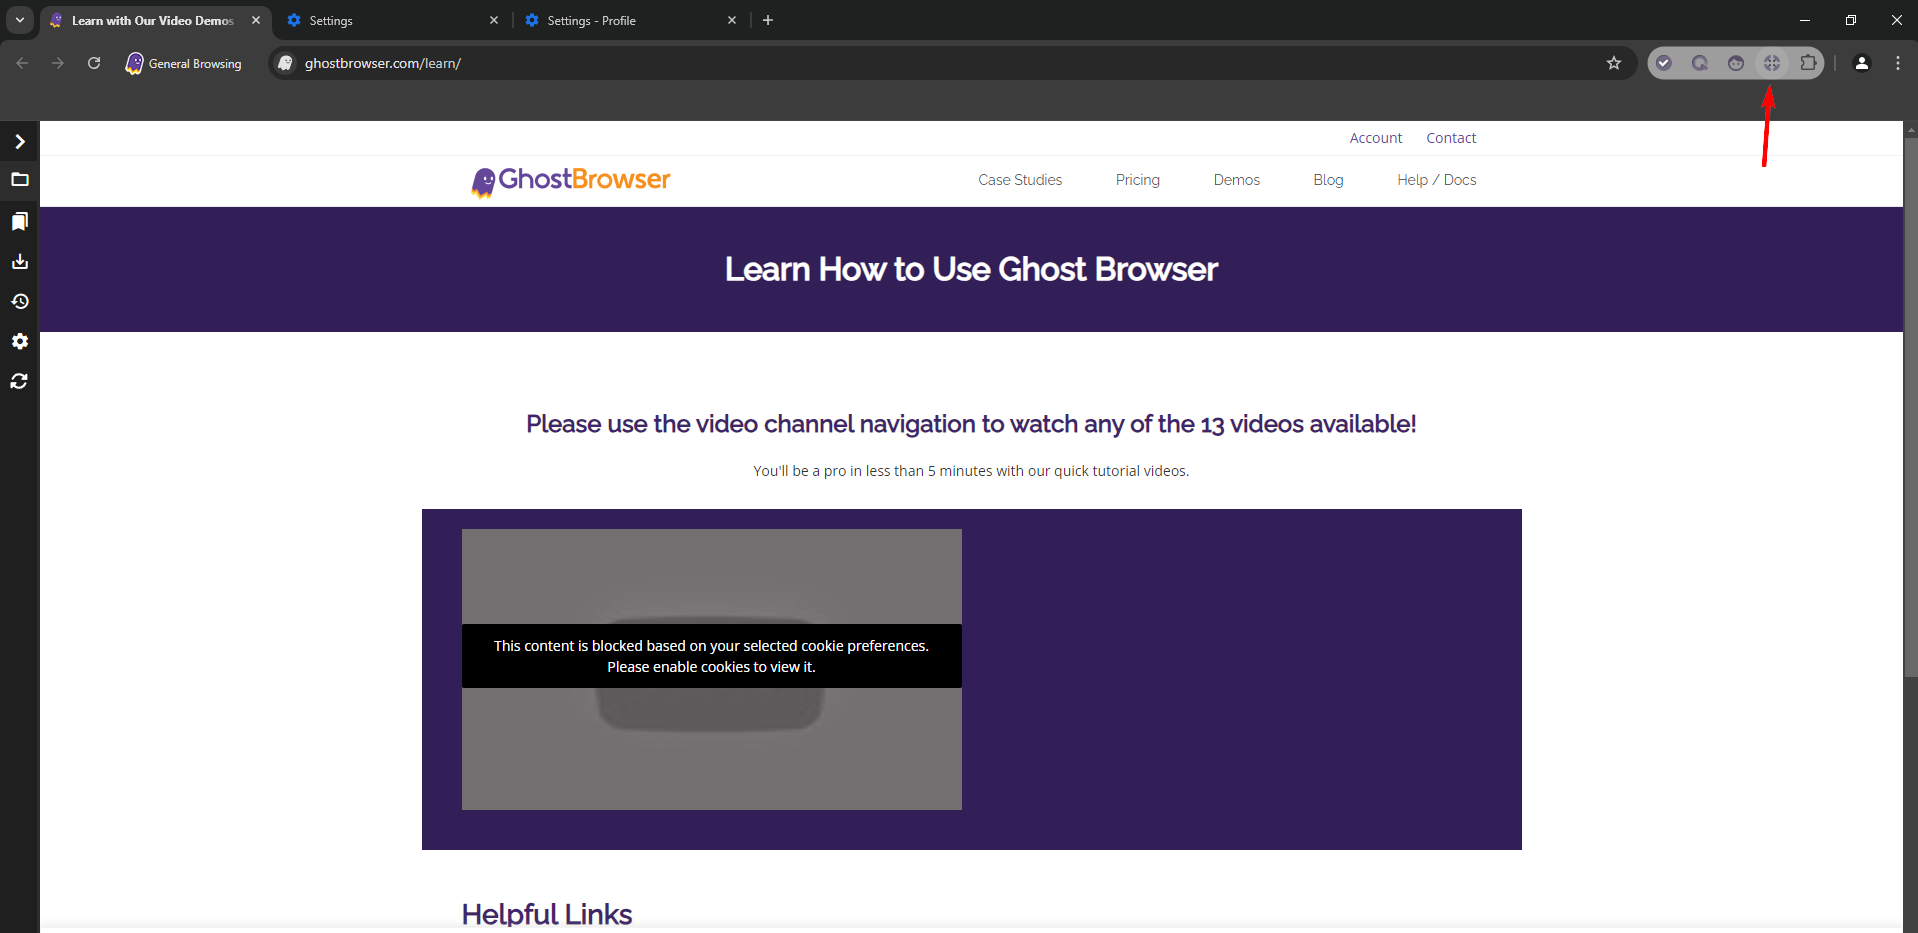 Fig. 2. Ghost Browser interface with the Ghost Proxy Control icon highlighted in the top right corner.
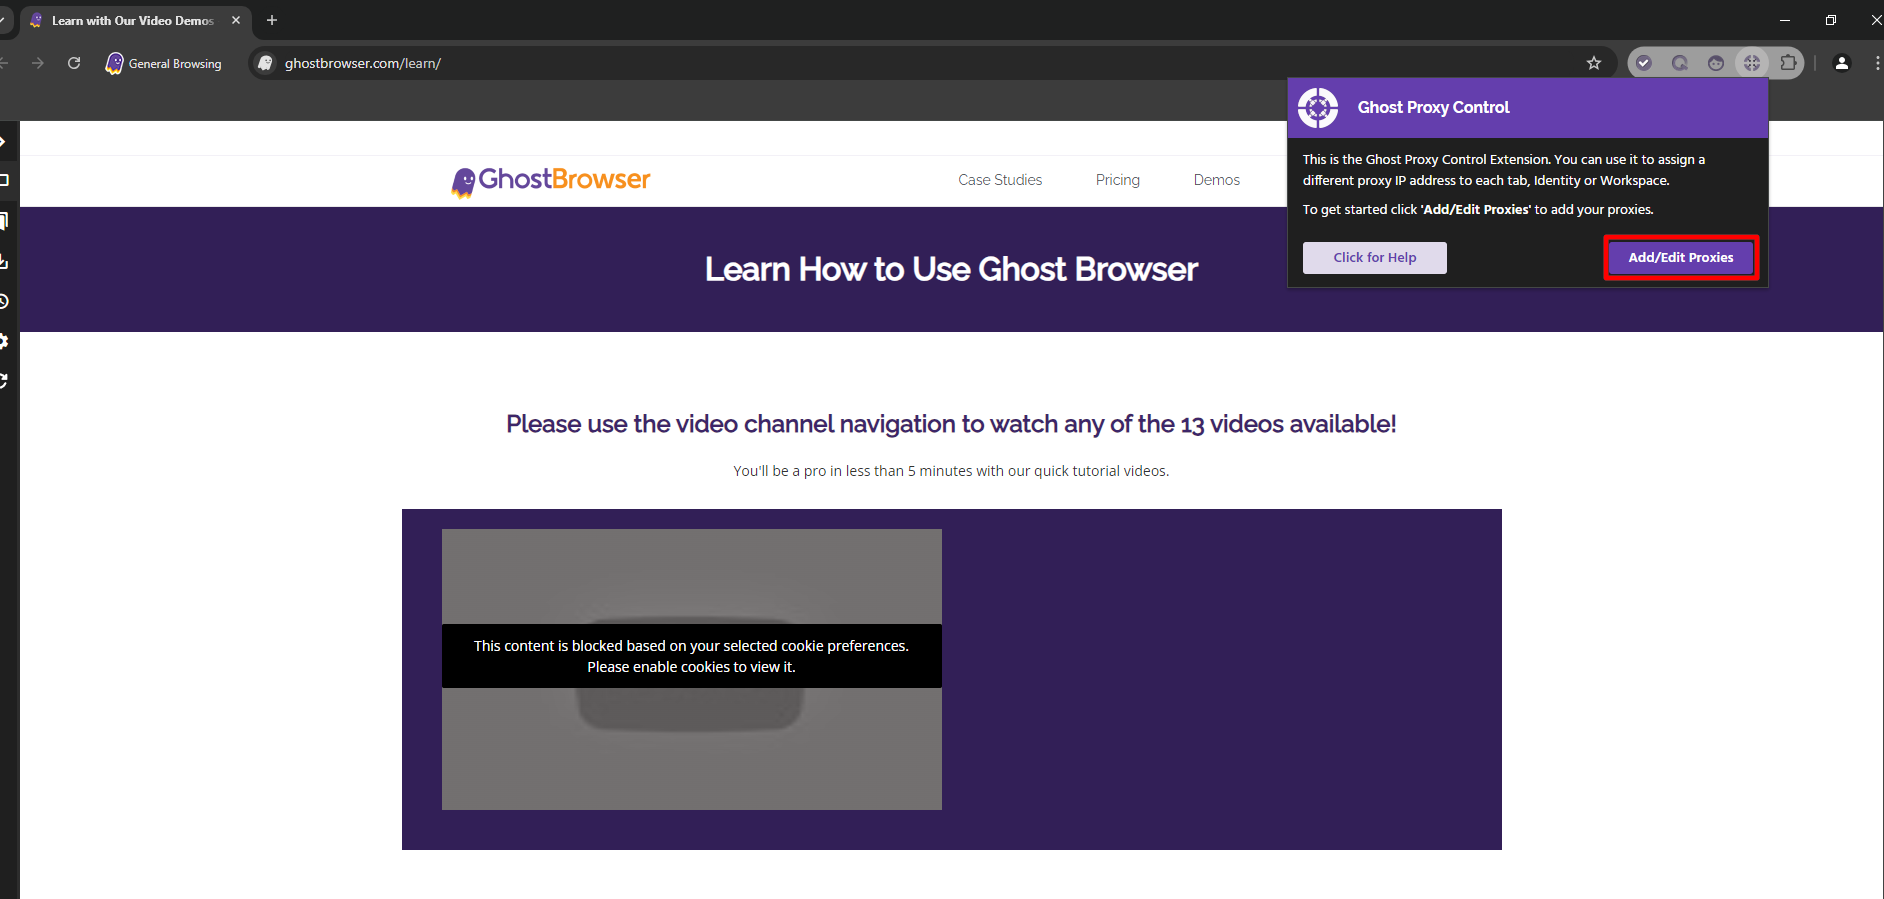 Fig. 3. Ghost Proxy Control pop-up window in Ghost Browser, showing the "Add/Edit Proxies" option for configuring proxy connections.
Step 2. Adding Proxies (Two Methods)
Method A: One by One (Add a Single Proxy)
Suitable if you have 1-2 proxies.
- Go to the “Add a Single Proxy” tab.
- Fill in the fields:
- Name: Name (e.g.,
Proxy CyberYozh). - Host / Port: IP and port.
- Username / Password: Login and password.
- Click Add Proxy.
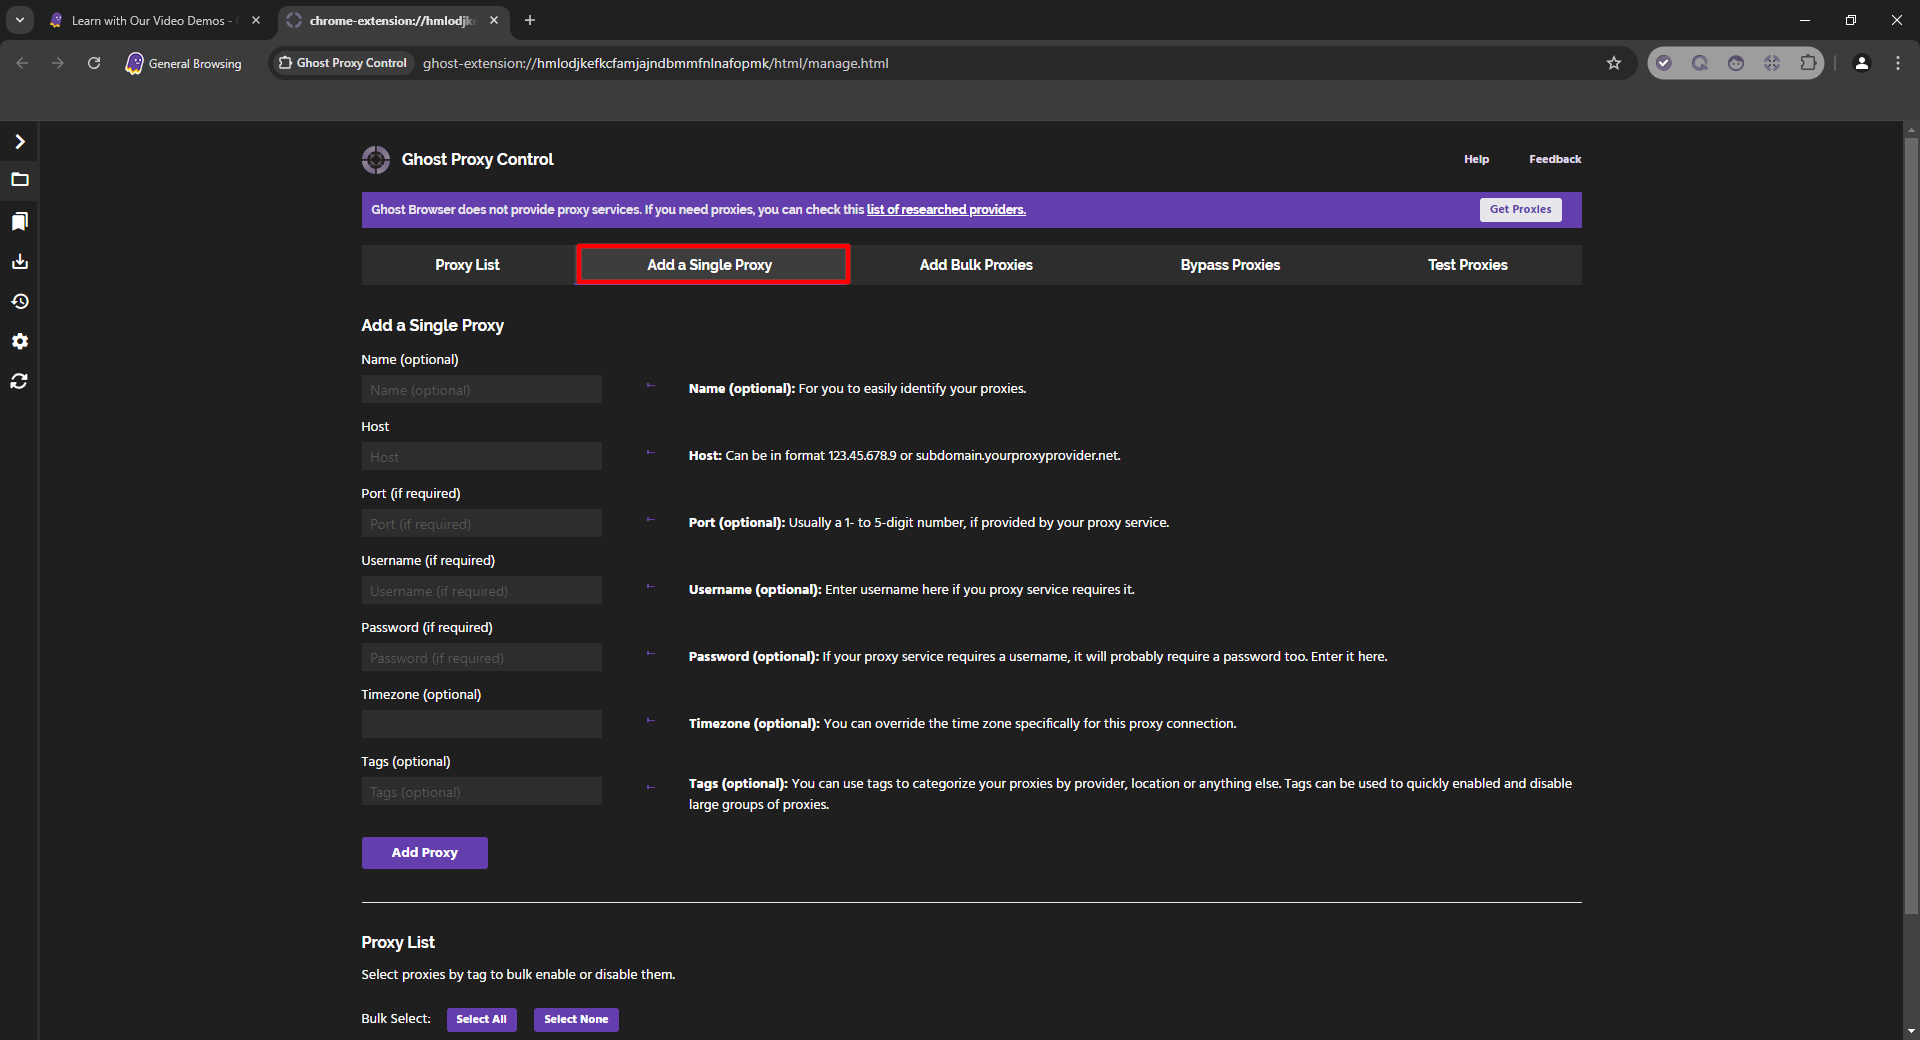 Fig. 4. Ghost Browser interface showing the proxy server settings panel with the "Add a Single Proxy" tab selected.
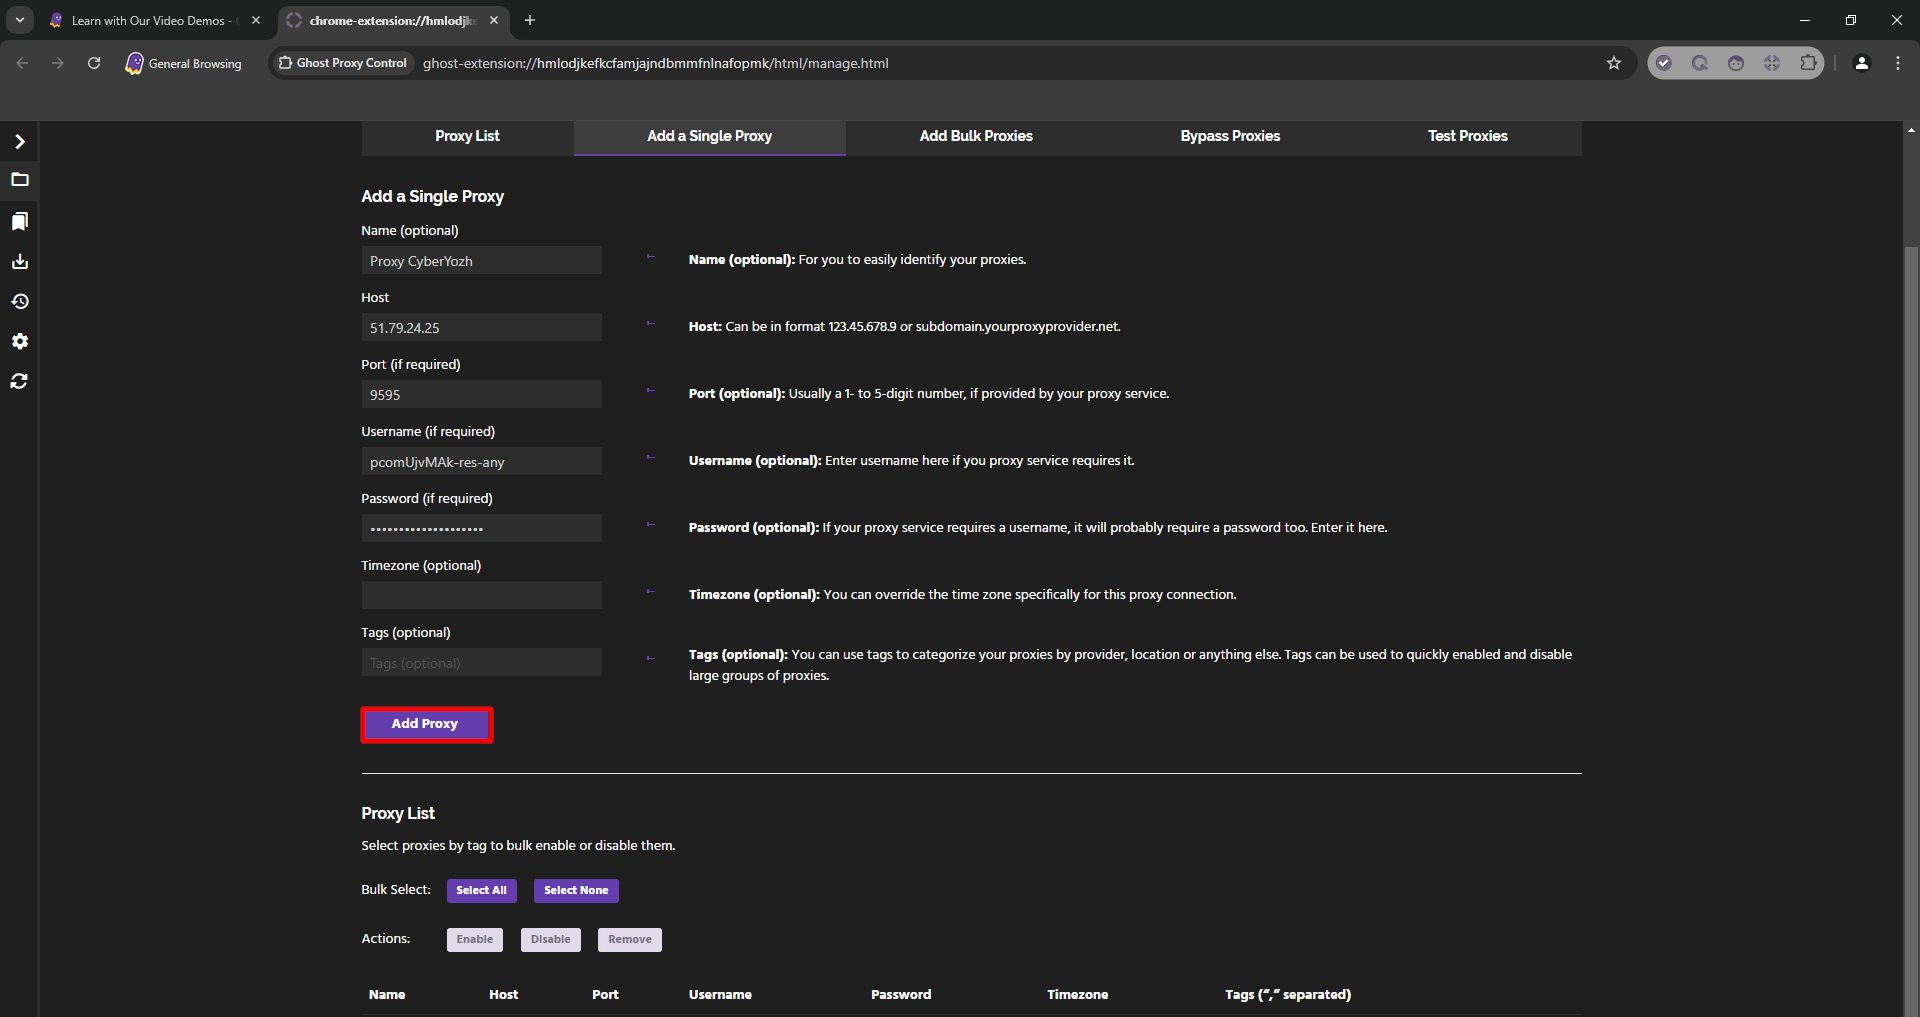 Fig. 5. The interface for adding a single proxy in Ghost Browser with the connection setting fields filled in.
Method B: Bulk Import (Bulk Proxies)
Suitable for pros.
Go to the “Bulk Proxies” tab.
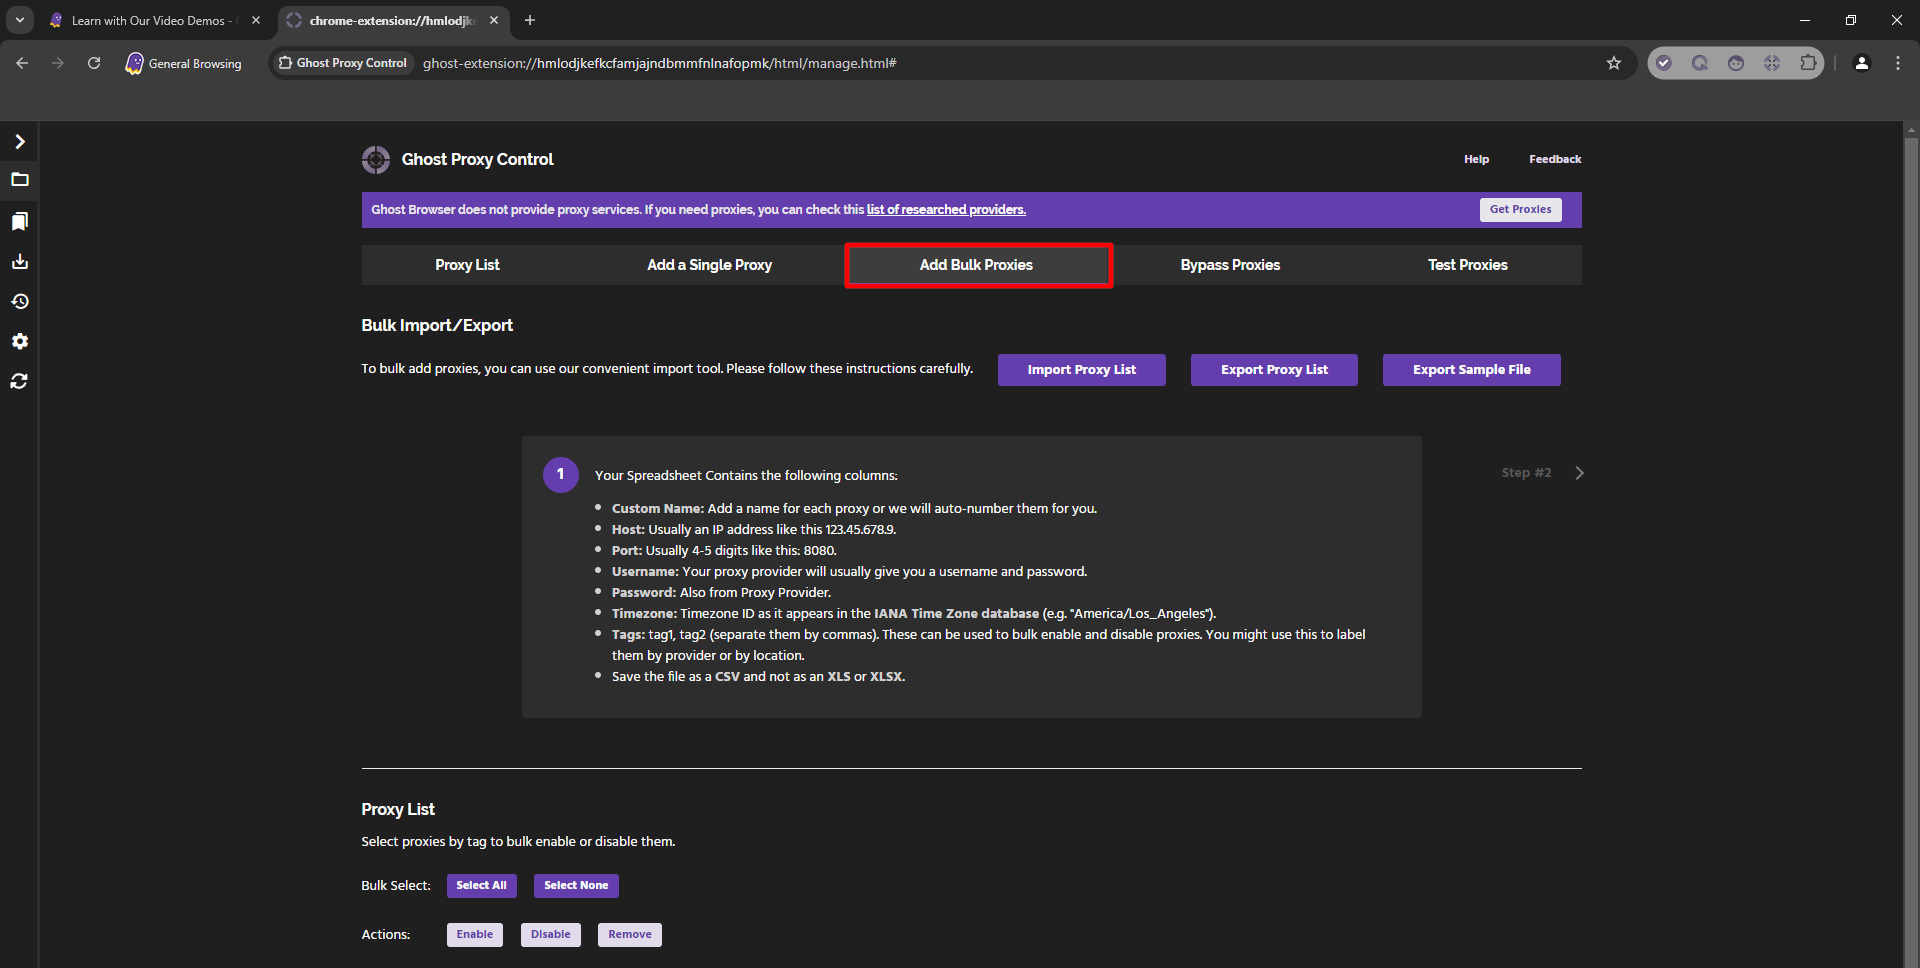 Fig. 6. Ghost Browser interface demonstrating the "Bulk Proxies" tab for mass importing proxy servers.
Click “Export Sample File” to download a sample
.csvfile. Important: Do not change the file extension and do not use Excel to save as .xls. Use pure CSV only.Fill in the file with your data according to the pattern:
Name,Host,Port,User,Pass.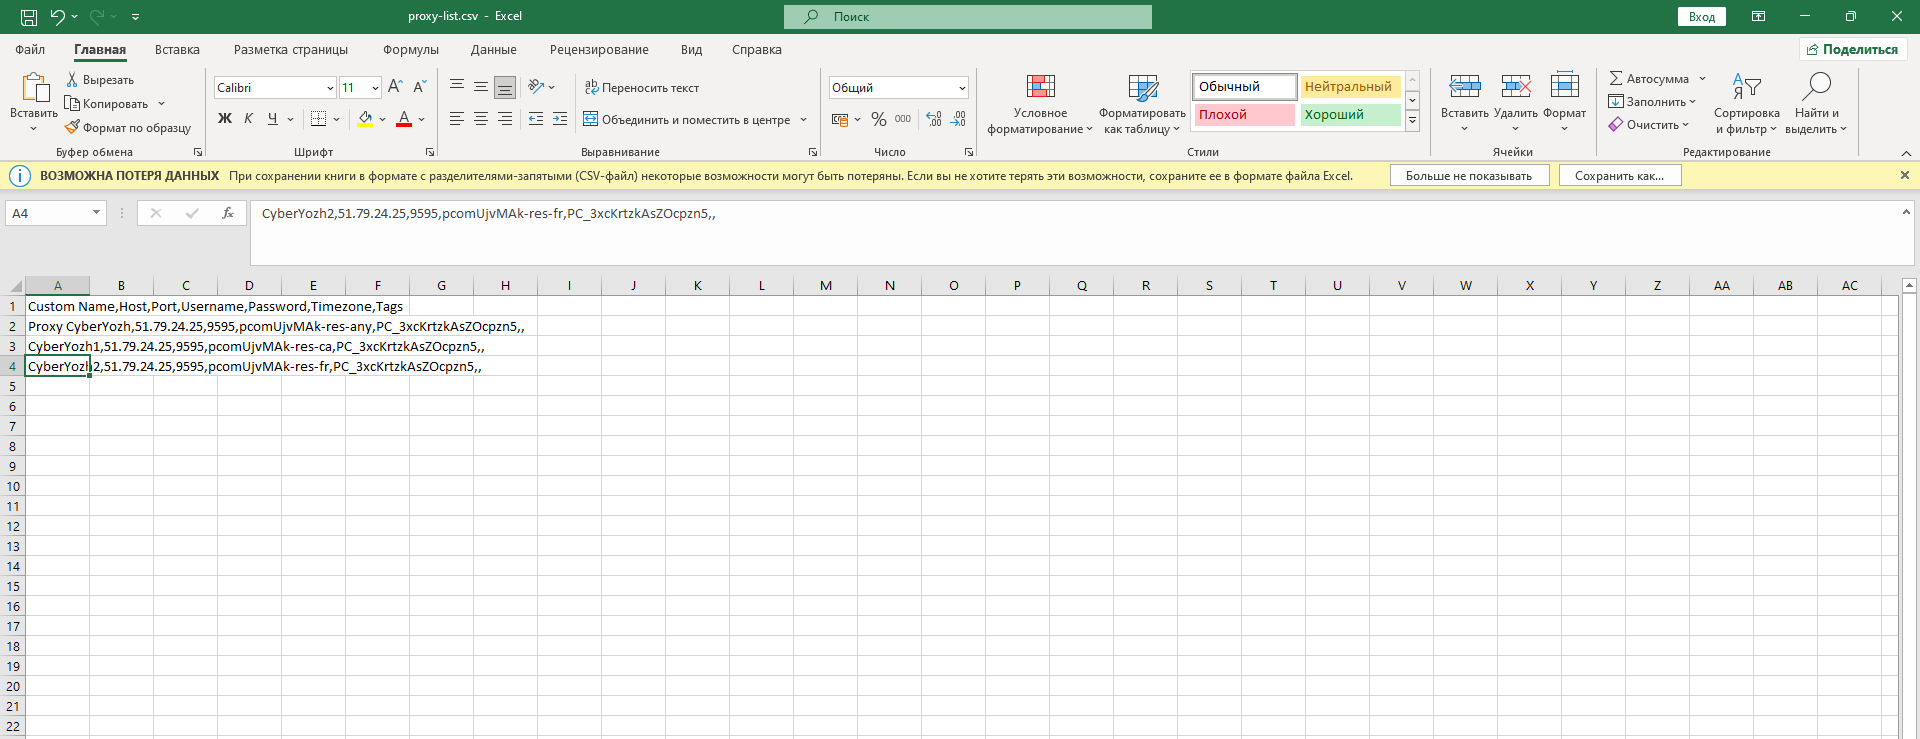 Fig. 7. Example of a CSV file structure for bulk importing proxy servers into Ghost Browser. The image shows the data format with comma-separated fields, including the proxy name, IP address, port, username, and password. This example demonstrates the correct formatting for successful import of proxy configurations.
Click “Import Proxy List” and upload the file back into the browser.
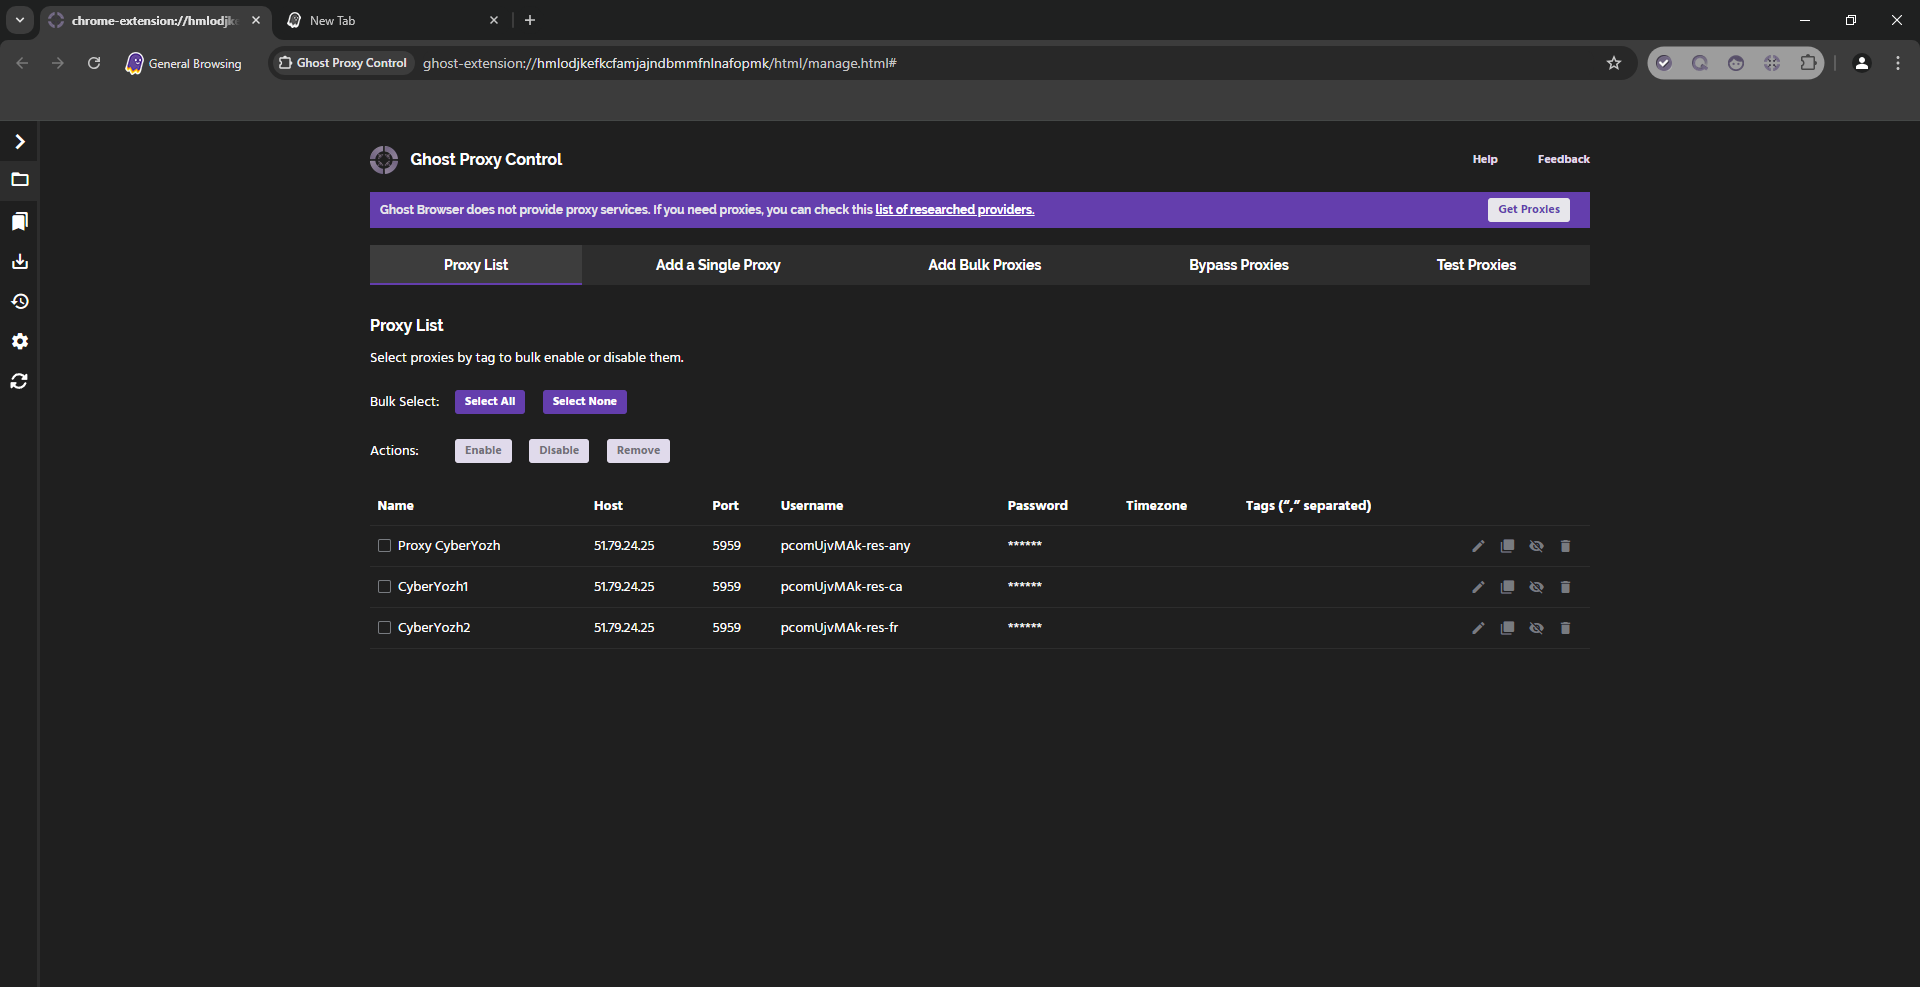 Fig. 8. Ghost Browser bulk proxy import interface after successful upload of the CSV file.
Proxy entry example: Proxy CyberYozh,51.79.24.25,9595,pcomUjvMAk-res_sc-br_goias_goiania,PC_3xcKrtzkAsZOcpzn,,
Step 3. Verification (Test Proxies)
Be sure to test the proxies before starting work.
- Go to the “Test Proxies” tab.
- In the Test URL field, enter the site you will be working with (e.g.,
instagram.comorwhoer.net). - Click Test.
- A green OK status means the proxy is working. If there is an error — check the data.
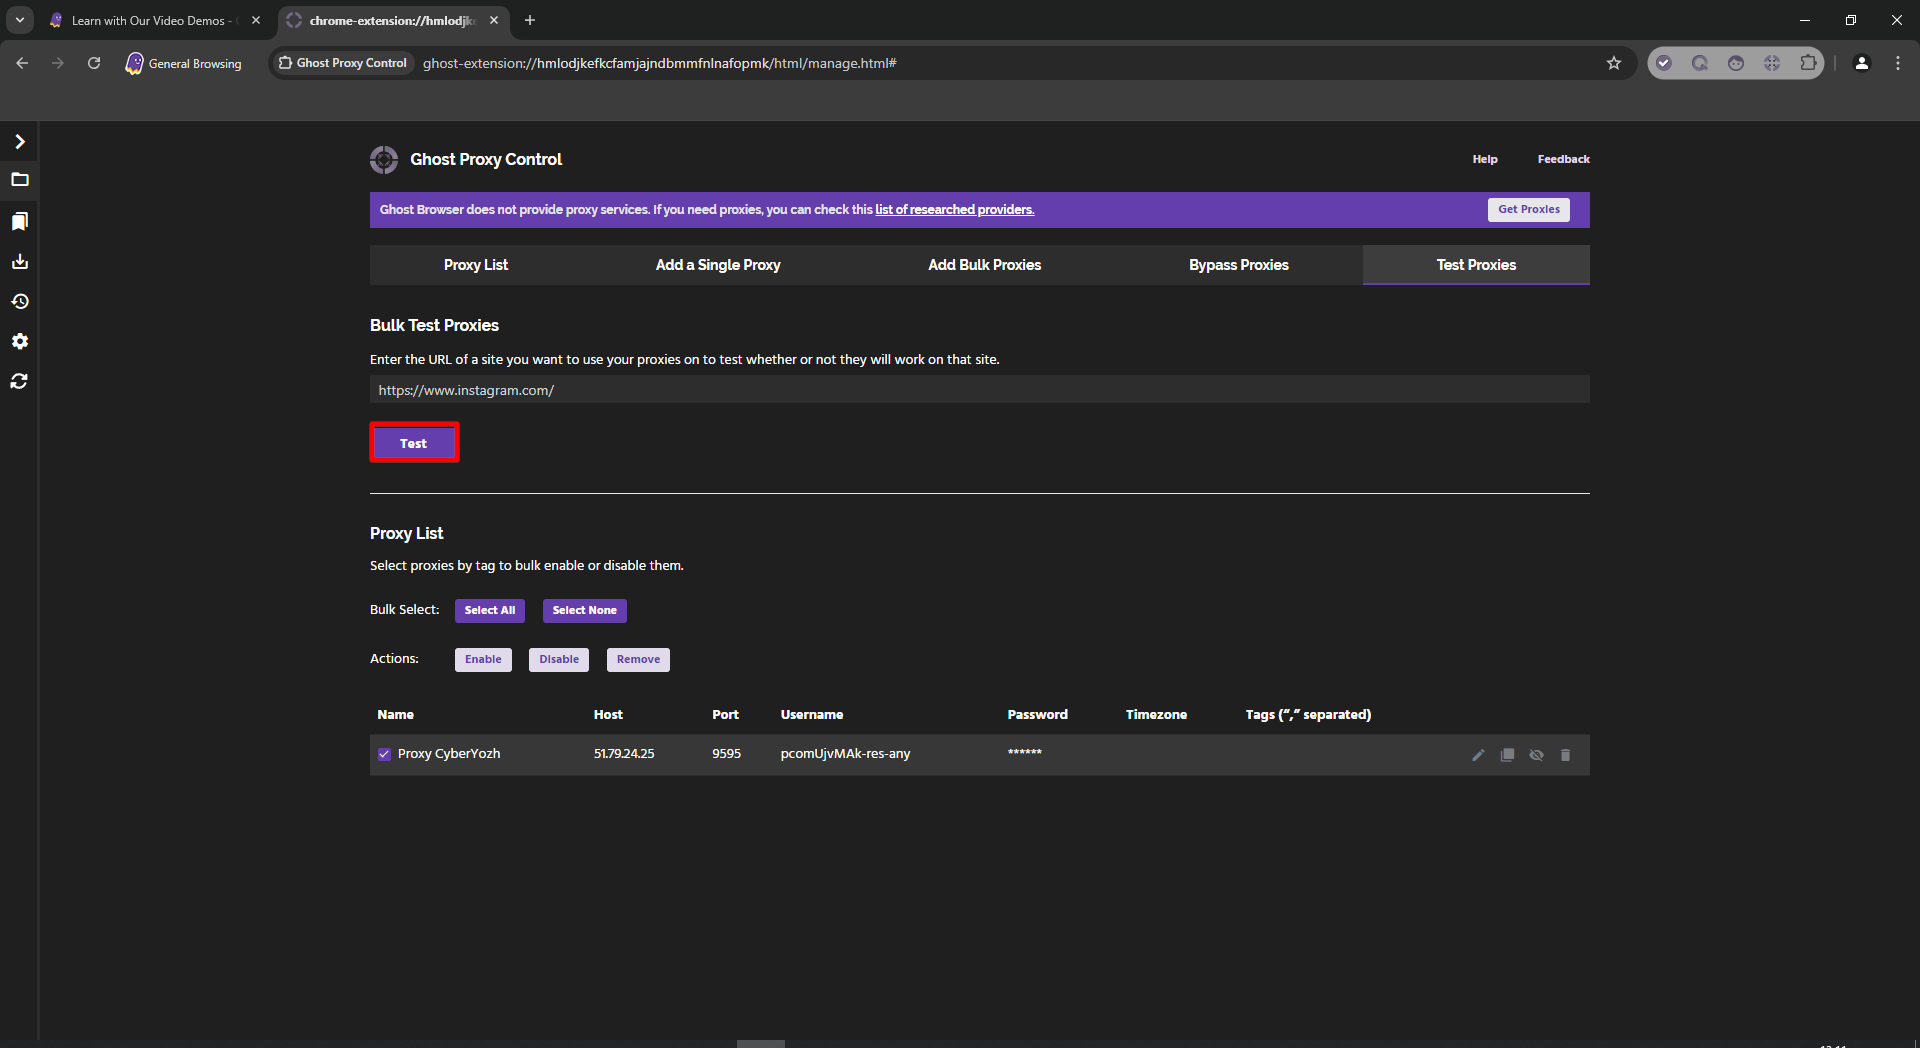 Fig. 9. Proxy server testing interface in Ghost Browser, displaying a panel with a field for entering the URL of the tested site and a "Test" button to launch the functionality check of configured proxy connections.
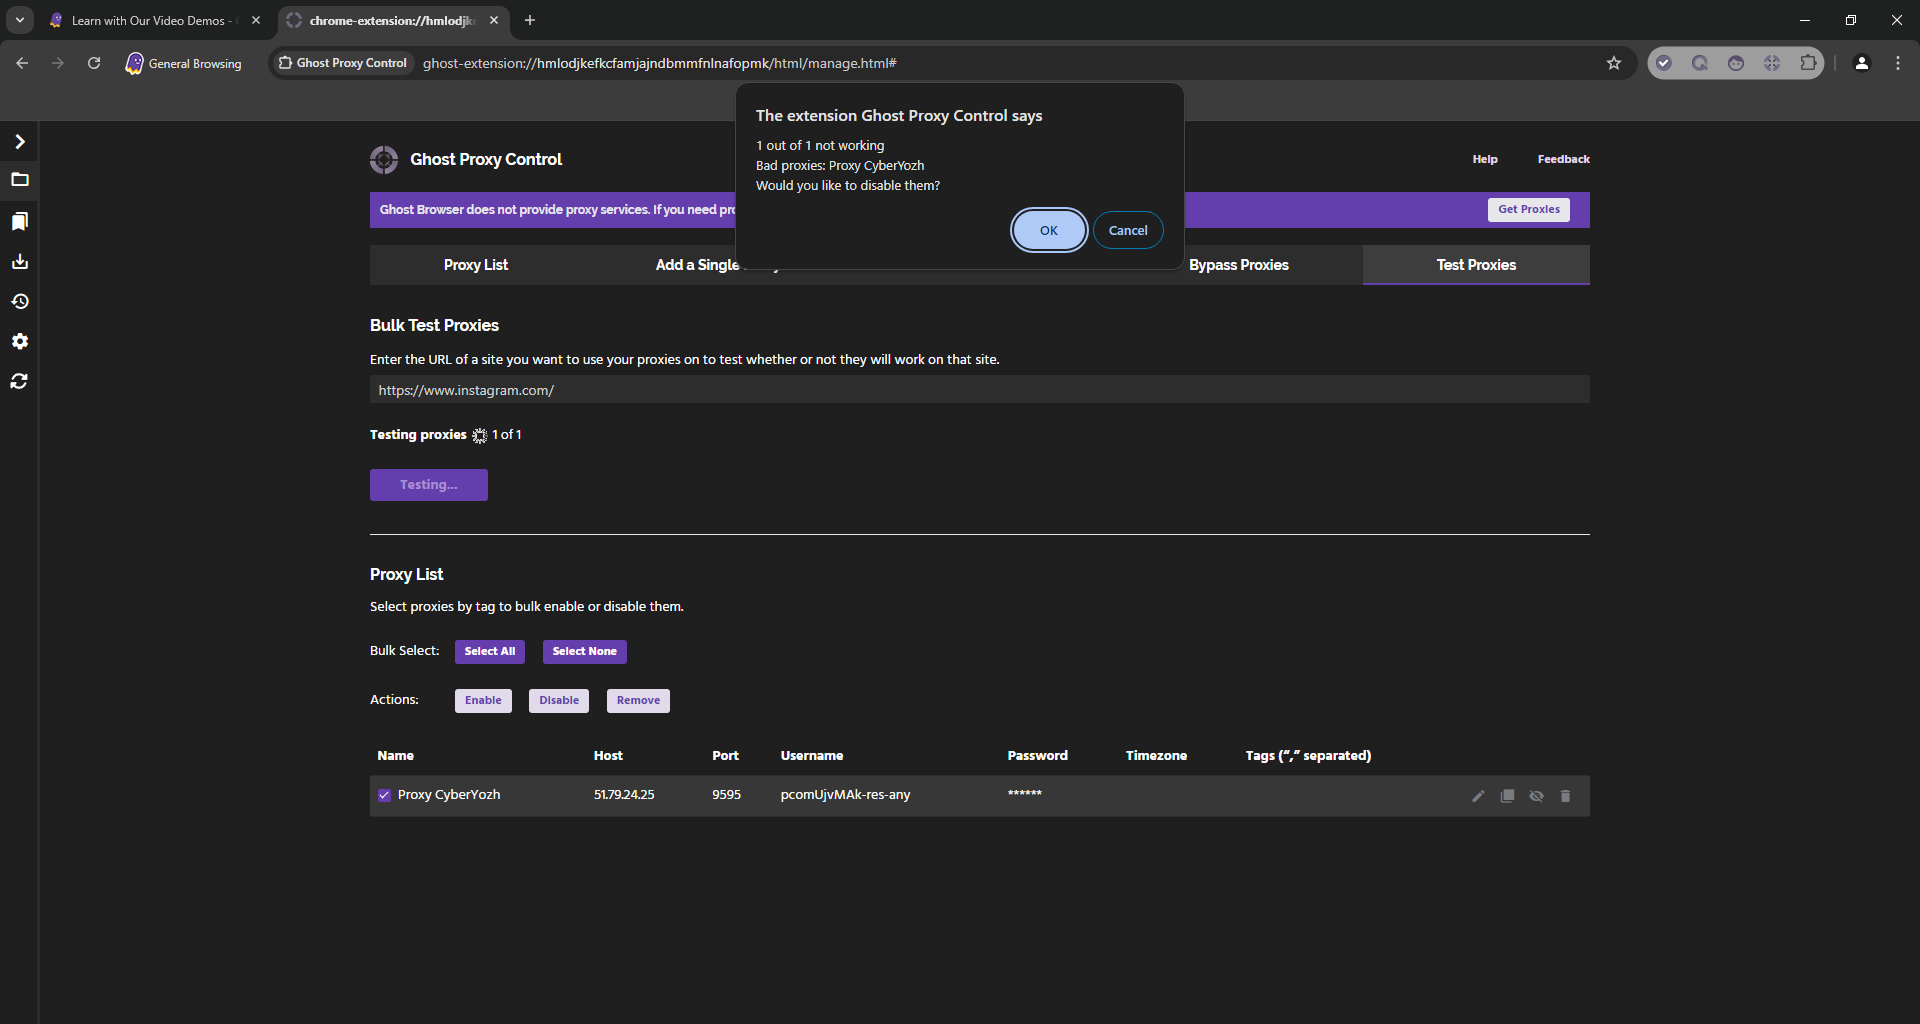 Fig. 10. Proxy server test results in the Ghost Browser interface.
Part 4. Linking a Proxy to an Identity
Now for the most interesting part. we will link the proxy to a specific tab.
In the main browser window, click on the colored circle to the left of the address bar (or on the Let's go button / profile icon).
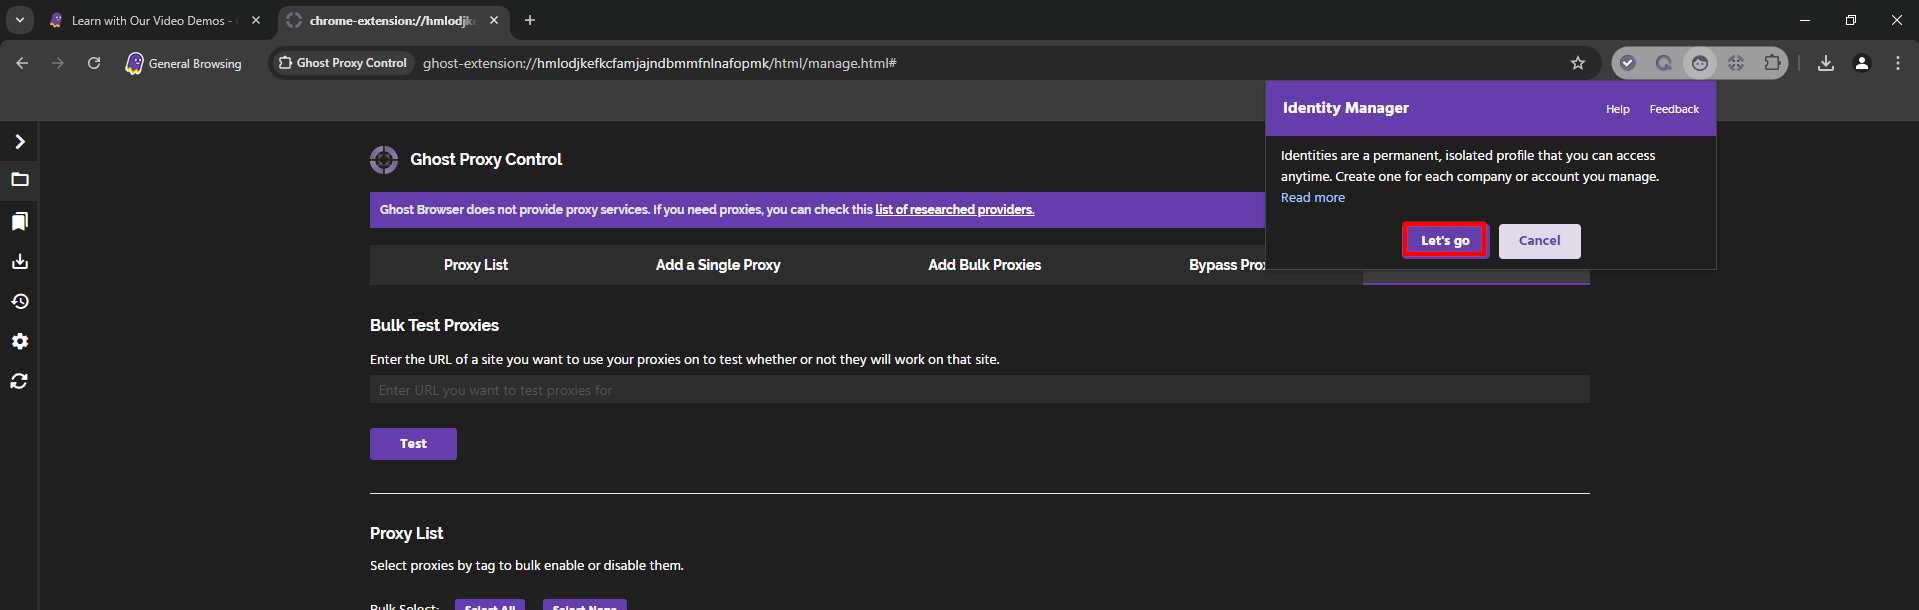 Fig. 11. Ghost Browser interface with the user profile settings area highlighted.
Click “Create Identity” (or Edit if you are modifying the current one).
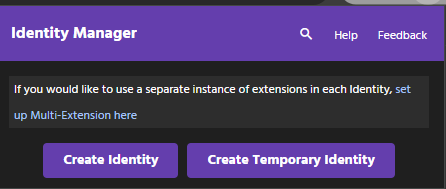 Fig. 12. Ghost Browser interface with a dialog box for creating a new identity (profile). The window contains a "Create Identity" button, which allows the user to initiate the process of creating a new profile for subsequent proxy connection setup.
In the menu that opens, find the Set Proxy dropdown list.
- Select the proxy that you added and tested earlier.
- Click Save.
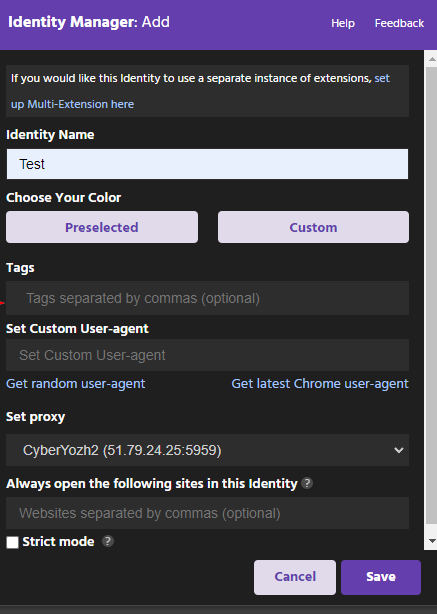 Fig. 13. Proxy setup interface in Ghost Browser, demonstrating the "Identity Settings" panel with the proxy server selection dropdown menu.
Now all tabs opened in this "Identity" (e.g., the purple one) will work through the selected proxy. You can open another tab nearby (e.g., the green one) with a different proxy.
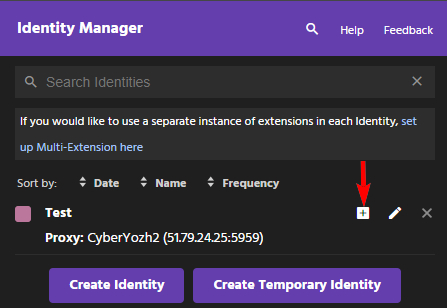 Fig. 14. Ghost Browser interface demonstrating the profile management panel with the option to launch the created profile highlighted.
Part 5. Final Verification
Open browserleaks.com/ip or whoer.net in a new "colored" tab.
What to look for:
- The IP address should match the selected proxy.
- The country should be correct.
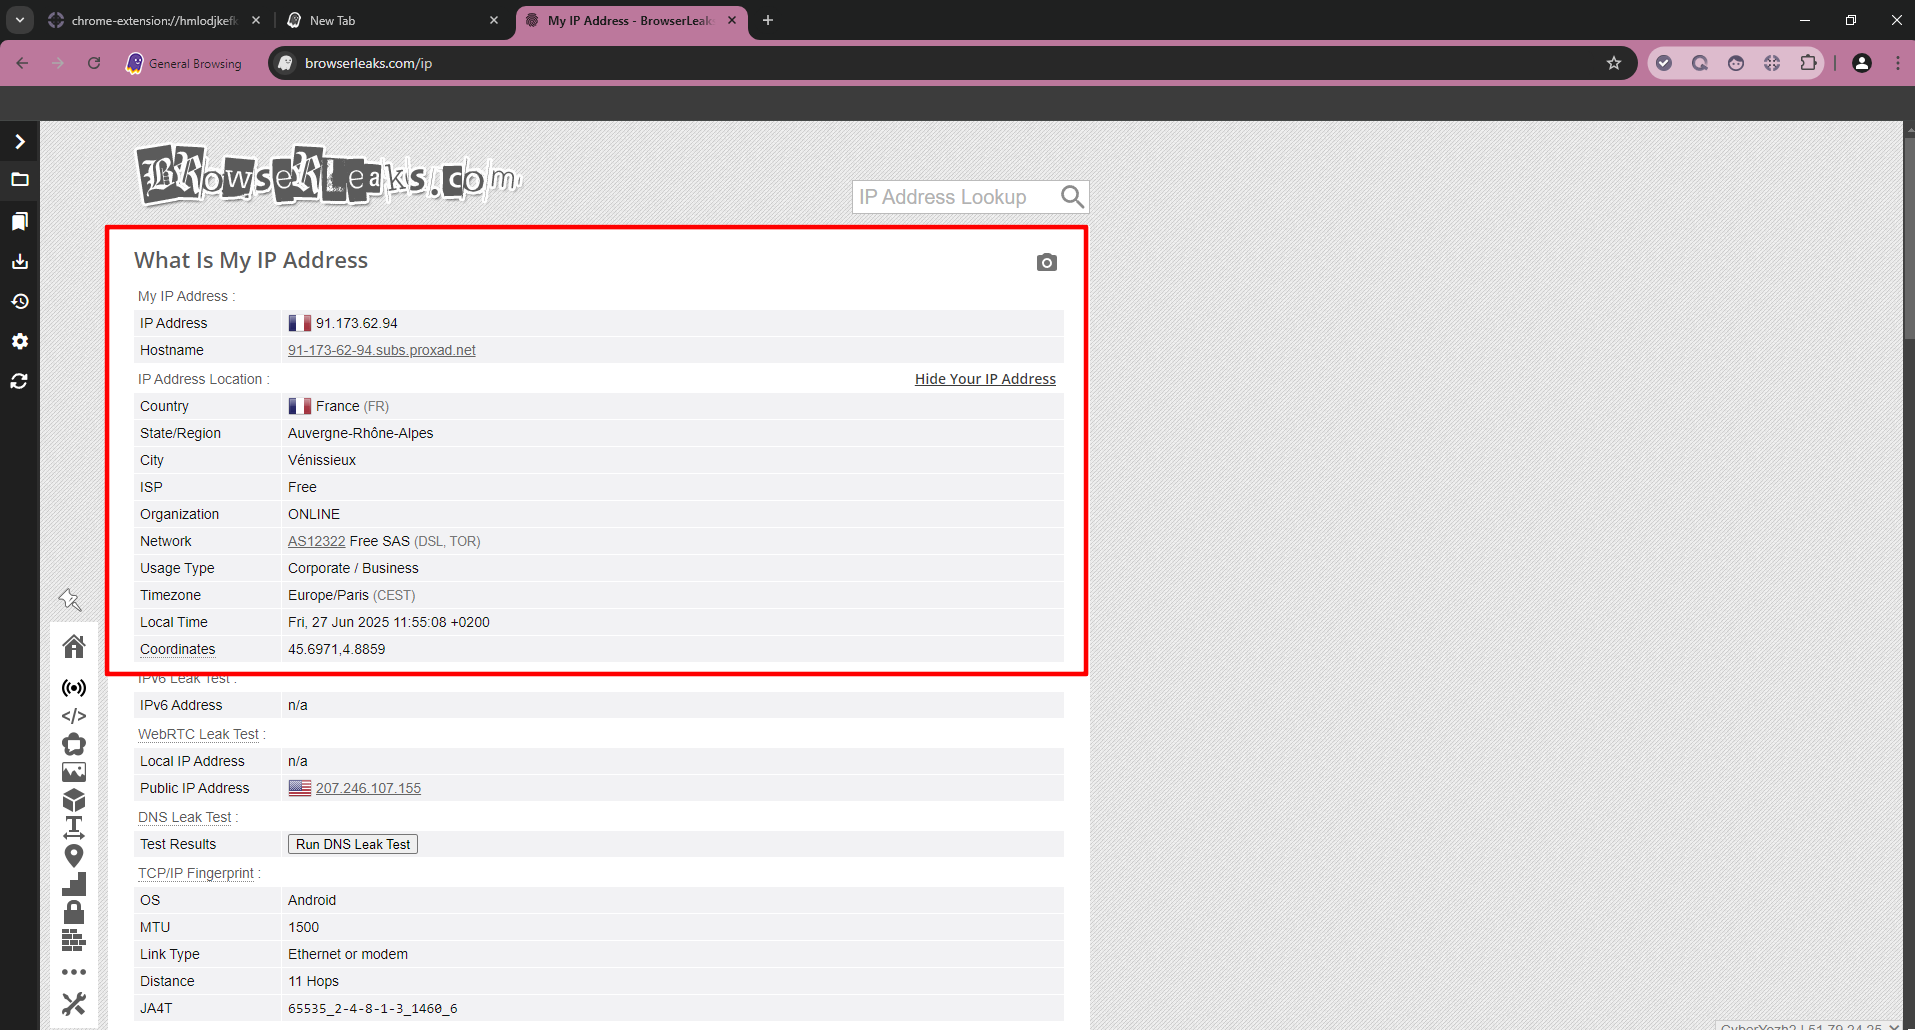 Fig. 15. The Browserleaks website interface, displaying information about the current IP address and geographical location of the user. The image demonstrates the successful operation of the configured proxy connection in Ghost Browser, as confirmed by the display of the proxy server's IP address instead of the user's real IP address.
Congratulations! You have set up an isolated workspace.
Conclusion
Ghost Browser is the king of productivity, but without good proxies, it is useless.
- For social networks, use Mobile proxies.
- For marketplaces, use Residential proxies.
- For testing, use Datacenter proxies.
You can always find reliable channels for any task in the CyberYozh App catalog. Happy working!
