
Yandex Browser — is a powerful tool with built-in Protect technology and integration of Yandex services. However, when it comes to anonymity or ensuring privacy and secure network access, the built-in tools are not enough.
The main technical feature of Yandex Browser: it uses system proxy settings. This means that the browser does not have its own separate gateway, but routes traffic through Windows settings.
In this guide, we will break down which type of proxy to choose (to ensure a stable connection without interruptions) and how to correctly configure the connection.
Part 1. Strategy: What proxy do you need for Yandex Browser?
The choice of proxy depends on your tasks. For correct and stable operation with search engines, it is important to choose the appropriate type of IP address.
1. Datacenter Proxies — For content access
- What they are: High-speed IP addresses from hosting providers.
- Purpose: Providing a secure connection and protecting personal data during web surfing, downloading files, and simple browsing.
- Pros: High speed and low price.
- Cons: Possible temporary delays or additional connection checks from search engines.
2. Residential Proxies (ISP) — For SEO and Shopping
- What they are: IP addresses of real home internet service providers.
- Purpose: SEO analytics (Wordstat, Key Collector), working with Yandex Market, Avito, and shopping in foreign stores.
- Why: This is the most trusted type for Yandex. You look like a regular home user, which ensures maximum stability and session continuity.
3. Mobile Proxies (4G/5G) — For SMM and Zen
- What they are: IP addresses of cellular operators.
- Purpose: Managing channels on Yandex Zen, working with VKontakte/Odnoklassniki profiles, and registering email accounts.
- Why: Maximum trust from social networks and Yandex services.
- 👉 You can read more about mobile proxies here
Part 2. Data Preparation
For stable operation, we recommend using private channels from CyberYozh App.
After purchase, you will receive:
- IP (Host):
172.98.60.180 - Port:
58763 - Login / Password: Authorization data.
Important: Since Yandex Browser uses Windows settings, we recommend choosing the HTTP/HTTPS protocol. System-wide SOCKS5 operation in Windows for browsers often requires additional software.
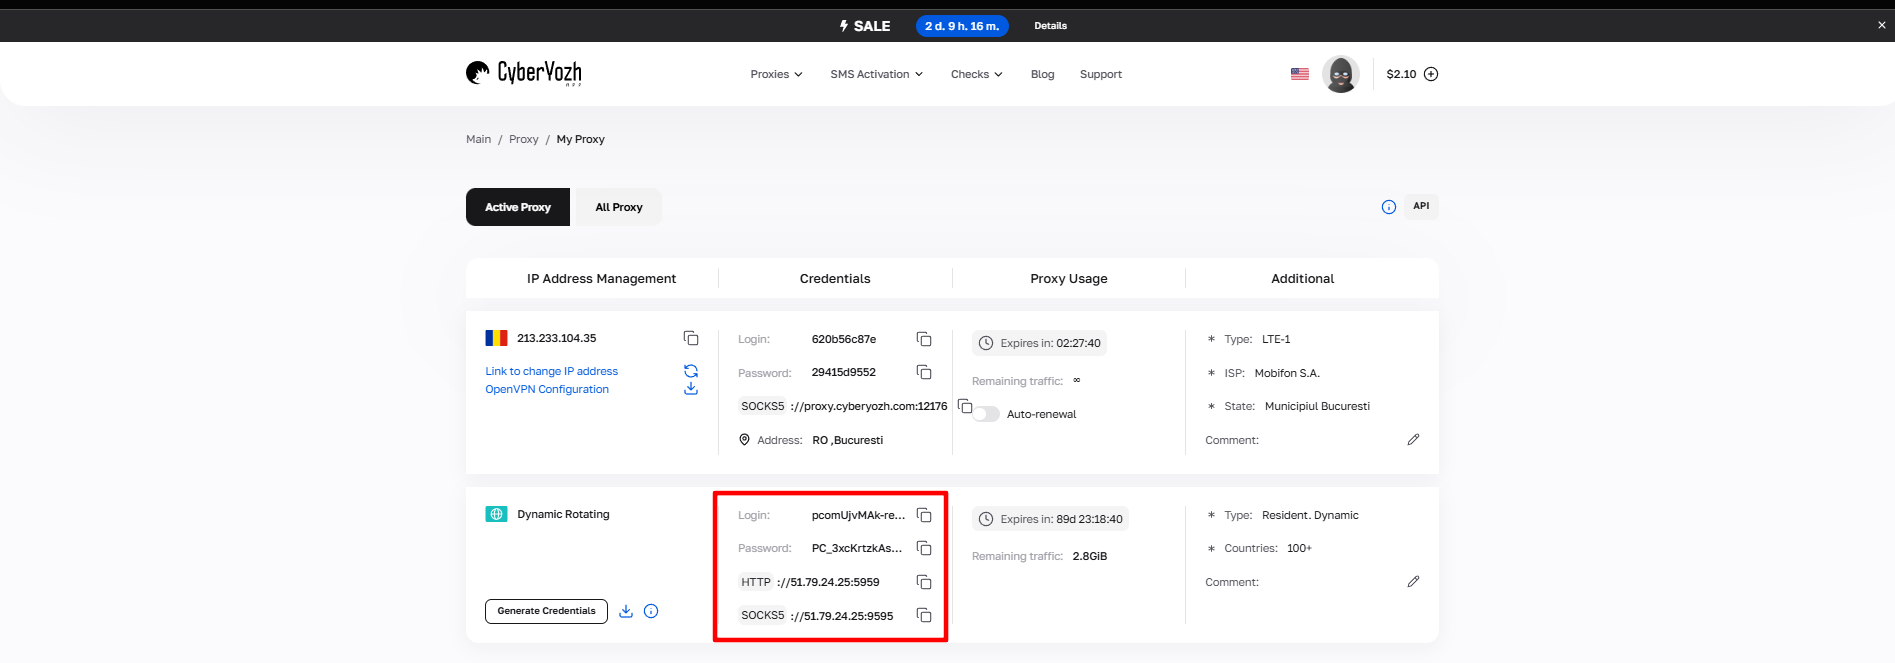 Fig. 1. Screenshot of the CyberYozh App platform interface, showing the location of data for connecting to the proxy server. The image displays fields for IP address (Host), port (Port), username (Proxy Username), and password (Proxy Password).
Part 3. Step-by-Step Configuration
Note: The instructions are based on the English version of the interface, but the placement of elements is identical for the Russian version.
Step 1. Digital Hygiene (Clearing History)
Before setting up a new secure connection, it is recommended to clear the browser data.
Click on the menu (three bars) -> History -> Clear history.
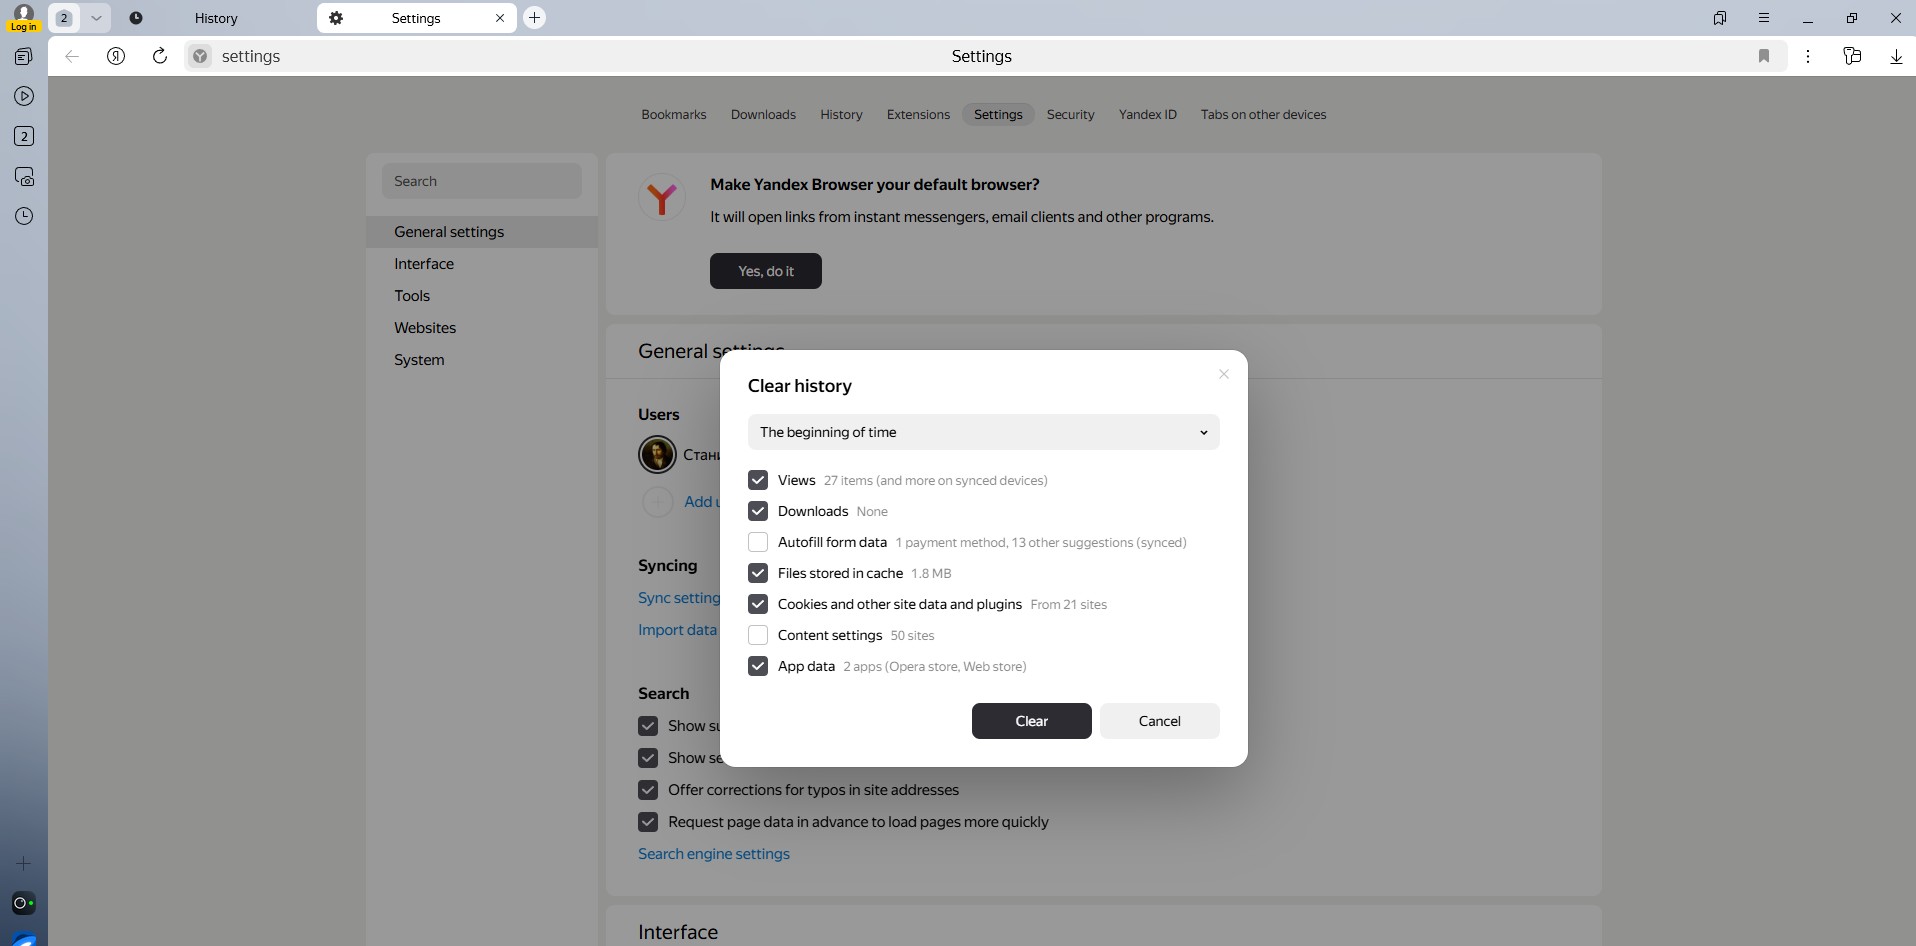 Fig. 2. User interface of Yandex Browser settings, browser history clearing section. The image shows a window with data clearing parameters, including the selection of time range and types of data to be deleted.
Select the range "All time".
- Check the boxes for Cookies, Cache, and browsing data. Click Clear.
Step 2. Navigating to System Settings
- Go to Settings.
- In the menu on the left, select the System section.
- Click on Proxy setup.
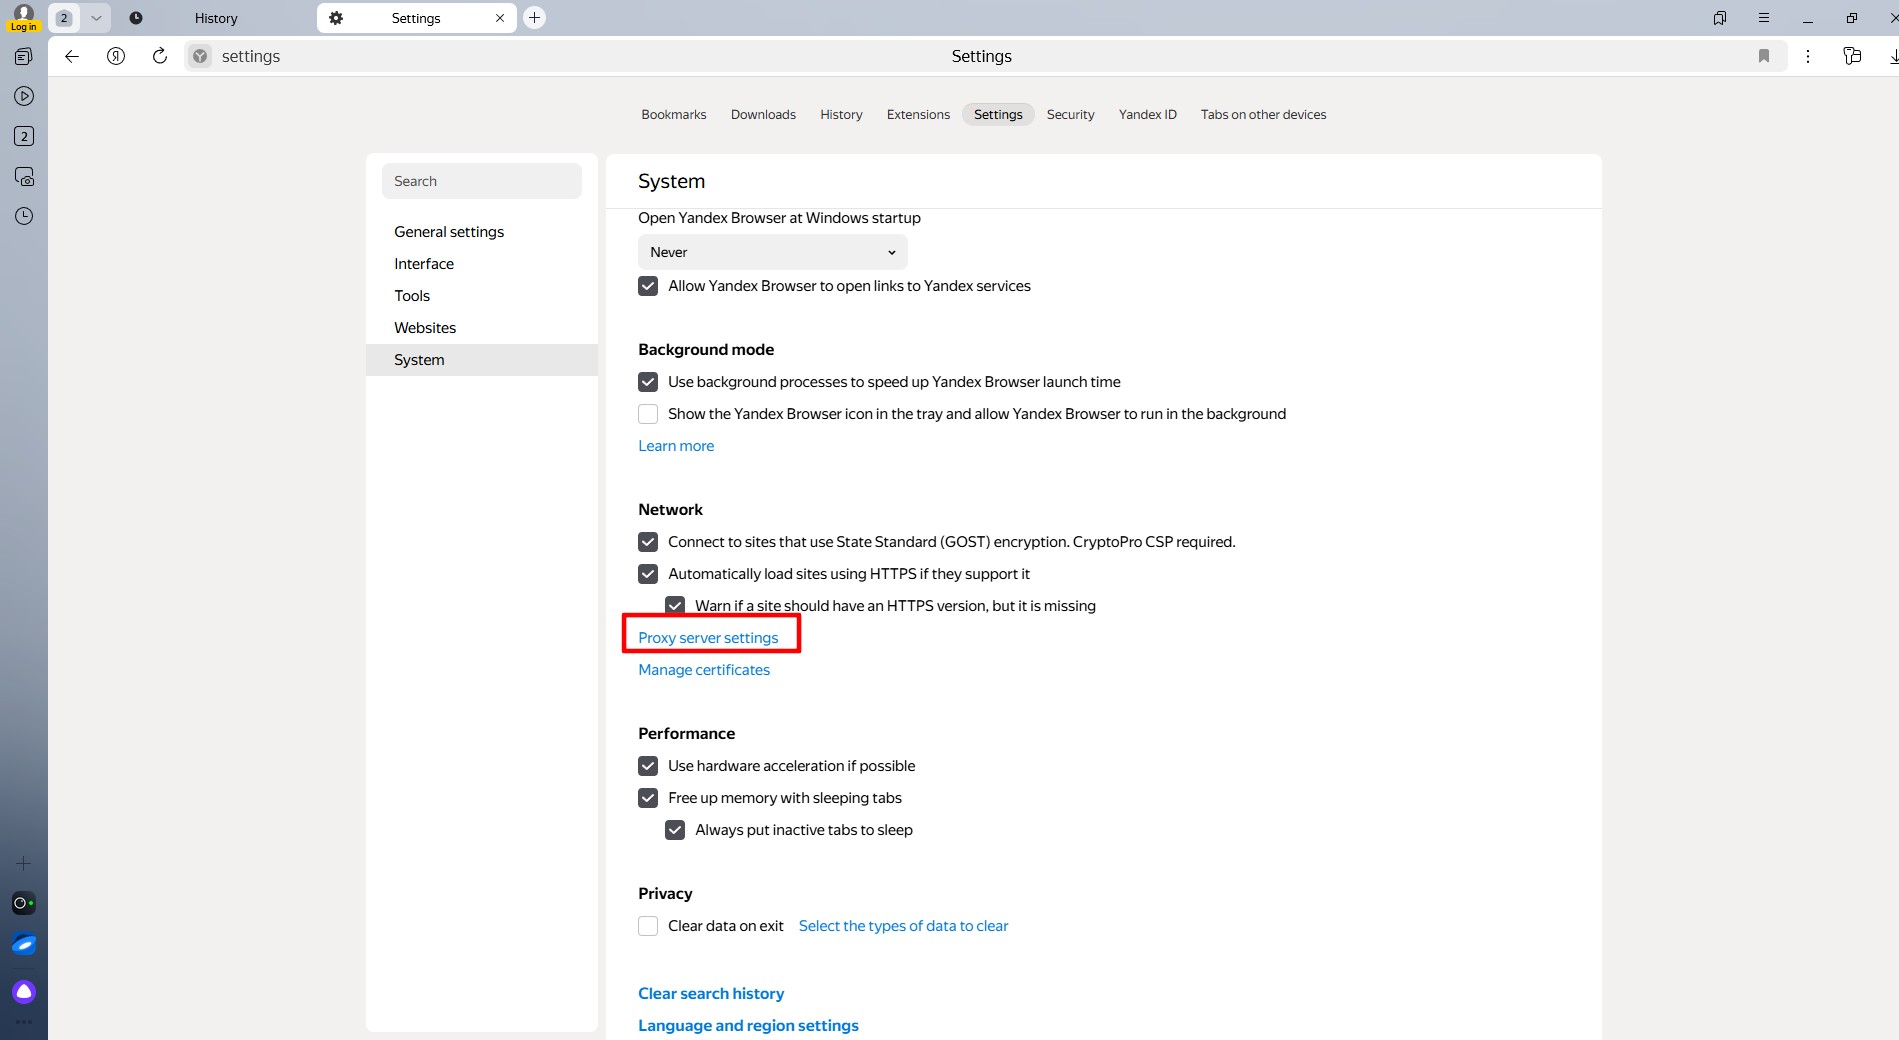 Fig. 3. System proxy settings window in Yandex Browser, demonstrating the connection parameter configuration panel. The image shows interface elements for configuring network settings and the proxy server.
Step 3. Configuring in Windows
The browser will redirect you to the "Internet Properties" window (Windows).
- Go to the Connections tab and click the LAN settings button.
- Check the box "Use a proxy server for your LAN".
- Enter the IP address in the Address field and the port in the Port field.
- Tip: If you are using an HTTP proxy, click "Advanced" and make sure the address is specified for both HTTP and Secure (HTTPS).
- Click OK to save.
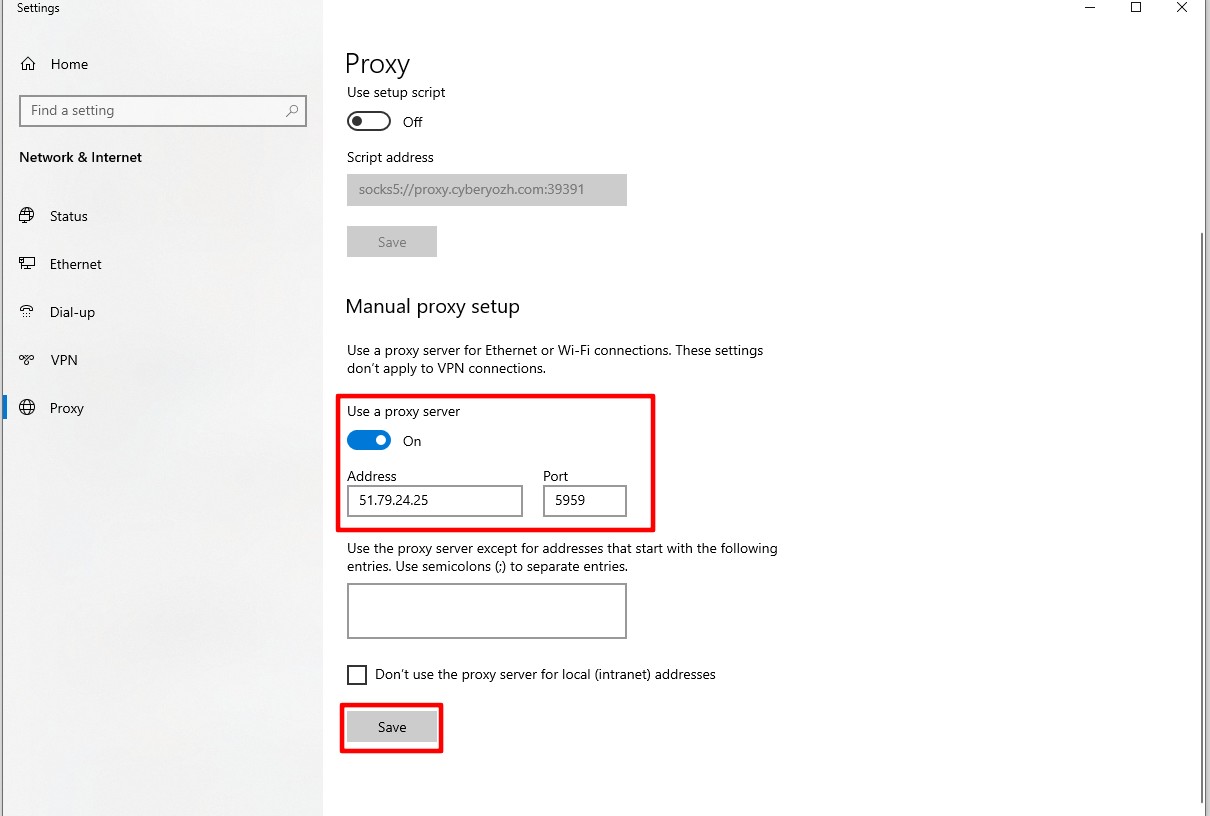 Fig. 4. Screen image of proxy server settings in Yandex Browser, demonstrating the system proxy configuration dialog box with fields for entering the server address, port, and authentication parameters.
Step 4. Authorization
Return to Yandex Browser and try to open any website (e.g., google.com). A system window will appear requesting authorization.
- Enter your Login and Password for the proxy.
- Click Sign in.
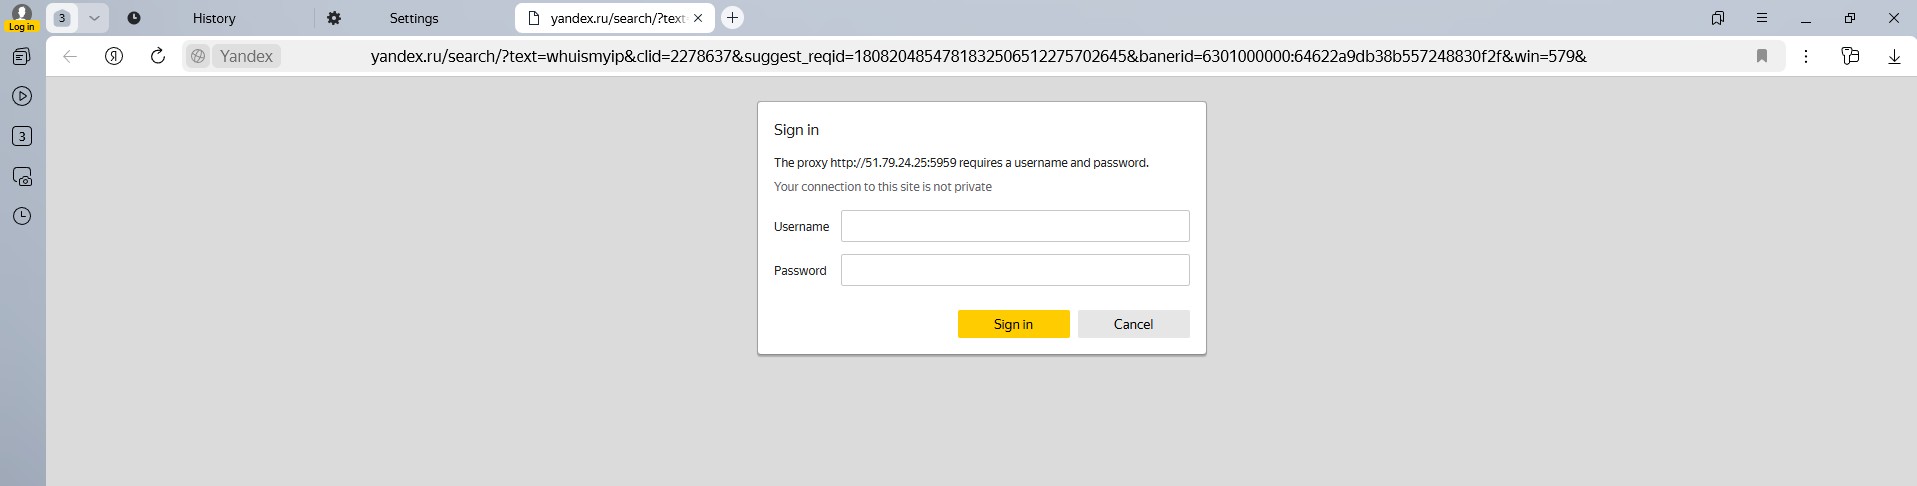 Fig. 5. Authentication dialog box in Yandex Browser for the proxy server. The window contains standard fields for entering credentials: username (login) and password, as well as a "Sign in" button to confirm authorization.
Part 4. Anonymity Check
Now your browser (and the entire system) is working through the new IP. Check it. Go to whoer.net or iplocation.net.
What to look for:
- Has your IP changed?
- Does the region match the purchased proxy?
- Are there any DNS or WebRTC leaks?
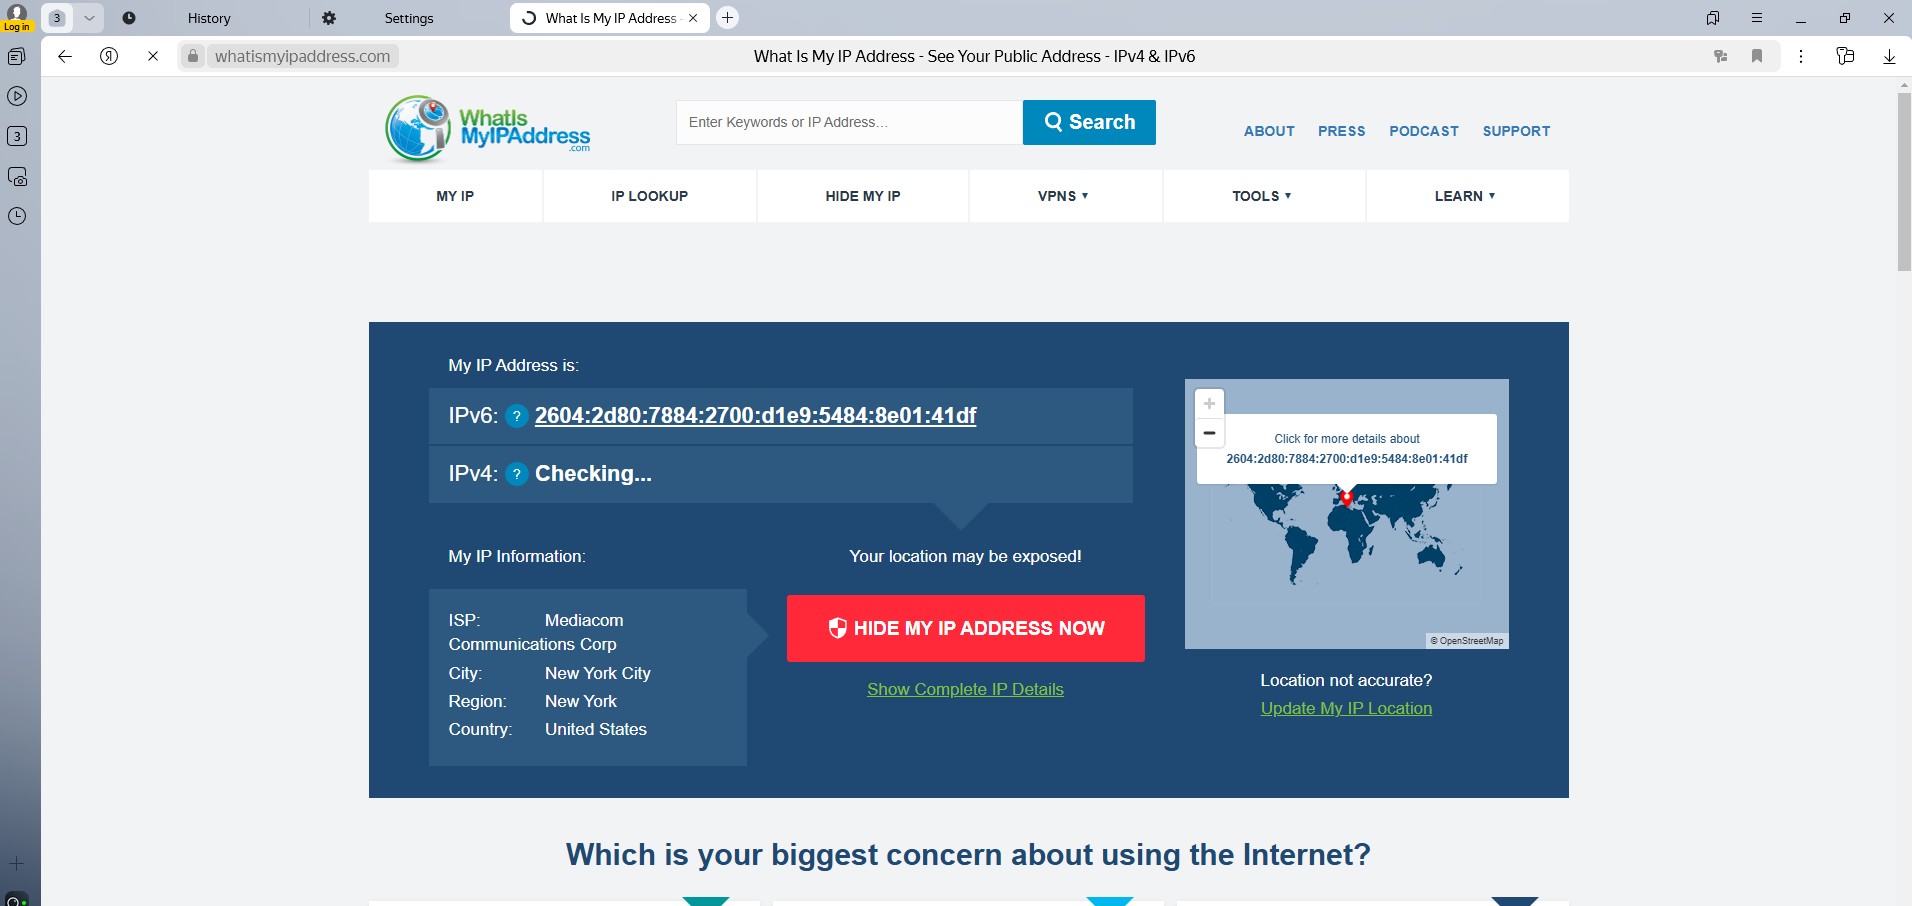 Fig. 6. IP address check service interface, showing the results of determining the current location and IP address after configuring the proxy server. The image confirms successful proxy configuration by displaying the changed IP address and geolocation.
If the data matches — you have successfully configured an anonymous connection.
Conclusion
Yandex Browser works great with proxies if they are selected correctly.
- For SEO and Marketing, use Residential Proxies.
- For Zen and social networks — Mobile Proxies.
- For streaming — Datacenter Proxies.
You can find reliable IPs with a clean history for working in the CIS and global segments in the CyberYozh App catalog. Have a safe workflow!
