
Today, we will take a detailed look at an important topic — the use of proxy servers in ZennoPoster for automating various tasks. We will break down not only the basic concepts of proxy server operation but also delve into the specifics of their configuration and application within the context of automation. We will explore different types of proxy servers, their features, and optimal use cases for various tasks.
After studying this detailed instruction, you will have all the necessary information to effectively use proxies in your projects: from basic setup to advanced application techniques. You will learn how to use proxies to manage network access and ensure a stable, uninterrupted connection, as well as how to create reliable automated processes in ZennoPoster.
In this guide, we will use the English version of the program, as it is the international standard and the most widely used in the professional community. However, it is important to note that for your convenience, various interface languages are available in the program settings.
What kind of proxy is needed for ZennoPoster?
Before opening ProjectMaker, you need to decide on the “fuel” for your template. Simply “buying a proxy” is not enough. You need to understand the difference between IP types.
1. Mobile Proxies (For marketing tasks) If your template is designed for managing corporate accounts (Facebook, Instagram, Google) or automating routine digital marketing tasks — you need Mobile Proxies (4G/5G).
- Why: Mobile IPs provide a connection with a high level of trust thanks to CGNAT technology, ensuring stable interaction with social platforms.
- ZennoPoster Nuance: You will need the IP rotation function. In the template, you will need to add a GET request to change the IP via a link (API) so that each new thread works from a clean address.
2. Residential Proxies (For corporate tasks) If you are writing a template for e-commerce management, market research on Amazon/eBay, or working with payment systems — choose Residential Proxies.
- Why: These are the IPs of real home users. They have maximum trust.
- ZennoPoster Nuance: Use them in static mode to maintain a constant connection profile and ensure secure, uninterrupted sessions.
3. Datacenter Proxies (For parsing) If the task is to collect data from thousands of pages (scraping), cheap Datacenter IPv4 or IPv6 will do.
- Why: Speed and low price. Trust is not important here.
How to buy a proxy
For reliable operation, use only proven services with positive reviews. Get the connection data for the proxy in the CyberYozh App. We have a separate guide explaining step-by-step how to do this.
Select a suitable proxy server and place an order. Important: use a separate proxy for each profile. We recommend purchasing private proxies.
Obtaining connection data
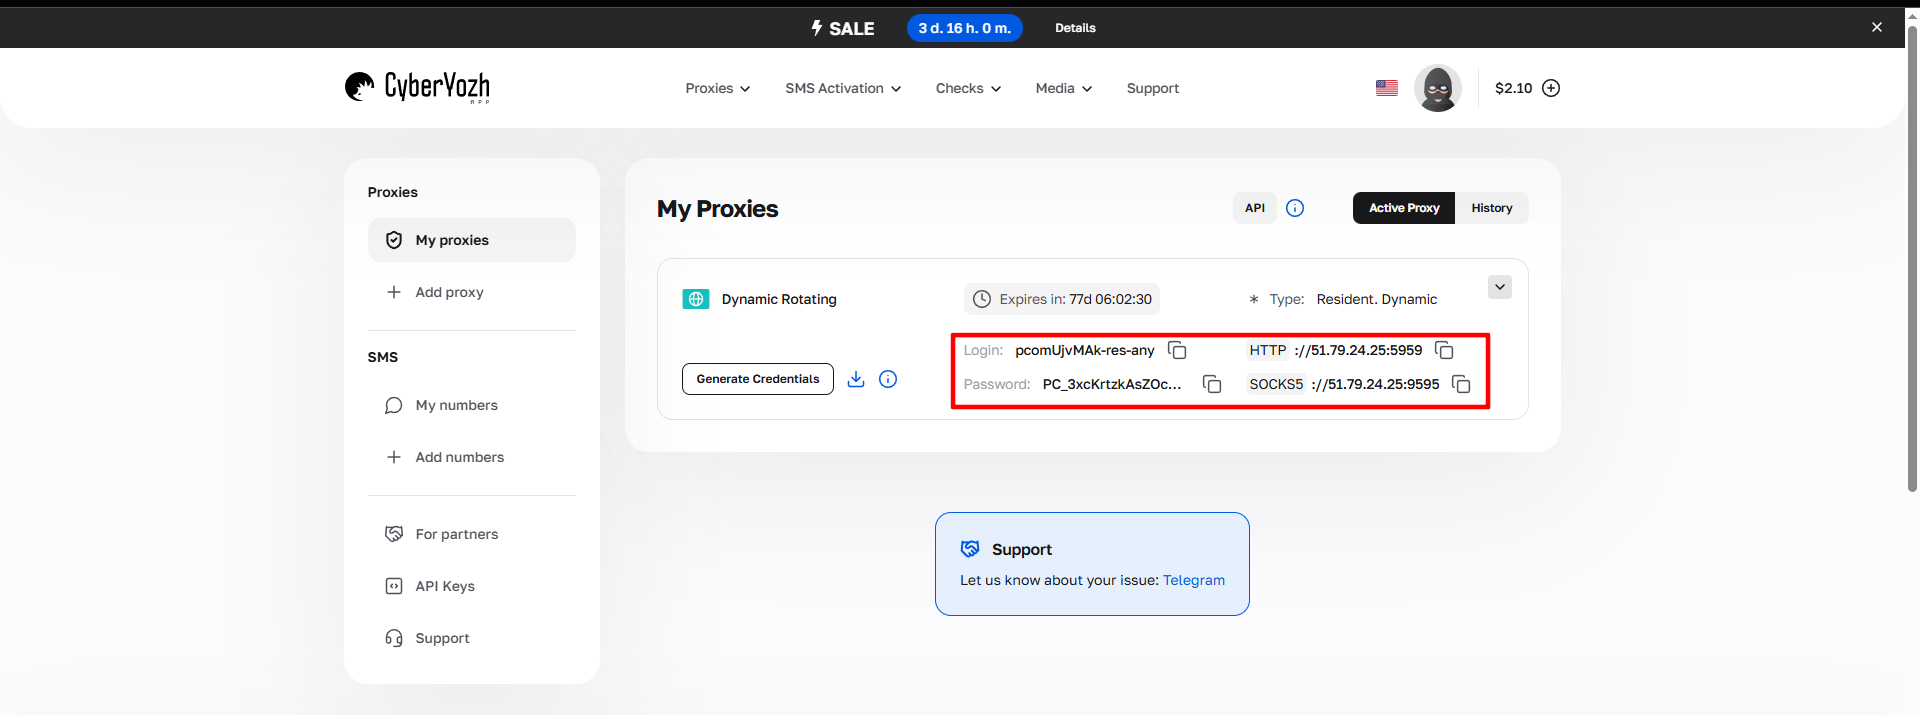 Fig. 1. Screenshot of the CyberYozh App platform interface, demonstrating the location of proxy server connection data. The image shows fields for IP address (Host), port (Port), username (Proxy Username), and password (Proxy Password).
After purchasing a proxy, you will receive connection information:
- Host: Proxy IP address
- Port: Proxy port
- Proxy Username: Login
- Proxy Password: Password
Proxy example:
- Host: 172.98.60.180
- Port: 58763
- Login: 7XbvvWautzmOZMA
- Password: xdtAof3xB7RSmUr
Step-by-step guide to setting up a proxy in ZennoPoster
Let's take a detailed look at the process of configuring proxy servers in ZennoPoster. The program supports working with three main types of proxy protocols, each of which has its own characteristics and advantages:
- HTTP — the basic protocol for working on the Internet, which is widely used for simple tasks and provides a standard level of security.
- SOCKS5 — a more versatile protocol with extended functionality, including UDP support.
- SSH — the most secure protocol with full data encryption, providing the highest level of security when transmitting information.
In our guide, we will focus on using the SOCKS5 protocol, as it represents the optimal balance between versatility and high performance. It is important to note that the setup steps described below will also apply to the configuration of HTTP and SSH protocols, making this guide universal for all proxy types.
Prepare the proxy list
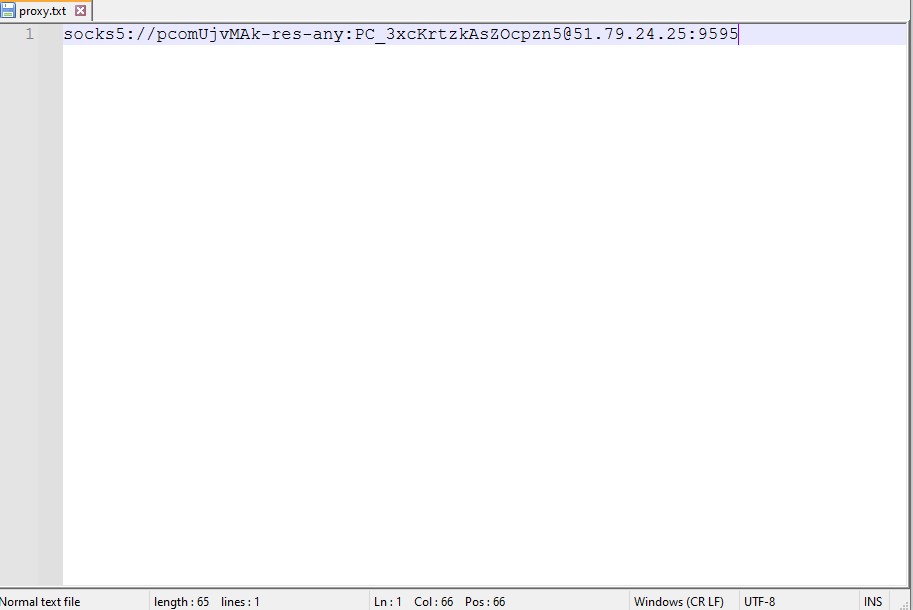 Fig. 2. Window for adding a proxy list with configuration options.
- Create a text document (.txt) on your device.
- Enter all proxies in this format:
Free proxy:
IP:port
Proxy with authorization:
login:password@IP:port
Creating a new project
- Launch the program and create a new project:
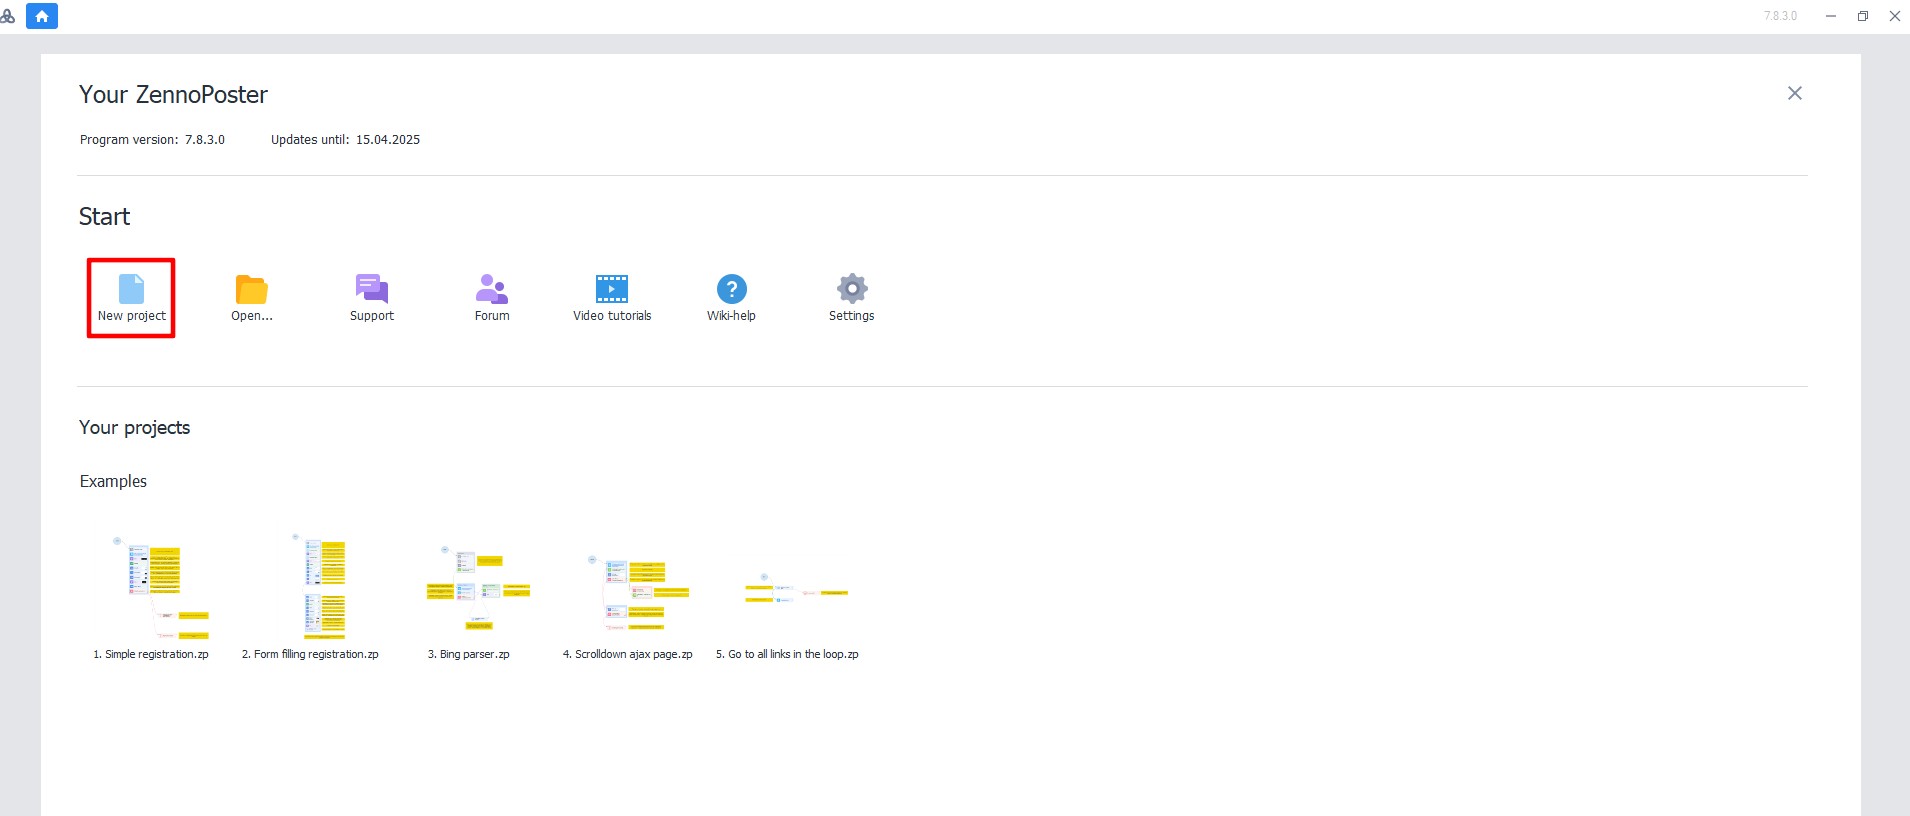 Fig. 3. Interface for creating a new project in ZennoPoster. The image shows the program window with basic controls for project initialization, including save options and parameter settings.
- Click "File" → "Save".
- Specify the path and project name.
** Adding a proxy list**
- At the bottom of the screen, click the "+" icon ("Add" submenu).
- Select "Add list".
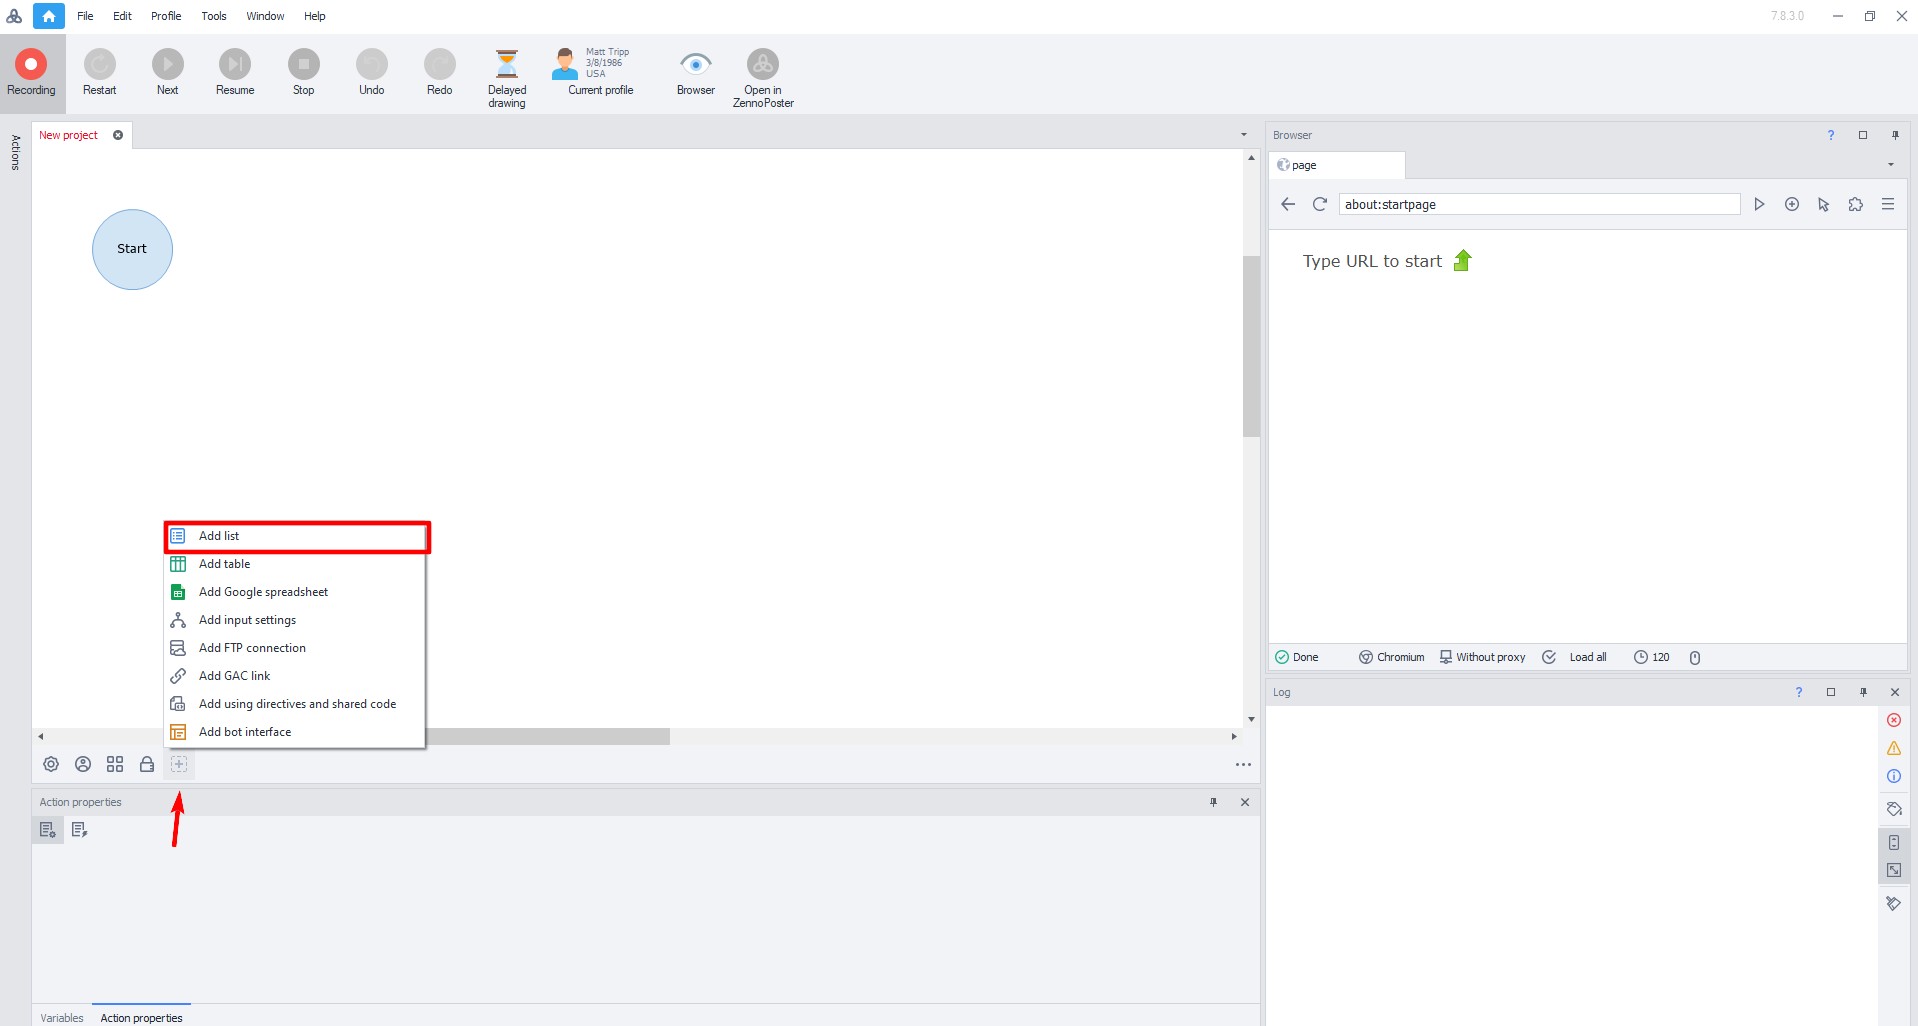 Fig. 4. Dialog box for adding a new list in ZennoPoster. The image shows the program interface with the "+" button and the "Add list" option for creating a new list element.
Set the name of the list and click "OK".
In the window that opens:
- Check the box next to "Load from file".
- Specify the path to the previously created file with proxies.
- Check the box next to "Save changes to list".
After this, the proxy list will appear in the program.
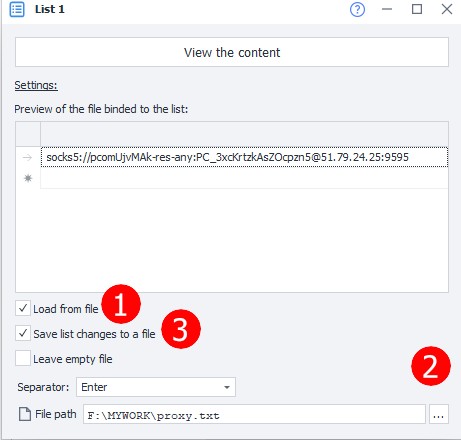 Fig. 5. Visualization of successful proxy list import in the ZennoPoster interface.
Configuring list operations
In the workspace, drag the arrow from "Start" to the right.
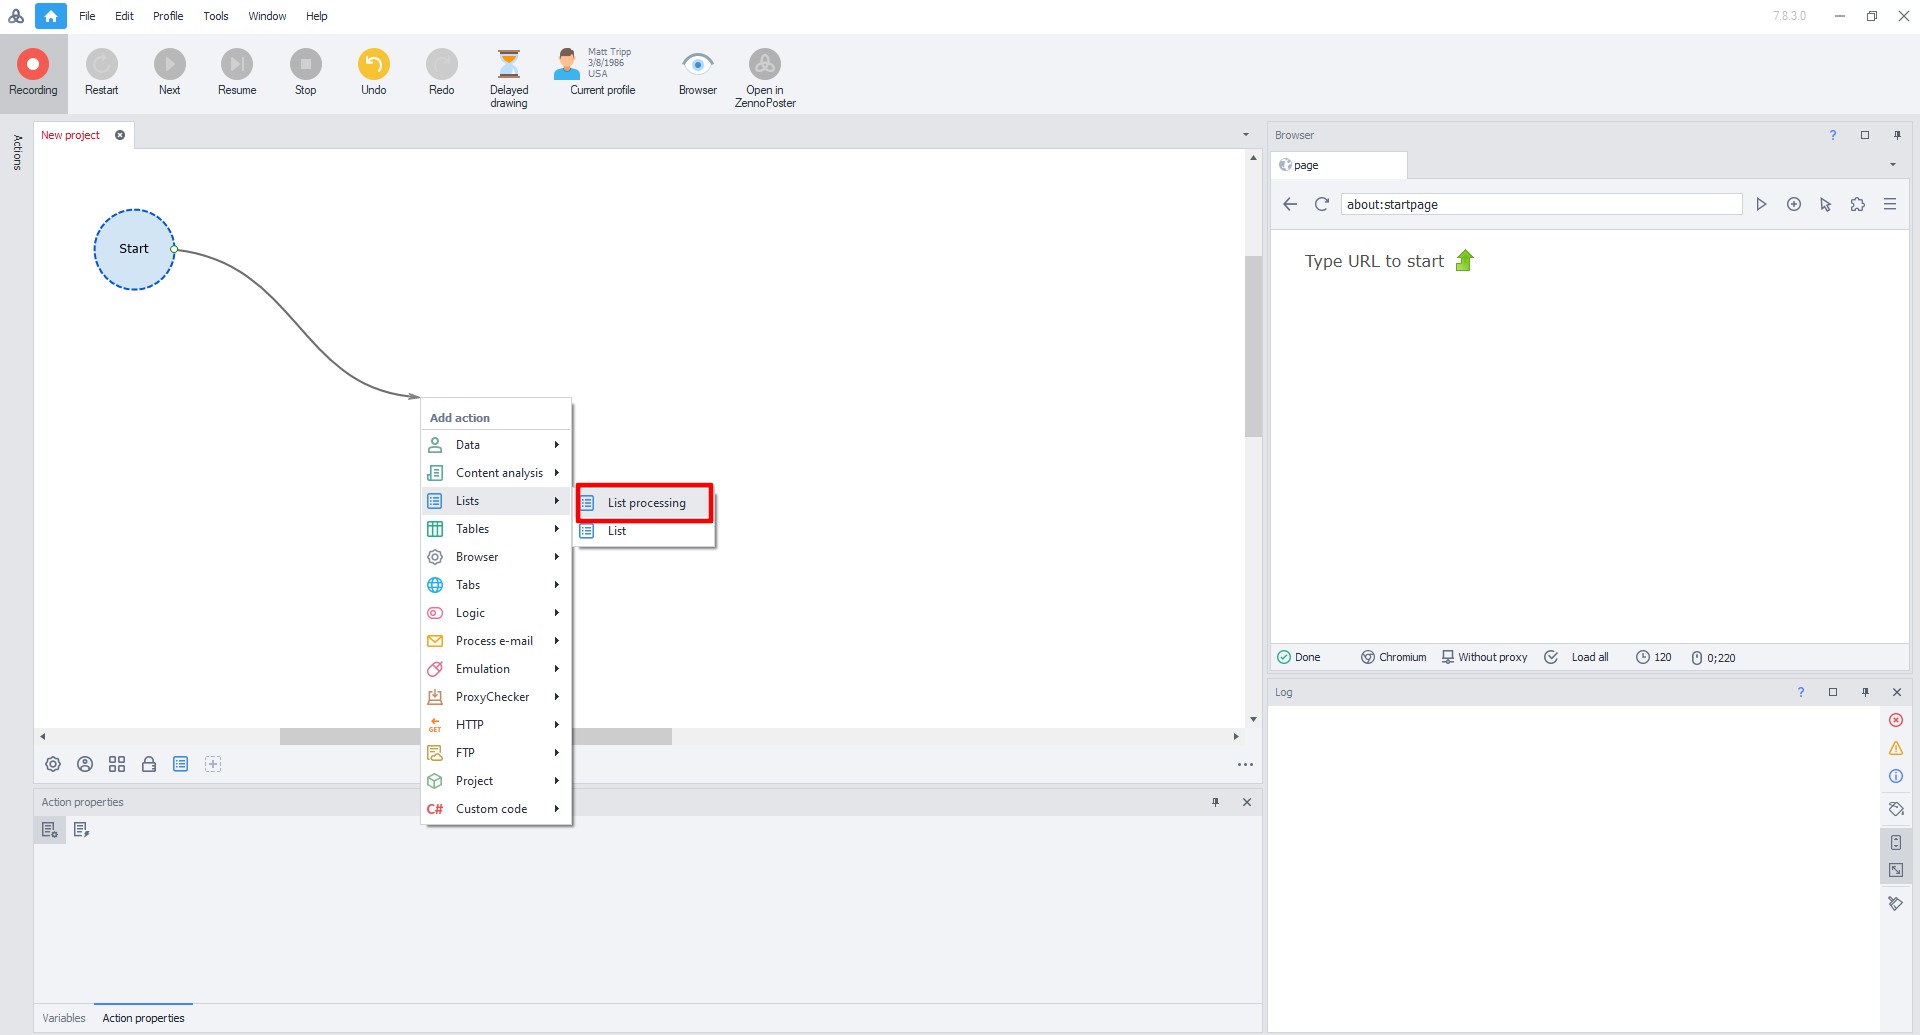 Fig. 6. Workflow diagram in ZennoPoster, demonstrating the interface for setting up connections between system components.
In the menu that opens, select "List" → "List operations".
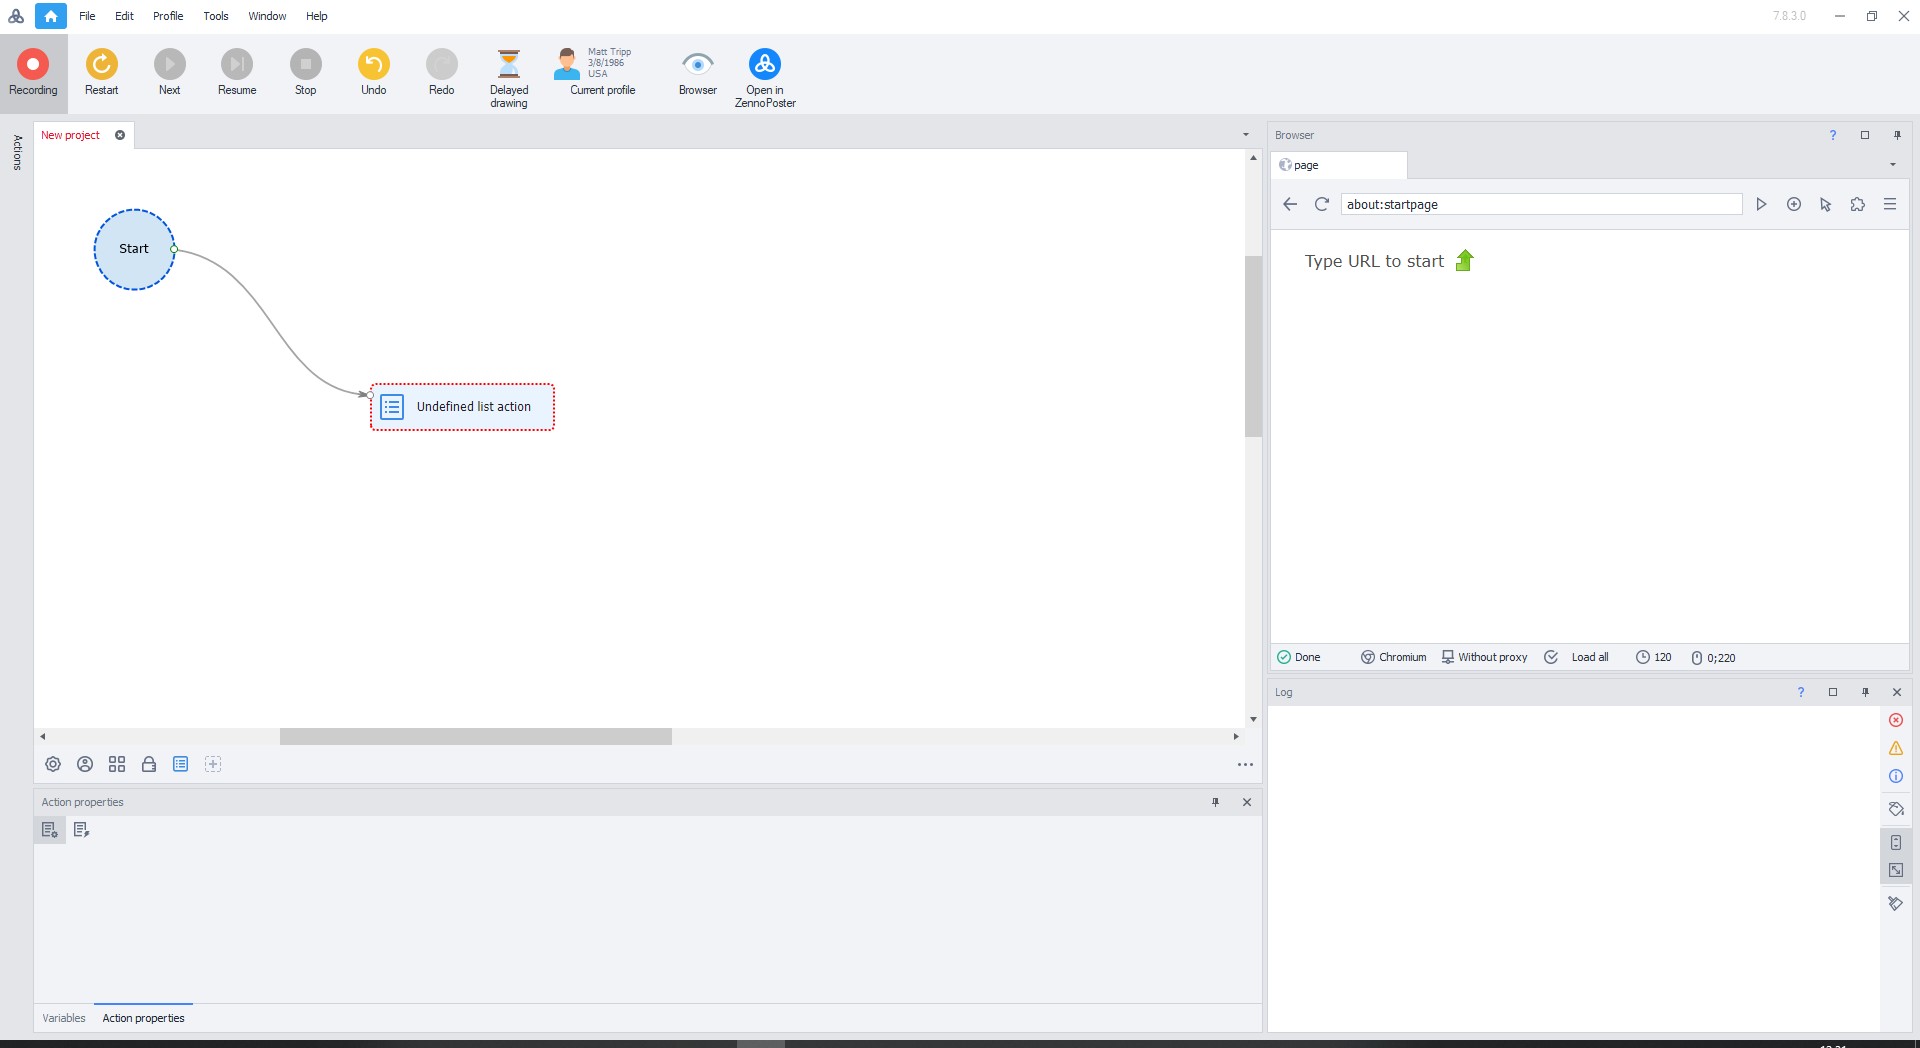 Fig. 7. Dialog box for selecting list operations in the ZennoPoster interface, demonstrating a hierarchical menu with options for working with lists.
Double-click on "Undefined list actions".
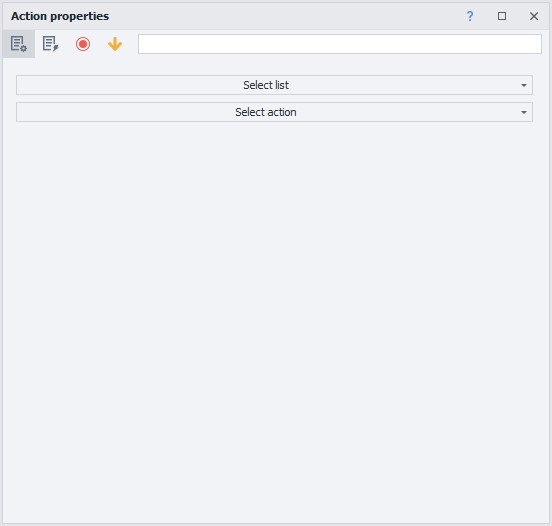 Fig. 8. Dialog box for configuring list operations in ZennoPoster, showing the selection of the "Undefined list actions" action with configuration parameters.
In the menu that opens, select:
- List — select the added proxy list.
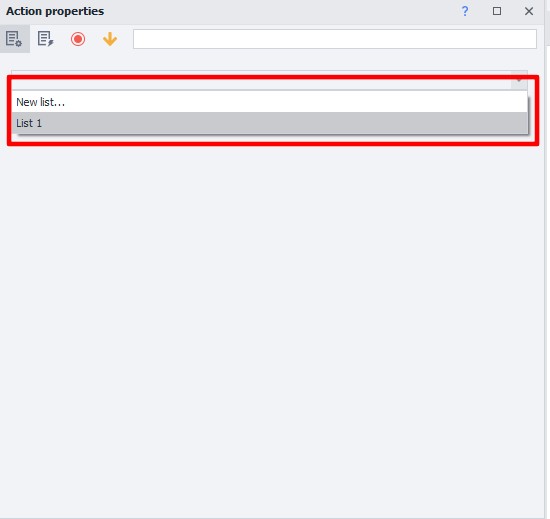 Fig. 9. List setup dialog box in ZennoPoster with action selection parameters and variable configuration.
- Action — select "Get line".
- In the "Put into variable" field, enter the name of the variable in English.
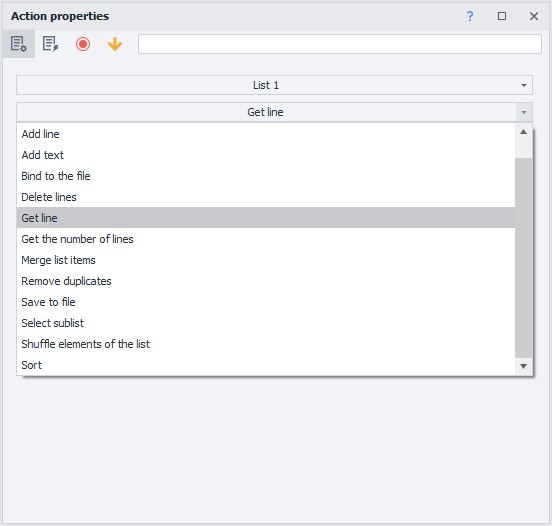 Fig. 10. Variable setup dialog box in ZennoPoster, demonstrating the field for entering a variable name in English, intended for storing proxy server information.
- Click "Create".
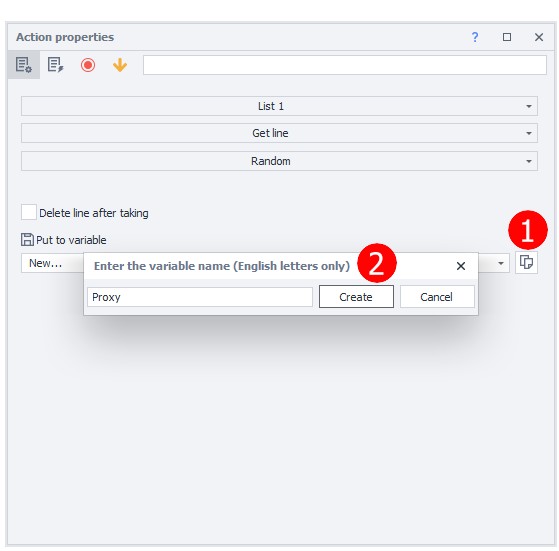 Fig. 11. Visualization of the variable setup interface in ZennoPoster after creating a new proxy server list item. The image shows the configuration results with successfully set parameters for working with the proxy list.
- Close the window.
Setting the proxy in the browser
- Drag the arrow from "Start" to the new action.
- In the menu that opens, select "Browser" → "Settings".
- Double-click on the "Browser settings" rectangle.
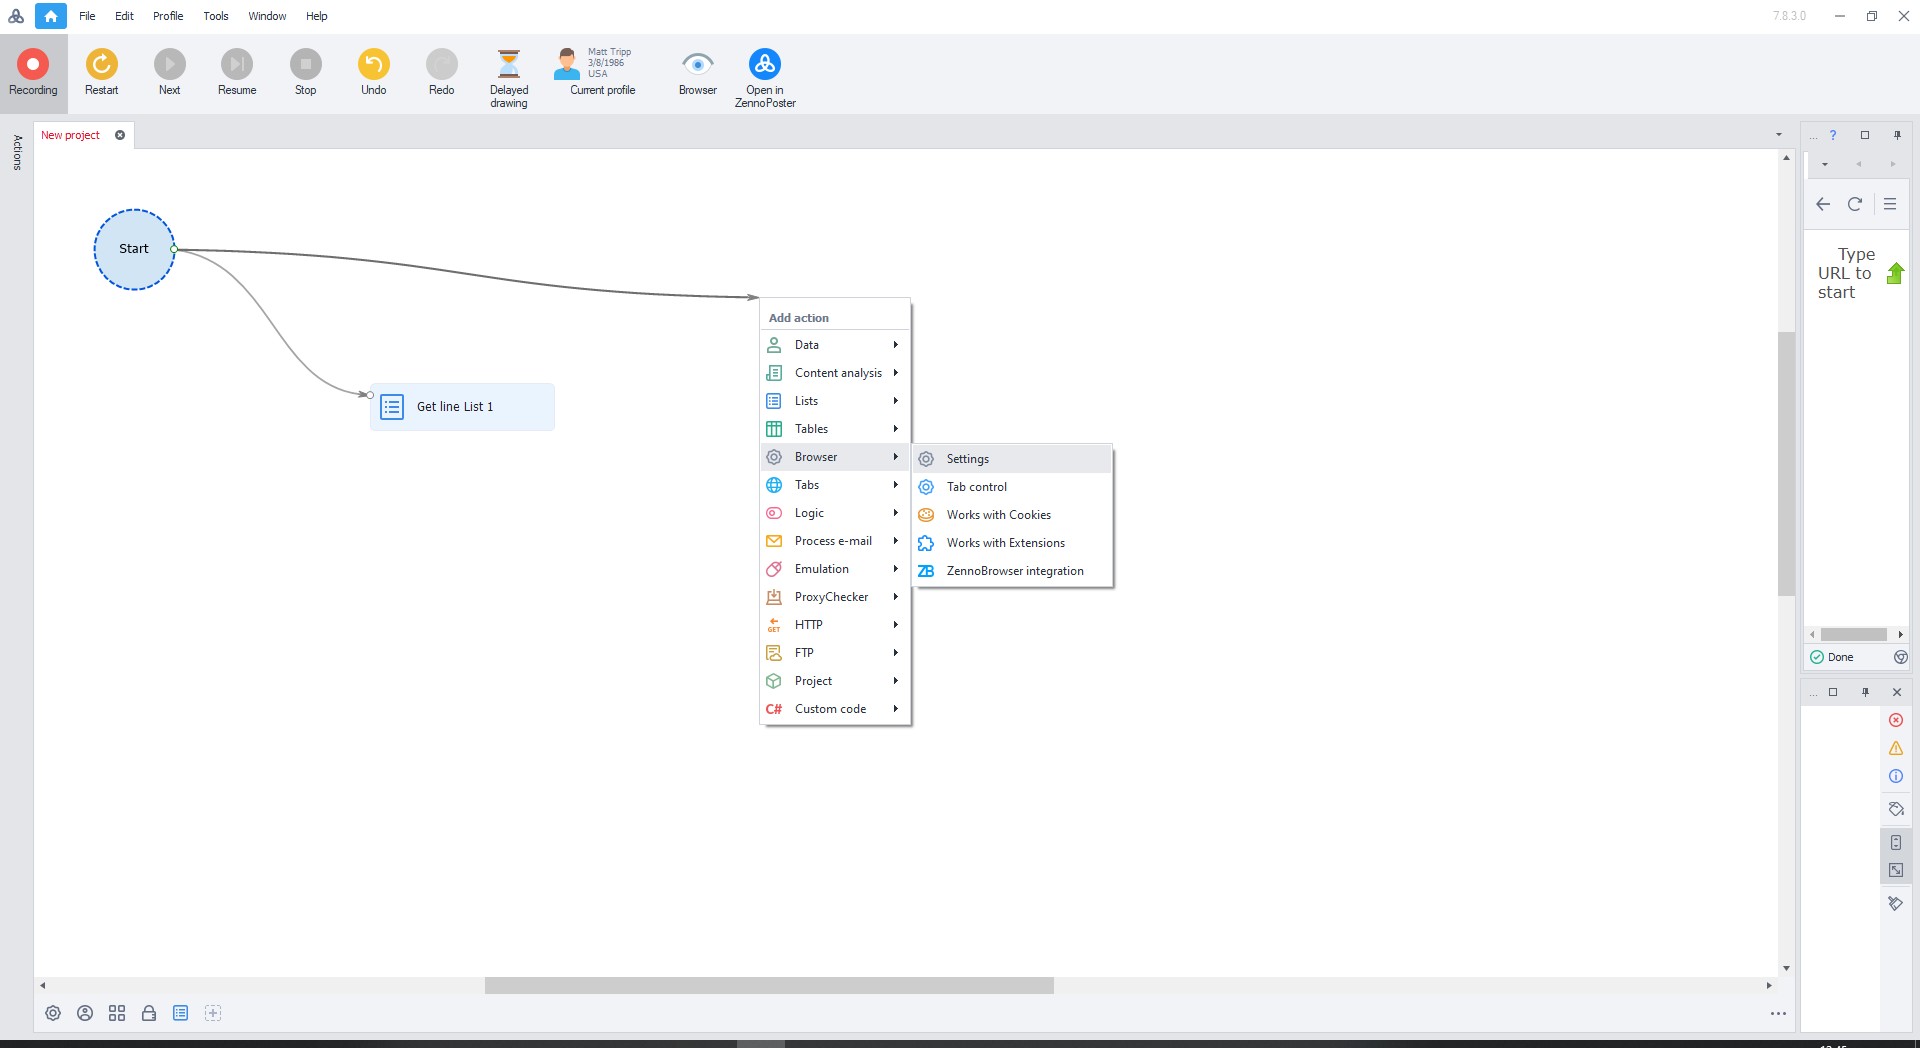 Fig. 12. Dialog box for configuring browser parameters in ZennoPoster. Shows basic configuration elements and proxy server options.
In the menu, select:
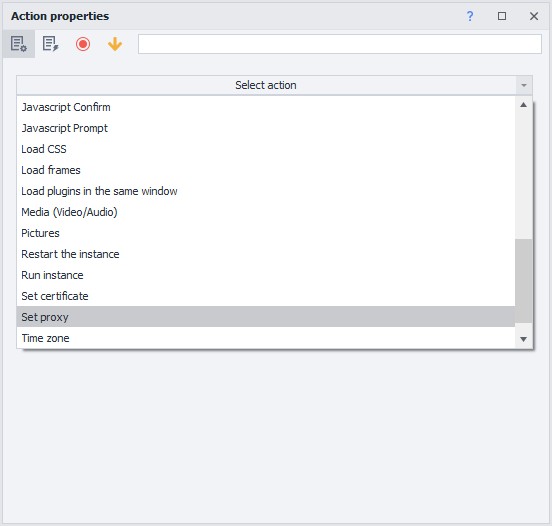 Fig. 13. Graphic interface for setting up a proxy server in ZennoPoster. The image shows a dialog box with proxy configuration parameters, including fields for setting up and configuring the proxy connection.
- "Set proxy".
- In the field, right-click and select "Set value from variable".
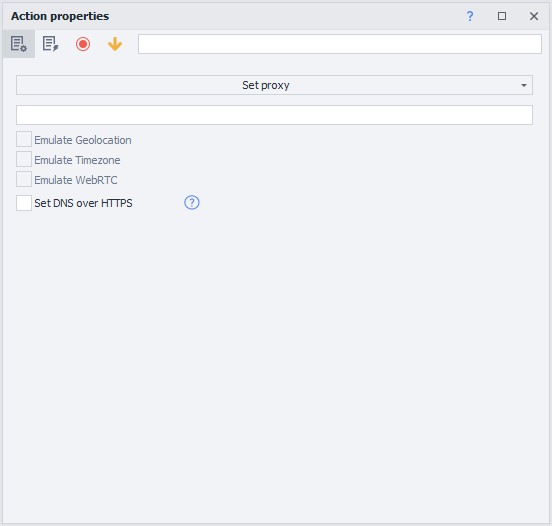 Fig. 14. Context menu in the ZennoPoster interface, demonstrating the selection of the "Set value from variable" option for proxy server configuration.
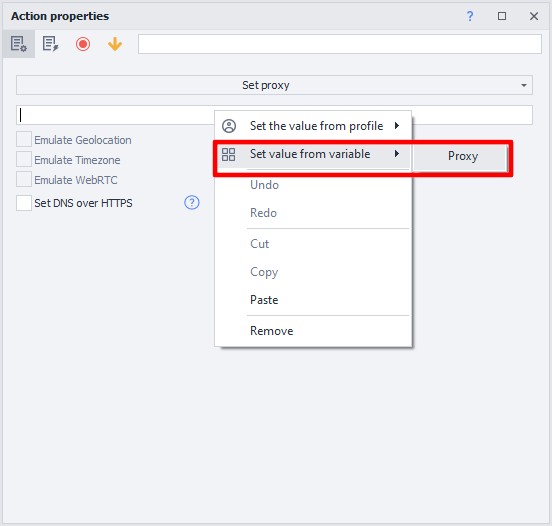 Fig. 15. Proxy configuration dialog box in ZennoPoster, showing the interface for selecting variables to set up the proxy connection.
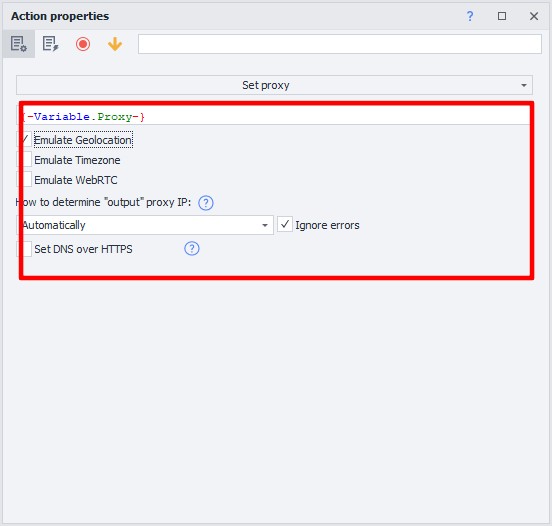 Fig. 16. Final stage of proxy configuration via the variable system in ZennoPoster.
Close the window.
Performance check
- Drag the arrow from "Start" to the new action.
- In the menu that opens, select "Go to page".
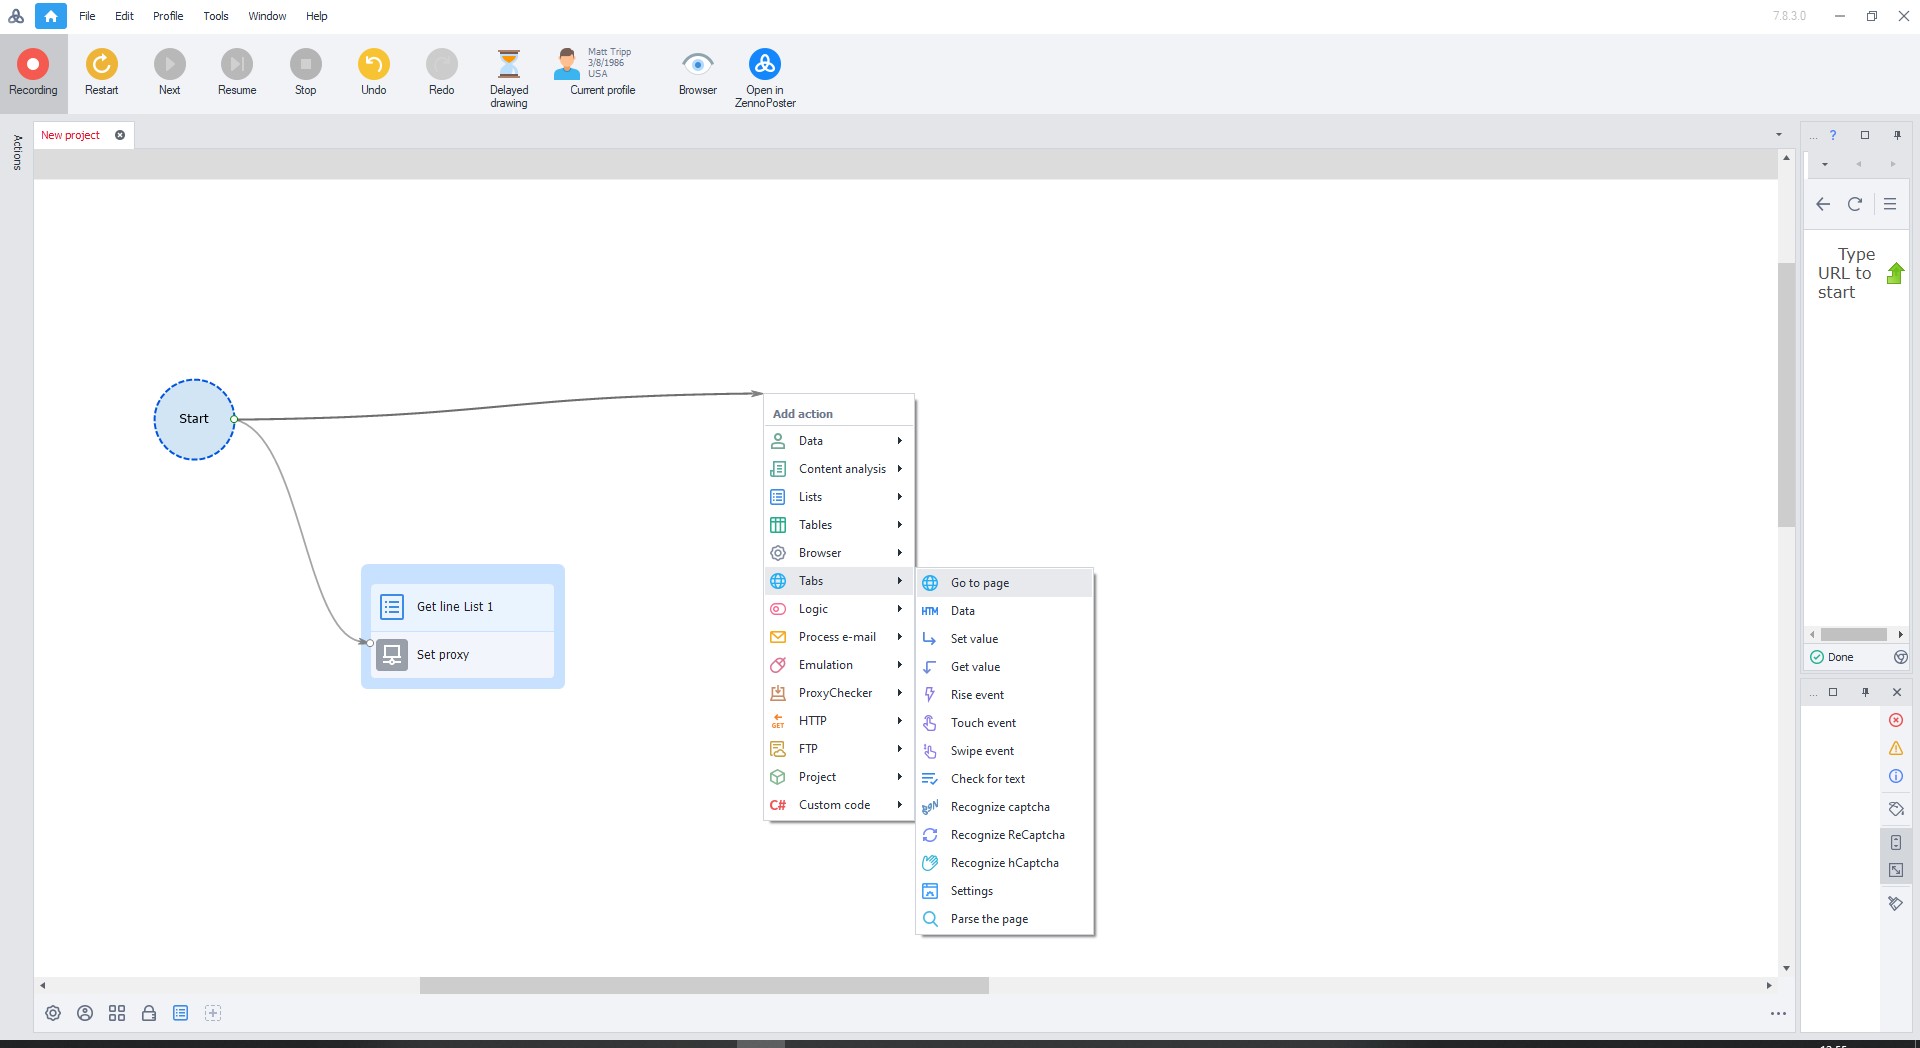 Fig. 17. ZennoPoster interface, showing the "Go to page" setup dialog box with a field for entering a URL. The interface element demonstrates basic configuration parameters for navigating web pages as part of an automated process.
Enter any website in the URL field (e.g., whatismyipaddress.com) and close the window.
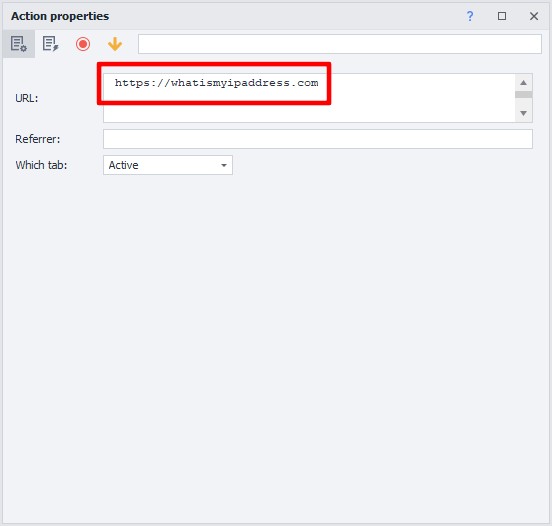 Fig. 18. Visualization of the ZennoPoster interface, demonstrating the process of setting a URL in the go-to-page dialog box.
Drag all three rectangles so that they are connected by arrows.
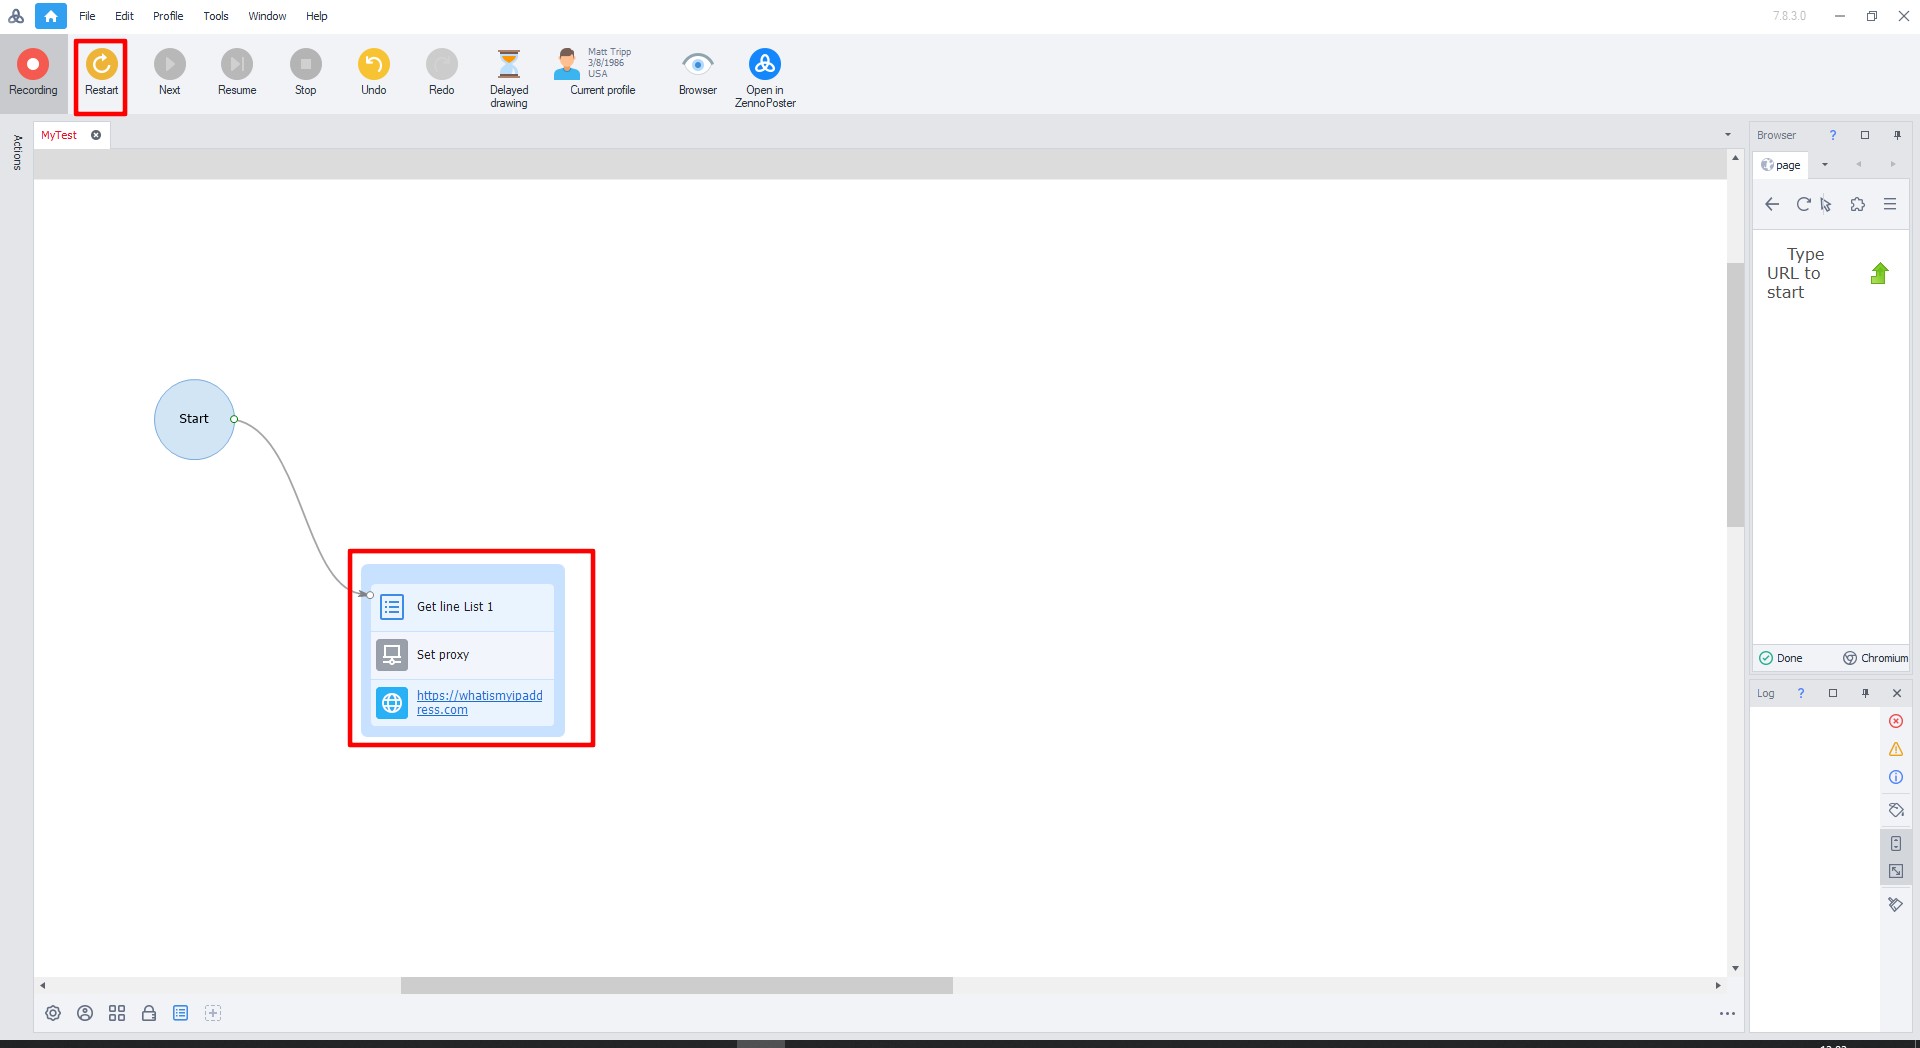 Fig. 19. Sequence of operations diagram in ZennoPoster with visualization of connections between proxy configuration blocks.
Click on the green arrow to start (or press F10).
If the setup is correct, green checkmarks will appear next to the rectangles.
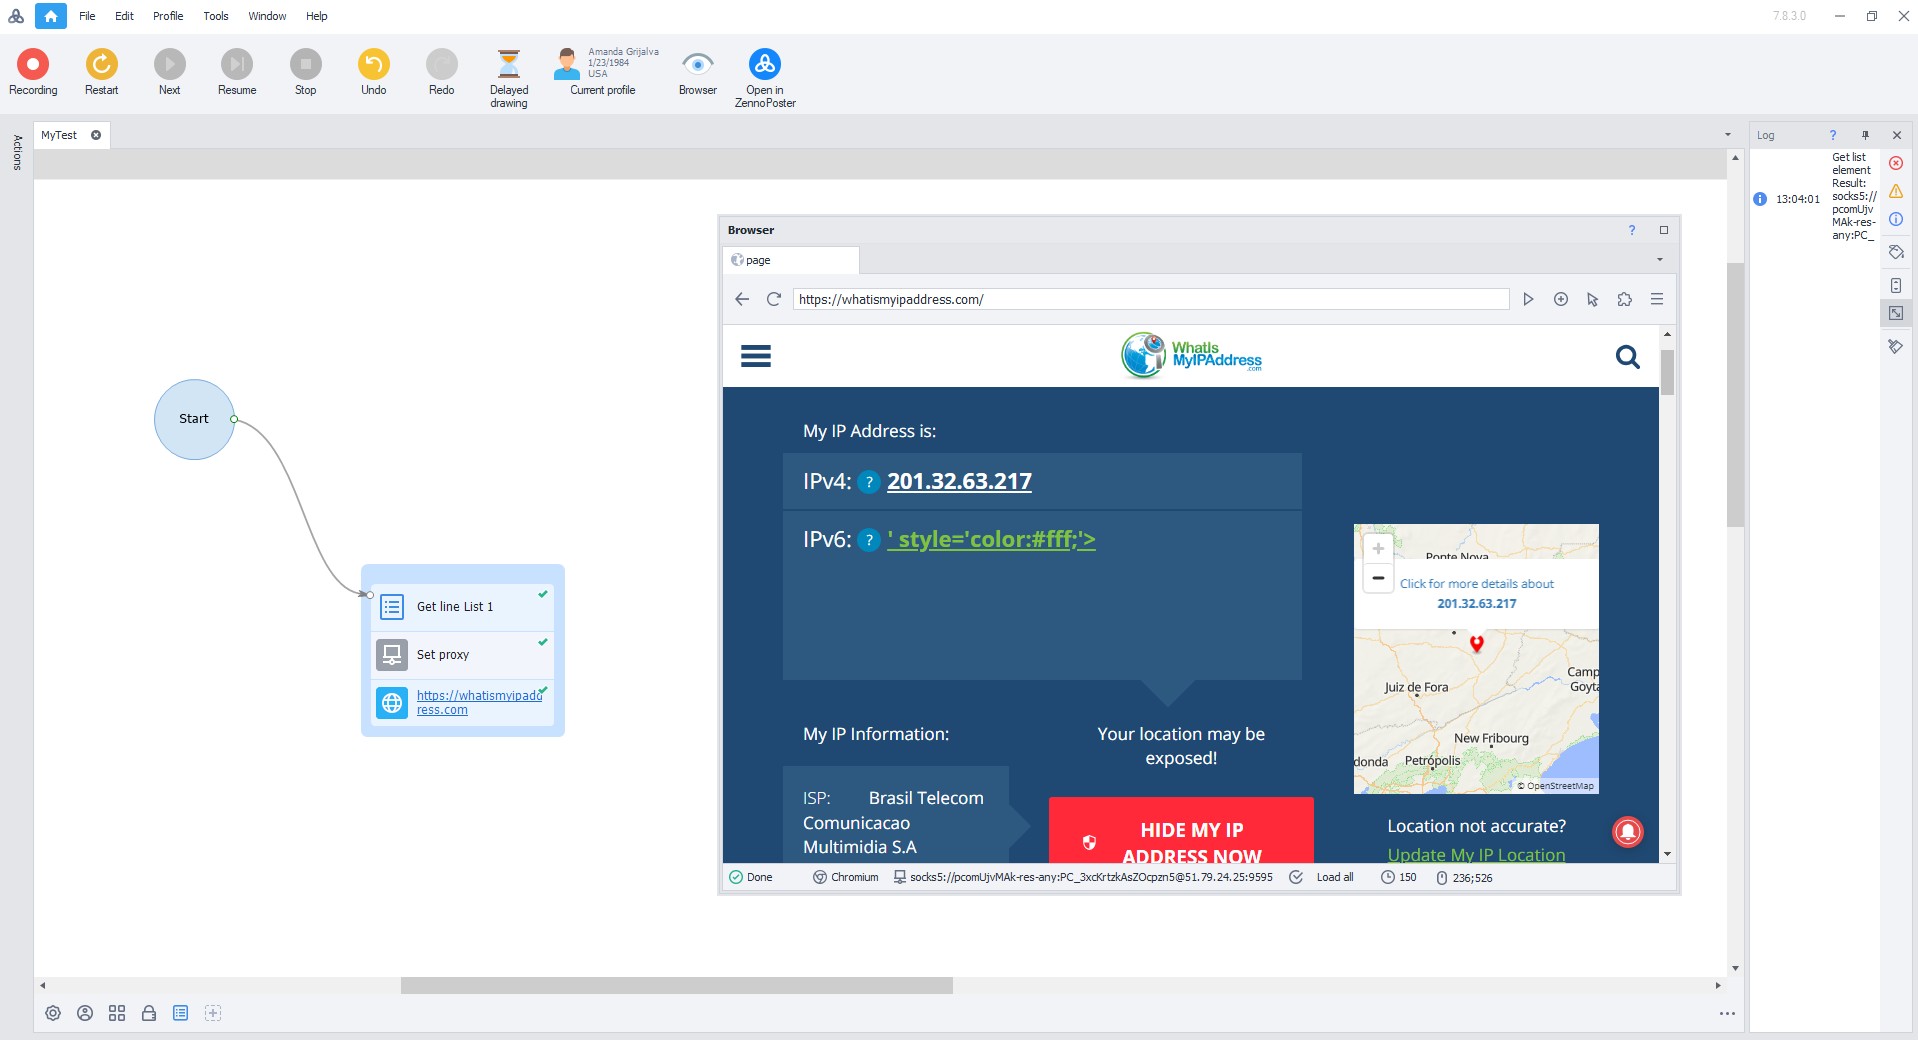 Fig. 20. ZennoPoster user interface, demonstrating successful execution of the configured sequence of operations, indicated by green checkmarks next to each stage of proxy configuration and its successful operation.
After execution, the site will open through the configured proxy.
Congratulations! You have successfully configured a proxy in ZennoPoster. Now you can work safely and effectively on the Internet. To increase the level of protection, we recommend using dedicated virtual numbers for secure registration of corporate accounts — this will provide additional privacy and protect corporate data.
