
Opera is known for its built-in free VPN. However, every professional knows: there’s no such thing as a free lunch. The built-in service is slow, offers few locations, and is easily detected by websites. For professional tasks (network testing, secure remote access, digital marketing) or comfortable work with global media without lags, you need a private proxy.
The main feature of Opera is that it uses system proxy settings. This means that by configuring the browser, you are actually rerouting the traffic of your entire computer through the proxy server.
In this guide, we will break down which proxy type to choose for your tasks and how to configure it via system parameters.
Part 1. Strategy: Which Proxy Do You Need for Opera?
Moving away from the built-in VPN is the right decision. But what should you choose instead?
1. Datacenter Proxies — Replacement for built-in VPN
- What they are: High-speed IP addresses from data centers.
- Purpose: An ideal replacement for a free VPN. Secure and fast access to international media platforms, downloading files, and accessing news resources.
- Pros: High speed (up to 1 Gbps) and low price.
2. Residential Proxies (ISP) — For secure shopping and finance
- What they are: IP addresses of real home internet service providers.
- Purpose: Secure purchases on foreign marketplaces, protection of payment data when paying for services, and reliable work with international platforms.
- Why: They ensure a seamless browsing experience with maximum protection of your personal data.
3. Mobile Proxies (4G/5G) — For corporate social networks
- What they are: Dynamic IPs from mobile carriers.
- Purpose: If you use Opera for professional SMM management and secure brand monitoring.
- Why: Reliable and stable connection for secure management of corporate profiles.
- 👉 You can read more about mobile proxies here
Part 2. Data Preparation
For the configuration, we will need data from a reliable provider. We recommend CyberYozh App.
After purchase, you will receive:
- IP (Host):
172.98.60.180 - Port:
58763 - Login / Password: Authorization credentials.
Important: To configure via the Windows system menu (as in this guide), it is best to use the HTTP/HTTPS protocol.
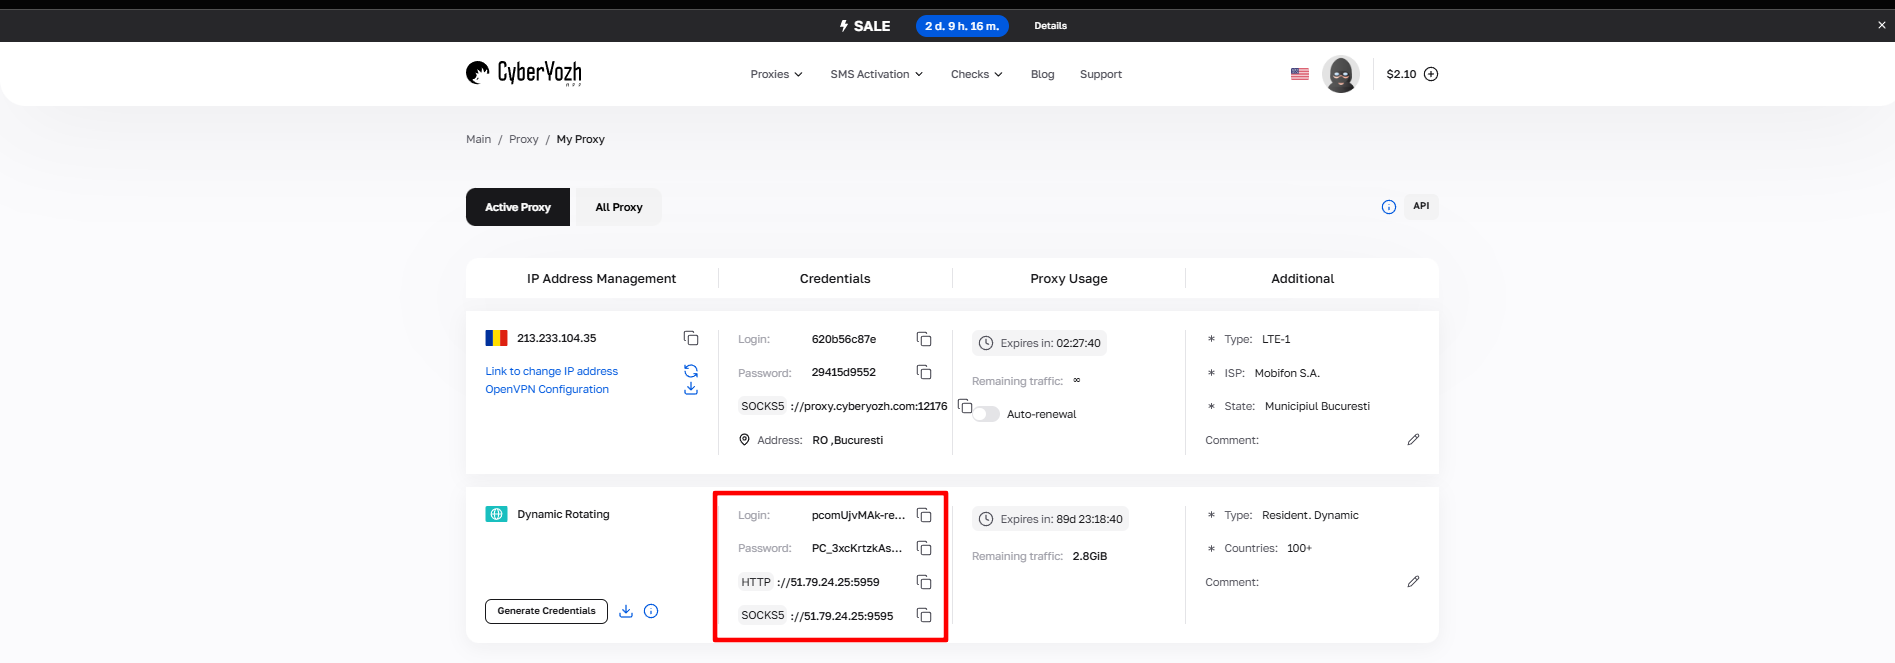 Fig. 1. Screenshot of the CyberYozh App platform interface, showing the location of data for connecting a proxy server. The image displays fields for IP address (Host), port (Port), username (Proxy Username), and password (Proxy Password).
Part 3. Proxy Configuration (System Method)
Remember: this setting will change the IP address for your entire system (including other browsers and programs).
Step 1. Accessing Settings
- Open Opera. Tip: for clean tests, it’s better to use Incognito mode (Ctrl+Shift+N), but proxy settings apply globally.
- Click on the "Settings" icon (sliders) in the sidebar or press
Alt+P. - Scroll down and click "Advanced" to expand the full menu.
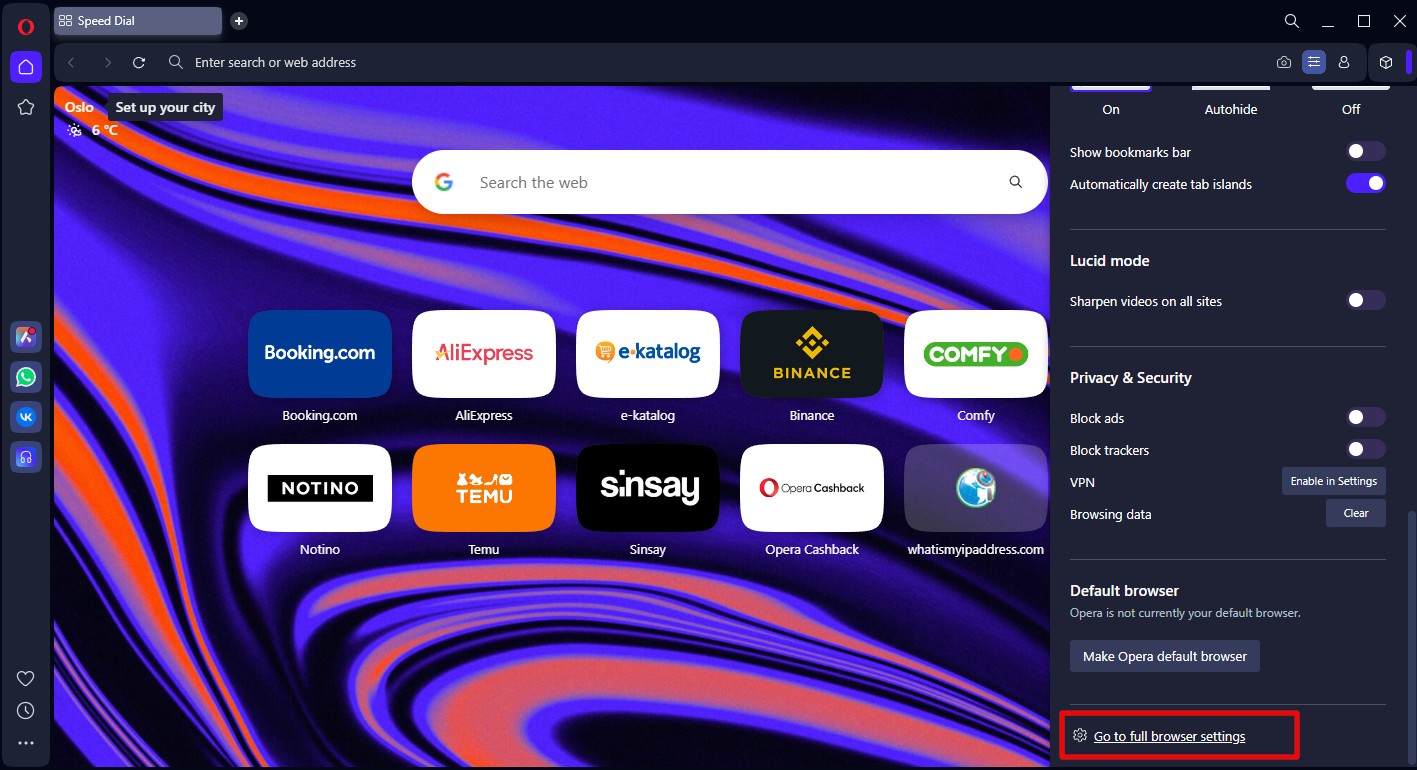 Fig. 2. Opera browser user interface with the settings context menu open. The image demonstrates access to the "Advanced" section required for subsequent proxy server configuration.
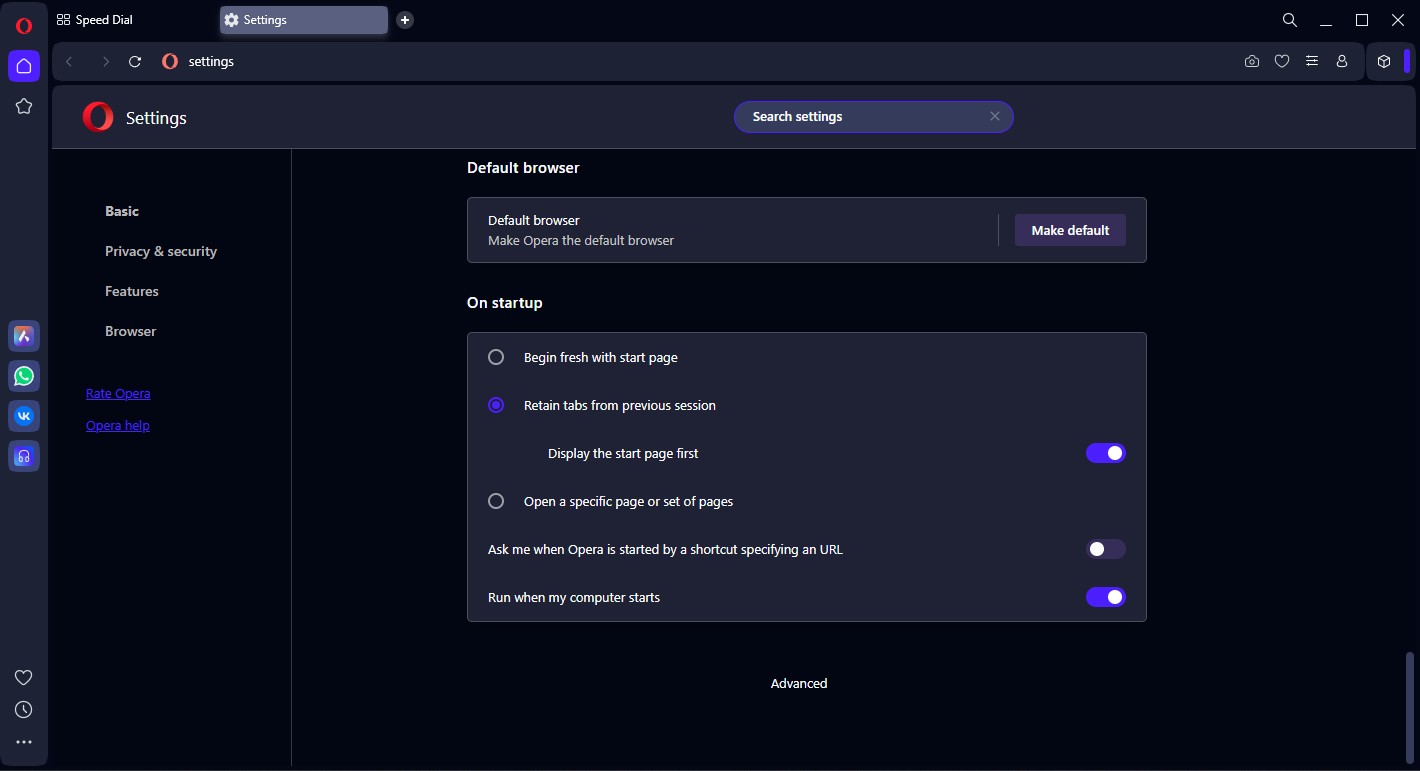 Fig. 3. Opera browser settings screen with the "Advanced" section open. The interface shows the location of system settings where the proxy server configuration is performed.
Step 2. Opening System Parameters
- Scroll to the "System" section.
- Find the "Open your computer's proxy settings" item and click the arrow button.
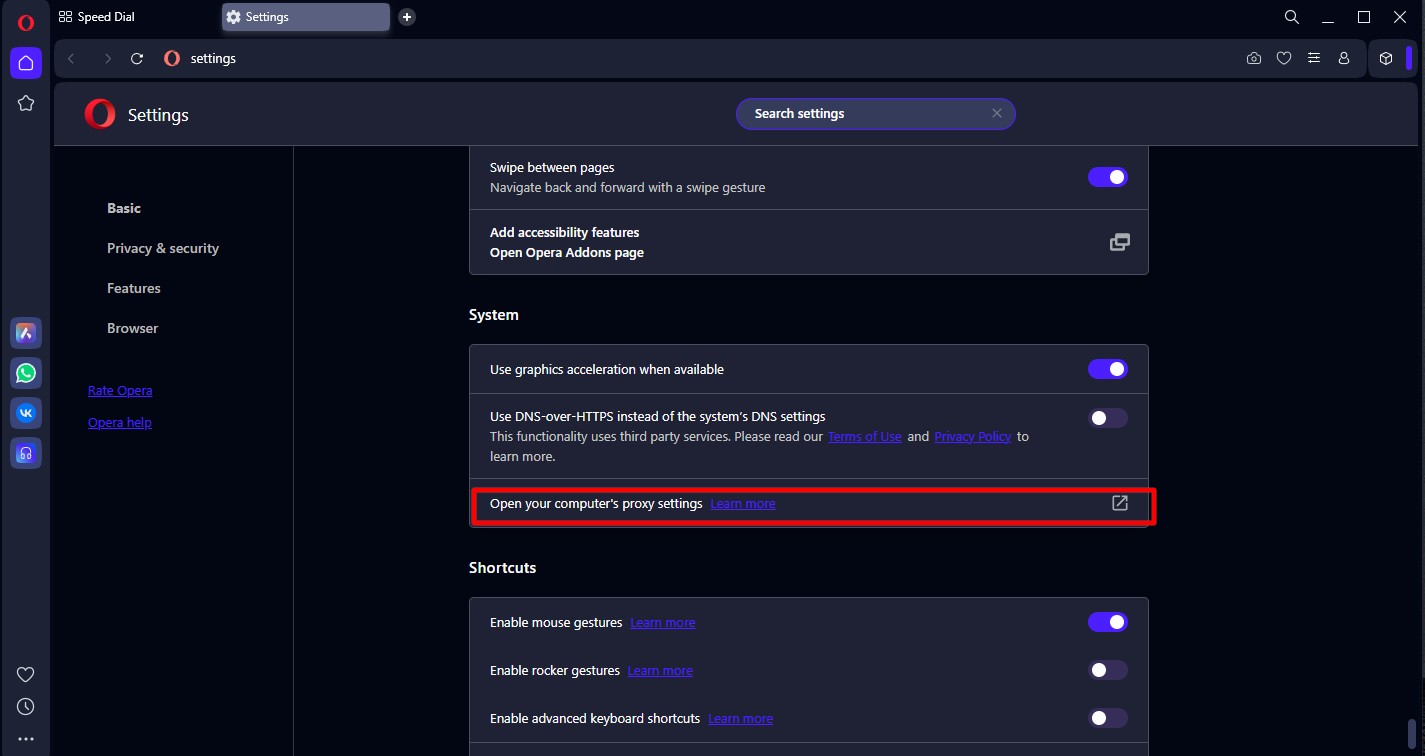 Fig. 4. Windows OS system proxy settings window, showing the connection parameters configuration interface.
You will be redirected to the Windows settings.
Step 3. Entering Data
- In the Windows window, find the "Manual proxy setup" section.
- Toggle the "Use a proxy server" switch to On.
- Fill in the fields:
- Address: Your IP (e.g.,
172.98.60.180). - Port: Your port (e.g.,
58763). - Click "Save".
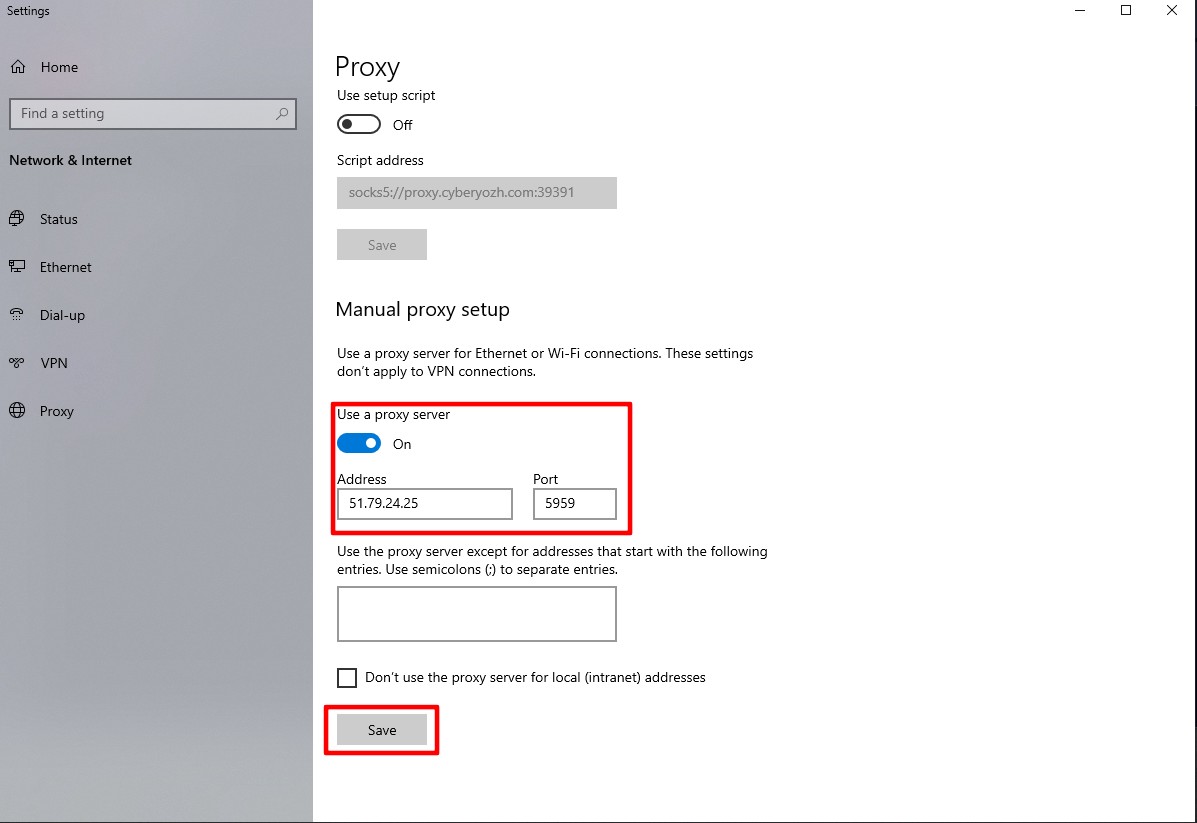 Fig. 5. Windows system proxy settings window with fields for entering connection parameters, including address and port. The image shows fields for HTTP proxy configuration with the "Use a proxy server" option activated.
Step 4. Authorization
Return to the Opera browser and try to open any website (e.g., google.com). The browser will show a system window for entering your login and password.
- Enter the Username and Password from your provider's personal cabinet.
- Click Sign in.
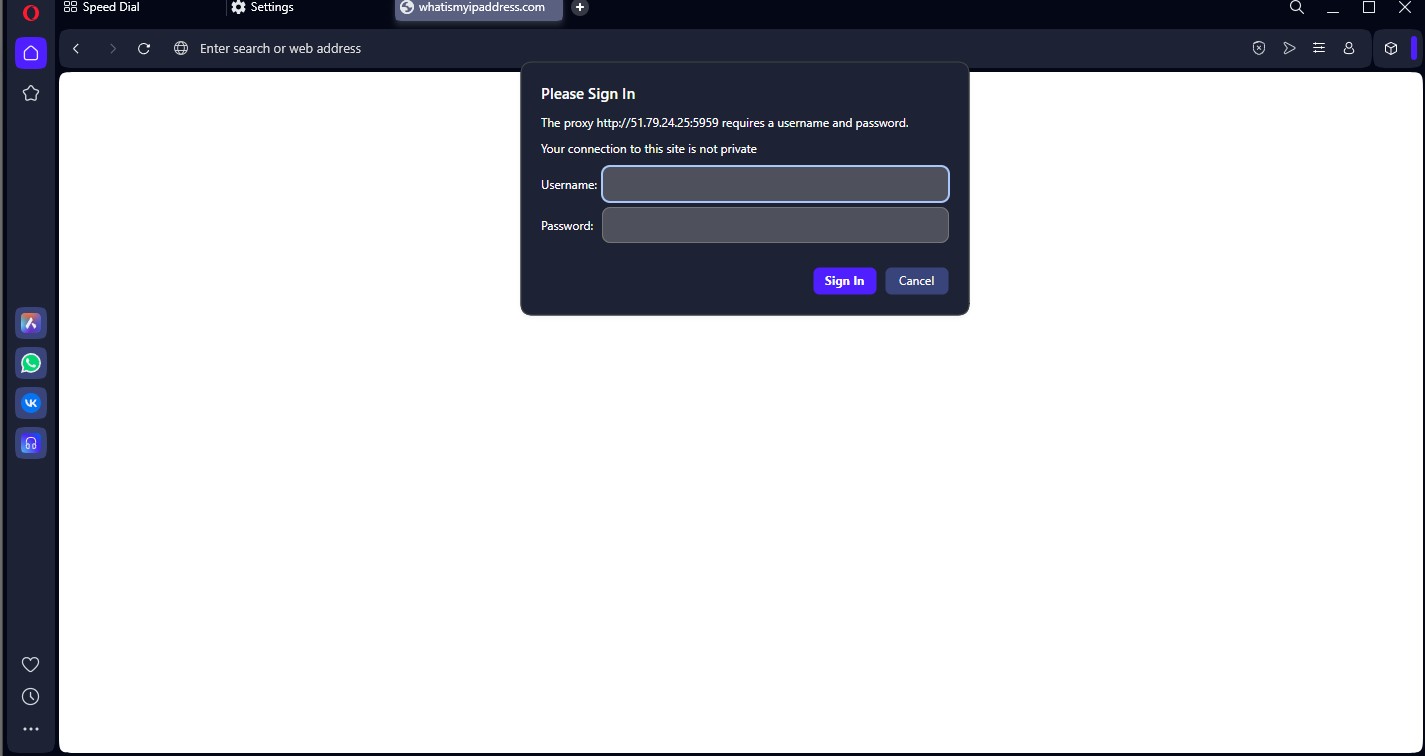 Fig. 6. Proxy server authorization dialog box in the Opera browser. The image shows an authentication form with fields for entering credentials (username and password).
Part 4. Checking Connection Security
Now your browser is working through a proxy. Be sure to verify this. Go to whoer.net or browserleaks.com/ip.
What to look for:
- Has the IP address changed to the purchased one?
- Does the geolocation match the proxy country?
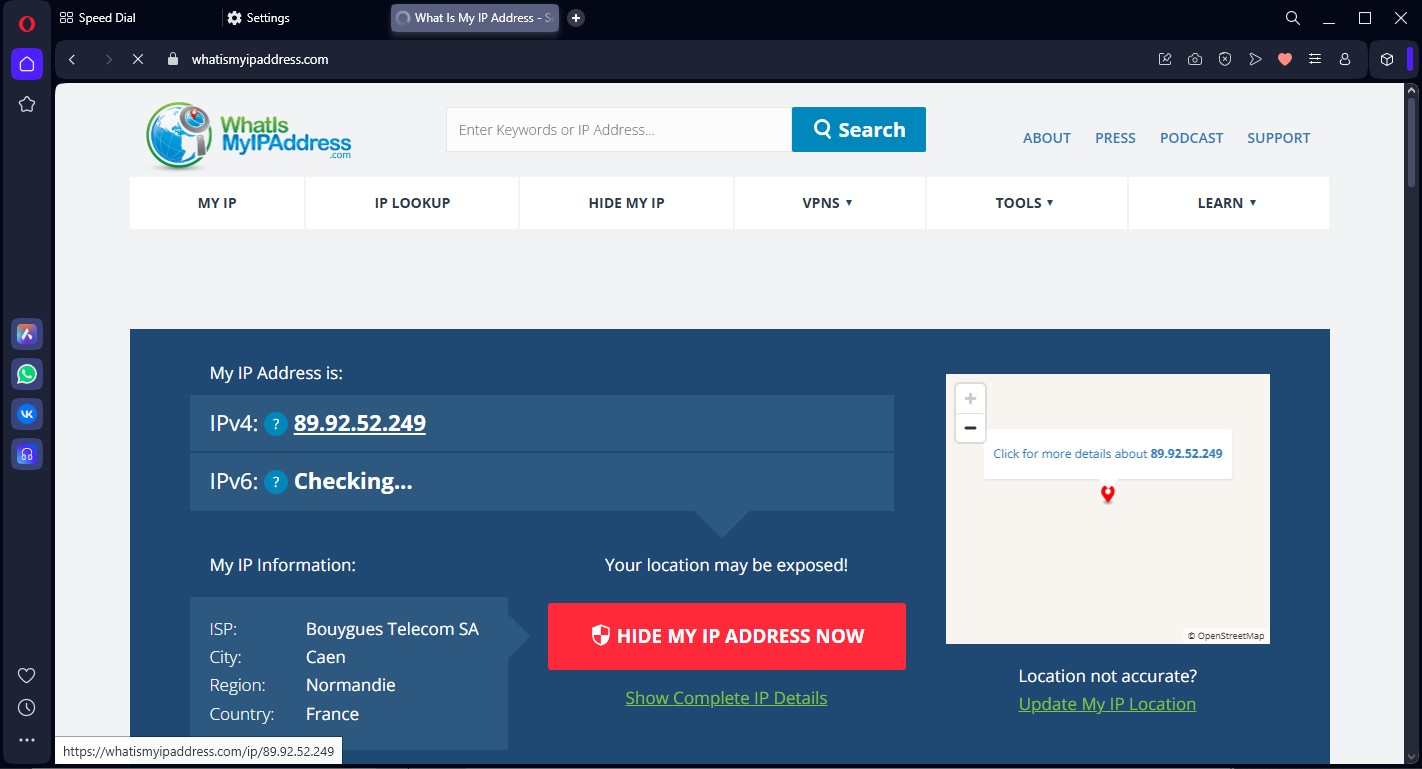 Fig. 7. Proxy connection check displaying IP address, geolocation, and connection parameters.
If the check passes — you are protected.
Tip: If you need the proxy to work only in Opera, while the rest of the computer connects directly — use browser extensions (e.g., Proxy SwitchyOmega) instead of system settings.
Conclusion
Opera with a correctly configured private proxy is a powerful tool for secure access to information and privacy protection.
- For secure surfing and data protection, use Datacenter Proxies.
- For secure shopping, use Residential Proxies.
You can find high-quality and fast proxies for any task in the CyberYozh App catalog. Work safely!
