
Linux is an operating system that gives the user full control over network traffic. It is an ideal platform for running testing tools, automation scripts, and secure surfing.
However, in Linux, there is no "one button" that magically enables a proxy everywhere. Browsers may use one set of settings, the terminal another, and system daemons a third.
In this guide, we will look at which type of proxy to choose for your tasks and three configuration methods: via the graphical interface (for desktop), via the terminal (for console), and via OpenVPN (for full tunneling).
Part 1. Strategy: Which proxy do you need for Linux?
Linux is often used for specific technical tasks. The choice of "fuel" (IP address) depends on exactly what you are running.
1. Datacenter Proxies — For code and administration
- What it is: Fast IPs from hosting providers.
- What it's for: Using utilities like
wget/curl, updating the system through blocked repositories, accessing servers via SSH, and automating routine tasks. - Pro: Maximum speed and low cost. In Linux, this is the most common choice for technical needs.
2. Residential Proxies (ISP) — For scripts and automation
- What it is: IP addresses of home internet service providers.
- What it's for: Running Python scripts for market research, managing high-load requests, and working with foreign services through a browser.
- Why: Residential IPs provide a higher level of trust for your legitimate automation tasks, ensuring a stable connection and reliable access to the required data.
3. Mobile Proxies (4G/5G) — For SMM and testing
- What it is: IPs from cellular operators.
- What it's for: Working with official social media management (SMM) tools, testing mobile applications, and managing corporate communications.
- Why: If you manage multiple corporate social media accounts on Linux, private mobile proxies with rotation via an IP change link will help maintain a secure and stable connection without interruptions.
- 👉 You can read more about mobile proxies here
Part 2. Data Preparation
We recommend using private channels from CyberYozh App. Unlike many others, we provide not only SOCKS5 but also OpenVPN configurations.
After purchase, you will receive:
- IP (Host):
172.98.60.180 - Port:
58763 - Login / Password: Authentication credentials.
- .ovpn file: (For the OpenVPN method).
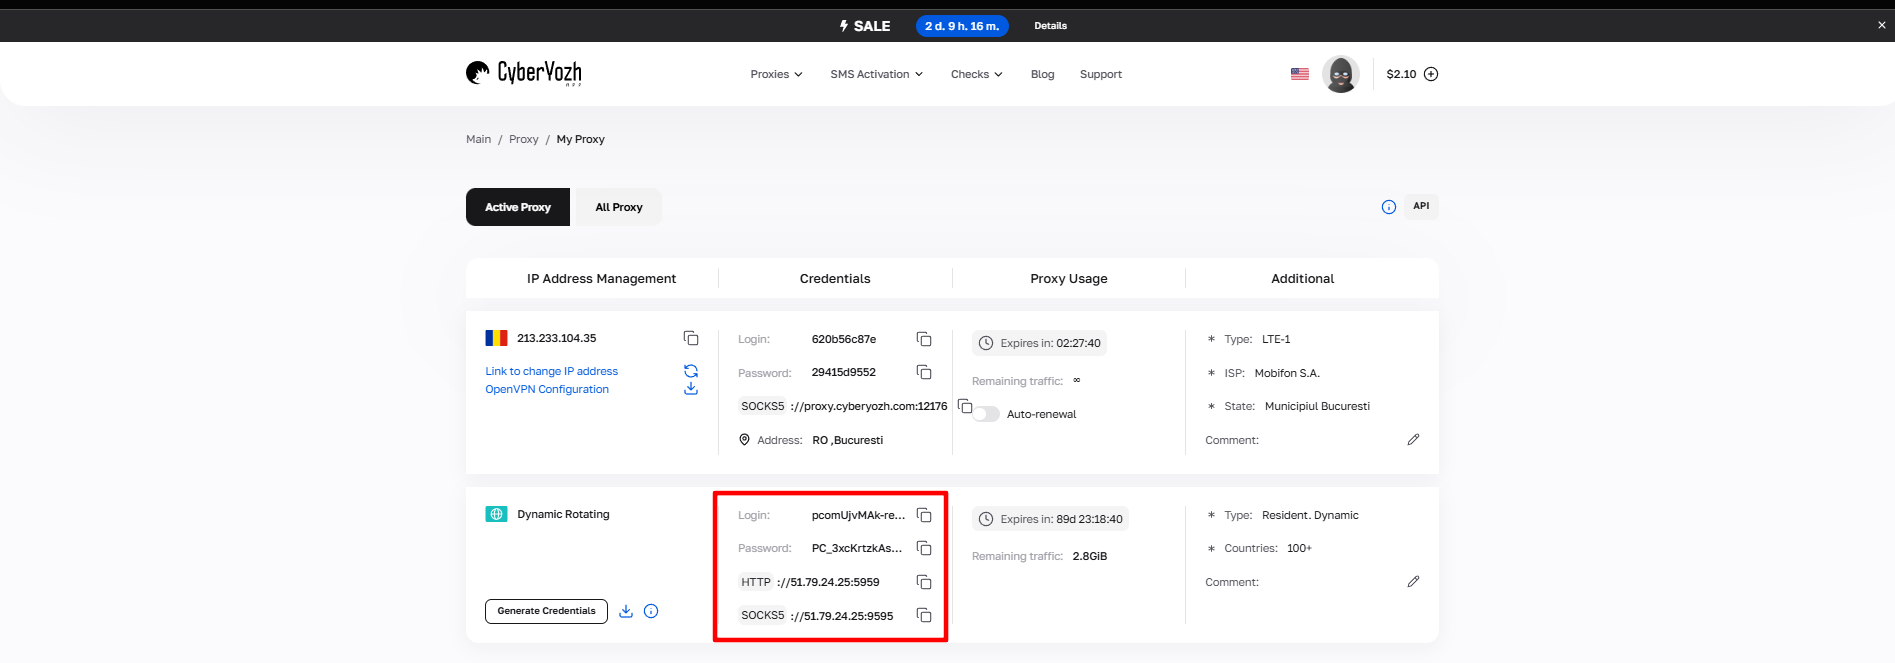 Fig. 1. Screenshot of the CyberYozh App platform interface, showing the location of the proxy connection data. The image displays fields for IP address (Host), port (Port), username (Proxy Username), and password (Proxy Password).
Part 3. Method 1: Graphical Interface (Network Manager)
This method is suitable for users of desktop versions (Ubuntu, Fedora, Mint with GNOME/KDE shells). It will change settings for browsers and system applications.
- Open Settings -> Network.
- Click on the gear icon next to Network Proxy.
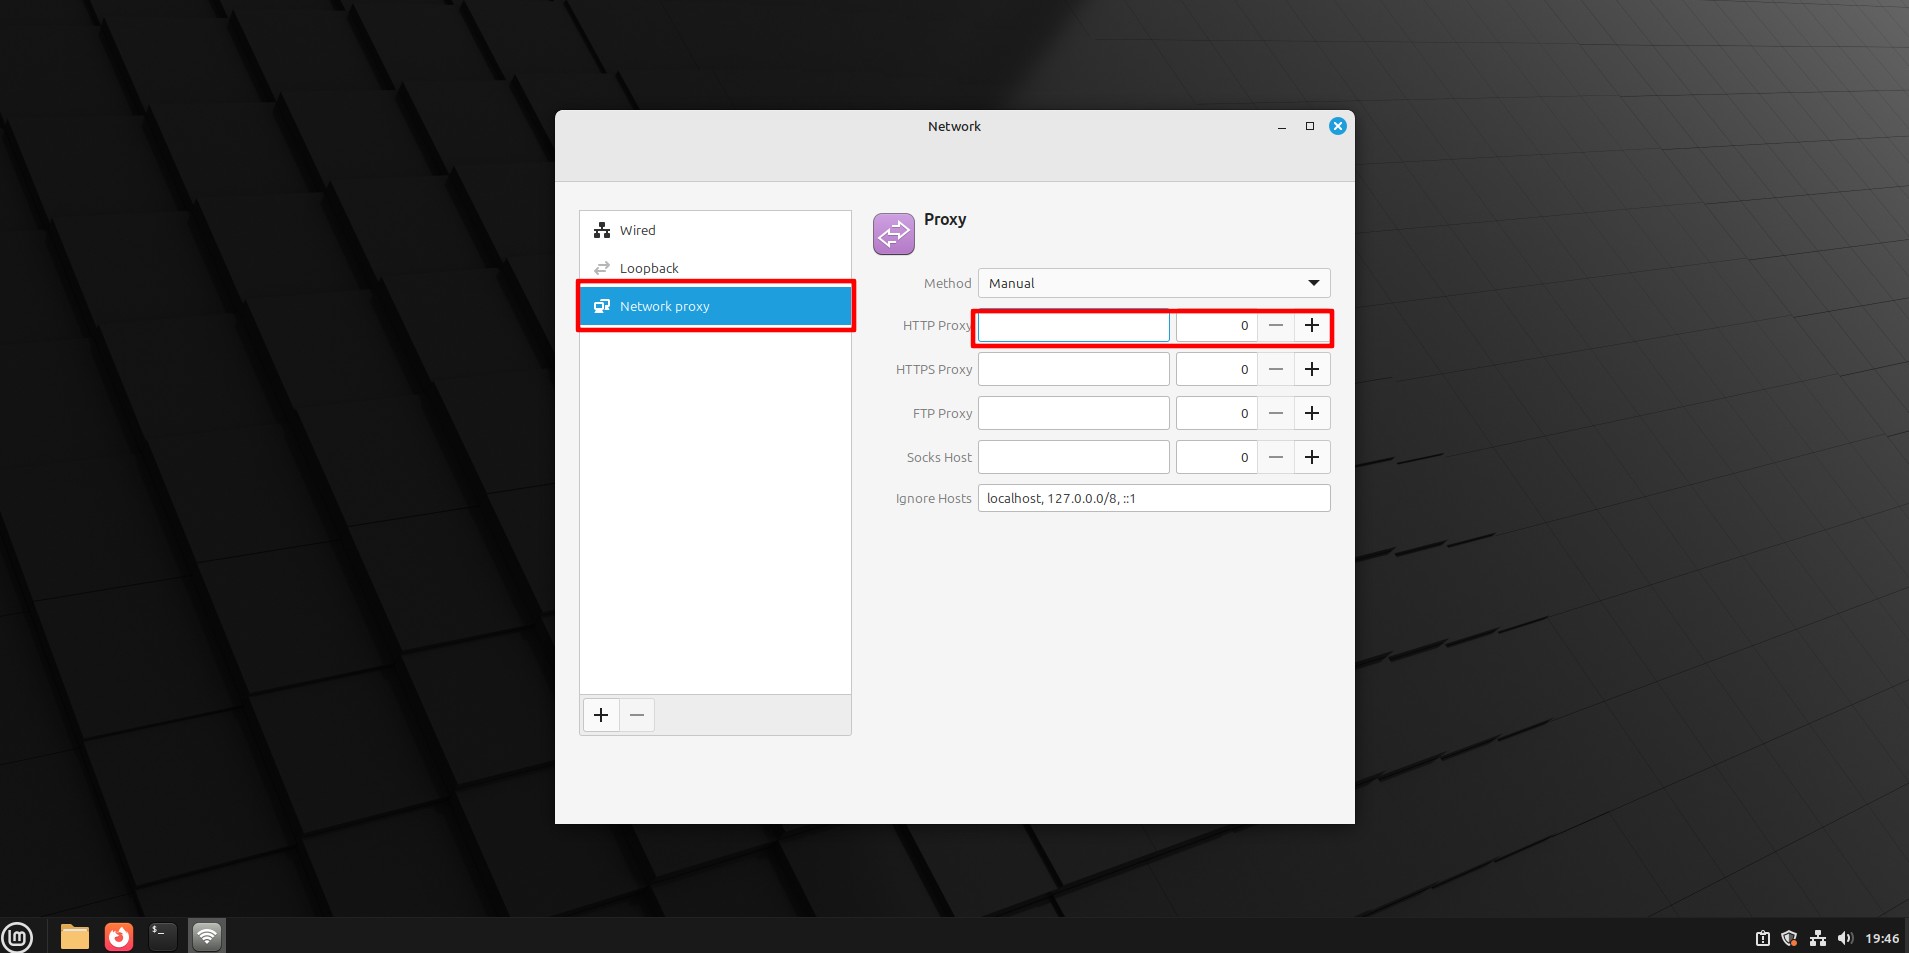 Fig. 2. Proxy settings window in NetworkManager, displaying network proxy configuration options.
- Select Manual mode.
- Enter the IP and Port for the required protocols (HTTP, HTTPS, SOCKS).
- Important: The Linux GUI often does not support entering a login/password in this window. Authorization will happen later: when you open a browser, it will request the login and password in a pop-up window.
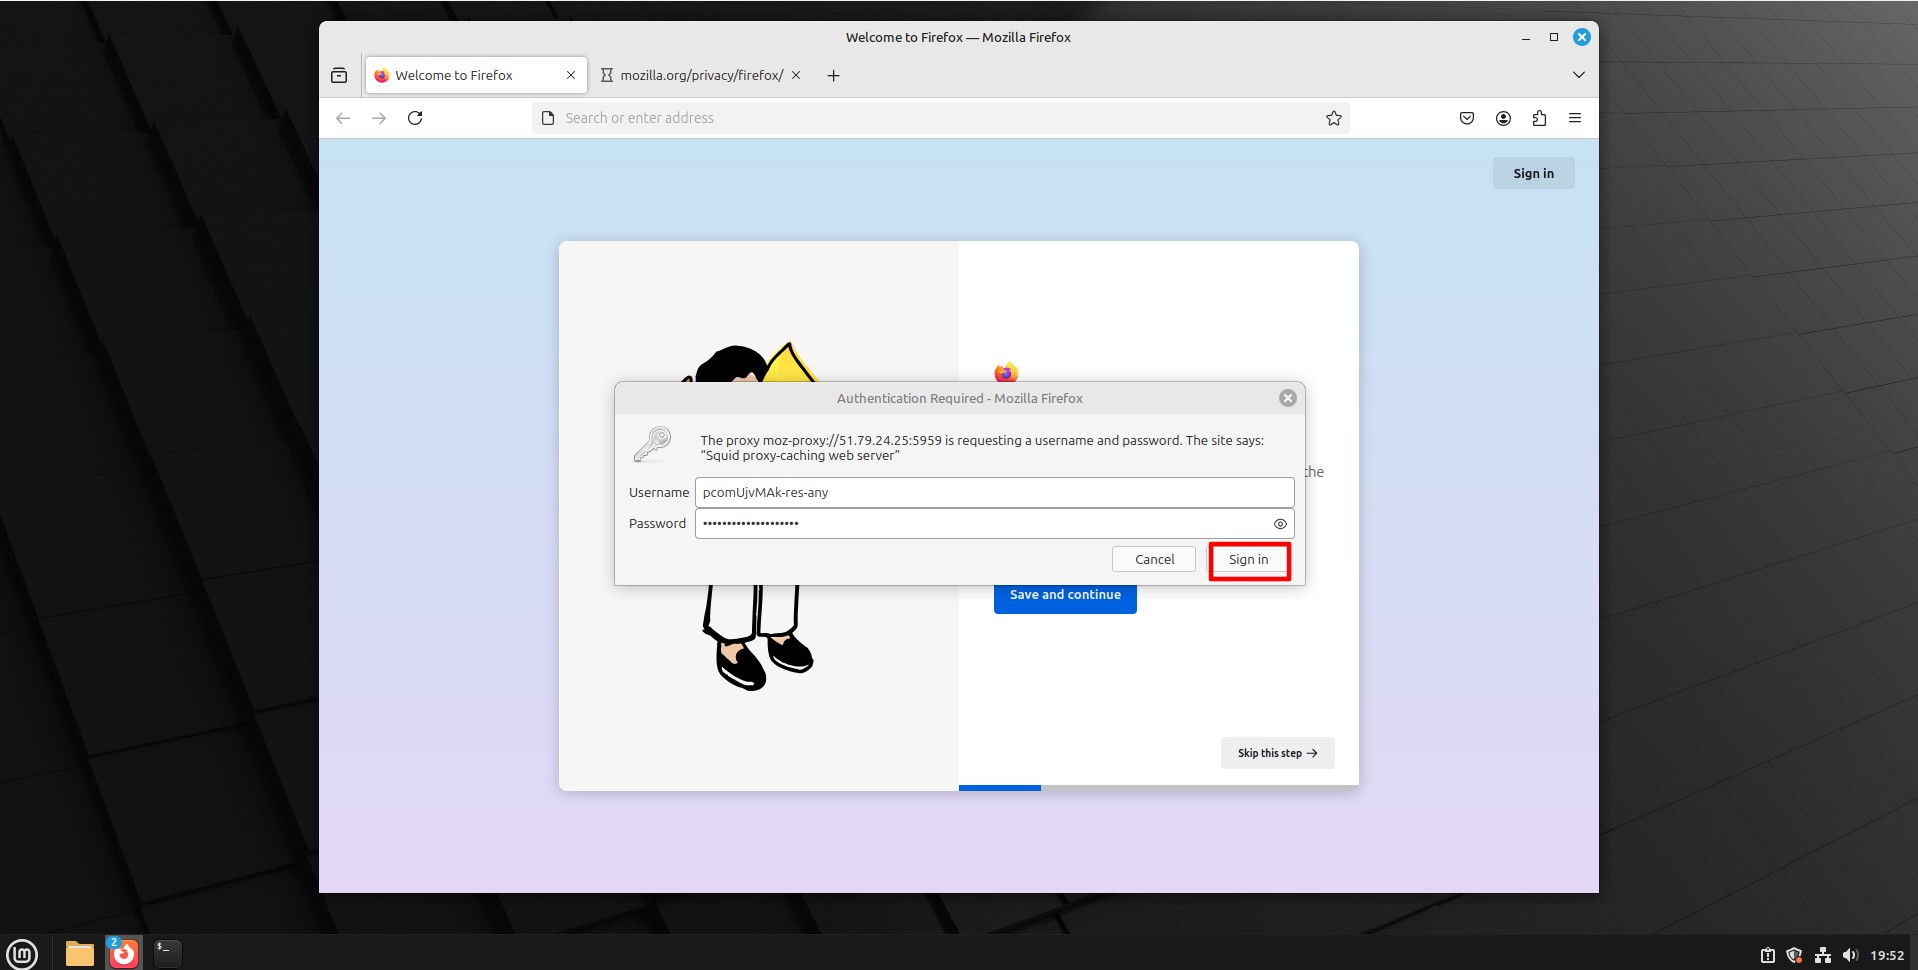 Fig. 3. Authentication dialog box for entering proxy server credentials.
Part 4. Method 2: Configuration via Terminal (The Linux Way)
If you are working with a headless server or want utilities like wget, curl, or git to work through a proxy, this method is mandatory.
Temporary configuration (for the current session)
Enter the following commands in the terminal (replacing with your data):
export http\_proxy="http://login:password@172.98.60.180:58763" export https\_proxy="http://login:password@172.98.60.180:58763"
Now curl or wget commands will work through the proxy.
Permanent configuration
To keep the settings after a reboot, add these lines to the ~/.bashrc or /etc/environment file.
Part 5. Method 3: Full Tunneling via OpenVPN
This is the most reliable way. Instead of configuring each program separately, we create an encrypted tunnel for all system traffic. CyberYozh App provides ready-made configs.
Step 1. Installation
Install the OpenVPN client (if not already installed):
- Ubuntu/Debian:
sudo apt install openvpn - CentOS/Fedora:
sudo yum install openvpn
Step 2. Download config
Download the .ovpn file from your CyberYozh App personal account.
 Fig. 4. Downloading the configuration file.
Step 3. Launch
Start the connection via terminal:
sudo openvpn /path/to/file.ovpn
 Fig. 5. Linux terminal interface demonstrating the process of launching OpenVPN with the path to the configuration file using the sudo openvpn command.
The system will ask for the proxy (VPN) login and password. Enter them.
- Tip: To avoid entering the password every time, you can create a text file
pass.txt(login on the 1st line, password on the 2nd) and add the--auth-user-pass pass.txtargument to the command.
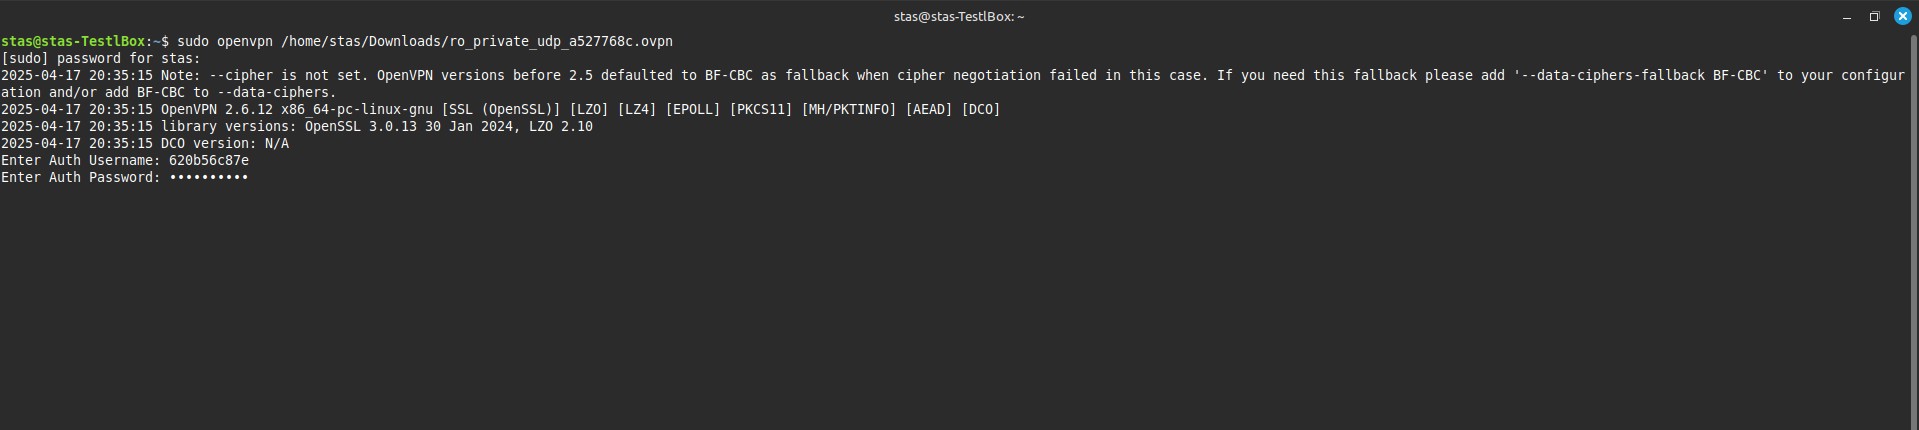 Fig. 6. Linux terminal interface, password entry.
If you see the message Initialization Sequence Completed — congratulations, you are connected!
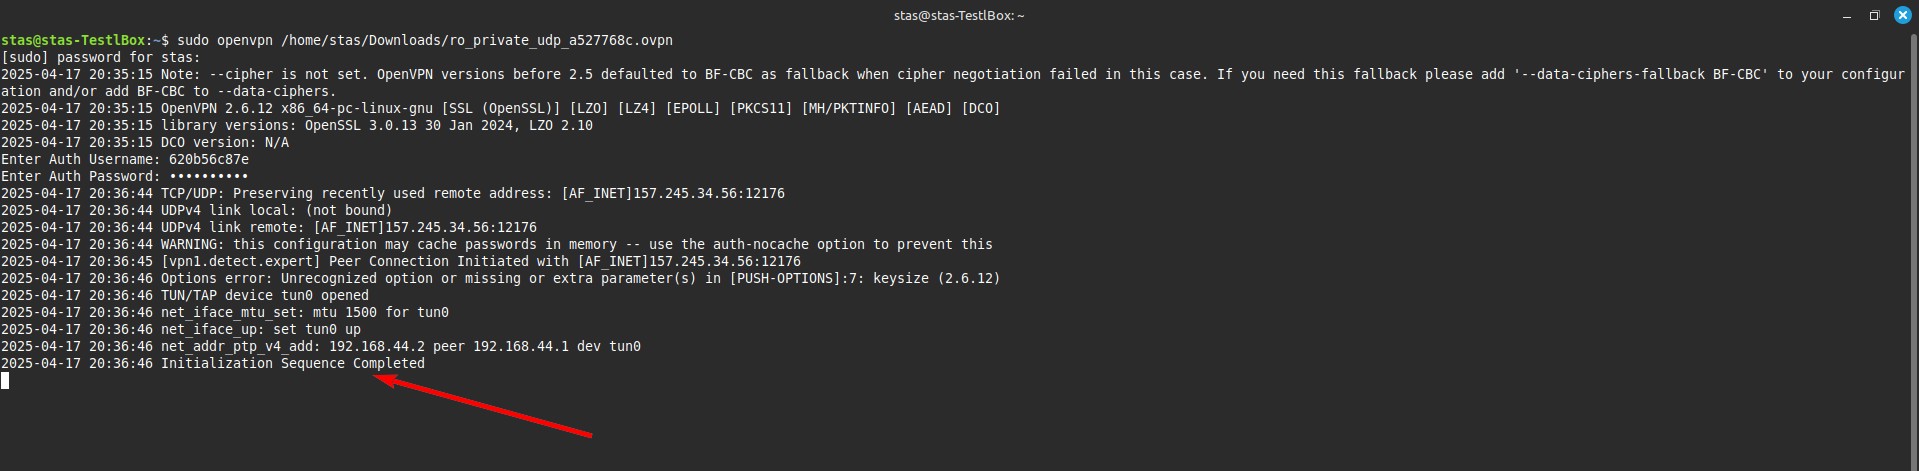 Fig. 7. Linux terminal with a success message.
Part 6. Verification
To make sure your Linux is now in another country, open a browser or type in the terminal:
curl ifconfig.me
You should see your proxy's IP address.
 Fig. 8. Web interface for checking status.
Conclusion
Linux gives you a choice:
- For scripts and automation, use environment variables in the terminal and Residential proxies.
- For full system protection, use the OpenVPN method.
- For social media management (SMM), connect Private Mobile proxies with rotation via link.
You can find all necessary configurations and proxy types in the CyberYozh App catalog.