
iOS is famous for its closed nature and security. However, Apple does not provide a built-in "Enable VPN/Proxy" button for the entire system in one click without third-party software.
Configuring a proxy on iPhone is necessary in two cases:
- Privacy on public Wi-Fi: To prevent a cafe or hotel admin from intercepting your traffic.
- Traffic routing: To optimize connection stability and ping in international applications and global games.
In this guide, we will break down which proxy type to choose for iPhone and how to configure it via system Wi-Fi settings.
Part 1. Strategy: Which proxy do you need for iPhone?
The choice of proxy depends on what you plan to do on your phone.
1. Mobile Proxies (4G/5G) — For mobile platforms and SMM
- What they are: IP addresses of real cellular operators.
- What they are for: Ideal for SMM tasks, testing mobile networks, and safely managing corporate accounts directly from your phone.
- Why: Mobile proxies provide IP addresses from cellular carriers, ensuring seamless operation and authentic testing in mobile networks.
- 👉 You can read more about mobile proxies here
2. Residential Proxies (ISP) — For e-commerce and research
- What they are: IP addresses of home internet service providers.
- What they are for: E-commerce market research, price comparison on global platforms, and secure connection management.
- Why: Residential proxies route traffic through standard ISP connections, making them perfect for testing localized web content and verifying ads.
3. Datacenter Proxies — For media and web surfing
- What they are: Cheap and fast IPs.
- What they are for: Improving network accessibility, resolving routing issues, and ensuring smooth content streaming via Safari.
- Plus: High speed, videos won't lag.
Part 2. Data Preparation
To configure the settings, you will need data from a reliable provider. We recommend CyberYozh App.
After purchase, you will receive your credentials. Important: iOS natively supports only the HTTP protocol.
- Find the IP and Port for HTTP/HTTPS in your personal dashboard.
- Find your Username and Password.
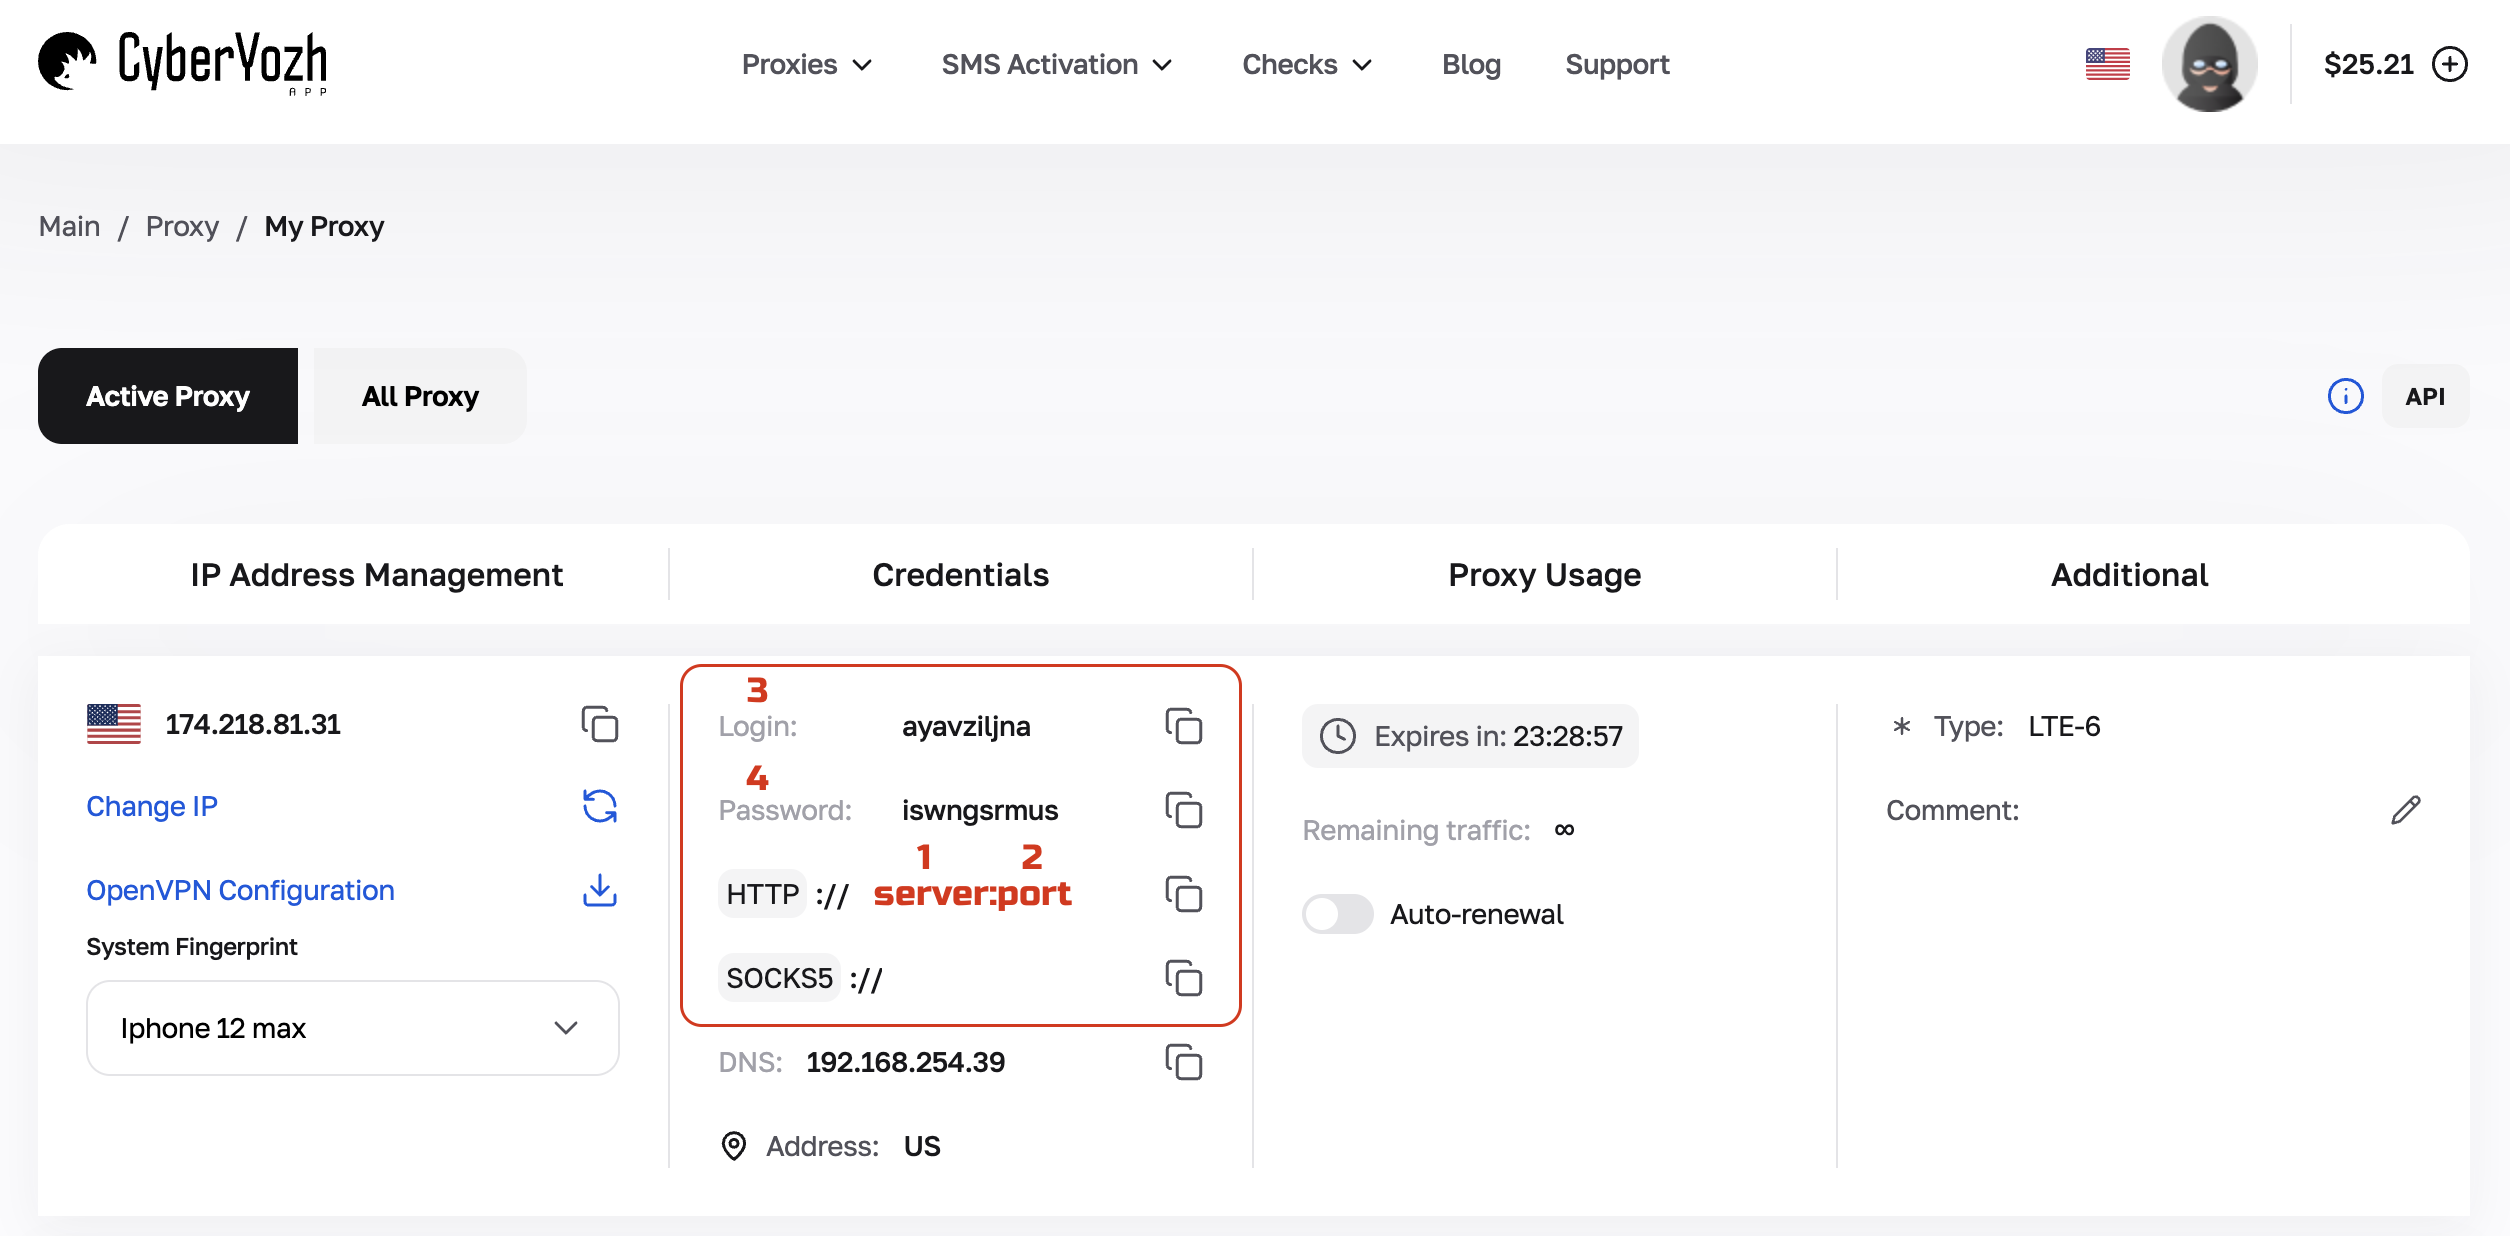 Fig. 1. Screenshot of the CyberYozh App platform interface.
Part 3. Configuring Proxy for Wi-Fi (Native Method)
This method works without installing third-party apps, but it has a limitation: the proxy only works for a specific Wi-Fi network. If you switch to mobile data or another Wi-Fi network, the proxy will disconnect.
Step 1. Wi-Fi Settings
- Open Settings on your iPhone or iPad.
- Go to the Wi-Fi section.
- Find the network you are connected to (marked with a checkmark).
- Tap the blue «i» (info) icon to the right of the network name.
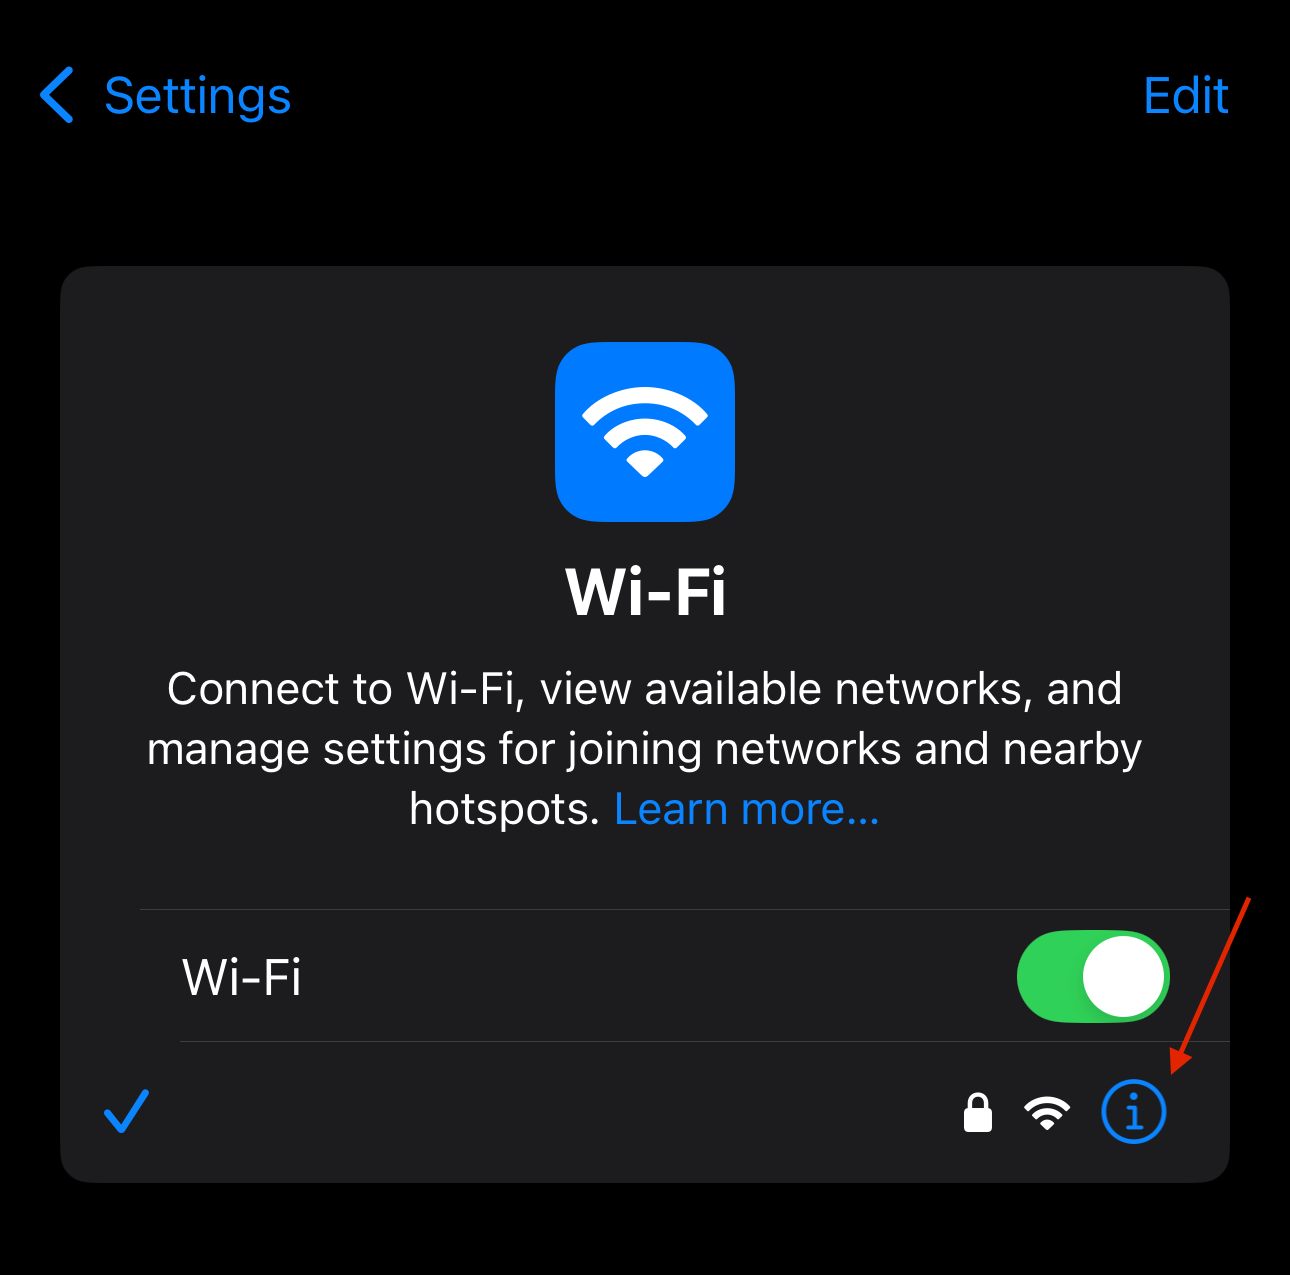 Fig. 2. Wi-Fi settings interface.
Step 2. Entering Data
- Scroll to the very bottom of the screen to the «HTTP Proxy» section.
Tap «Configure Proxy».
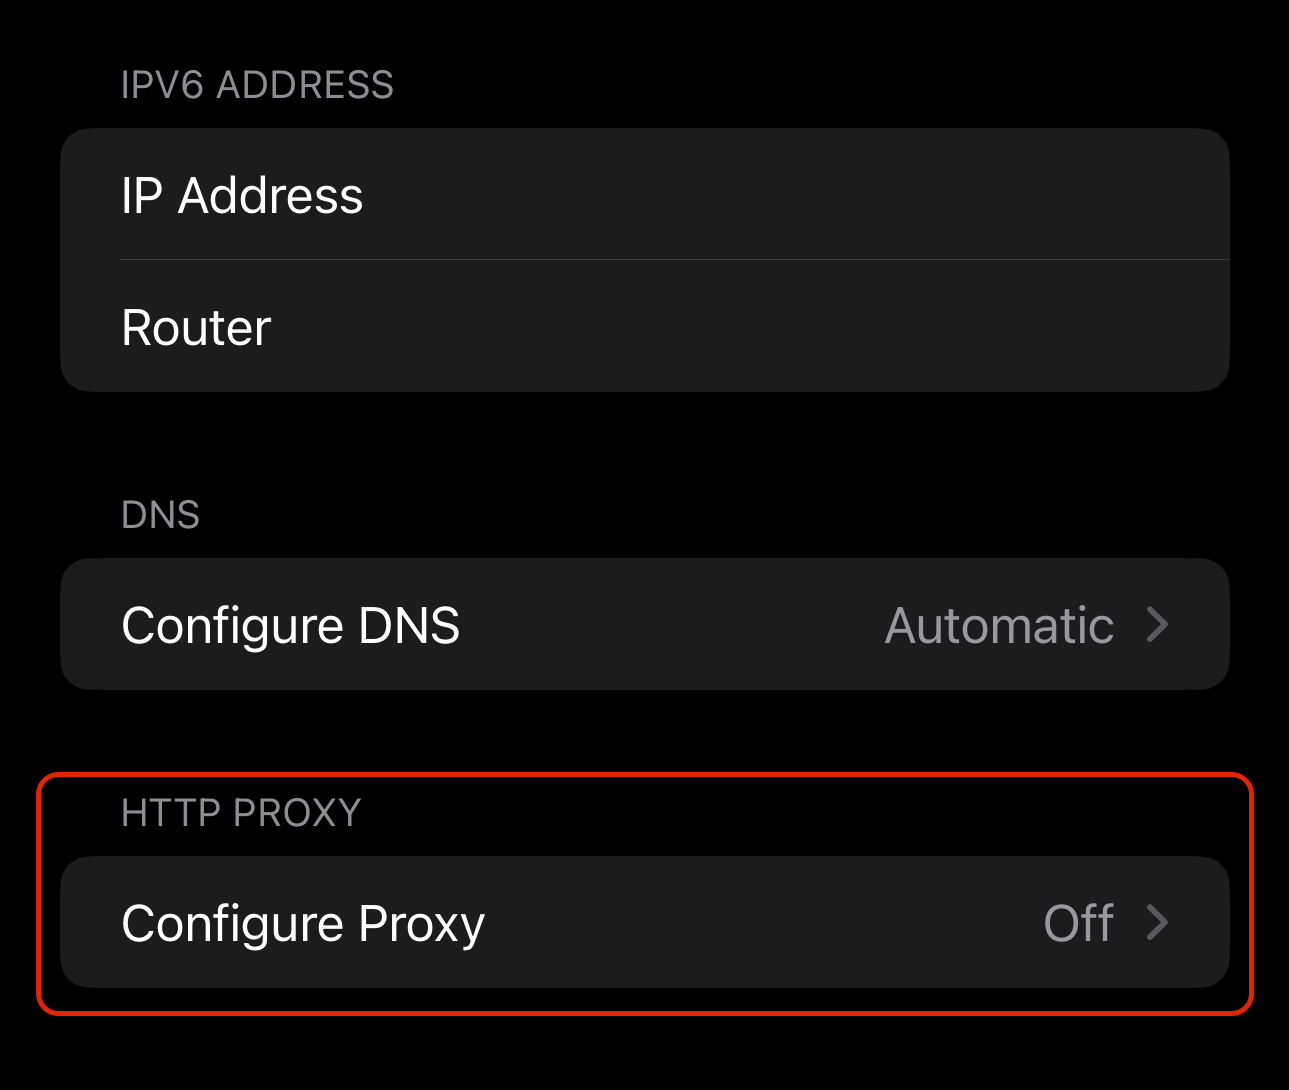 Fig. 3. Network settings menu.
By default, "Off" is selected. Switch to «Manual».
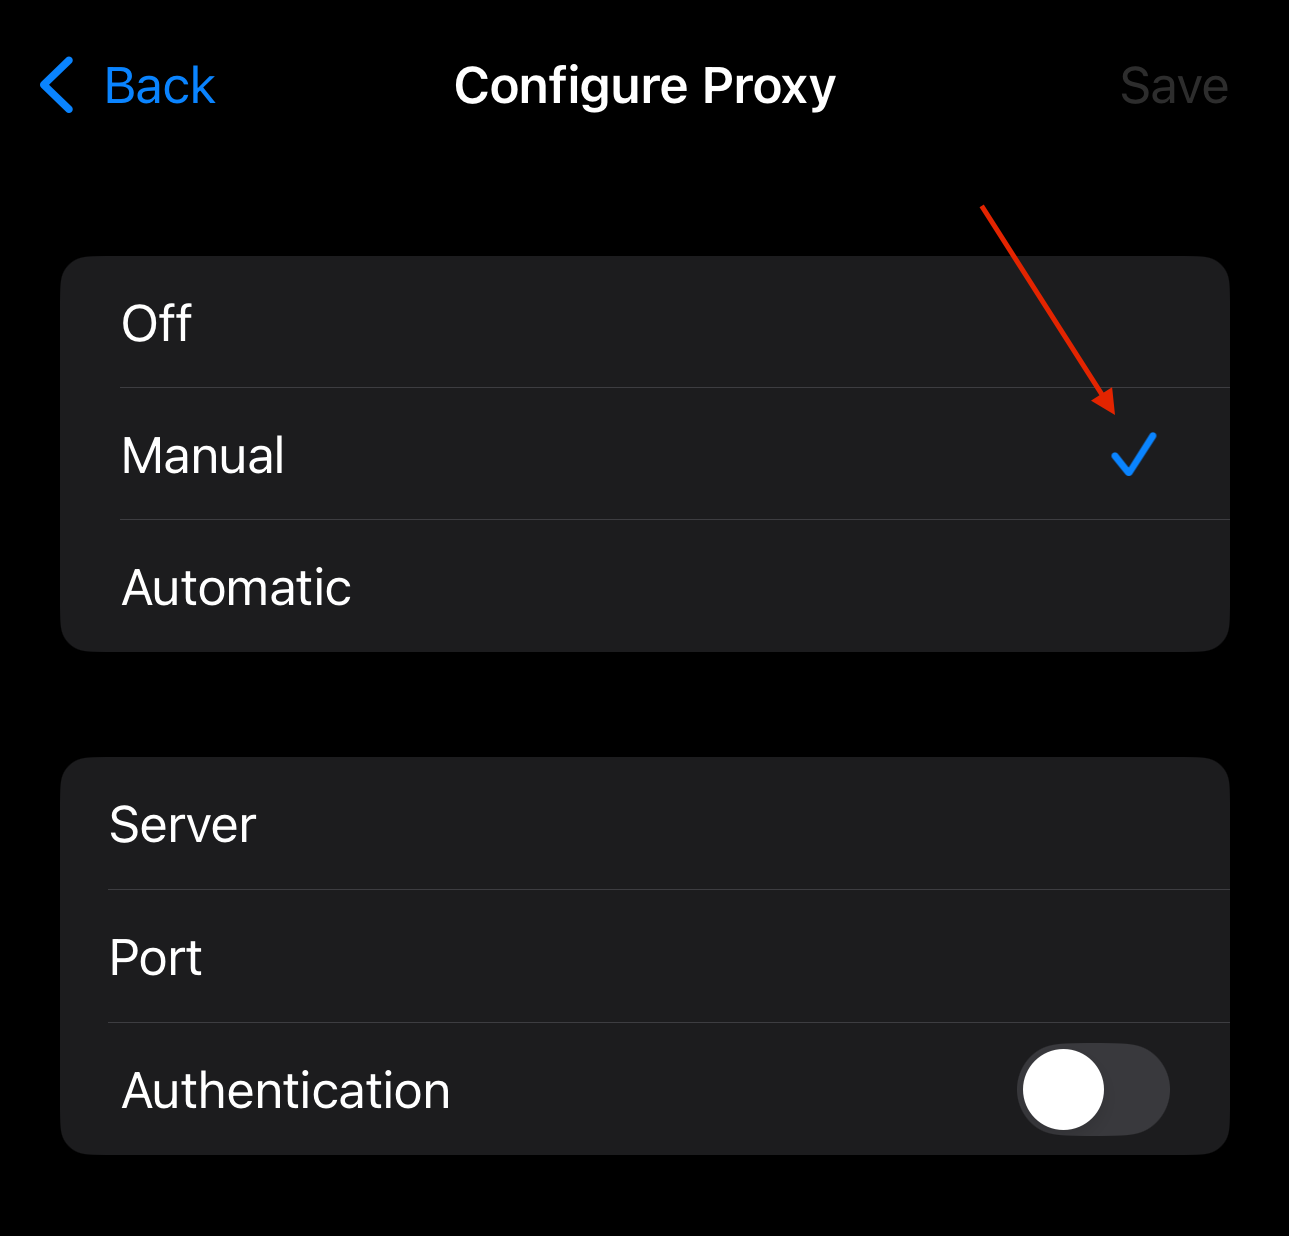 Fig. 4. Selecting the configuration mode.
The input fields will appear:
- Server: Enter the proxy IP address.
- Port: Enter the HTTP port (e.g.,
58763). - Authentication (Important):
- Turn on the «Authentication» toggle. Without this, a private proxy will not work.
Enter the Username (Login) and Password from your dashboard.
 Fig. 5. Proxy data entry window.
Tap «Save» in the upper right corner.
Part 4. Verification and Nuances
Now your iPhone is working through the proxy on this Wi-Fi network.
How to check?
Open Safari and go to whoer.net or ipinfo.io.
- If the IP has changed and the site shows the proxy country — everything is perfect.
- If pages don't load — check your username/password and make sure you used the HTTP port.
Configuring Proxy using a PAC file
- Select «Auto» in the «Configure Proxy» section.
- Enter the URL of the PAC file provided by your provider or network administrator.
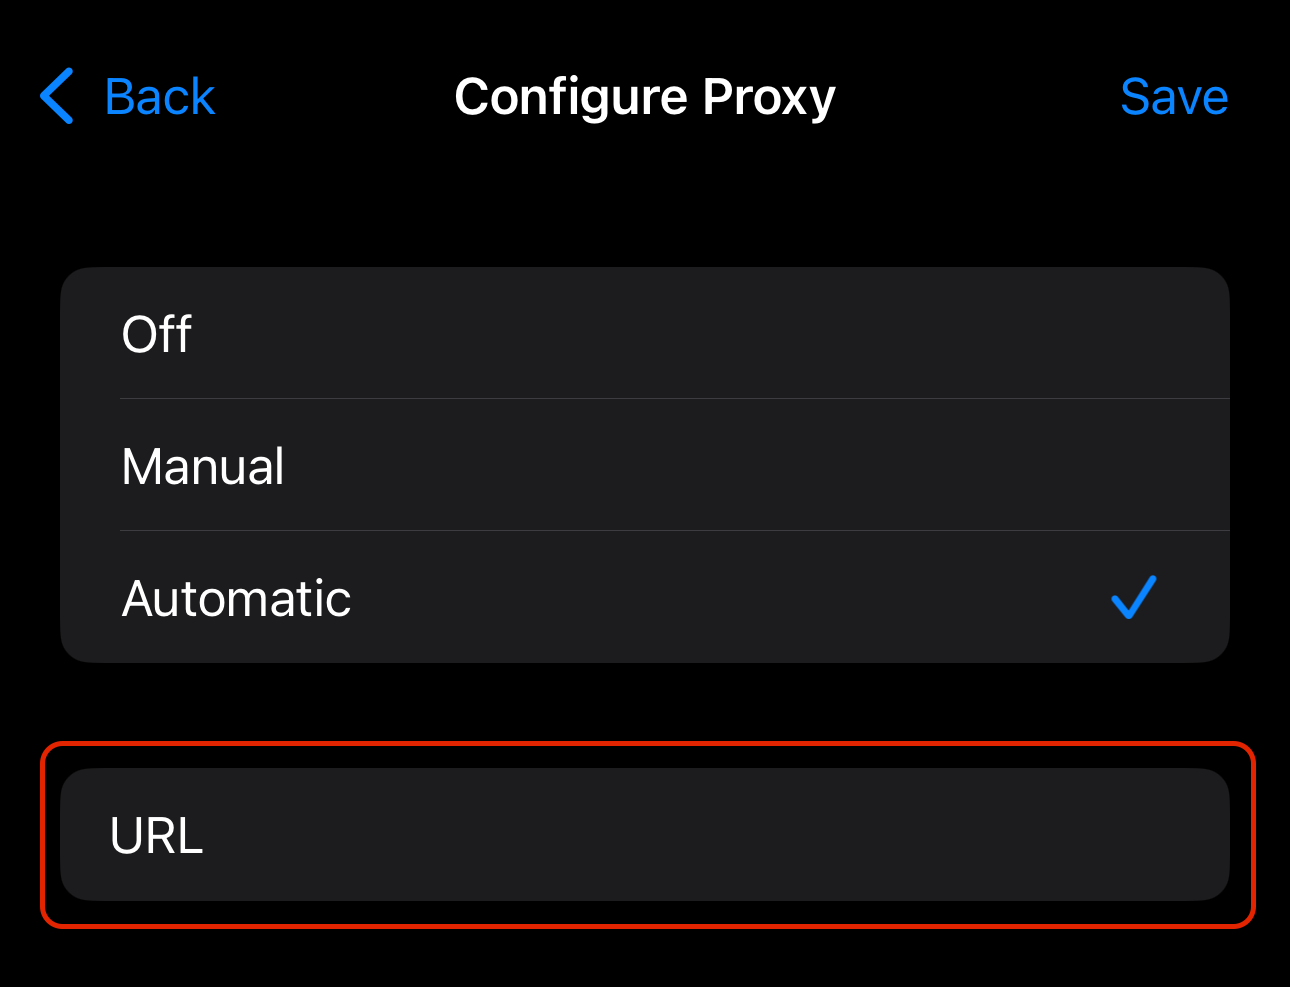 Fig. 5. PAC file data entry window.
- Tap «Save» to apply the changes.
What about mobile data (LTE)?
Native iOS settings do not allow setting a proxy for the mobile network (cellular data). If you need a proxy on the go (without Wi-Fi) or if you need the SOCKS5 protocol, you will have to install a third-party app, for example:
- Shadowrocket (paid, but the best option).
- Potatso Lite (free, basic functionality).
- v2rayTun.
In these apps, you create a profile, enter the proxy data, and they create a local VPN tunnel that routes all traffic (both Wi-Fi and LTE) through your proxy.
Conclusion
Setting up a proxy on iOS is simple if you know the system's limitations.
- For home and office (Wi-Fi), use the built-in settings and Residential/Datacenter proxies.
- For working on the go (LTE), use proxifier apps and Mobile proxies.
High-quality proxies for any iOS tasks can always be found in the CyberYozh App catalog. Happy surfing!