
macOS is famous for its security and ecosystem. But Apple cannot hide your IP address from your ISP or websites — that is a job for a proxy server.
The main feature of macOS: proxy settings here are system-wide. This means that if you configure a proxy in the system settings, the traffic of all applications will go through it: Safari, Chrome, Telegram, Mail, and even system updates.
In this guide, we will break down which type of proxy to choose for Mac and how to properly configure it so as not to "break" the internet.
Part 1. Strategy: Which proxy do you need for Mac?
Mac users often use their devices for work, creativity, and shopping. The choice of IP depends on the goal.
1. Residential Proxies (ISP) — For shopping and Apple ID
- What it is: IP addresses of real home internet providers.
- What it's for: Purchases on foreign websites (Nike, Supreme, Apple Store), registering foreign Apple IDs, working with payment systems (PayPal).
- Why: Stores see you as a regular MacBook user sitting at home in the USA or Europe. This evokes maximum trust.
2. Datacenter Proxies — For speed and content
- What it is: Powerful IPs from data centers.
- What it's for: Increasing online privacy, secure web surfing, and routing optimization.
- Plus: They are the cheapest and fastest. Excellent for testing geo-targeted content and secure international surfing.
3. Mobile Proxies (4G/5G) — For professional SMM
- What it is: IPs from mobile carriers.
- What it's for: Professional management of SMM campaigns and secure access to social platforms.
- Why: Mobile IPs use CGNAT technology, which provides a high level of reliability and network stability when working with social media.
- 👉 You can read more about mobile proxies here
Part 2. Data Preparation
We recommend using private channels from CyberYozh App.
After purchase, you will receive:
- IP (Host):
172.98.60.180 - Port:
58763 - Login / Password: Authorization data.
- .ovpn file: (If you plan to use OpenVPN).
Important: macOS perfectly supports both protocols:
- Web Proxy (HTTP/HTTPS) — for browsers and websites.
- SOCKS Proxy — a universal protocol for any programs.
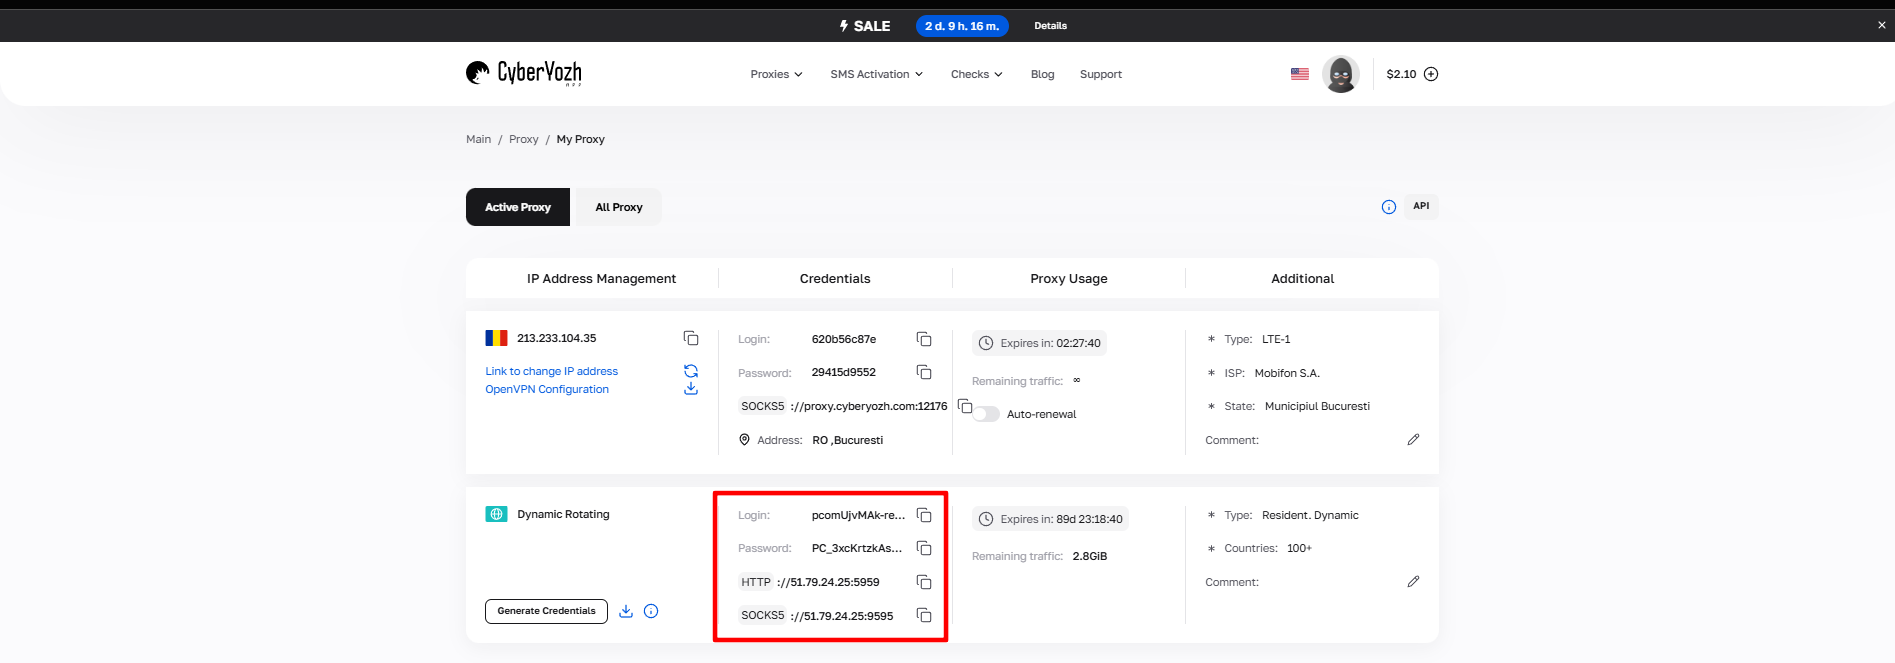 Fig. 1. Data from the proxy provider.
Part 3. Proxy Configuration (System Method)
We will be setting up the proxy for the active internet connection.
Step 1. Navigate to Network Settings
Click on the Apple () icon in the upper left corner -> System Settings.
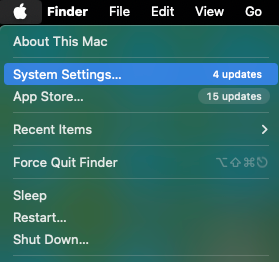 Fig. 1. Screenshot demonstrating the macOS System Settings menu, showing the main window with core system setting sections.
Go to the Network section.
- Select your active connection (usually Wi-Fi or Ethernet, marked with a green dot).
- Click the Details... or Advanced... button.
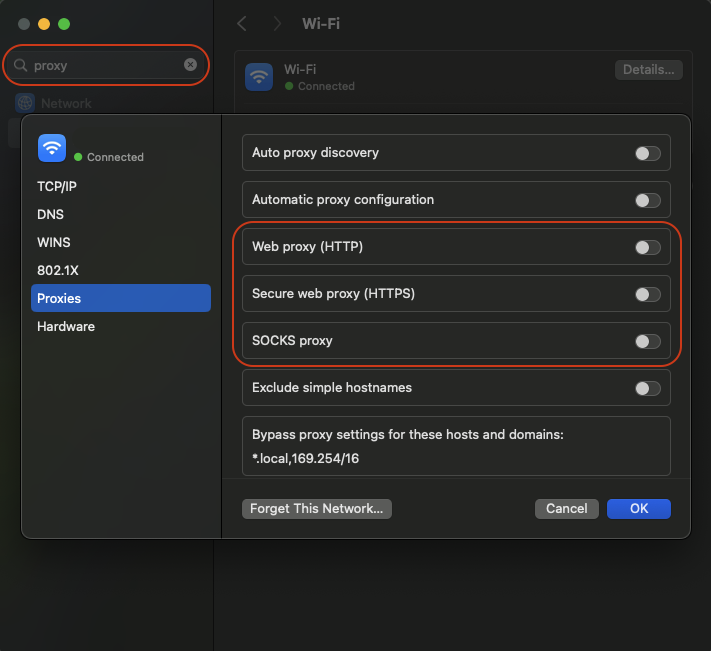 Fig. 2. macOS network settings interface showing the network connection configuration panel where basic proxy setup is performed.
Step 2. Entering Proxy Data
- In the window that opens, go to the Proxies tab.
- You will see a list of protocols. Choose the one you need:
- For HTTP: Turn on the Web Proxy (HTTP) and Secure Web Proxy (HTTPS) switches.
- For SOCKS5: Turn on the SOCKS Proxy switch.
- Tip: Don't turn everything on at once. Select only what you purchased.
- Fill in the fields on the right:
- Server: Your IP (e.g.,
172.98.60.180). - Port: Your port (e.g.,
58763). - Authentication: If the proxy is private (like with CyberYozh App), be sure to enable the "Proxy server requires password" option.
Enter your Username and Password.
 Fig. 4. Proxy server settings window containing fields for entering credentials, including login and password.
Click OK, and then Apply in the main settings window.
Part 4. Alternative: Setup via OpenVPN (Tunnelblick)
If you need full traffic encryption (like a VPN) or your provider issued you an .ovpn file, use this method. This is a more advanced level of protection.
- Download the client: macOS cannot handle OpenVPN "out of the box." Download the free Tunnelblick program (the official OpenVPN client for Mac).
- Installation: Install the application and launch it.
- Import config: Drag and drop the
.ovpnfile received from CyberYozh onto the Tunnelblick icon in the menu bar (top right). - Connection: Click on the Tunnelblick icon and select Connect.
- Enter your login and password if required.
Part 5. Verification
After setup, your entire Mac should "move" to another country. Let's check this. Open Safari and go to browserleaks.com or whoer.net.
What to look for:
- Has the IP address changed?
- Does the country match?
- Are DNS and WebRTC leaking?
If everything is correct — you have successfully configured an anonymous connection on macOS.
Conclusion
macOS requires attention during setup because parameters are applied globally.
- For shopping, use Residential Proxies.
- For professional SMM, use Mobile Proxies.
- For changing IP — use fast Datacenter Proxies.
You can find reliable and fast proxies compatible with the "Apple" ecosystem in the CyberYozh App catalog. Have a safe workflow!