
How to Connect A-Parser with Proxies: A Step-by-Step Guide for Stable Data Scraping
A-Parser is the Swiss Army knife of data collection automation. Powerful, flexible, and multi-threaded. But there’s a catch: any industrial-scale operation eventually hits the limits set by target websites. Search engines and large platforms impose restrictions on the number of requests from a single IP address to balance the load.
To keep your tool running smoothly and ensure tasks are completed without headaches, you need to properly "connect" it with proxies. This isn't just a recommendation; it's a mandatory requirement for stable performance.
Why Does a Data Collection Tool Need Proxies?
If you make more than 10 requests a day, the answer is obvious — to ensure connection stability and stay within limits. But if you dig deeper, high-quality proxies solve several key challenges:
- Scalability: A-Parser can operate in hundreds of threads. Without proxies, all these threads will use a single IP, which will quickly exhaust its limits. With a proxy pool, each thread gets its own unique address.
- Request Limit Management: Proxy rotation helps distribute requests evenly, ensuring smooth data collection and reducing the risk of interruptions due to rate limiting.
- Geo-targeting: Need to scrape search results as seen by a user in Berlin or New York? Just load proxies from the required country, and the program will receive relevant, geo-dependent data.
- Confidentiality: You maintain the privacy of your main IP address and keep your connection reputation high.
Which proxy should you choose? For data collection, rotating residential or mobile proxies are the best fit. They provide a high level of trust because their IP addresses belong to real home and mobile providers.
Step-by-Step Proxy Setup in A-Parser
The process consists of several stages: creating a settings preset, preparing the proxy file, running a check, and ensuring everything works.
Step 1: Gathering Proxy Credentials
The first and most important step is to ensure you have a full set of authorization data. These "keys" will allow your application or browser to connect to the proxy server and route traffic through it.
Make sure to prepare the following data:
- IP Address (host server)
- Port for connection
- Login and Password for authorization
- Protocol type (HTTP/HTTPS or SOCKS5)
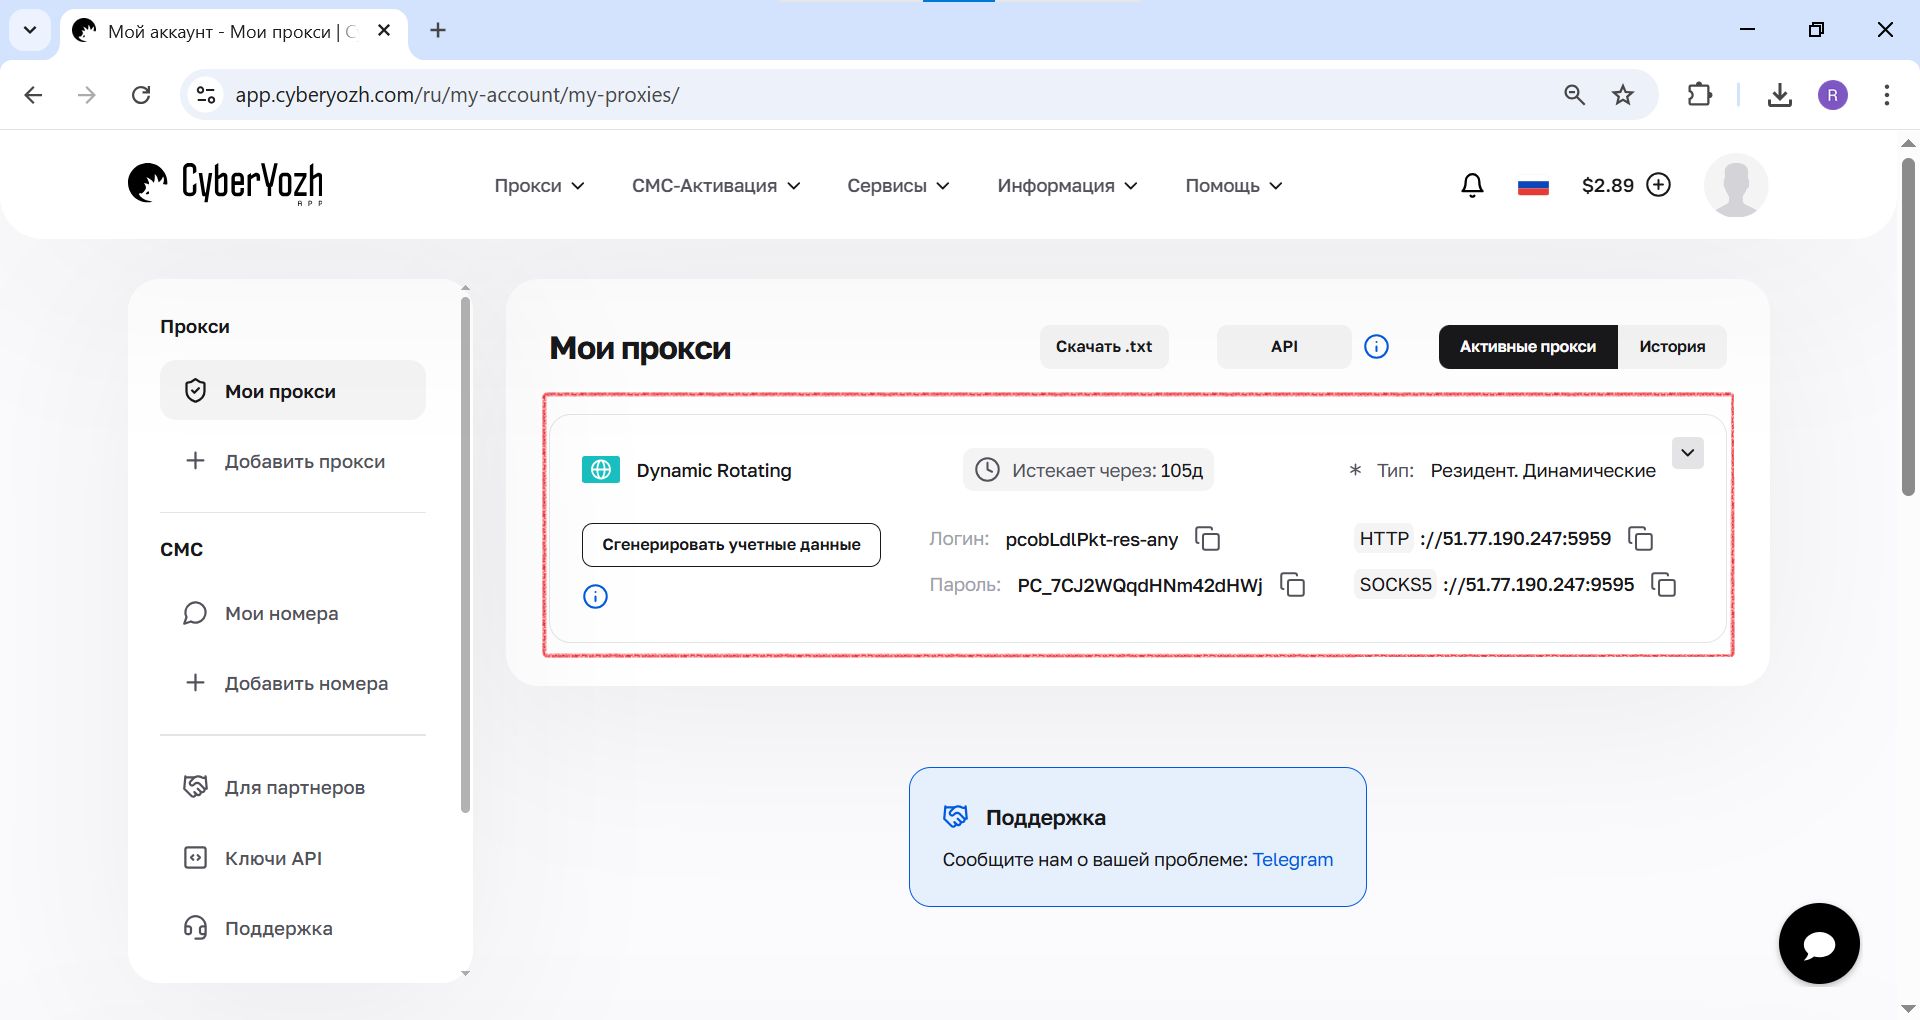 Fig. 1. This screenshot shows where all the necessary fields for connecting to a proxy server are located in the CyberYozh App dashboard.
Step 2: Creating a Preset for Our Proxies
To avoid entering the same parameters every time, we will create a separate preset (settings template) for them.
- In the A-Parser left menu, go to the "Proxy Checker" section.
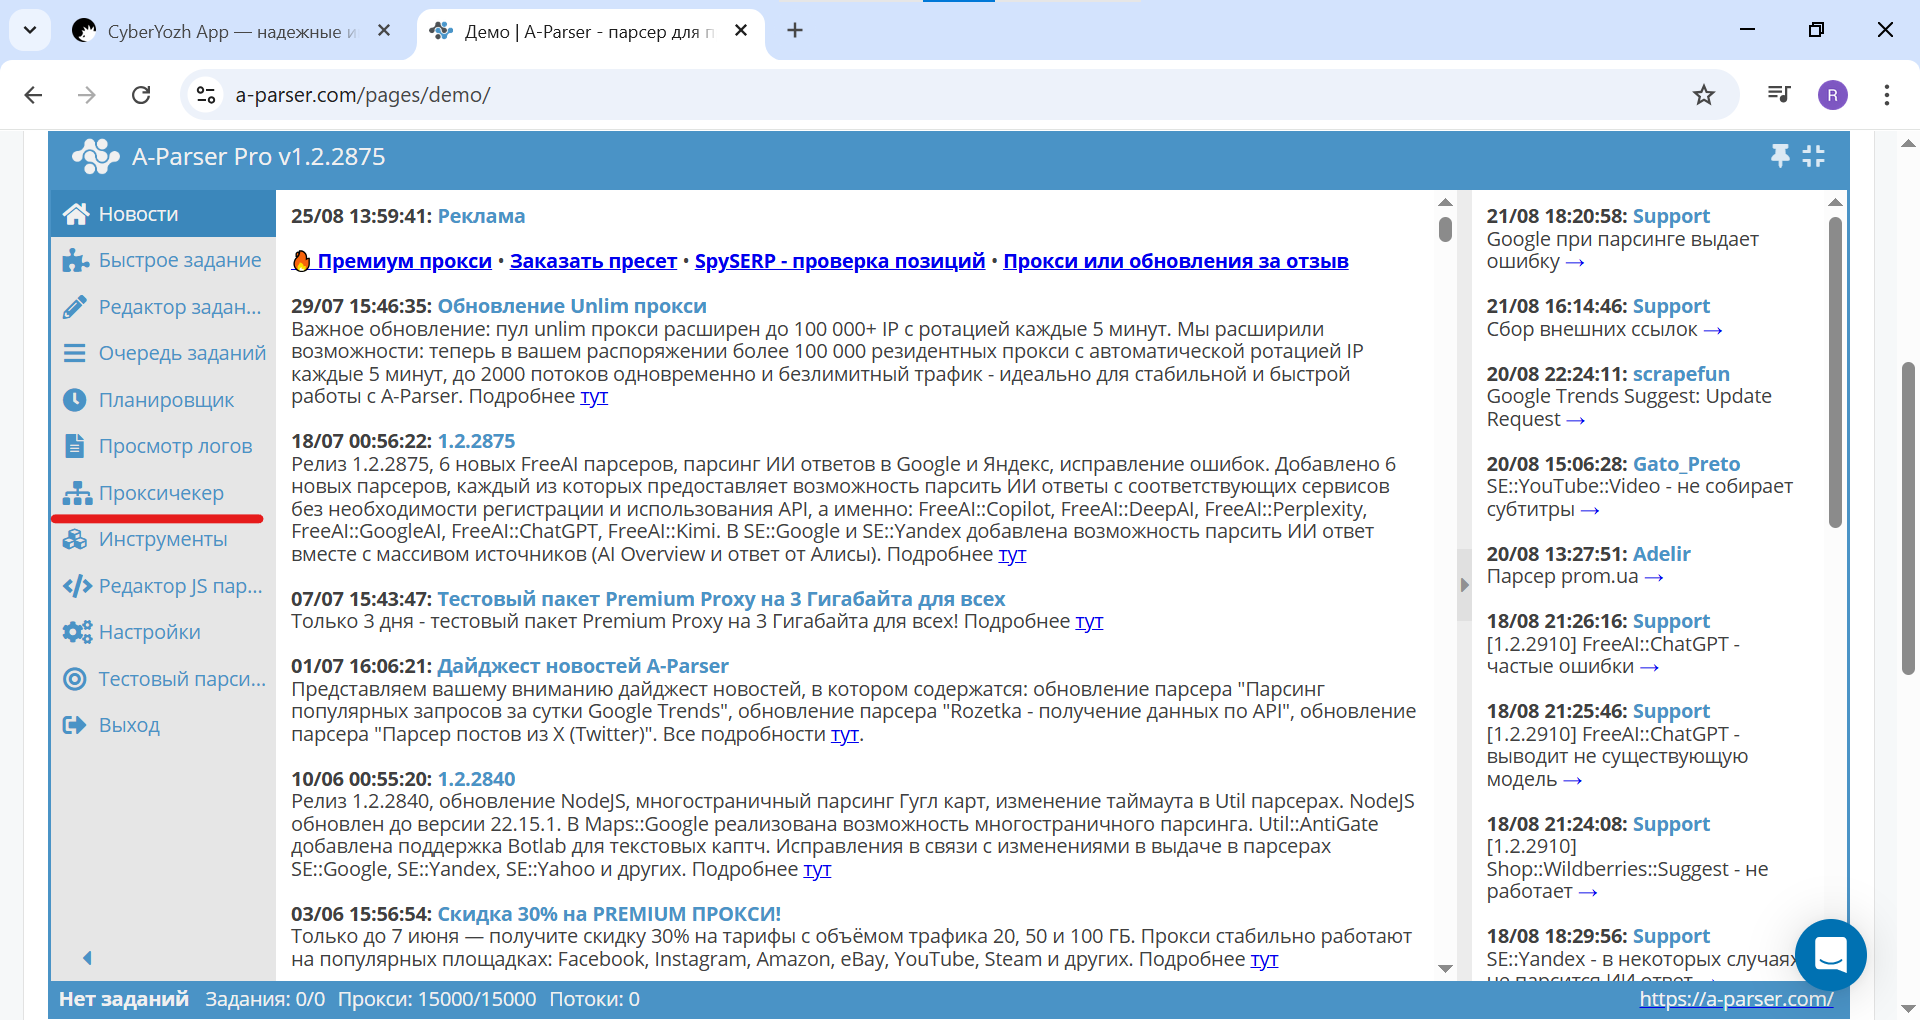 Fig. 2. Screenshot of the main A-Parser Pro interface showing the menu location. To begin, go to the "Proxy Checker" section.
- Click the "Add Proxy Checker" button.
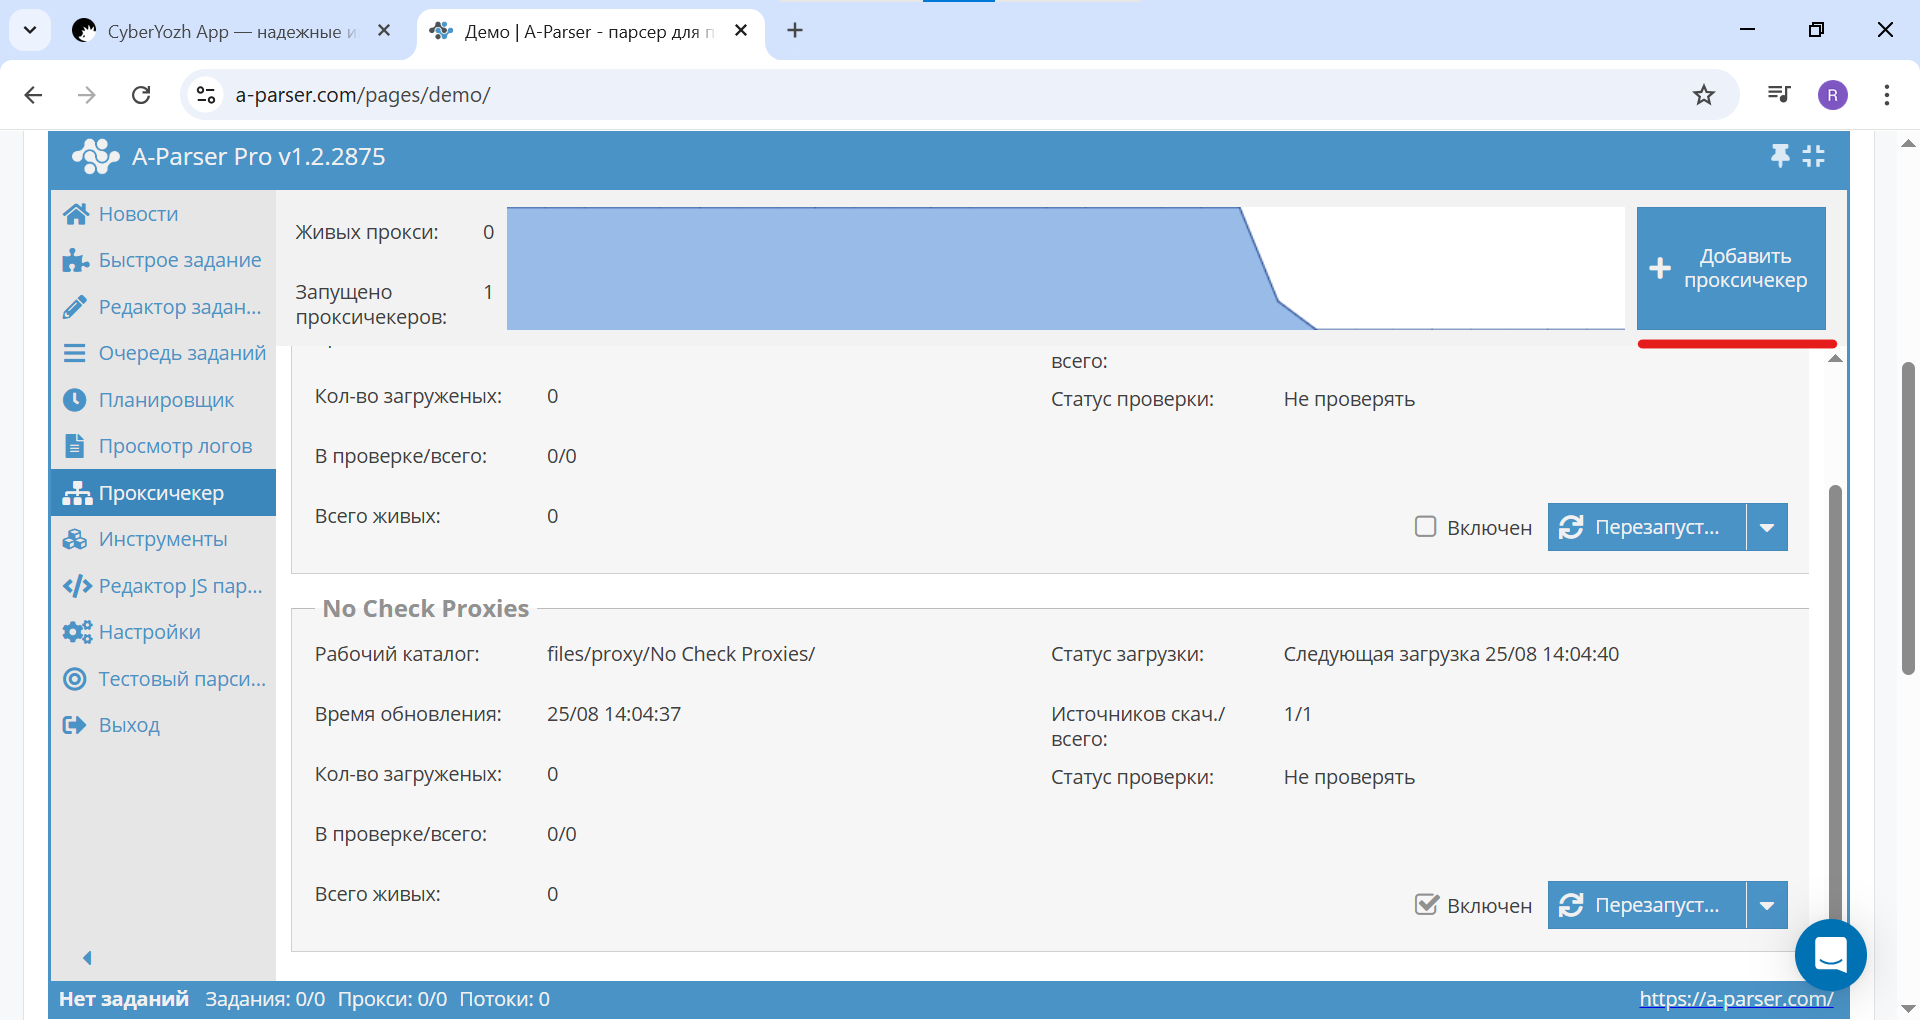 Fig. 3. Screenshot of the "Proxy Checker" section in A-Parser, showing the "Add Proxy Checker" button to create a new checker.
- Click the "Add ne..." button (Add new preset).
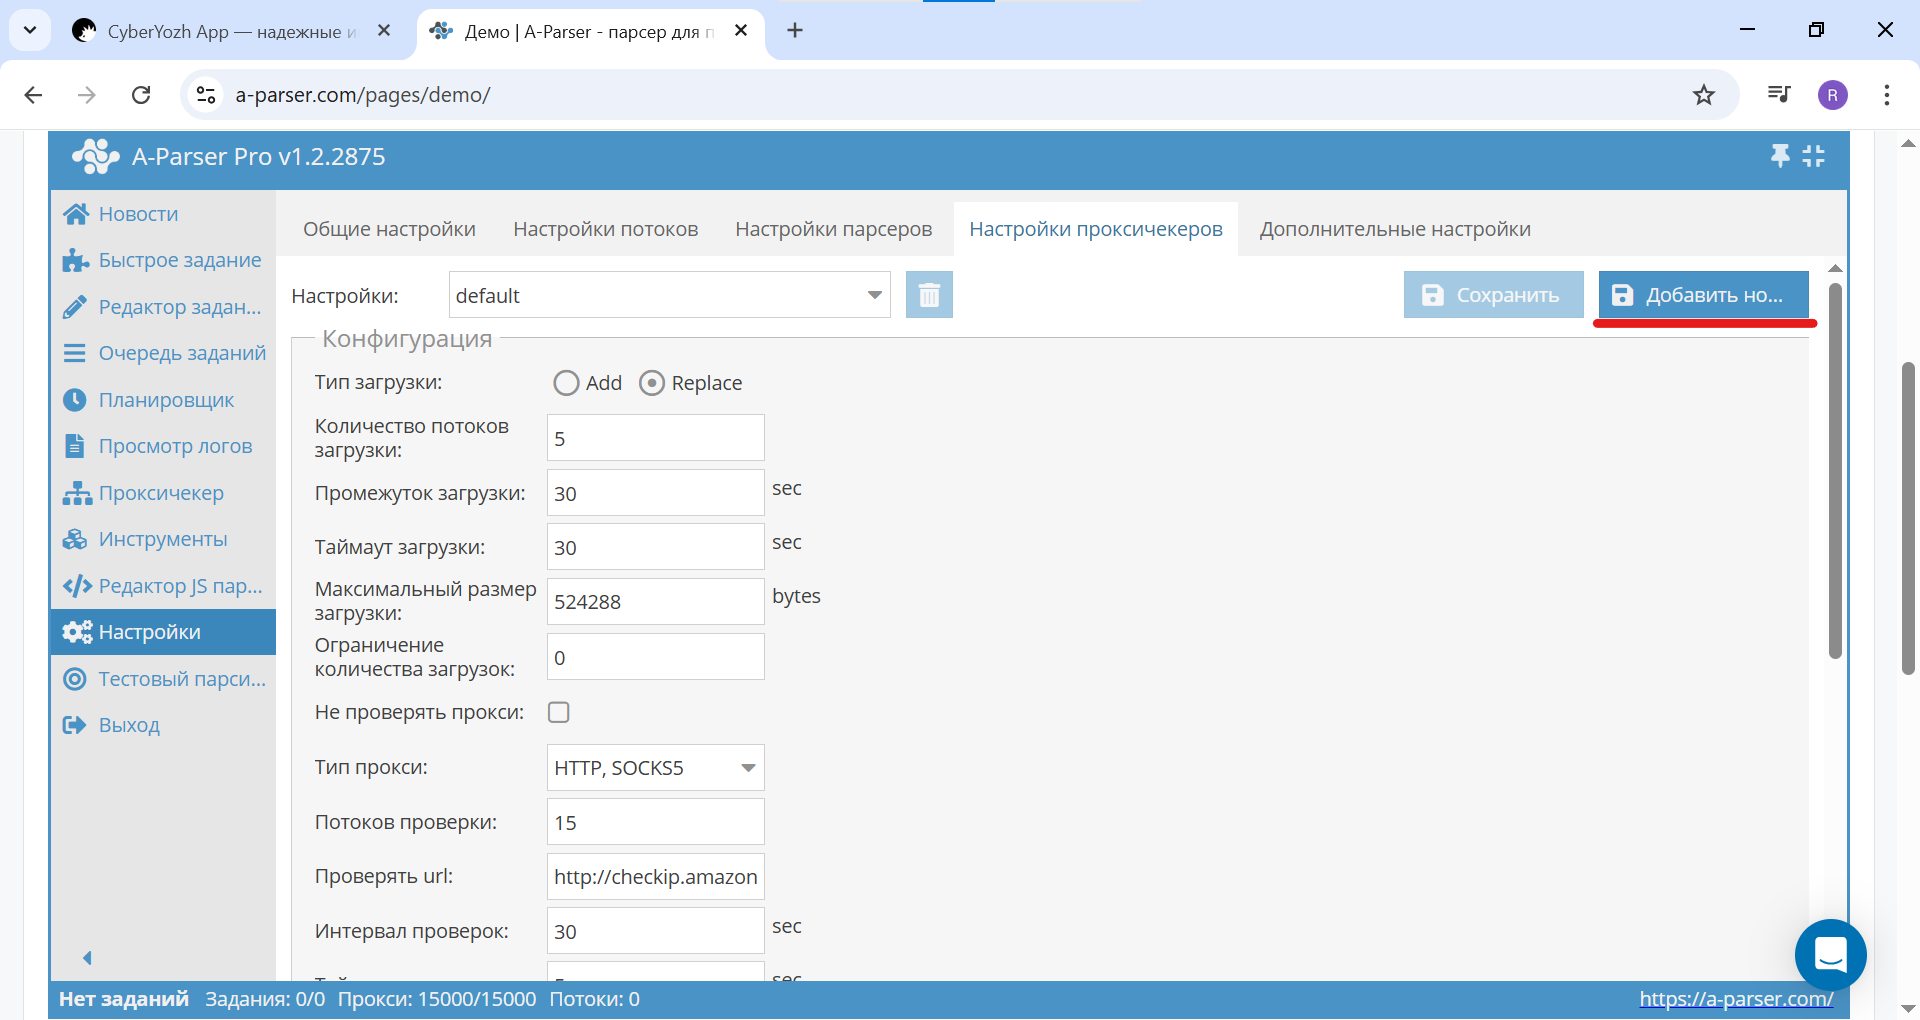 Fig. 4. Screenshot of the "Settings" section in A-Parser, showing the navigation to the "Proxy Checker Settings" tab and the "Add New Preset" button.
- In the pop-up window, enter a clear name, for example, CyberYozh, and click "OK".
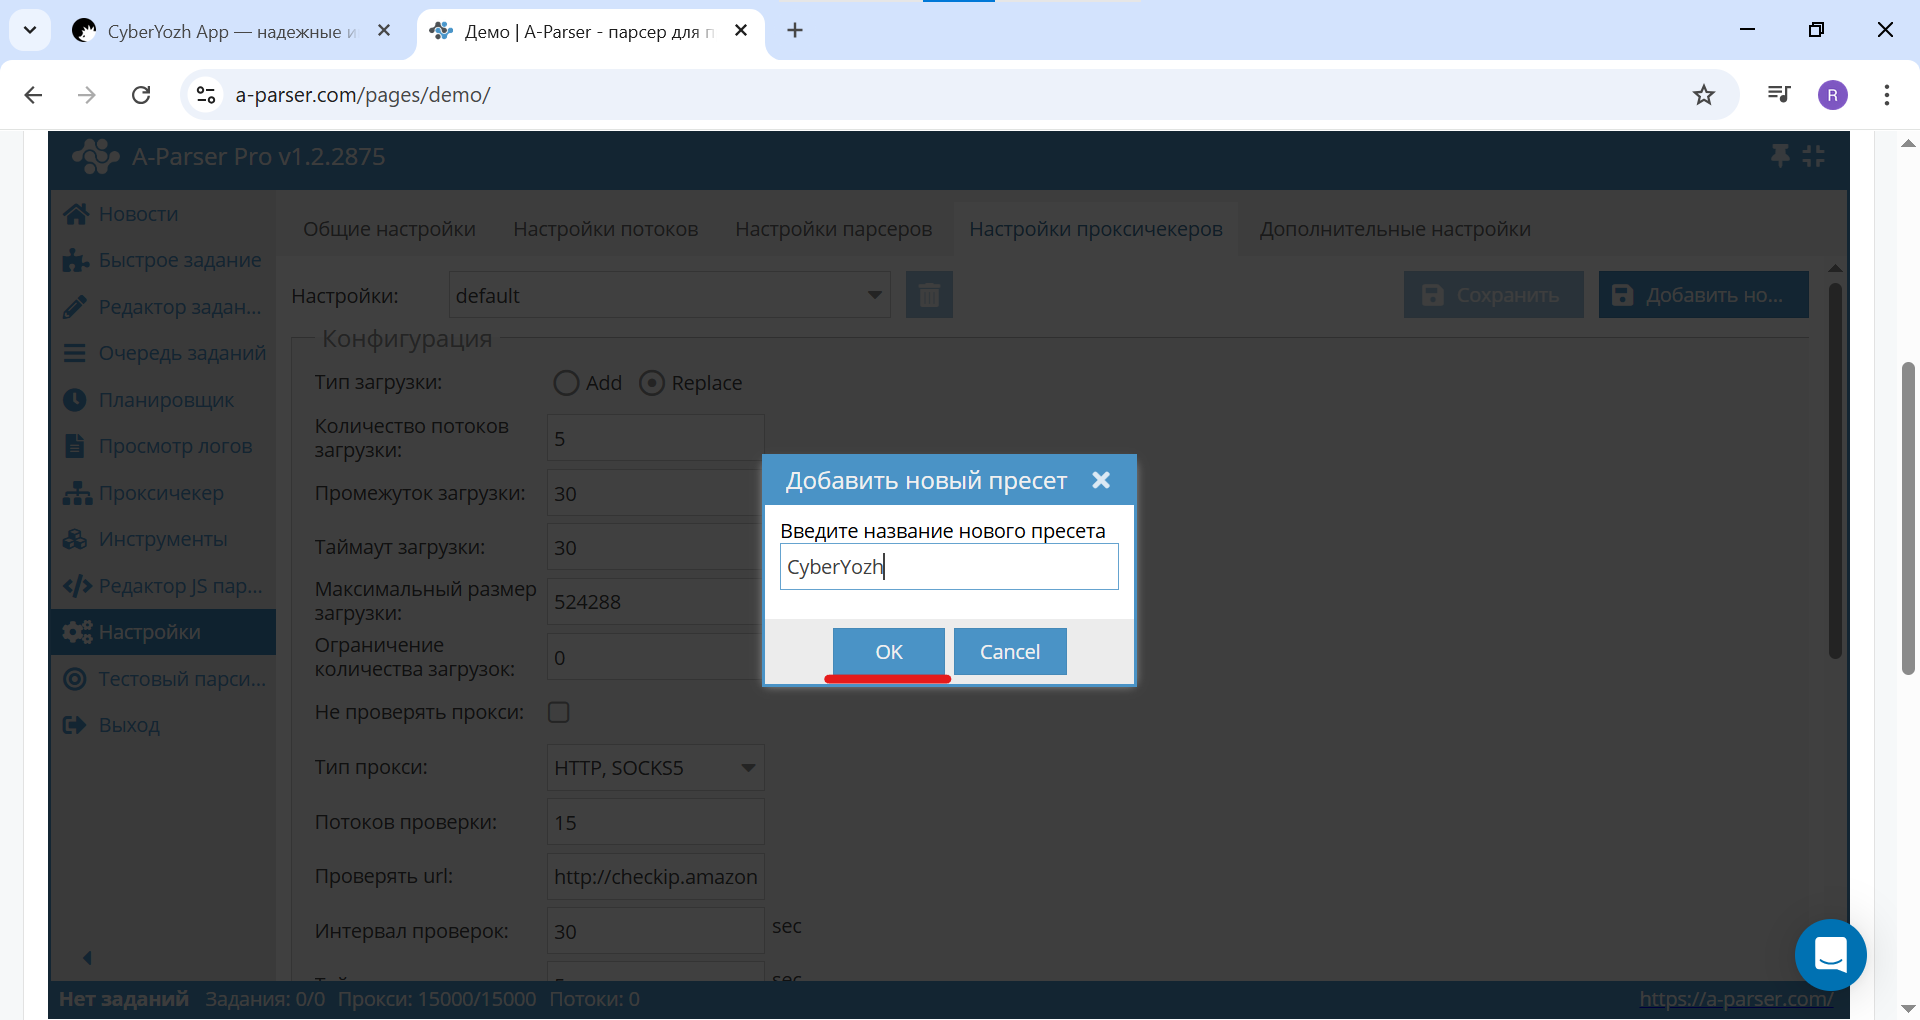 Fig. 5. Screenshot of the dialog window in A-Parser, demonstrating the process of creating a new preset named "CyberYozh".
Now all further settings will be tied to this preset.
Step 3: Configuring Authorization
The most crucial step. We specify how the program should handle proxies that require a login and password.
- Ensure that your preset ("CyberYozh") is selected in the "Settings" dropdown list.
 Fig. 6. Screenshot of the settings for the created preset in A-Parser, in this case — "CyberYozh".
- Scroll down the page and check the "Use proxy authentication" box.
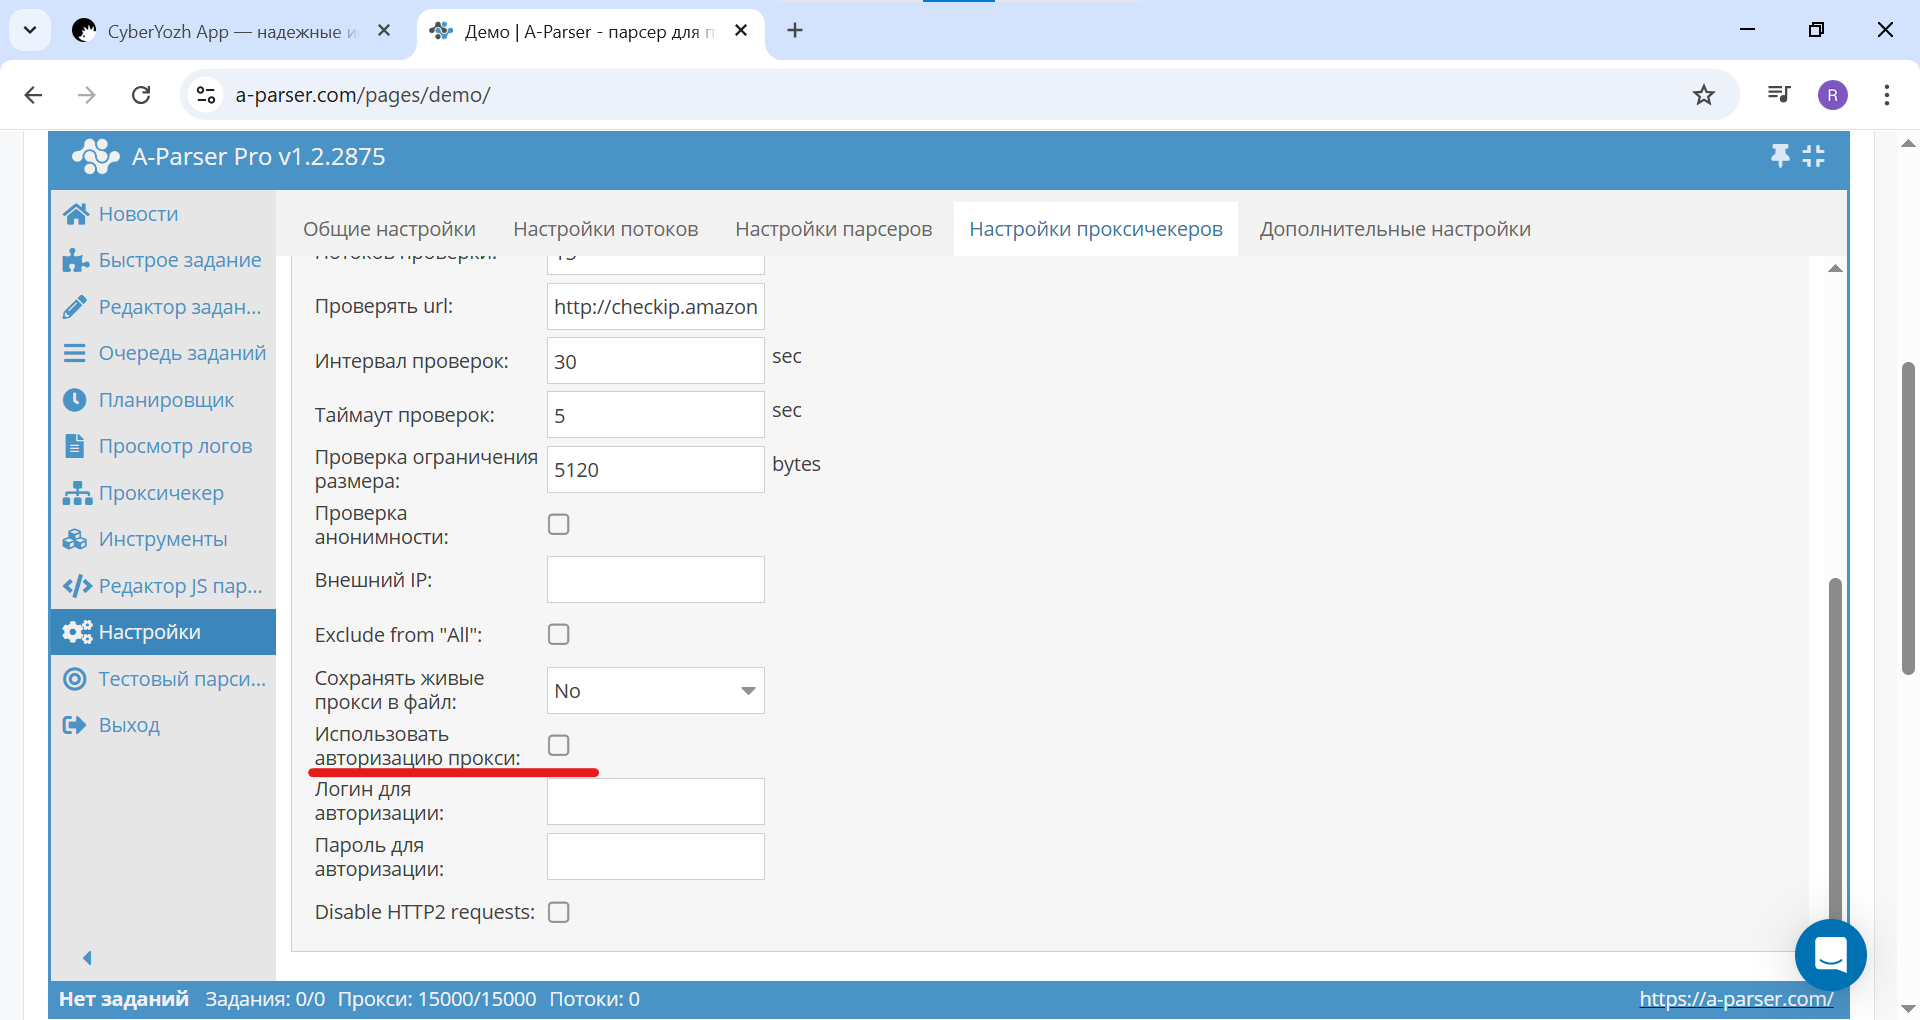 Fig. 7. Screenshot of the proxy checker settings in A-Parser, showing the activation of the "Use proxy authentication" option.
- Leave the "Login for authentication" and "Password for authentication" fields empty. A-Parser is a smart tool; it will automatically extract the credentials from your proxy list if they are in the correct format.
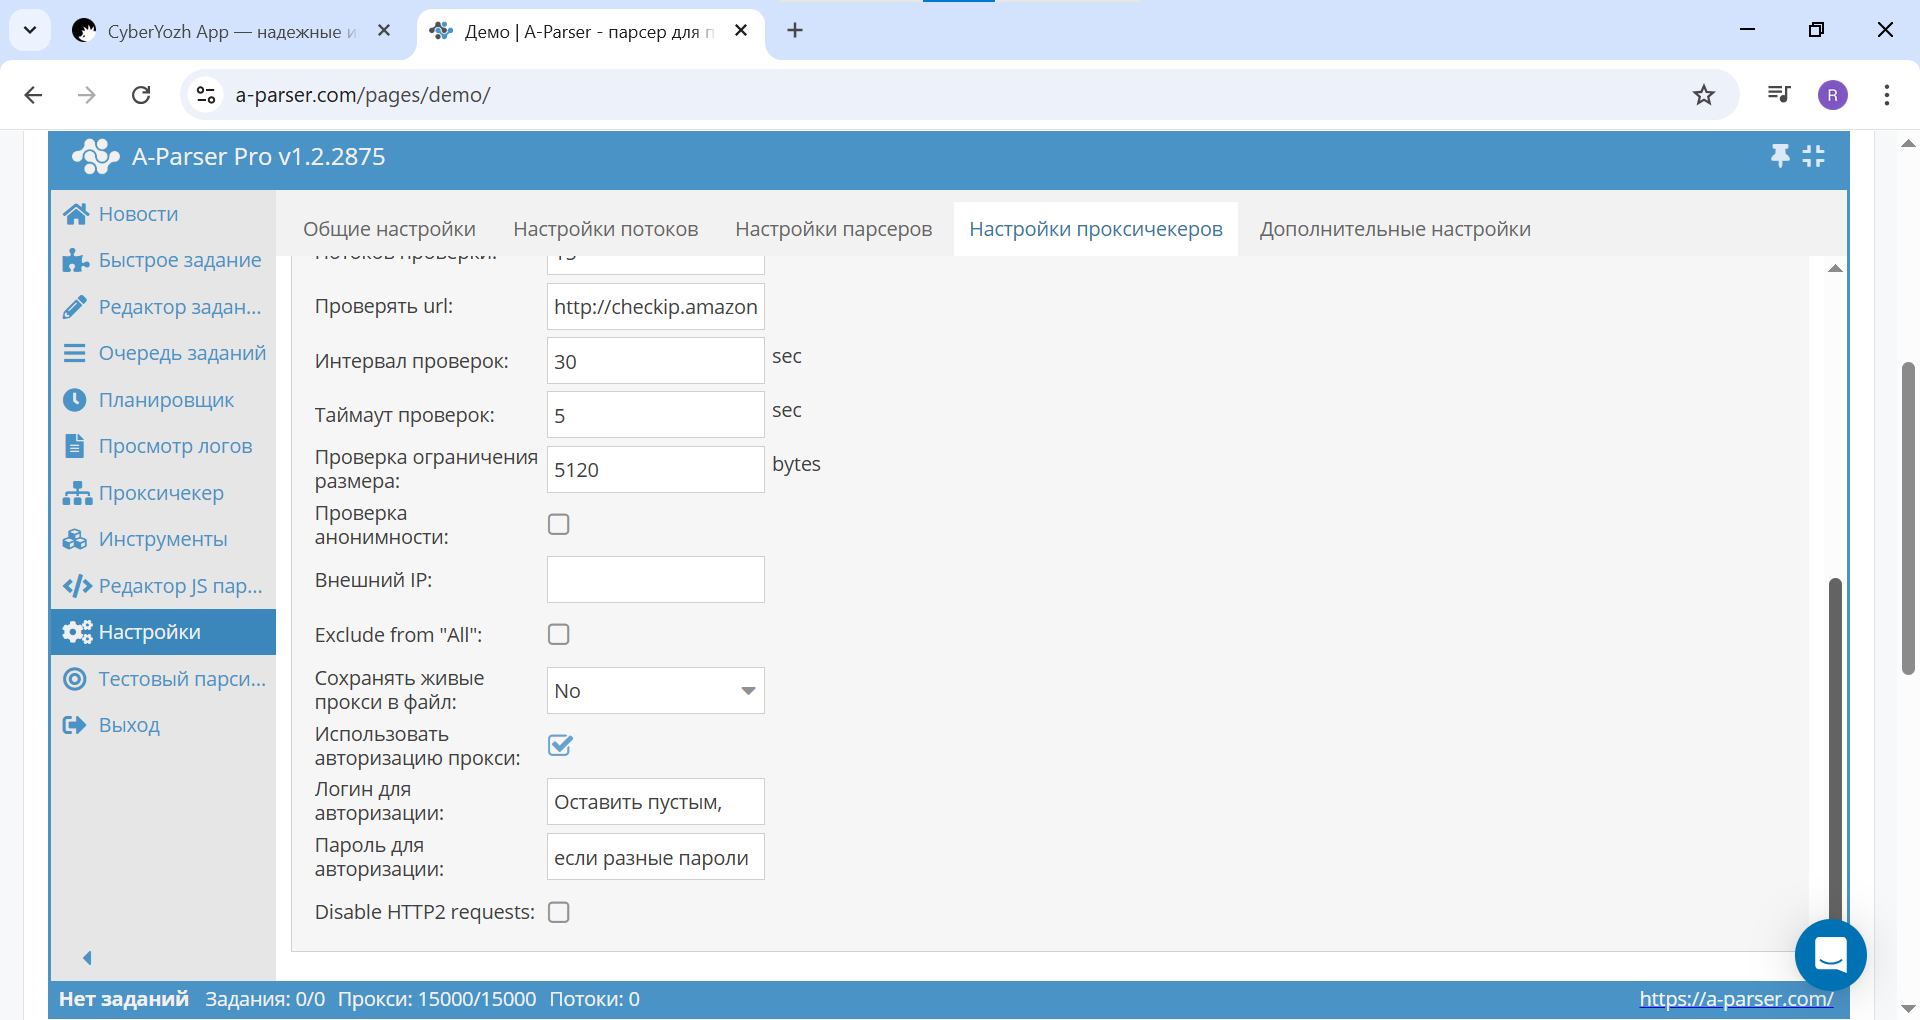 Fig. 8. Screenshot of the proxy checker settings in A-Parser. The login and password fields remain empty as the data will be read from the file.
- After this, be sure to click the "Save" button to apply the changes to the preset.
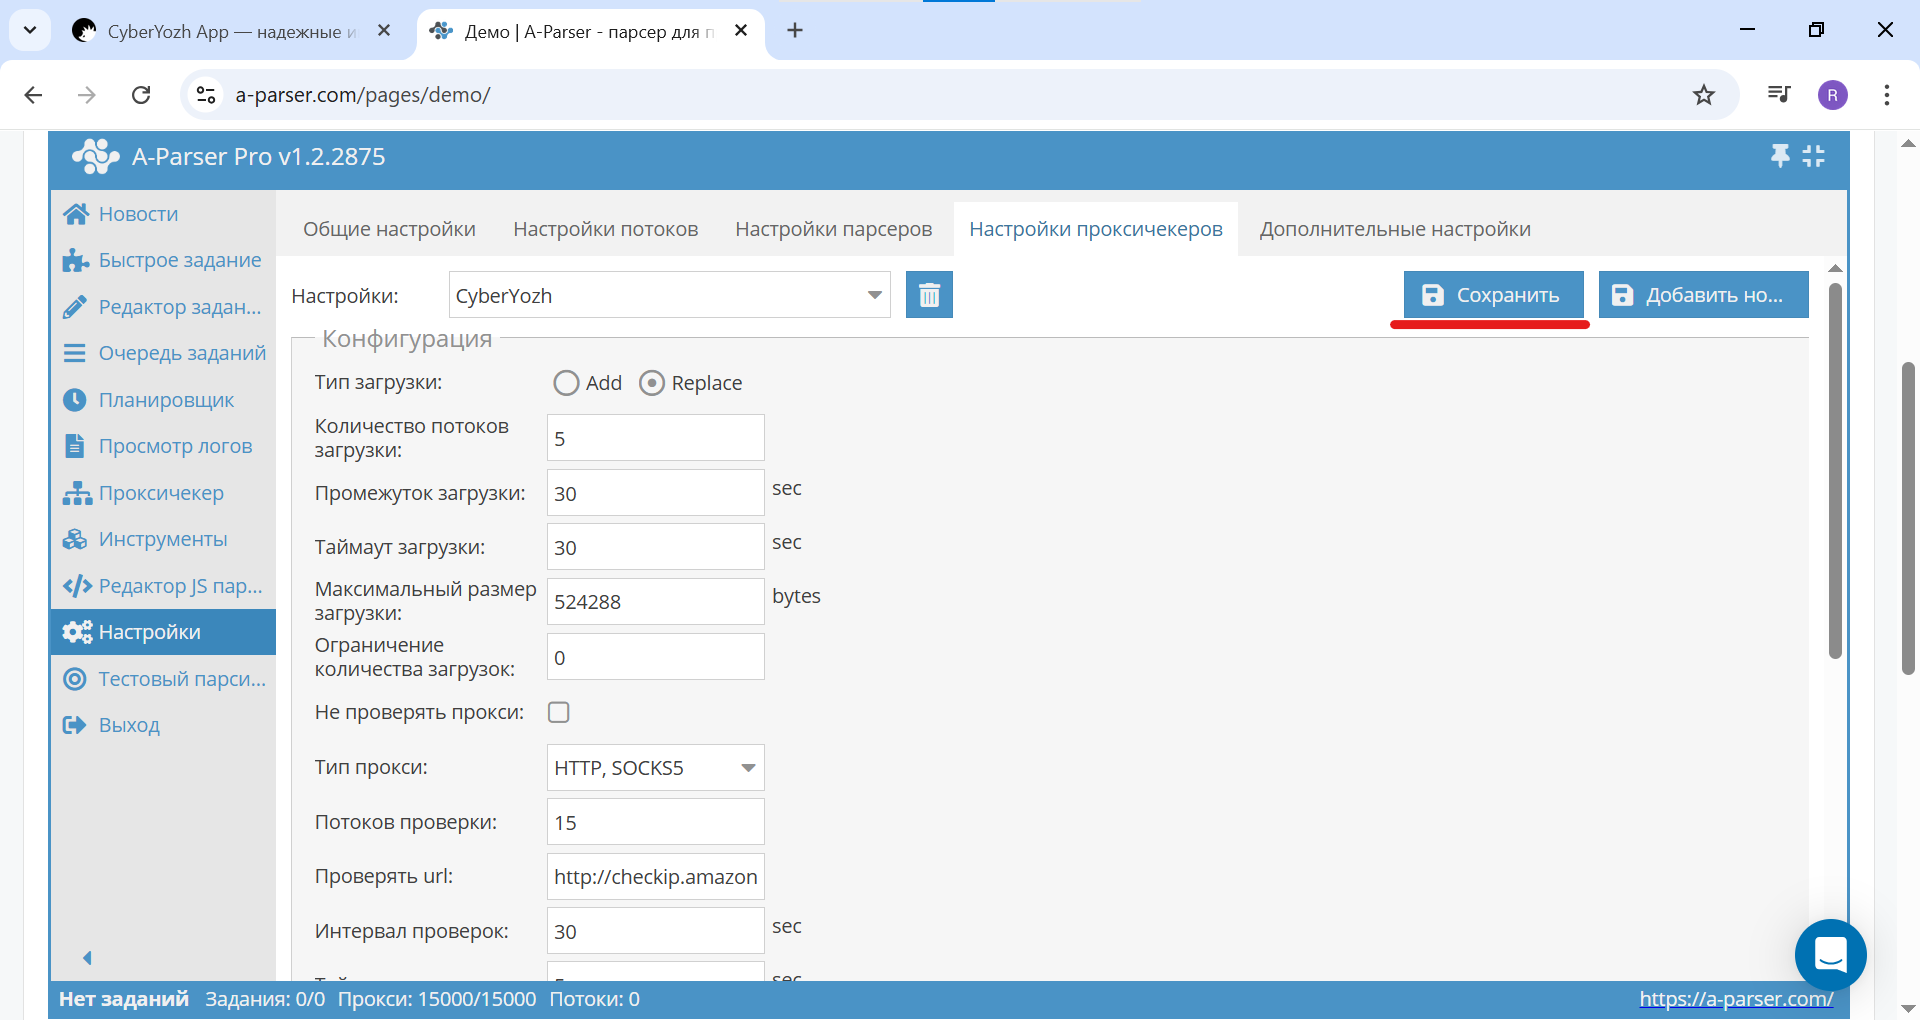 Fig. 9. Screenshot of the proxy checker settings in A-Parser, showing the location of the "Save" button.
Step 4: Preparing and Uploading the Proxy List
A-Parser automatically creates a folder for each new preset. This is where we will place our proxy list.
- Open the folder where A-Parser is installed. Navigate to:
.../aparser/files/proxy/. - Inside, you will see a folder named after your preset — CyberYozh. Open it.
 Fig. 10. Screenshot of the file manager showing the A-Parser folder structure. A folder named "CyberYozh" was automatically created for the preset, where the proxy.txt file should be placed.
- Create or open (if it already exists) a text file named
proxy.txtin this folder. - Open this file and paste your proxy list. The format must strictly be
login:password@IP-address:port. Each proxy on a new line. Don't forget to save the file.
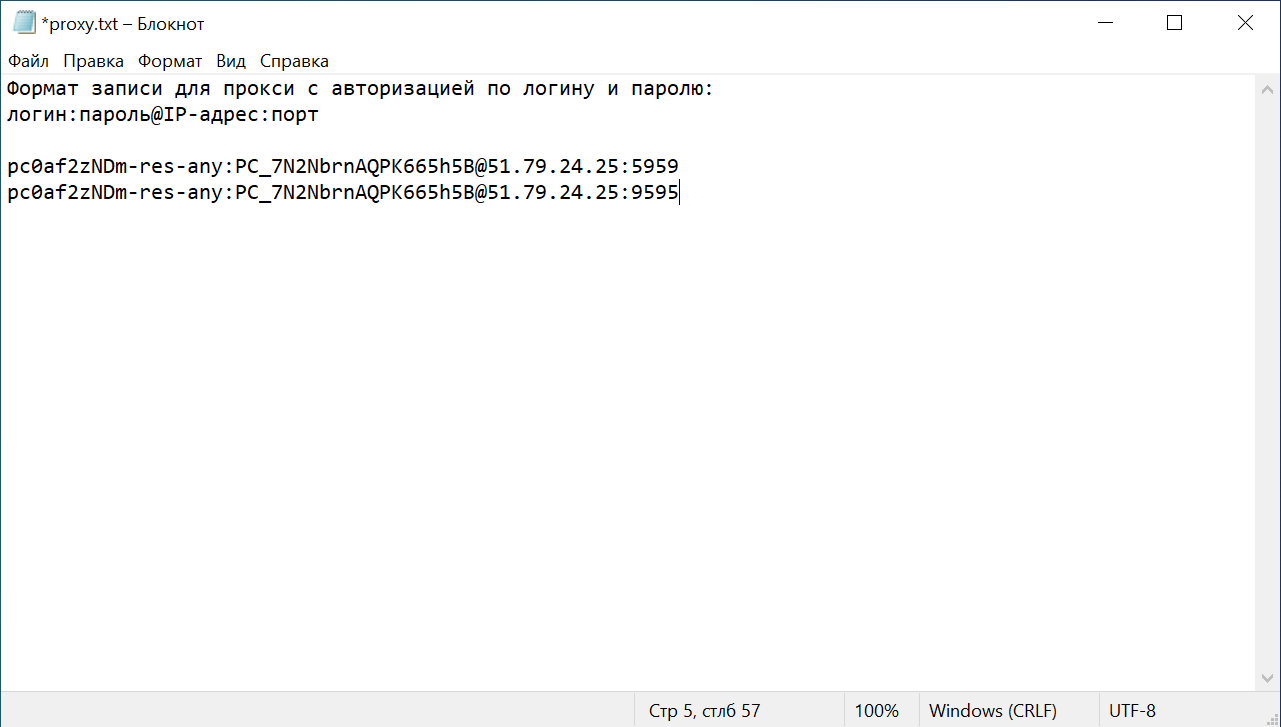 Fig. 11. Screenshot of the proxy.txt file, demonstrating the correct data format for proxies with authentication: login:password@IP-address:port.
Step 5: Running the Check
All settings are ready, and the file is in place. It's time to see if our proxies "come to life" in the parser.
- Return to A-Parser and go to the "Proxy Checker" section in the left menu.
- The parser will automatically pick up the
proxy.txtfile from the corresponding folder. - Done.
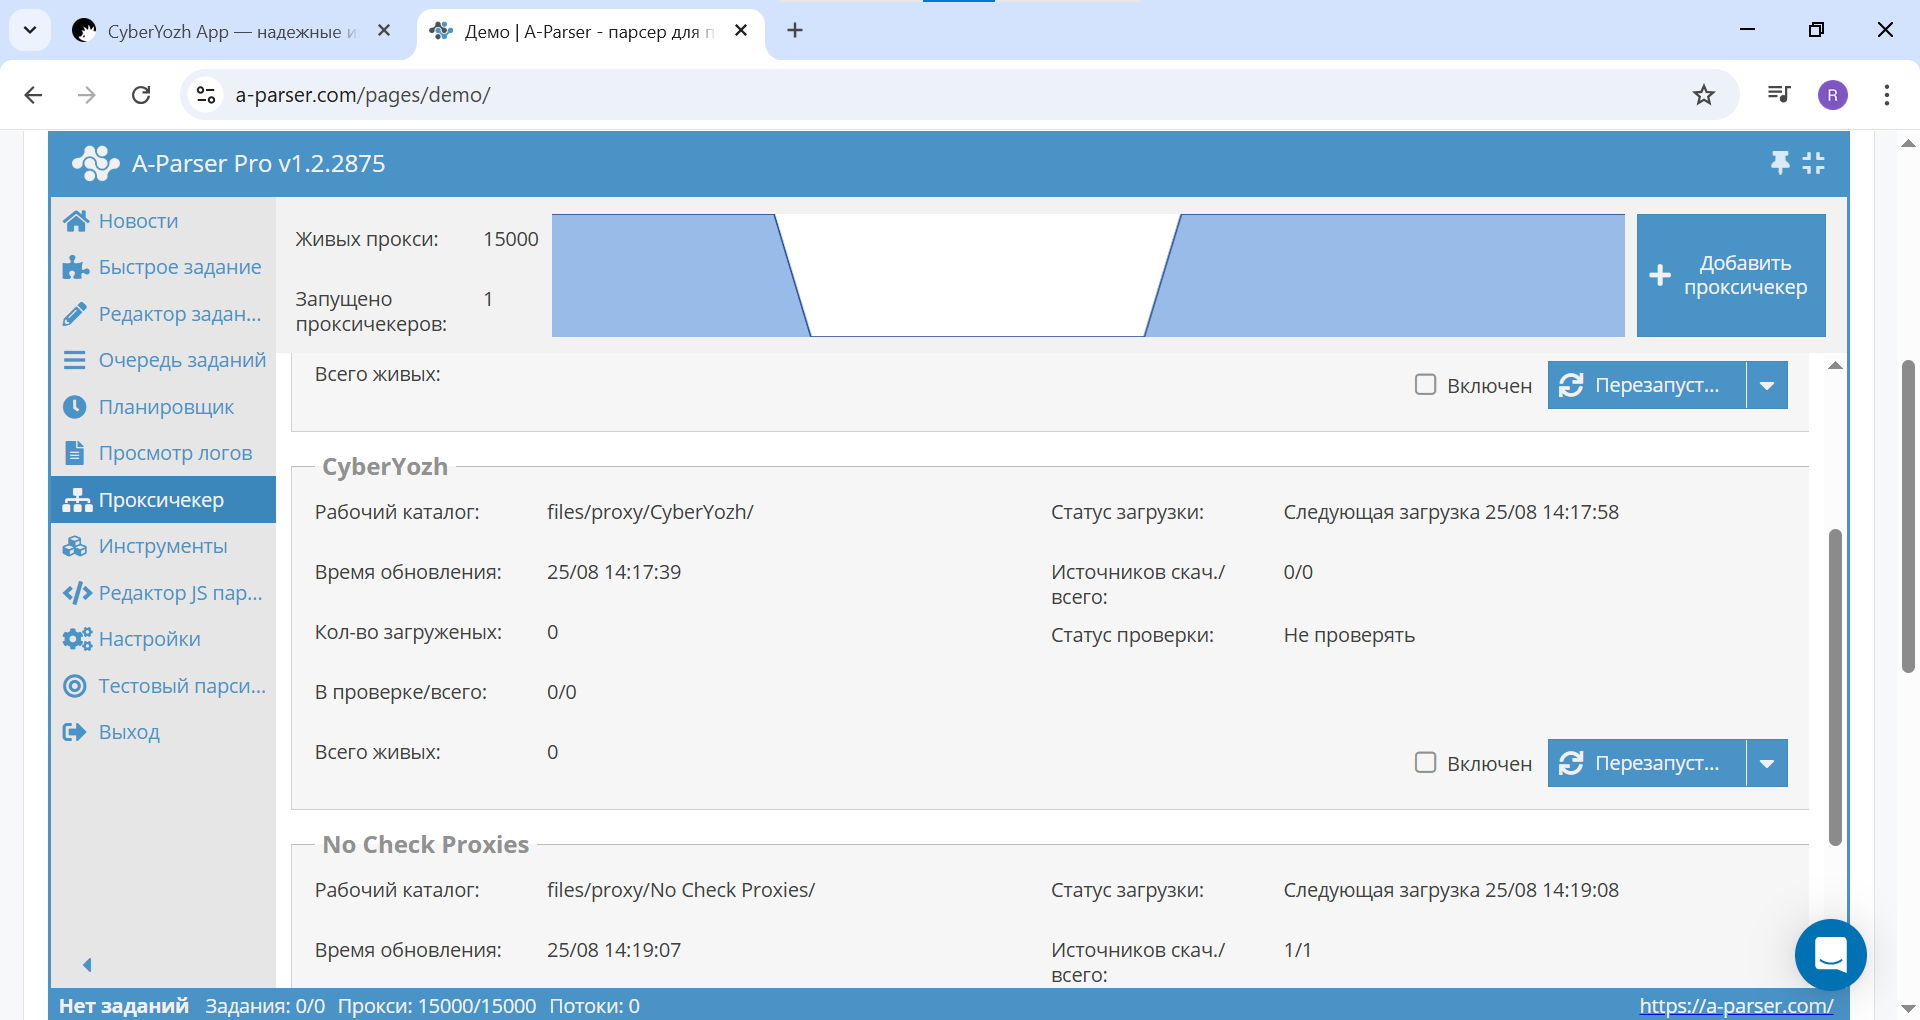 Fig. 12. Screenshot of the "Proxy Checker" section in A-Parser, showing the addition of a new proxy checker using the created preset.
The proxy checker will start working. Initially, you will see it running, but there won't be any "alive" proxies yet.
Step 6: Checking the Results
Once the check is complete, refresh the page. You should see the "Total Alive" counter showing the number of successfully verified proxies. If the number matches the amount of proxies in your file — congratulations, everything is set up perfectly!
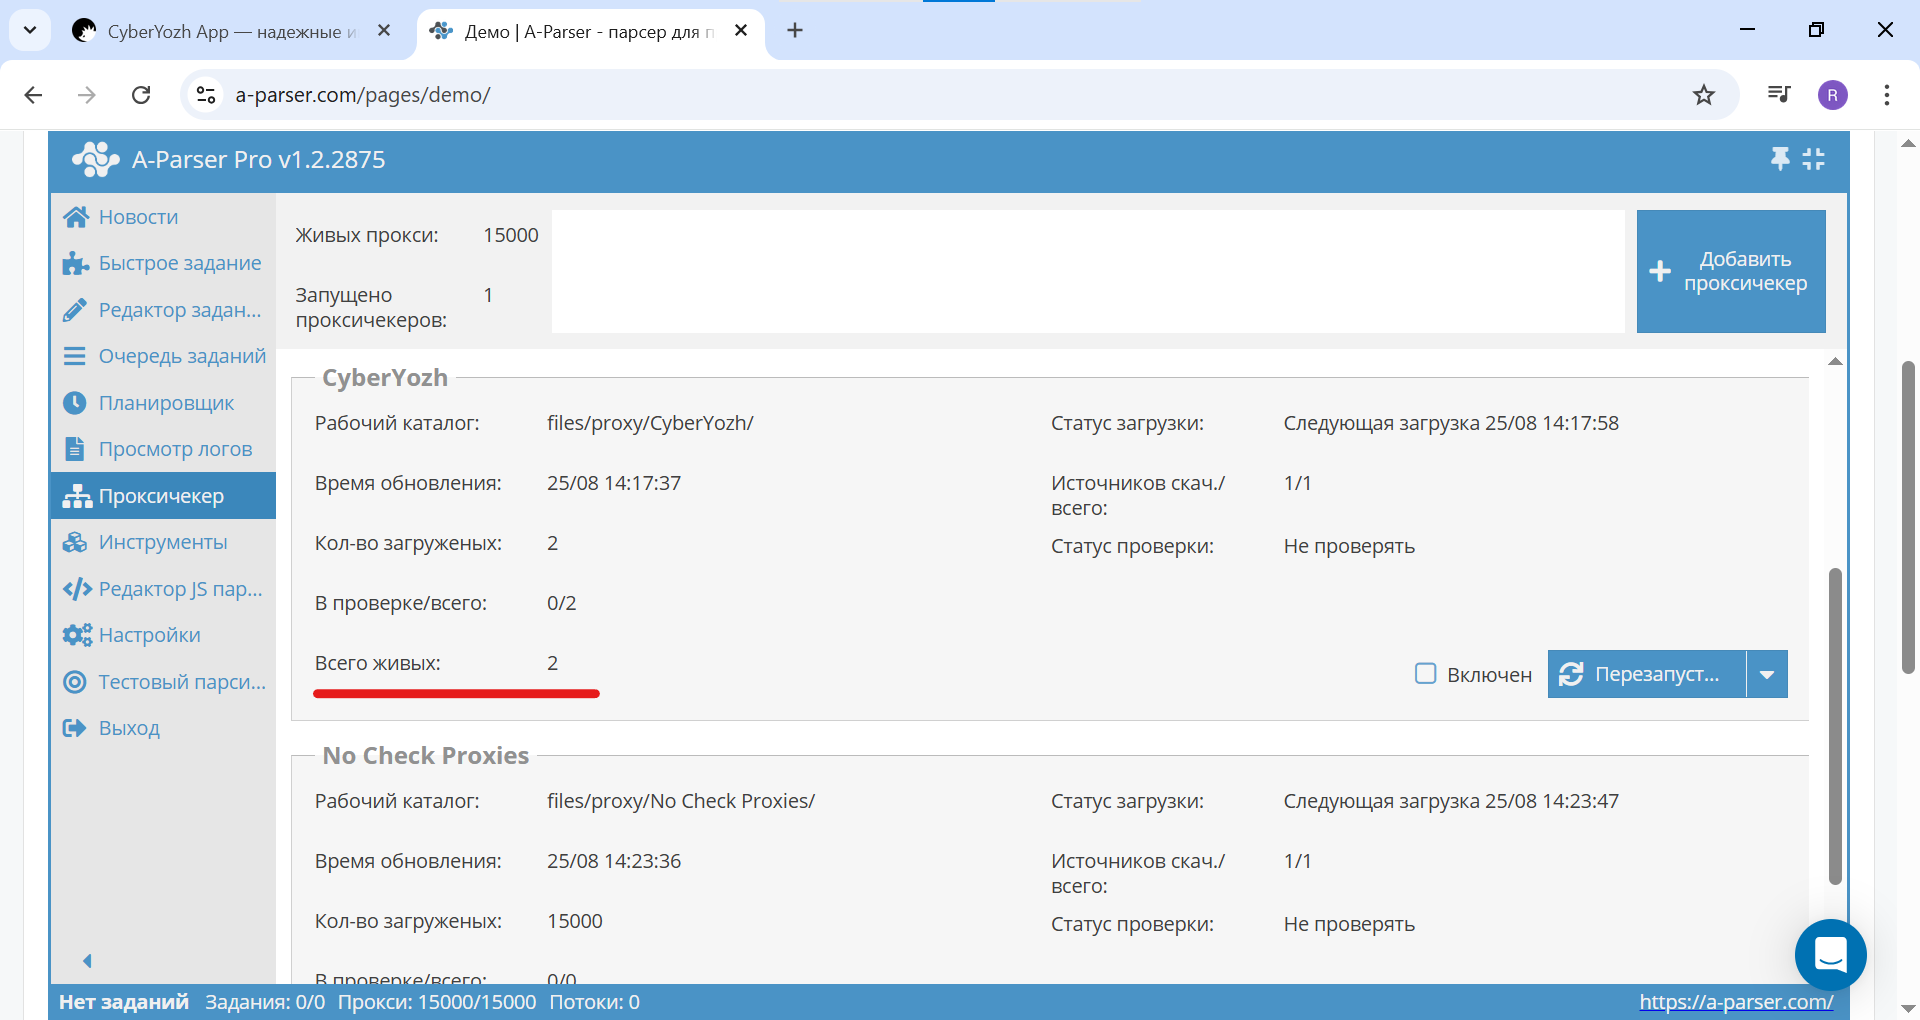 Fig. 13. Screenshot of the "Proxy Checker" section in A-Parser, showing a successful check result. The "Total Alive" counter displays the number of working proxies ready for use.
A-Parser is now ready to use this pool of "alive" proxies for your tasks.
Conclusion
Great! The setup is complete. Remember: the foundation of successful and uninterrupted data collection is not just powerful software, but also high-quality, reliable proxies. Saving on them almost always leads to connection issues and task interruptions.
Need stable residential or mobile proxies for A-Parser? In our catalog, you will find solutions with rotation and high trust levels that are perfect for multi-threaded scraping. And with the Fraud Score checker, you can always be sure of the cleanliness of the IPs you use.
