
PhantomBuster — is a powerful tool for workflow automation and public data analysis. It allows you to optimize LinkedIn outreach, effectively analyze public data on Instagram, and automate business processes without any coding knowledge.
But there is a catch: PhantomBuster operates in the cloud. When you launch a “Phantom” (script), it runs from the service's IP addresses (usually AWS data centers in France or the USA). Some platforms may restrict access from unrecognized data center IP addresses, which can interrupt your workflow and cause connection issues.
To work safely and scalably, it is critically necessary to connect your own, trusted proxy.
In this guide, we will break down which type of proxy to choose for LinkedIn/Instagram and how to correctly configure it in PhantomBuster.
Part 1. Strategy: Which proxy do you need for PhantomBuster?
Choosing the right proxy is essential for maintaining a stable, high-quality connection and ensuring uninterrupted operation across various platforms.
1. Mobile Proxies (4G/5G) — For Instagram and Facebook
- What it is: IP addresses from mobile carriers.
- Purpose: Audience engagement, routine task automation, and public data analysis on Instagram and Facebook.
- Why: Mobile proxies use cellular carrier IP addresses, providing a highly reliable connection that ensures stable and seamless operation with mobile-oriented platforms like Instagram.
- 👉 You can read more about mobile proxies here
2. Residential Static Proxies (ISP) — For LinkedIn and Twitter
- What it is: IP addresses from home internet service providers.
- Purpose: Lead generation automation in LinkedIn (Sales Navigator), Twitter (X) public data analysis, and working with Google Maps.
- Why: LinkedIn is sensitive to frequent IP changes. You need a static residential IP to provide a stable connection over a long period. Changing the IP address during an active session can lead to unexpected logouts or connection drops.
3. Datacenter Proxies
- What it is: Inexpensive IP addresses from hosting providers.
- Purpose: Scraping public information from Yellow Pages, Google Search, company websites, and other public sources.
- Risk: Using these for social media accounts is categorically not recommended.
Part 2. Data Preparation
Stability (Uptime) and the correct protocol are critical for PhantomBuster. We recommend using private channels from CyberYozh App.
After purchase, you will receive the following data:
- IP (Host):
172.98.60.180 - Port:
58763 - Login / Password: Authorization credentials.
Critically important: PhantomBuster supports ONLY HTTP/HTTPS protocols. The SOCKS5 protocol is not supported. Make sure you use the HTTP port from your personal dashboard.
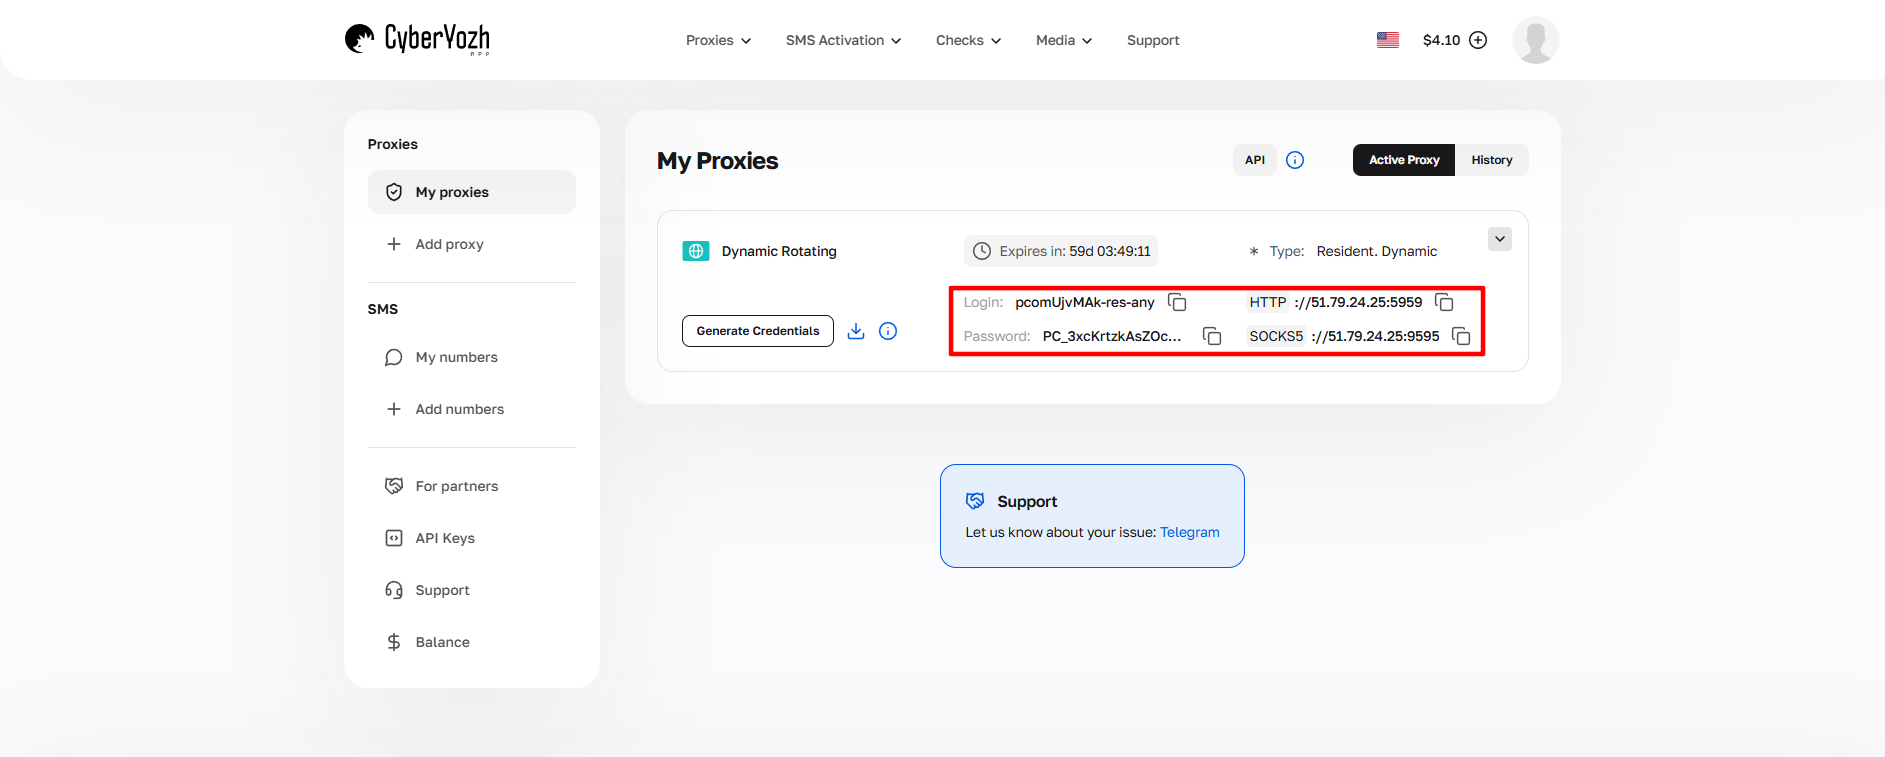 Fig. 1. Screenshot of the CyberYozh App platform interface, showing the location of the data for connecting to the proxy server. The image displays fields for the IP address (Host), port (Port), username (Proxy Username), and password (Proxy Password).
Part 3. Proxy Configuration (Creating a Pool)
In PhantomBuster, it is best to use Proxy Pools. This allows you to add a proxy once and then easily assign it to different Phantoms.
Step 1. Accessing Settings
- Log in to your PhantomBuster account.
Click on your name (or avatar) in the top right corner.
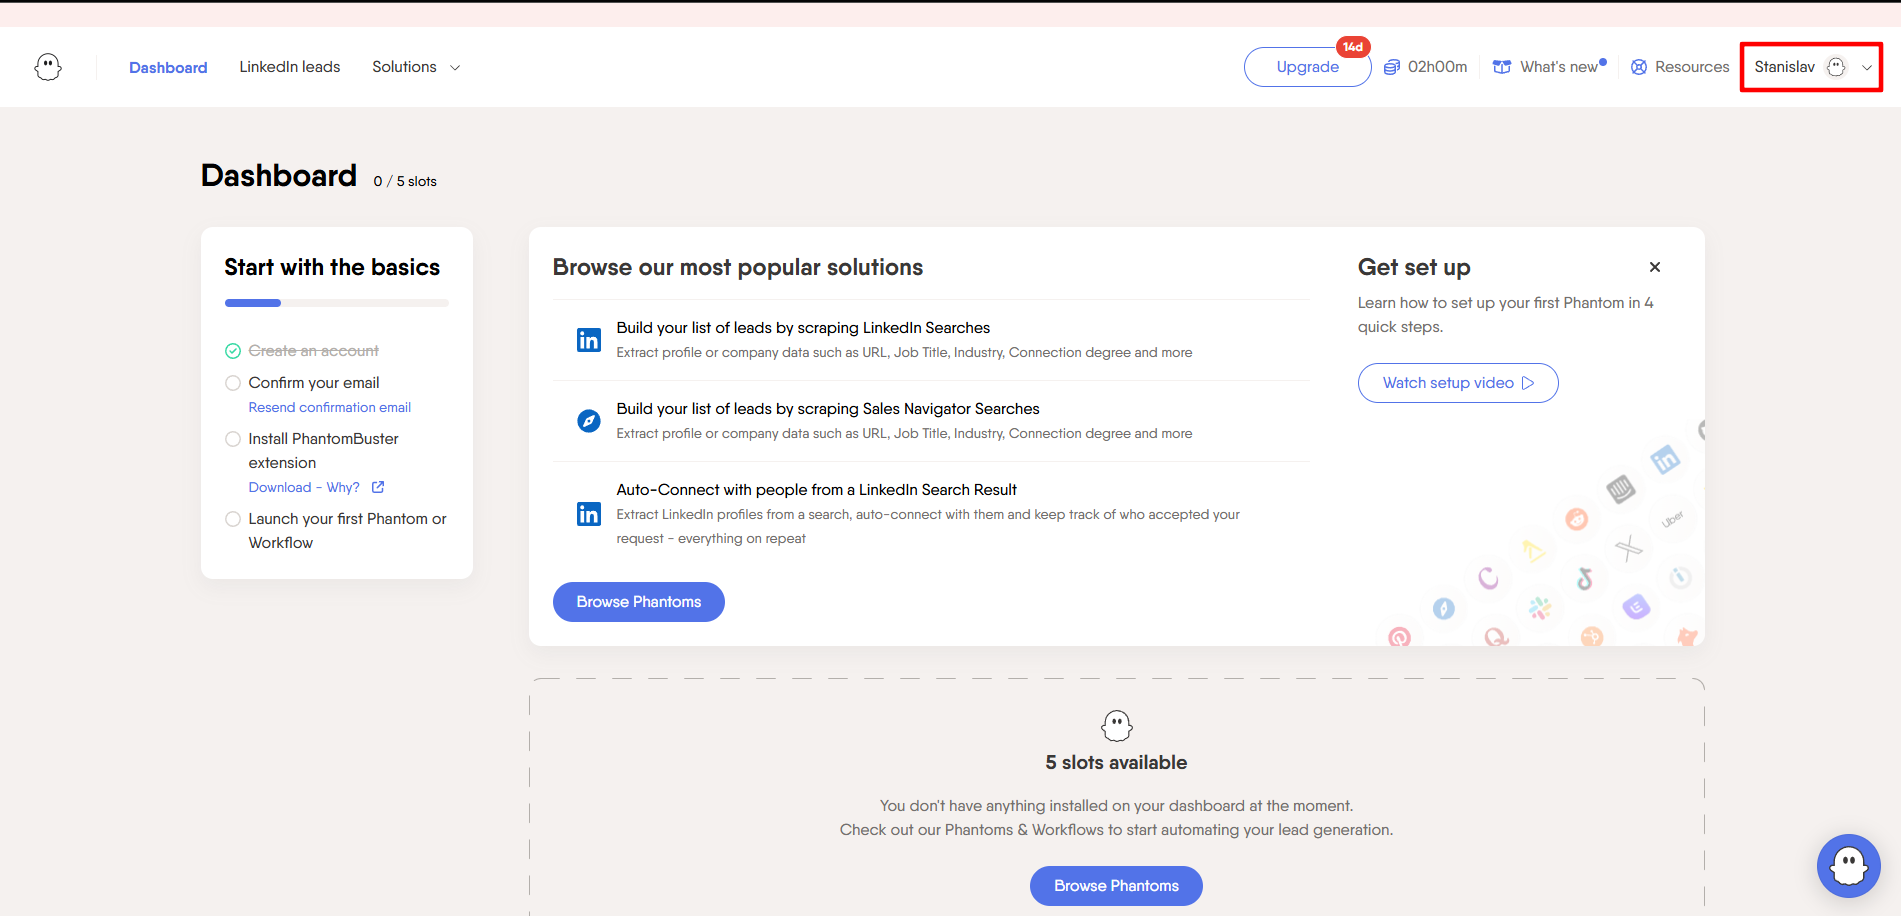 Fig. 2. PhantomBuster dashboard interface, showing the top navigation bar with the user profile element located in the upper right corner.
Select Proxies from the dropdown menu.
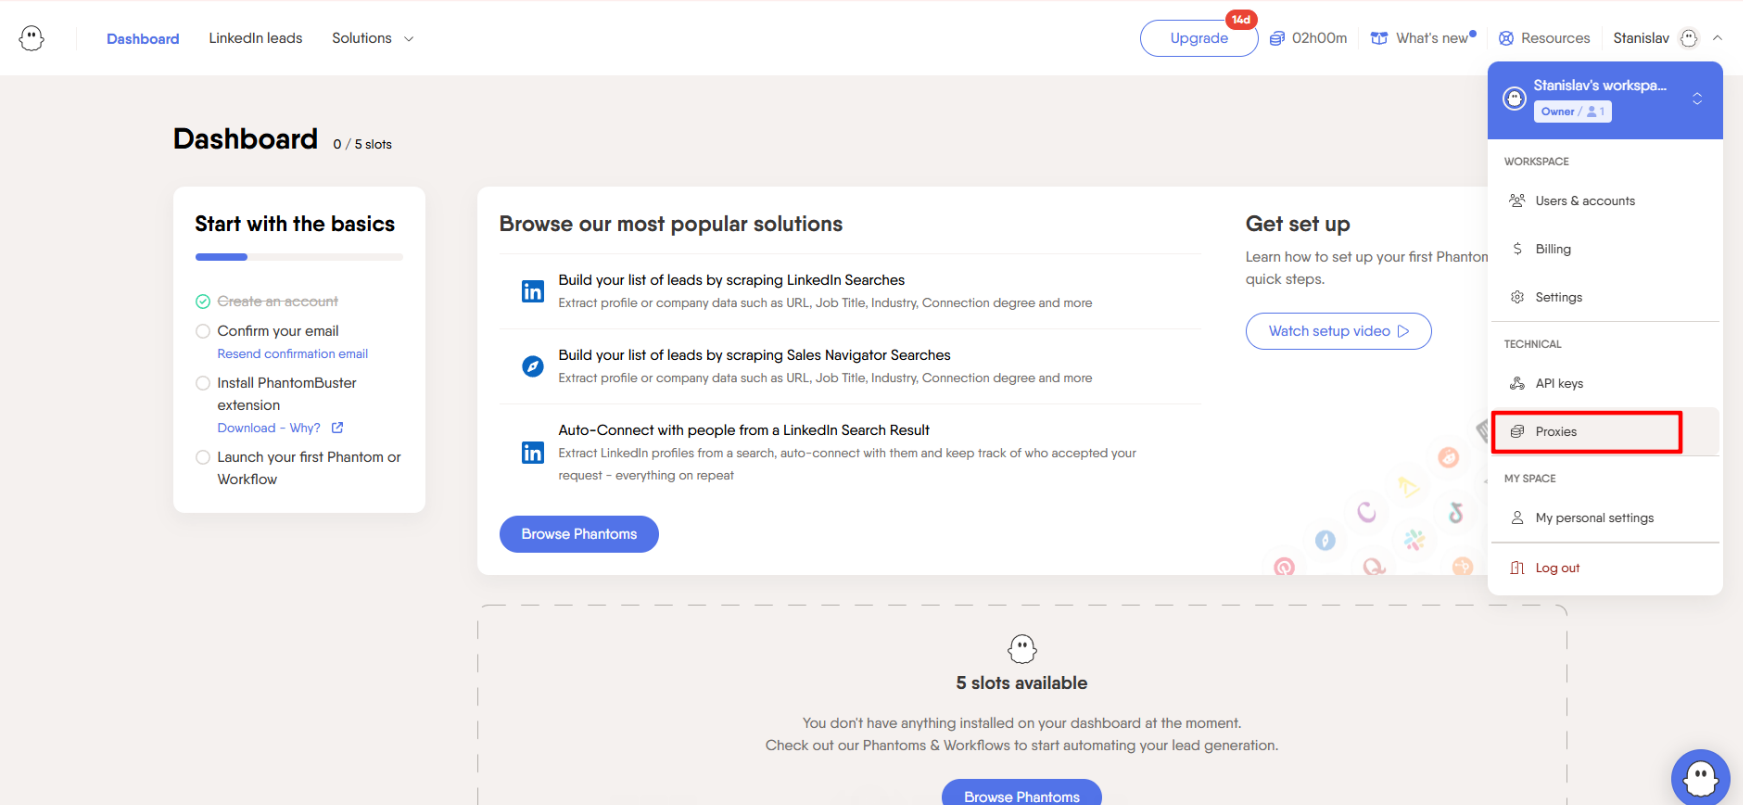 Fig. 3. PhantomBuster management interface. The image shows the selection of theProxiesmenu item.
Step 2. Creating a Pool
Click the blue + New Proxy Pool button.
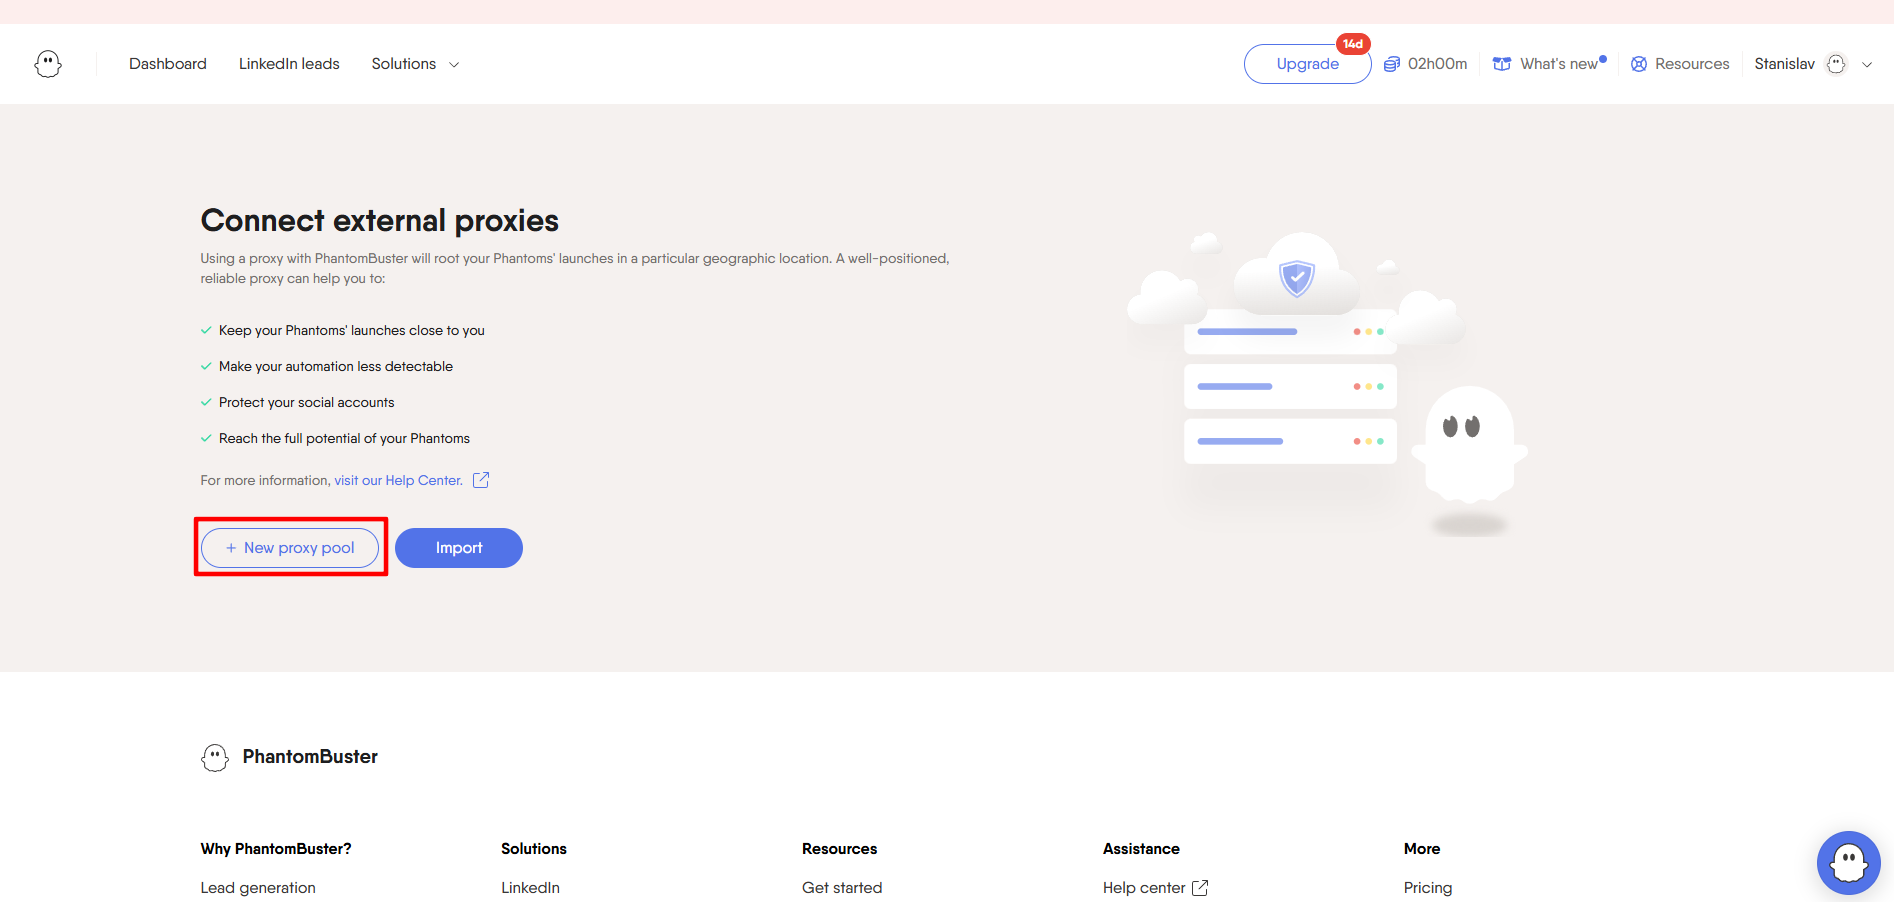 Fig. 4. User interface of the proxy management panel in PhantomBuster, showing the "New Proxy Pool" button.
Give the pool a clear name (e.g.,
CyberYozhProxy). Fig. 5. Proxy pool creation interface in PhantomBuster. The visualization shows a dialog box with a field for entering the "Proxy Pool Name" and the corresponding configuration form.
Step 3. Entering Data
Enter your proxy details. PhantomBuster accepts them in the format: ip:port:login:password
Example: 51.79.24.25:9595:pcomUjvMAk-res-any:xdtAof3xB7RSmUr
- Paste the string into the field.
- Click Add proxy.
- If the proxy is added successfully, you will see it in the list.
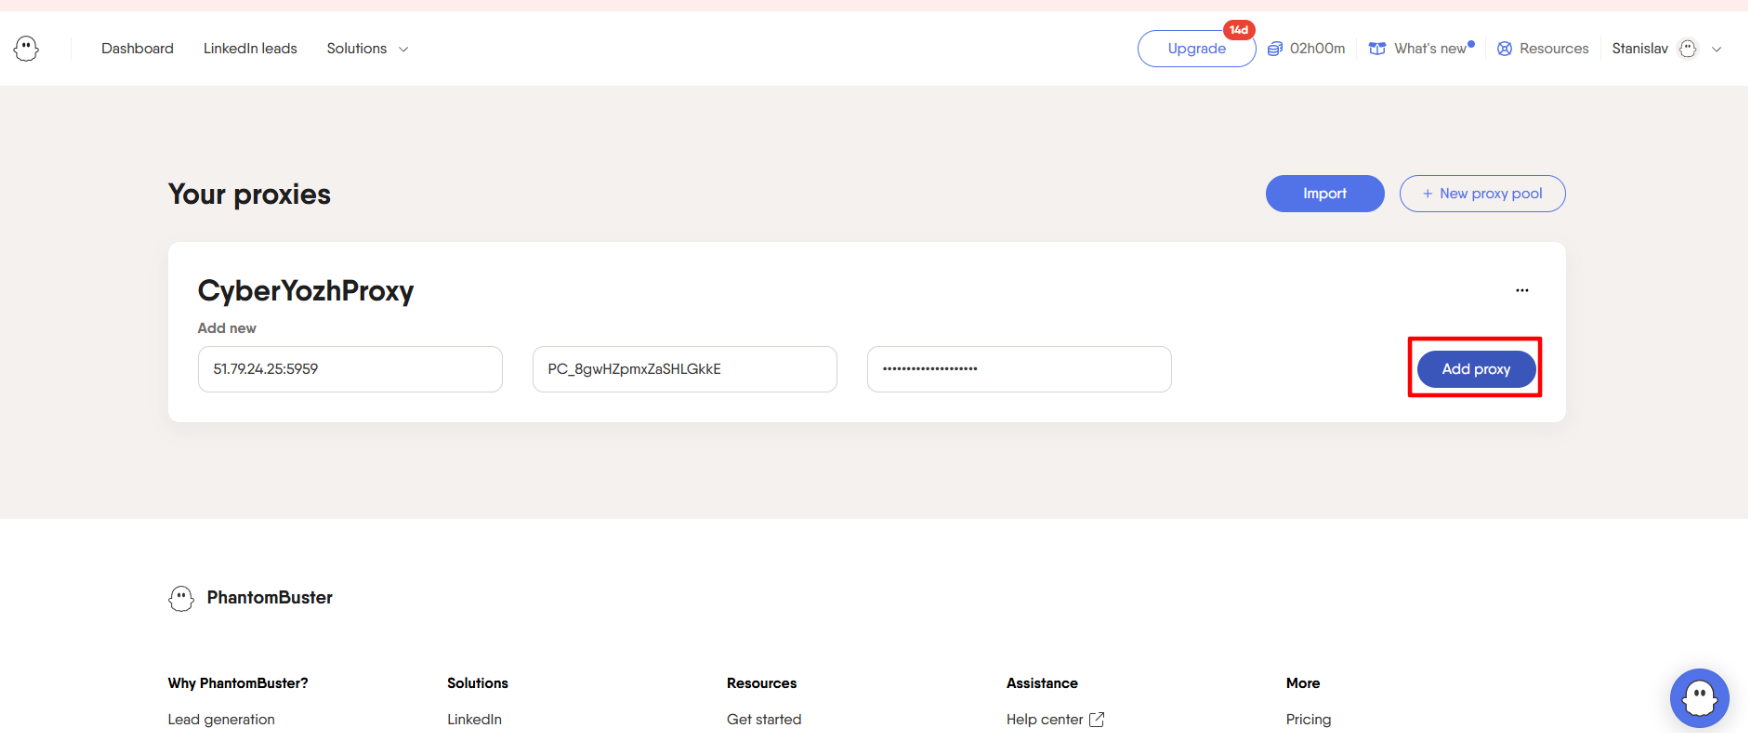 Fig. 6. Proxy server configuration interface in the PhantomBuster system. The image shows the form for entering proxy connection parameters, including fields for specifying the IP address and port, as well as authentication credentials (username and password).
Part 4. Linking a Proxy to a Phantom
Now that the proxy is added to the system, you need to tell a specific script (e.g., "LinkedIn Profile Scraper") to run through this proxy.
Step 1. Selecting a Phantom
Go to the Dashboard and select the desired Phantom (or create a new one via "Solutions").
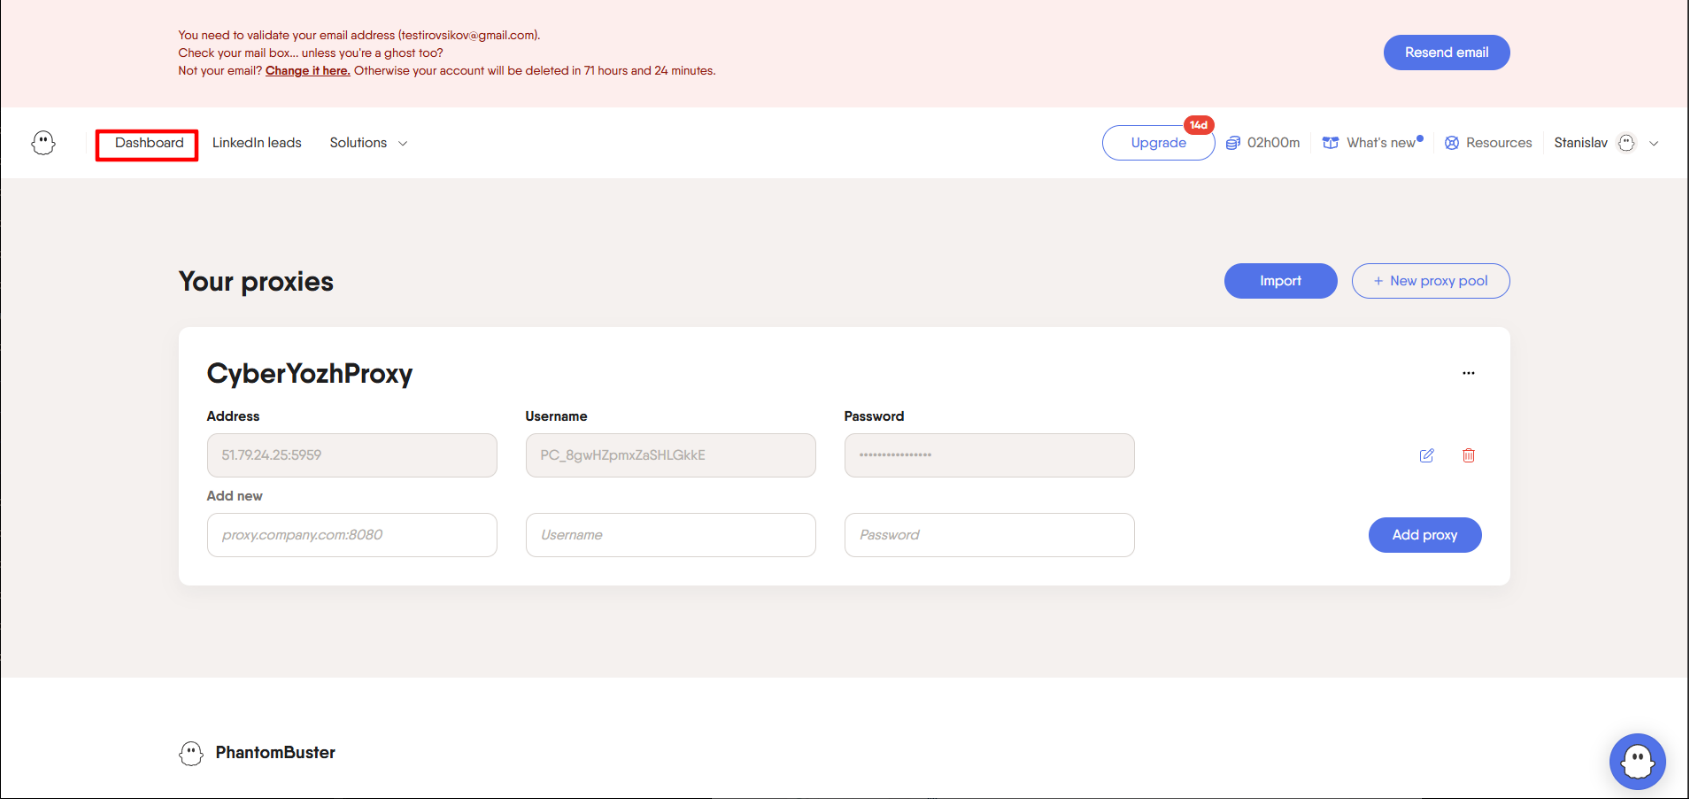 Fig. 7. PhantomBuster dashboard user interface, showing the "Dashboard" navigation element.
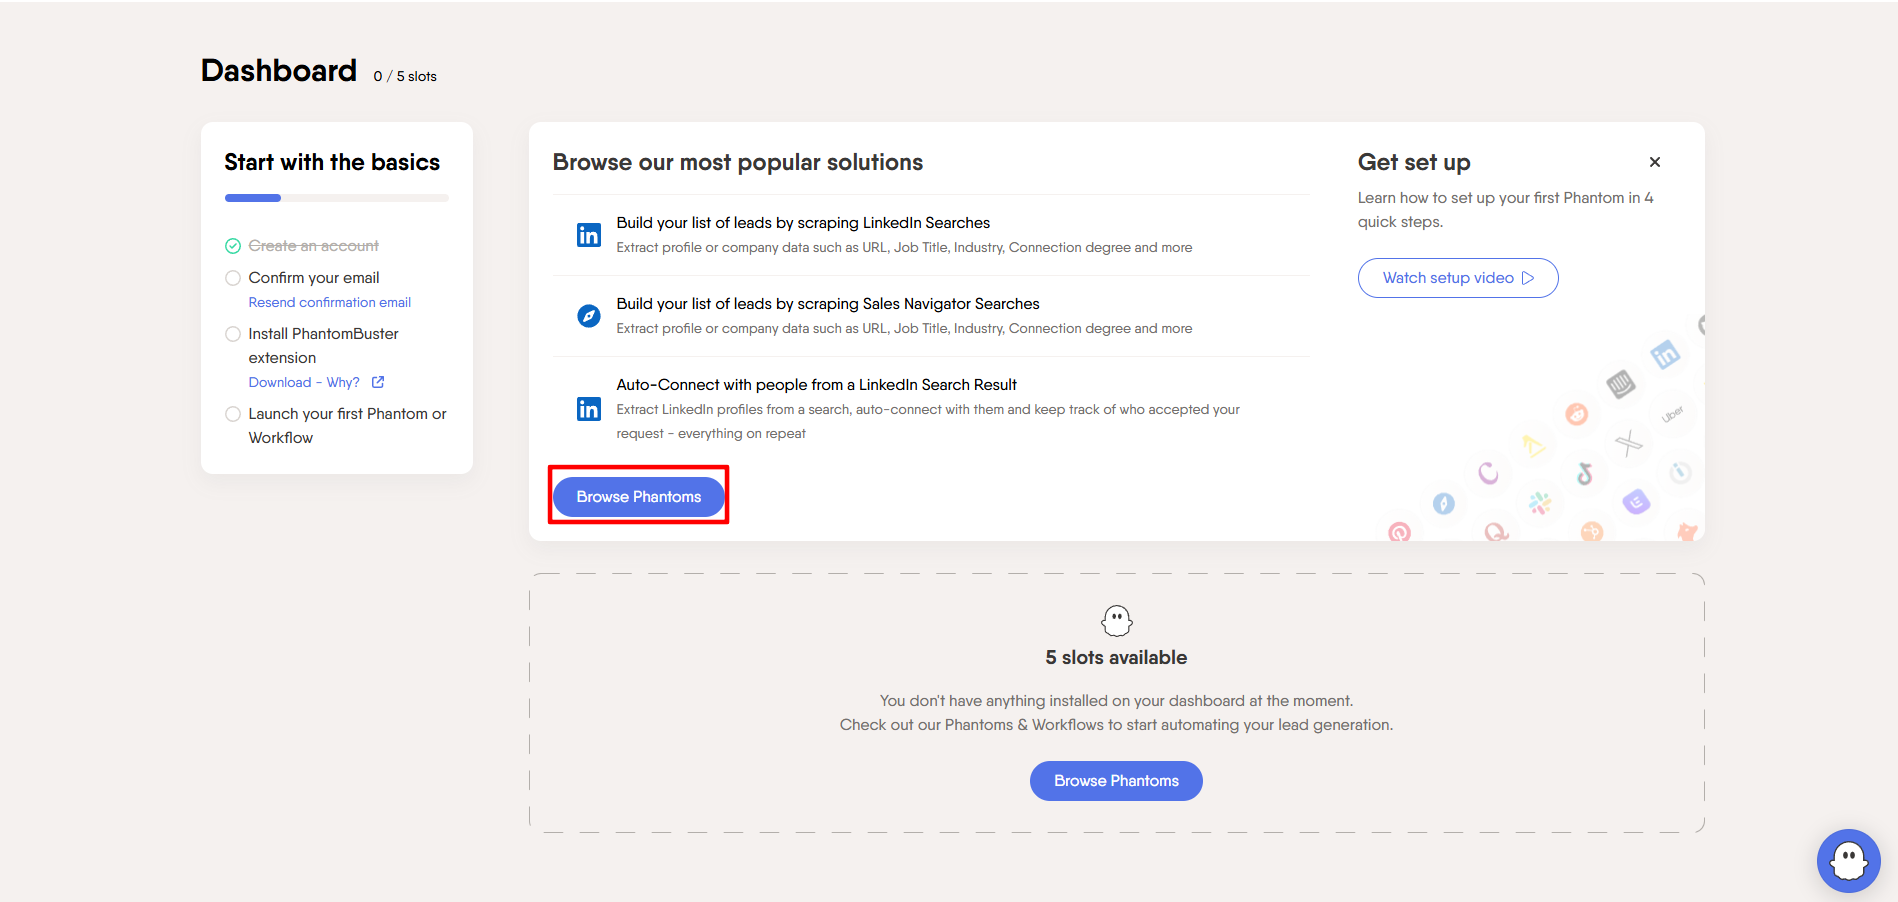 Fig. 8. PhantomBuster dashboard interface, showing the functional element for creating a new Phantom. The image presents a UI section with the "New Phantom" button.
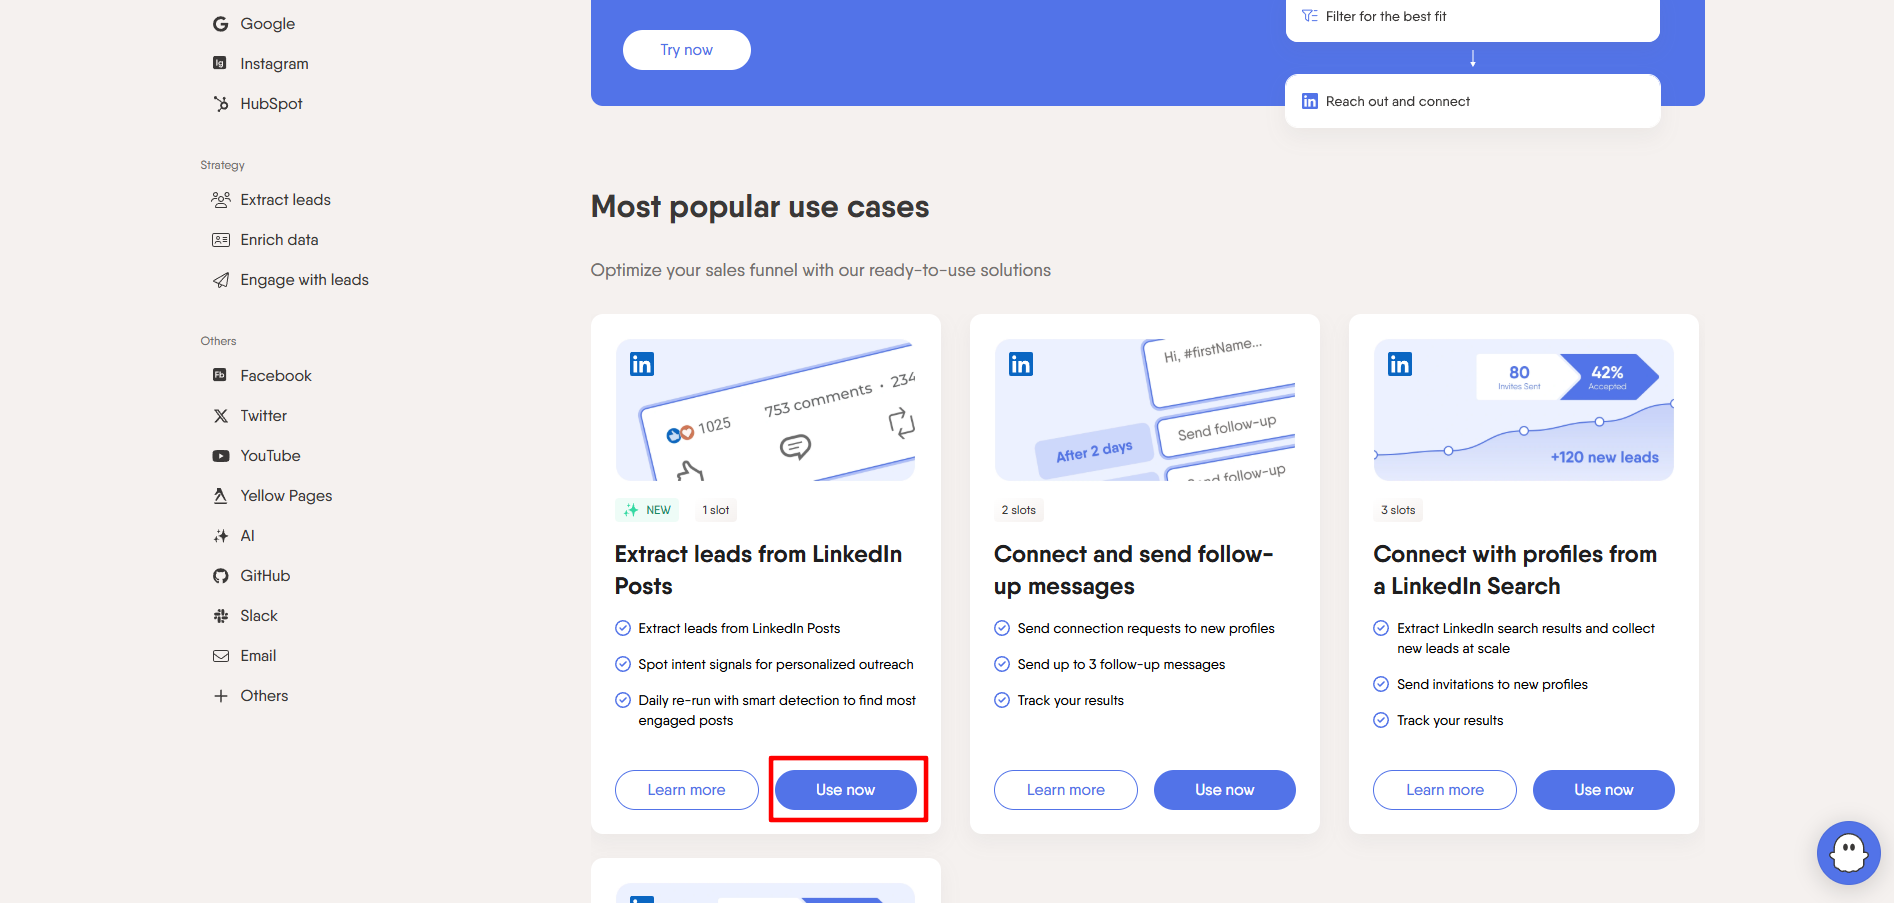 Fig. 9. Visualization of the project selection interface on the PhantomBuster platform. The image shows a structured catalog of automated modules (Phantoms).
Step 2. Launch Configuration (Settings)
Click on the three dots next to the Phantom -> Setup (or Edit). Go through the setup stages (account connection, search criteria) until the Settings step.
In the left menu of the Phantom settings, find the Advanced section (sometimes hidden under a "Show advanced settings" button).
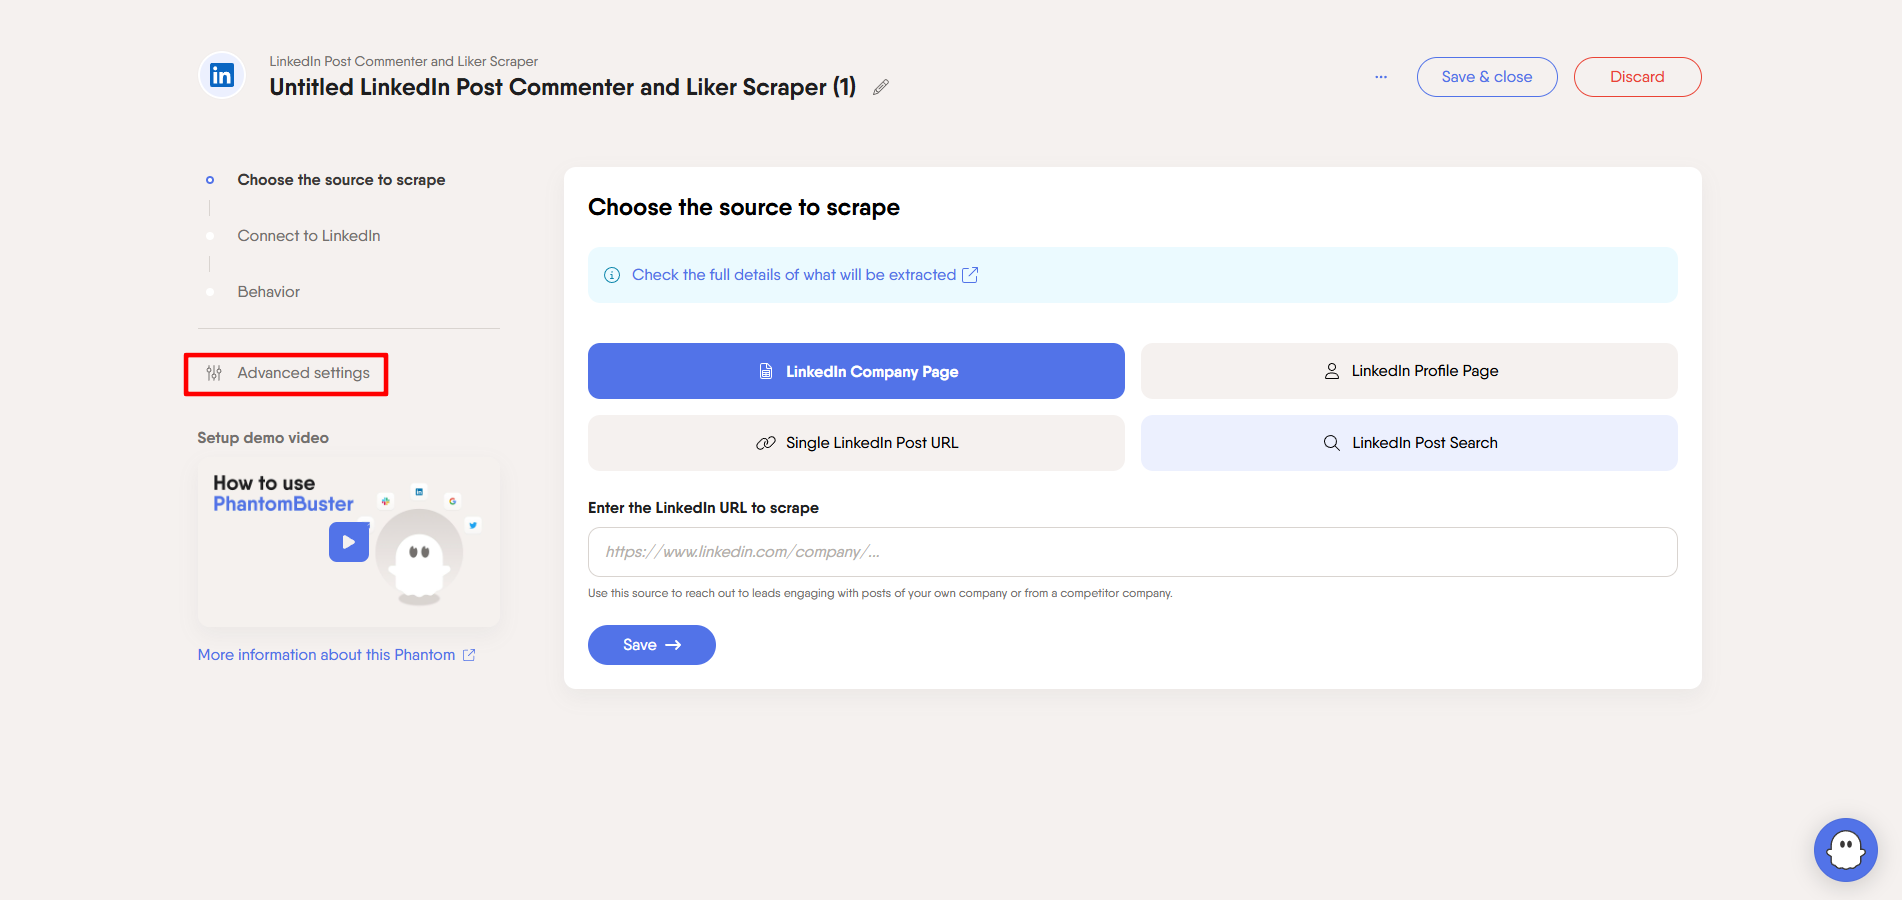 Fig. 10. Advanced settings configuration interface in the PhantomBuster system. The navigation panel with the "Advanced" section highlighted is visualized.
Step 3. Choosing the Proxy
Find the Proxy (or Proxies) field.
- In the dropdown list, select Random proxy from pool....
- Select the pool you created (e.g.,
CyberYozhProxy).
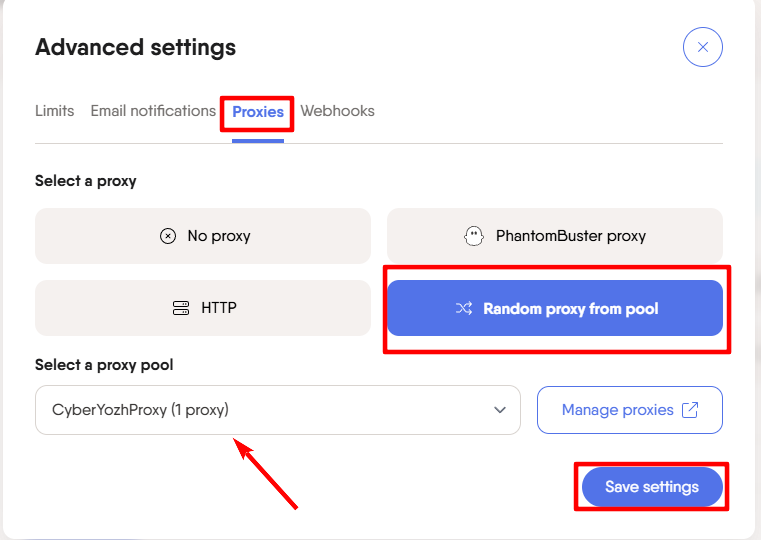 Fig. 11. Proxy connection configuration interface in the PhantomBuster system. The image shows the proxy pool setup dialog box with a dropdown menu.
Click Save. Now this Phantom will only run through your reliable proxy.
Part 5. Pro Tips
- Geolocation matters: If your LinkedIn account is registered in the USA, use only USA proxies. Connecting from a different region may trigger standard security checks; using a geographically consistent IP ensures seamless access to your workspace.
- One Account = One Proxy: If you use multiple Phantoms for the same LinkedIn account, make sure they all run through the same static proxy. IP hopping is not allowed.
- Limits: Even when using a proxy, follow the platforms' recommendations regarding the number of requests. Do not process 1,000 profiles per hour. PhantomBuster recommends safe automation limits in the description of each Phantom — follow them.
Conclusion
Automation with PhantomBuster is a powerful lever, but it will break without a proxy.
- For LinkedIn, use Residential Static Proxies.
- For Instagram, use Mobile Proxies.
- For Yellow Pages, use Datacenter Proxies.
You can always find reliable HTTP and SOCKS5 proxies compatible with PhantomBuster in the CyberYozh App catalog. Happy automating and lead generating!
