
Complete Guide to Setting Up an Upstream Proxy for Debugging and Geo-Testing
Charles Proxy — is a true multi-tool in the arsenal of anyone working with web traffic. It is a powerful debugging proxy that is installed on your computer and allows you to intercept, inspect, modify, and replay all HTTP/HTTPS traffic between your device and the Internet. But what if, for debugging purposes, you need Charles itself to access the network not from your IP, but from an IP address located, for example, in the USA or Brazil?
This is exactly why Charles features External Proxy Settings. It allows you to configure a so-called Upstream Proxy (a higher-level proxy or gateway) through which all traffic intercepted by Charles will pass.
Why does a professional need this?
- Geo-specific testing: Check how your website or mobile app displays content, prices, and advertisements for users from a specific country.
- Emulation of real users: See which CDN servers and API endpoints are utilized when accessing from different geolocations.
- Testing network configurations: Evaluate application behavior in environments where internet access is routed through strictly defined gateways.
- Access control validation: Verify application responses and access control rules using various regional IP addresses.
In this guide, we will break down step-by-step how to configure Charles to work through an external proxy server to gain full control over not just the traffic itself, but its source as well.
Part 1: Step-by-Step External Proxy Configuration in Charles
The configuration process is logical and won't take much time. You will need your proxy server data: IP address, port, protocol (HTTP or SOCKS), and, if required, a username and password.
Step 1: Gathering Proxy Credentials
The first and most important step is to ensure you have a complete set of authorization data. These «keys» will allow your application or browser to connect to the proxy server and route traffic through it.
Be sure to prepare the following data:
- IP address (host server)
- Port for connection
- Username and password for authorization
- Protocol type (HTTP or SOCKS5)
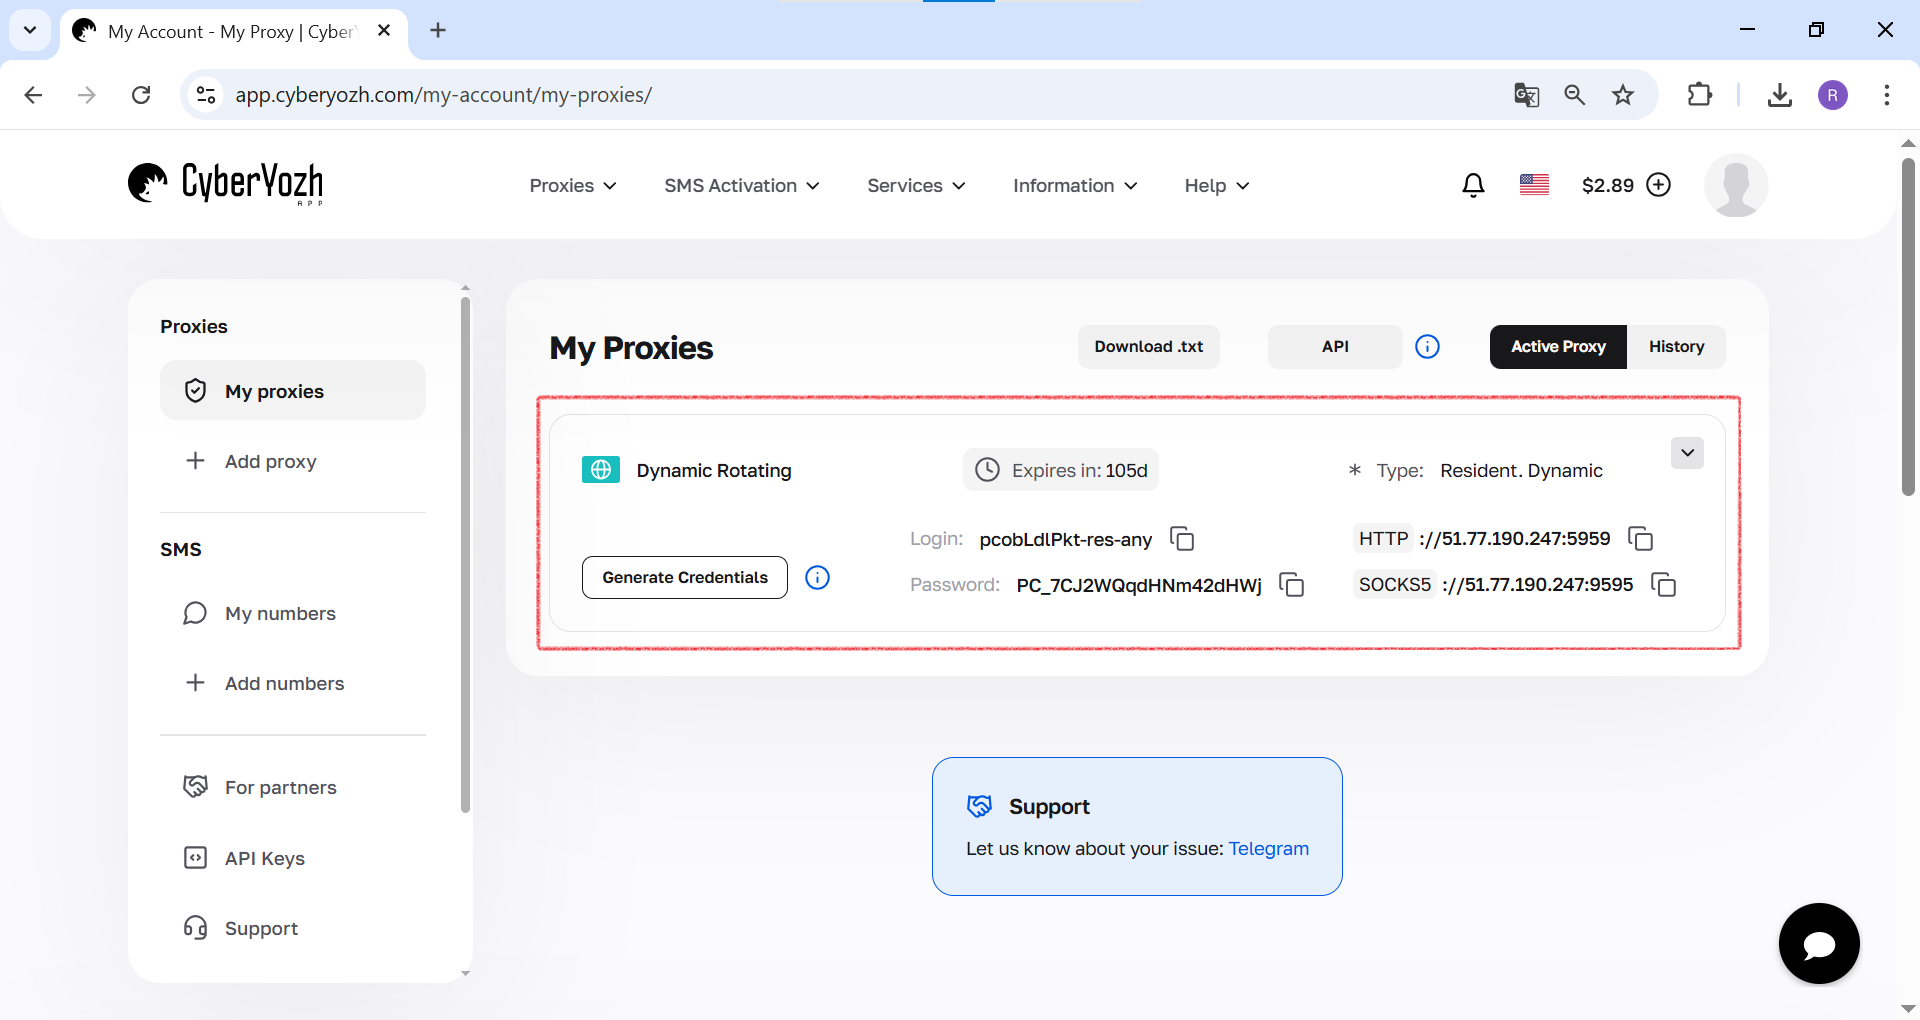 Fig. 1. This screenshot shows where all the necessary fields for connecting to the proxy server are located in the CyberYozh Apppersonal account.
Step 2: Accessing External Proxy Settings
First, you need to open the corresponding settings window in Charles.
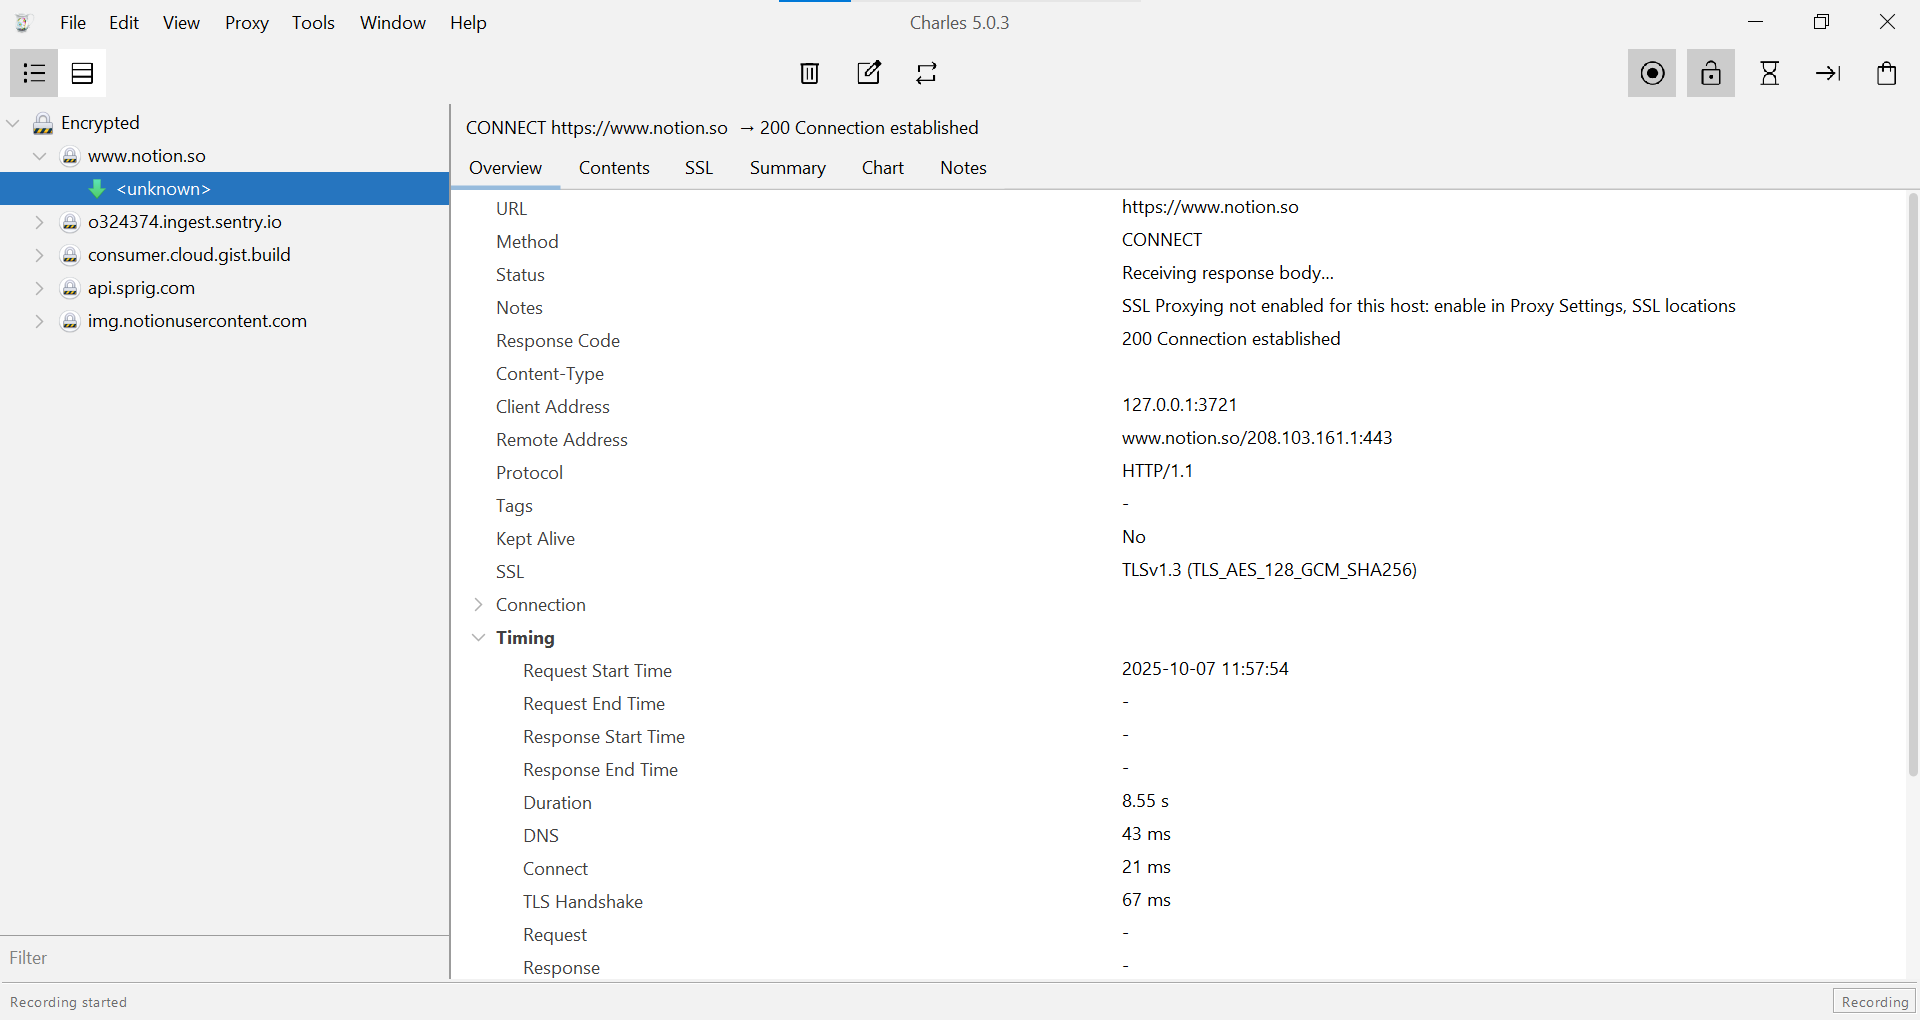 Fig. 2. This screenshot shows the main Charles Proxy interface before starting the configuration, demonstrating the session panel and the request details window.
- In the program's top menu, go to the «Proxy» section.
 Fig. 3. This screenshot shows the first step to access the settings, where the «Proxy» item is highlighted in the program's top menu.
- In the dropdown list, select «External Proxy Settings...».
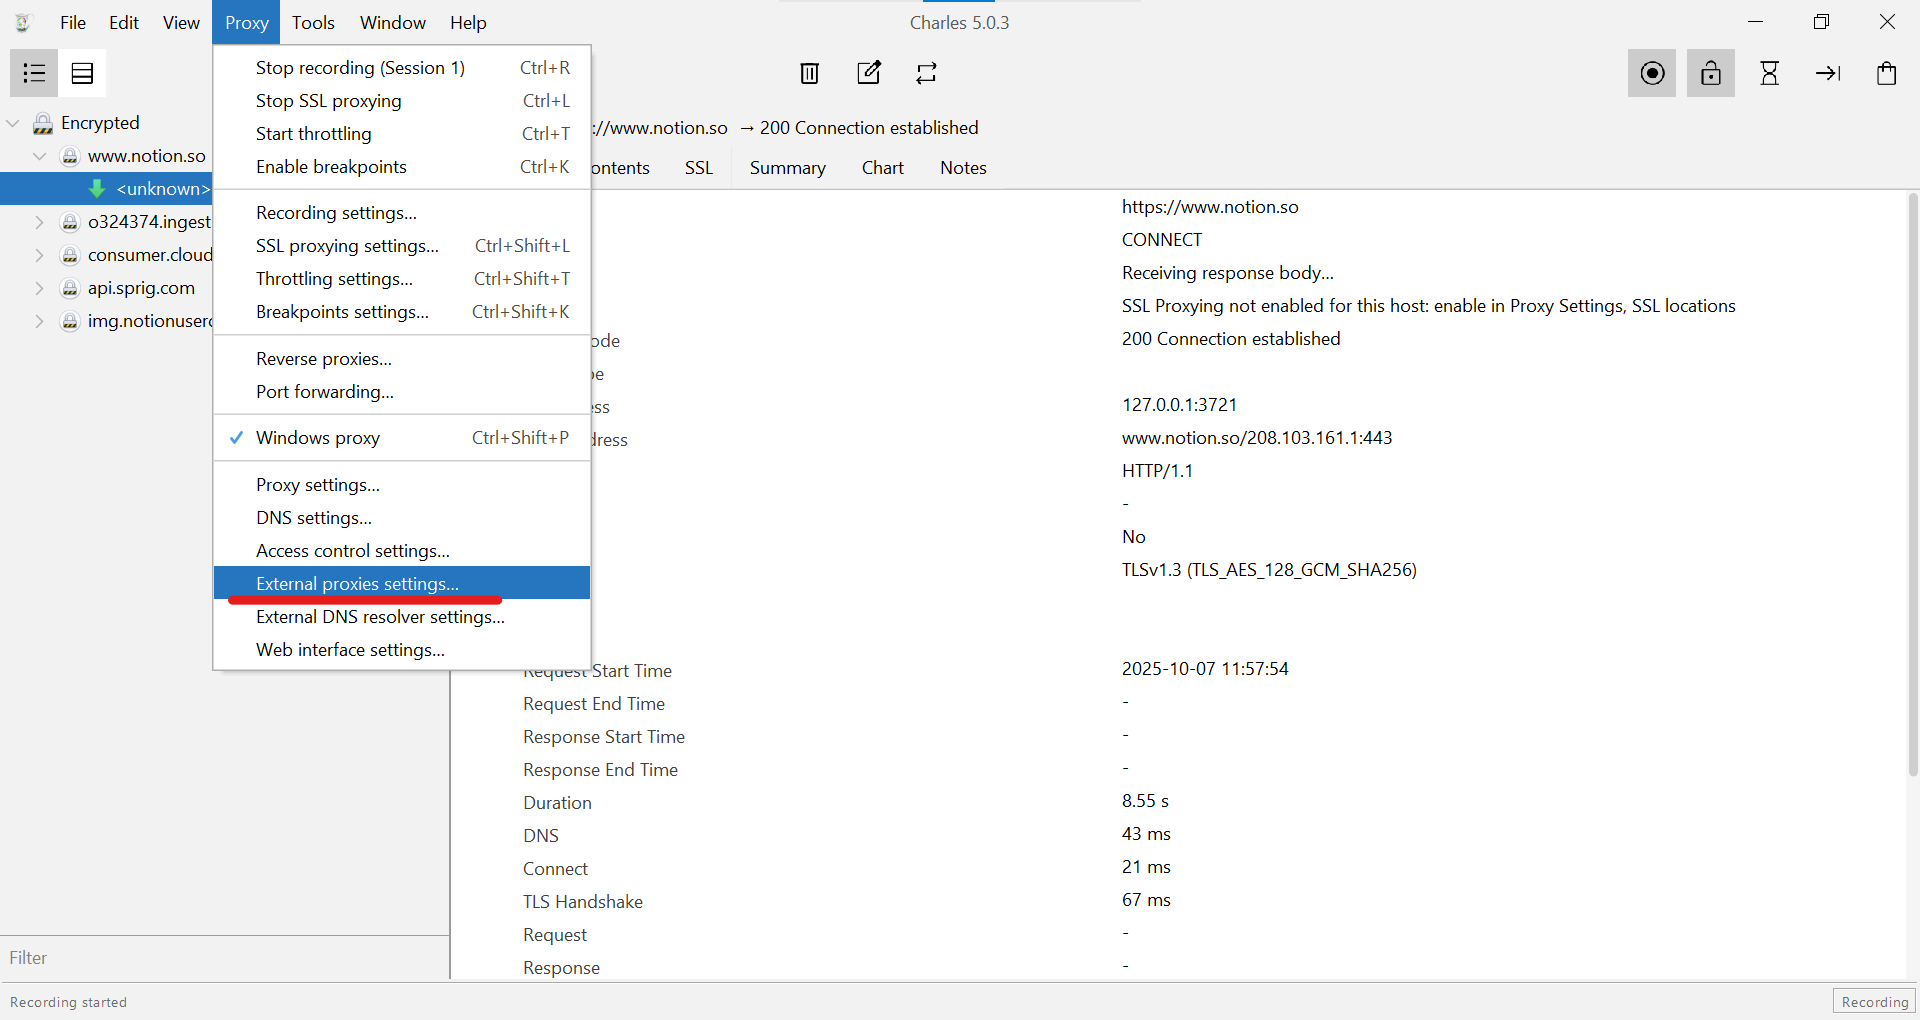 Fig. 4. This screenshot shows the «Proxy» dropdown menu, where you must select «External Proxy Settings...» to proceed to the external gateway configuration.
Step 3: Activation and Protocol Selection
In the opened «External proxies settings» window, you will see settings for different protocols.
- Check the box next to «Use external proxy servers» to activate the function.
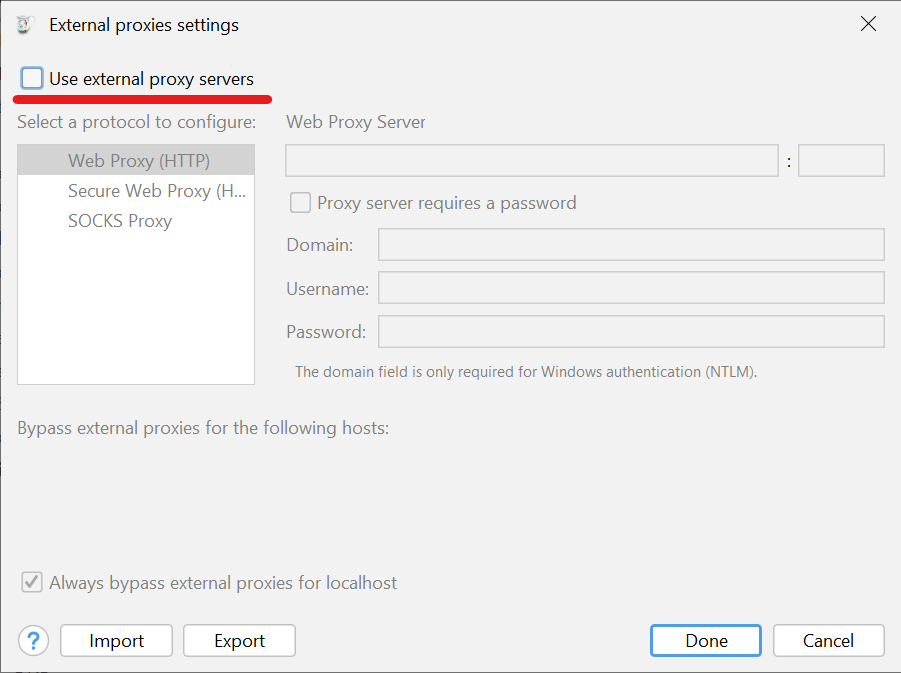 Fig. 5. This screenshot shows the «External proxies settings» window, where you need to check the box next to «Use external proxy servers» to activate the feature.
- Select the protocol you will be using. Charles allows you to configure different proxies for different protocols simultaneously.
- Web Proxy (HTTP): For standard HTTP traffic.
- Secure Web Proxy (HTTPS): For secure HTTPS traffic.
- SOCKS Proxy: A universal protocol that is preferred for many tasks. We recommend using this one if your proxy provider supports it.
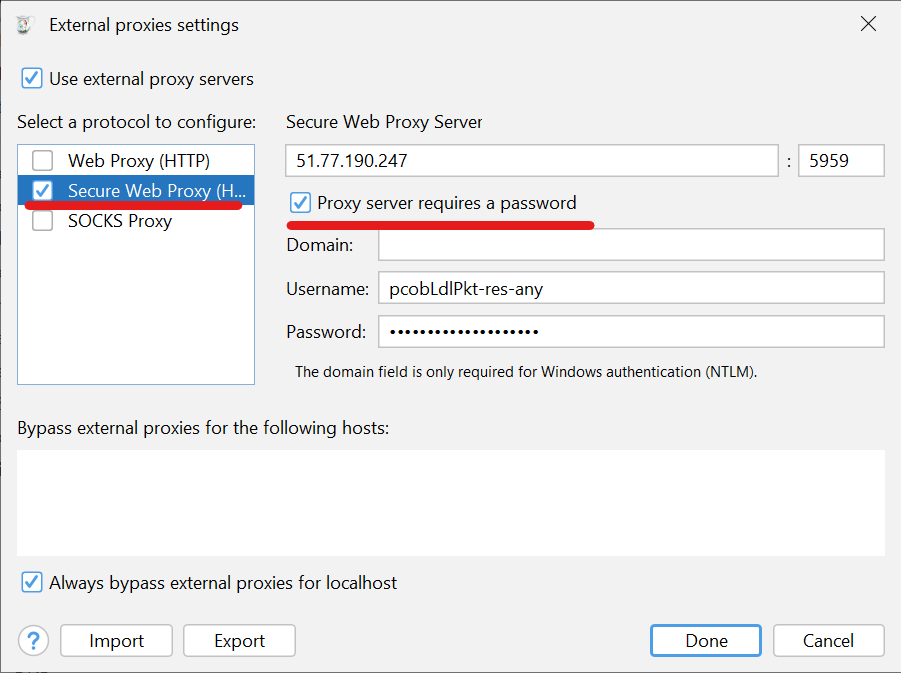 Fig. 6. This screenshot shows the process of configuring an HTTPS proxy: the «Secure Web Proxy (HTTPS)» protocol is selected, server data is entered, and the «Proxy server requires a password» checkbox is activated.
Step 4: Entering Proxy Server Data
Now enter your proxy details. We will look at the configuration using SOCKS Proxy as the most universal option.
- Activate the «SOCKS Proxy» checkbox.
- In the corresponding fields, enter the IP address and port of your server.
- If your proxy requires authorization (and high-quality proxies always do), check the box next to «Proxy server requires a password».
- Fill in the «Username» and «Password» fields.
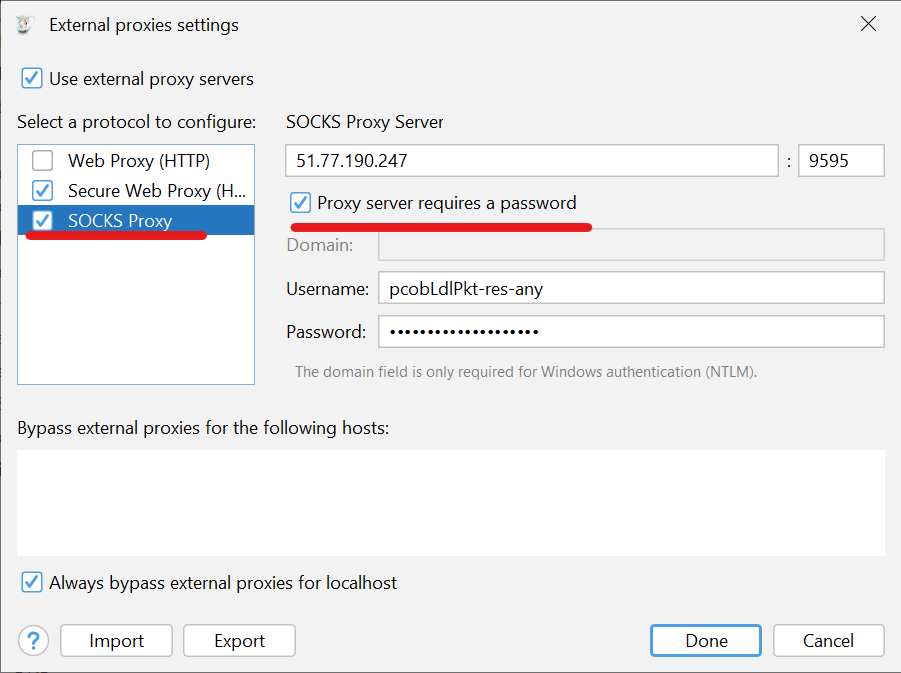 Fig. 7. This screenshot shows an alternative configuration using the SOCKS protocol: the «SOCKS Proxy» item is selected and the corresponding authorization fields are filled in.
- After filling in all the fields, click «Done».
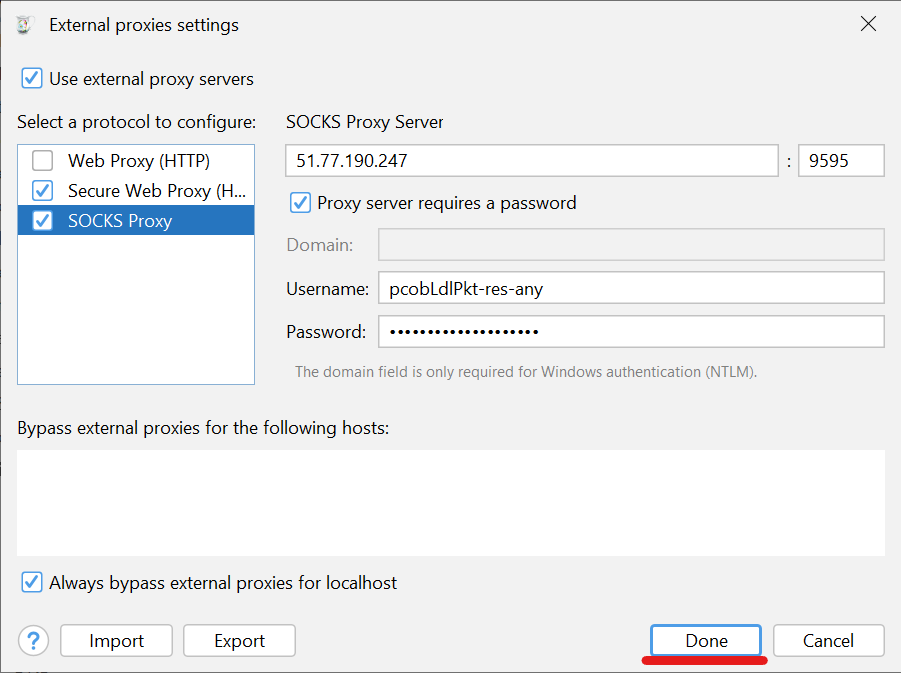 Fig. 8. This screenshot shows the final stage of saving the configuration, where you must click the «Done» button after entering all the data.
Part 2: Verifying Correct Operation
The setup is complete. Now you need to make sure that Charles is actually routing traffic through the gateway you specified.
Step 5: Analyzing Traffic in Charles
- Ensure that traffic recording in Charles is active (the button with the red circle on the toolbar).
- Open any website in your browser. In the left part of the Charles interface, you will see new hosts appearing.
- Find any request in the list, for example, to
app.cyberyozh.com. On the «Overview» tab, you will see technical information about the connection. This proves that Charles is intercepting the traffic.
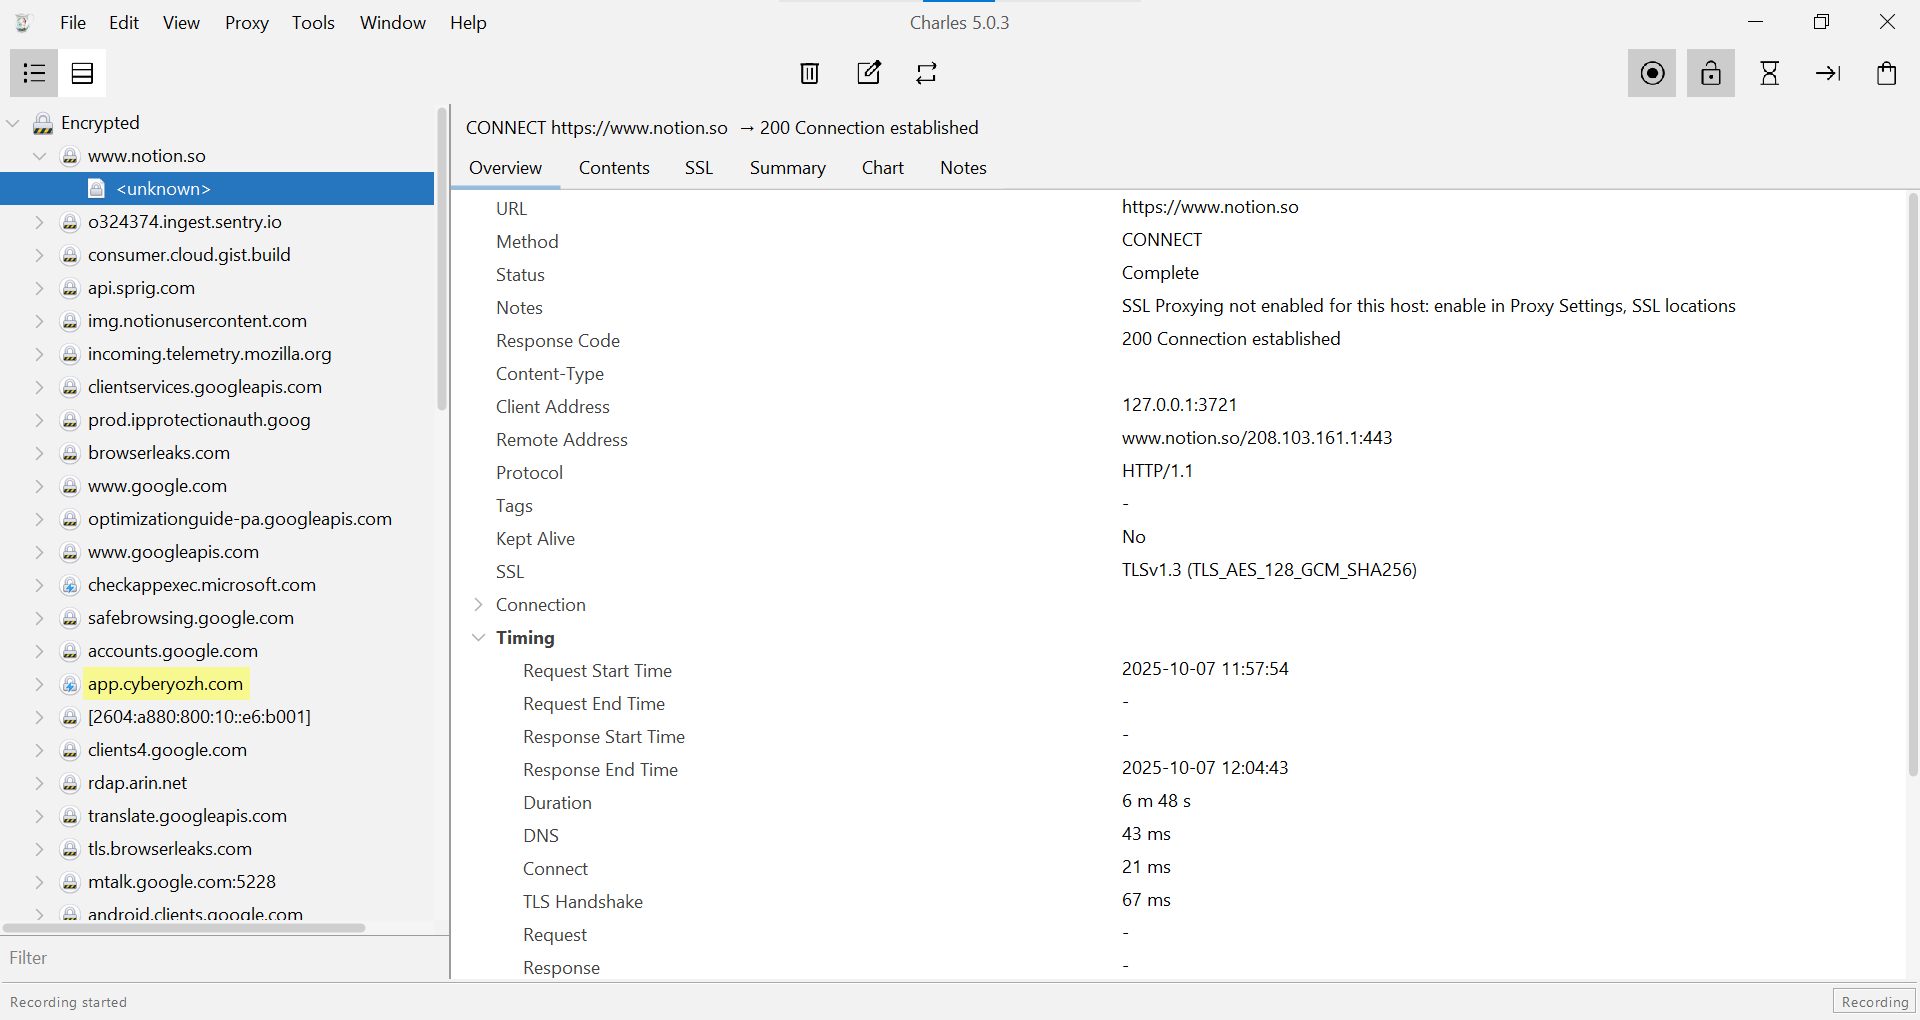 Fig. 9. This screenshot shows the Charles interface after setup, where active traffic is visible in the session list, confirming that the program is intercepting network requests.
Step 6: Final External IP Address Check
The most reliable way to ensure you are accessing the internet from the proxy's IP address is to check it on an external service.
- Open any IP check website in your browser (the traffic of which passes through Charles), for example,
browserleaks.com/ip. - You should see an IP address and geolocation that belong to your proxy server, not your ISP.
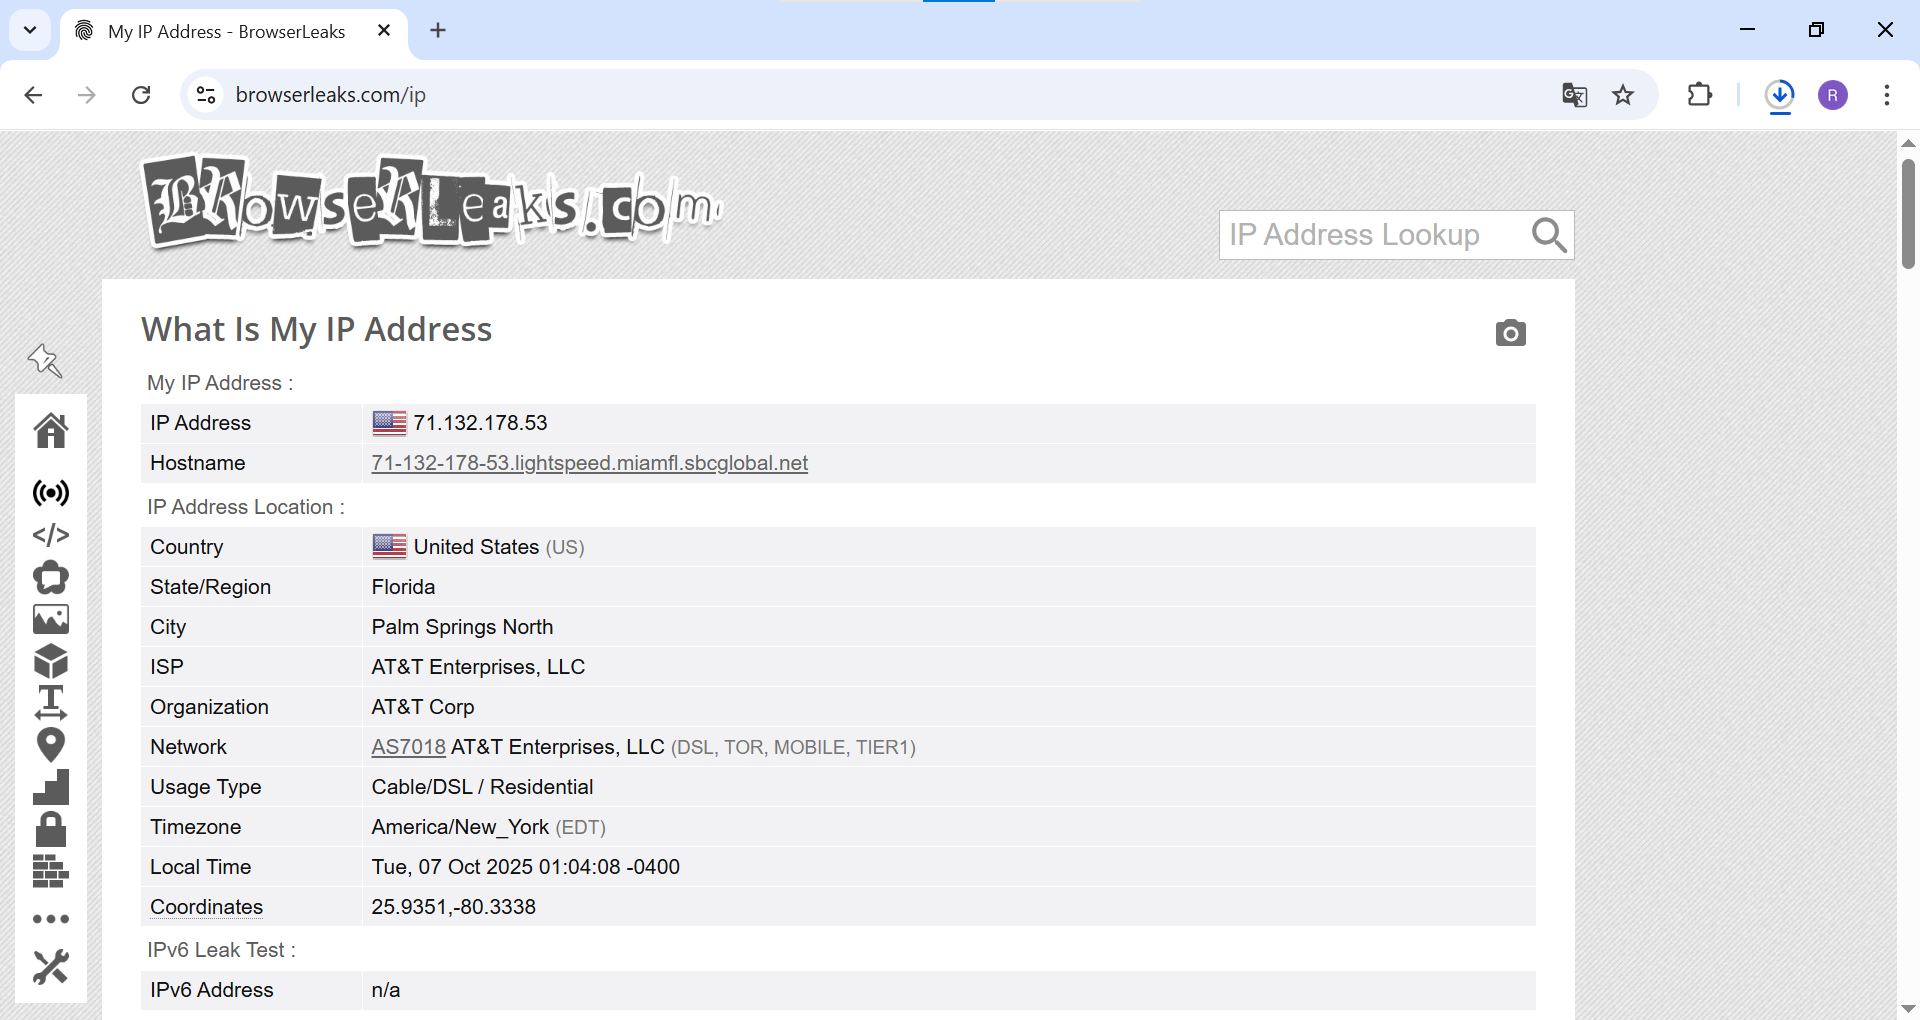 Fig. 10. This screenshot shows the result of a successful configuration. In the browser, whose traffic passes through Charles, the browserleaks.com website displays the IP address and geolocation of the external proxy server.
Done! You have successfully configured Charles to work through an external proxy.
Important Nuance: Decrypting HTTPS Traffic
By default, Charles does not decrypt the content of HTTPS requests, it only forwards them (you only see CONNECT requests). To see the content (headers, JSON, HTML), you must:
- Go to «Proxy» -> «SSL Proxying Settings...».
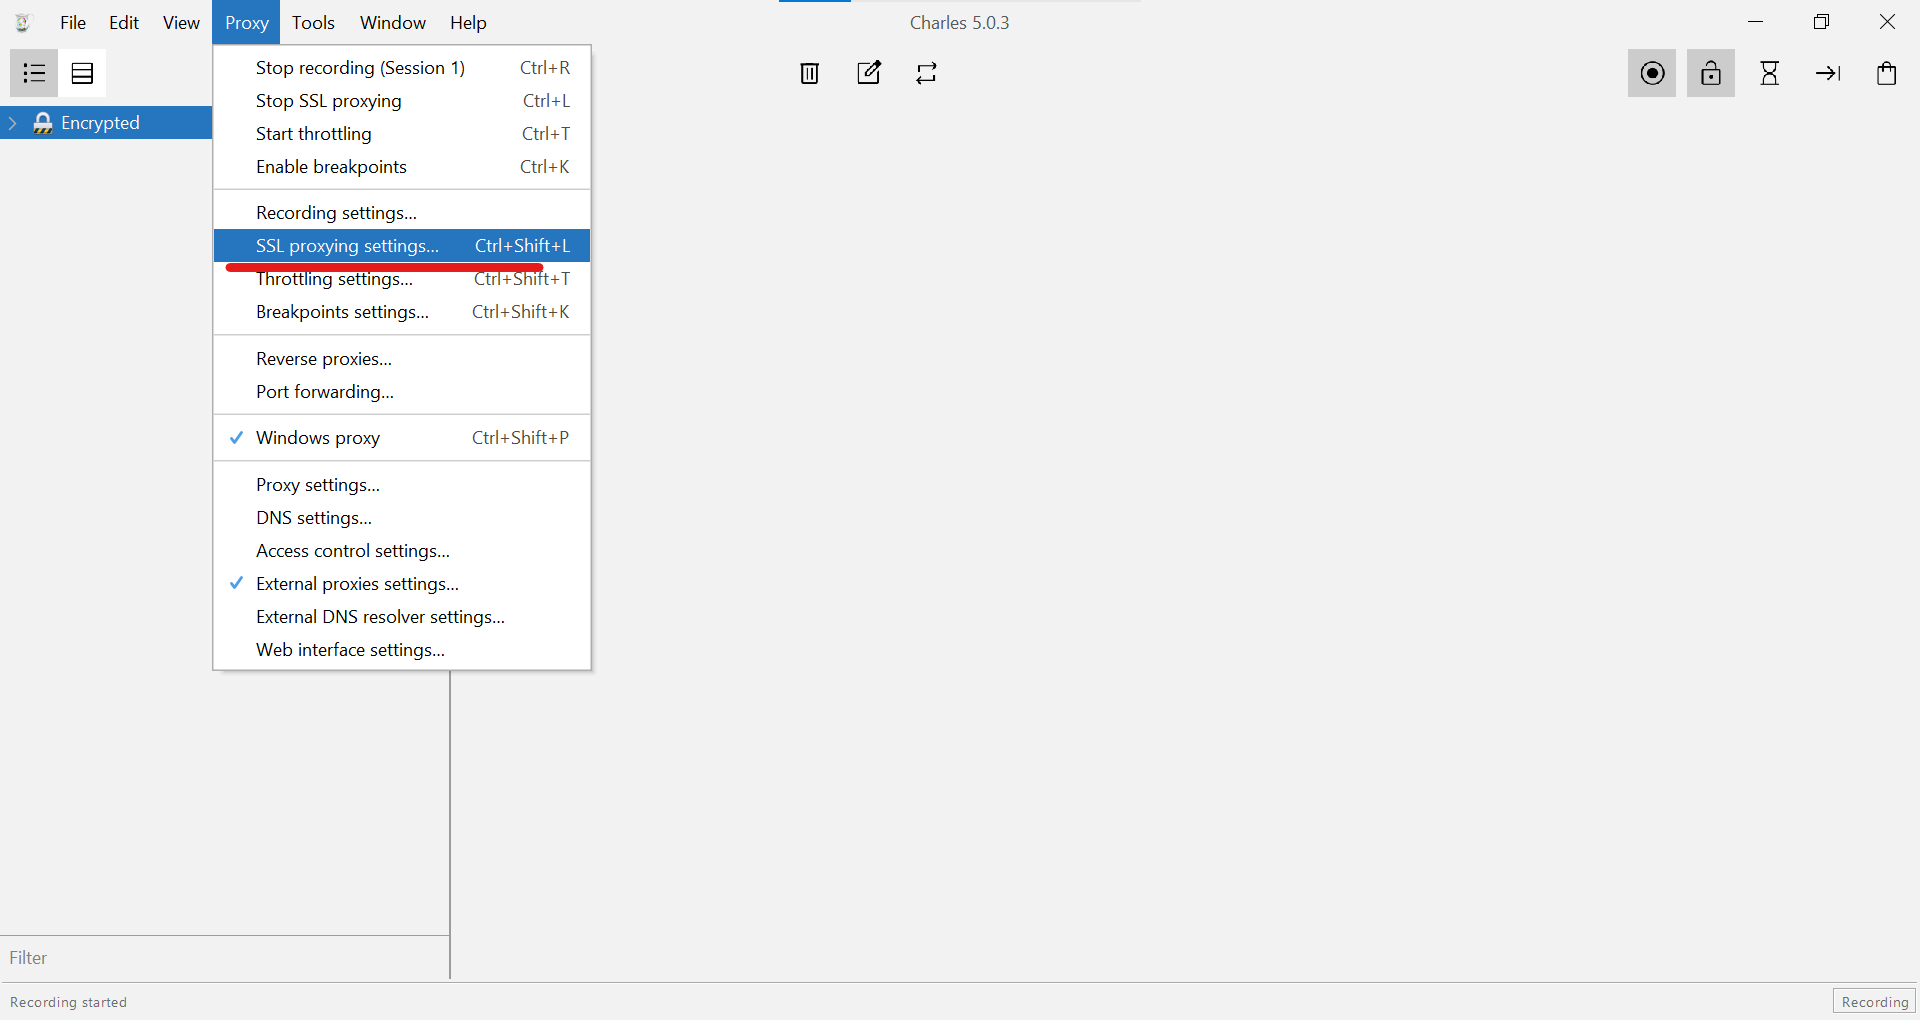 Fig. 11. This screenshot shows how to find and select «SSL Proxying Settings...» in the «Proxy» menu to go to the HTTPS traffic decryption settings.
- Turn on «Enable SSL Proxying» and add the hosts you want to decrypt (e.g.,
*:443for all).
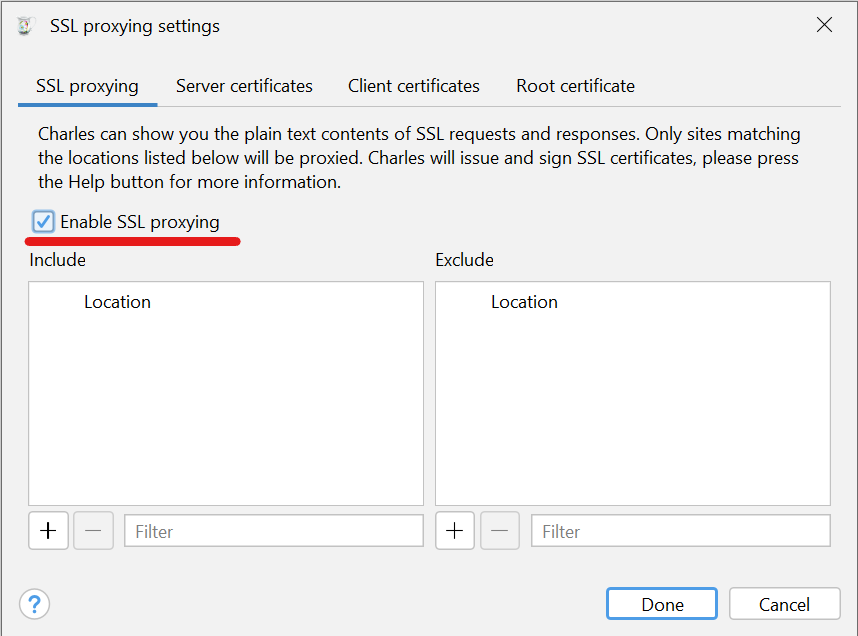 Fig. 12. In the opened «SSL Proxying Settings» window, the first thing to do is activate the function itself by checking the box next to «Enable SSL proxying», as highlighted in the image.
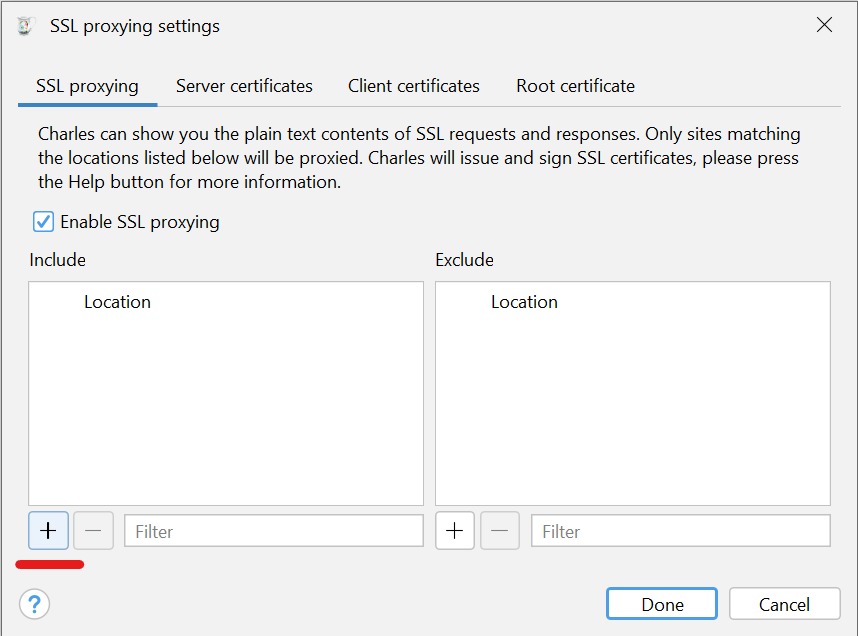 Fig. 13. To add a new traffic decryption rule at this step, click the «+» (Add) button located under the «Include» field.
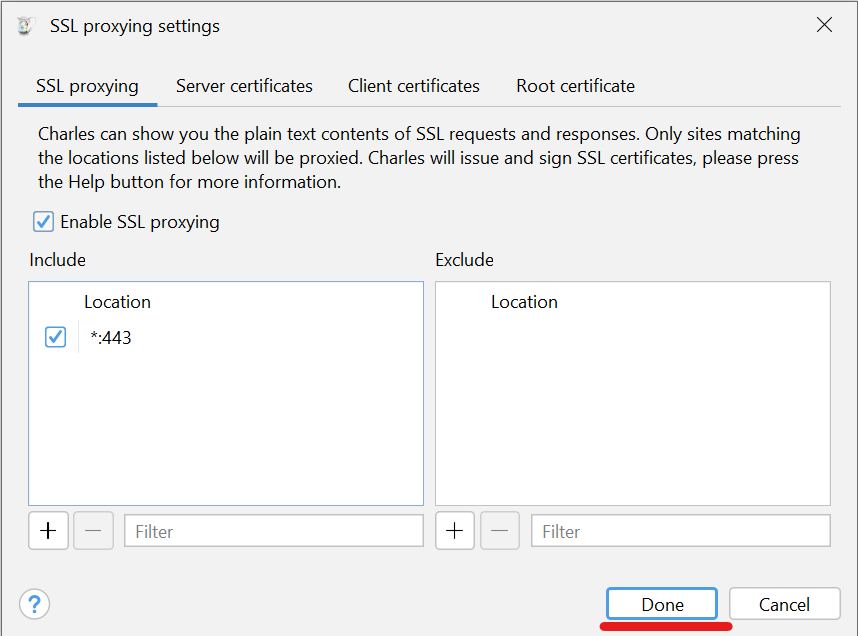 Fig. 14. Here, the final stage of host configuration is demonstrated: the universal address *:443 has been added to the list to intercept all HTTPS traffic. After this, simply click the «Done» button to save the settings.
- Install the Charles Root Certificate on your operating system and browser by following the instructions in the «Help» -> «SSL Proxying» -> «Install Charles Root Certificate» menu.
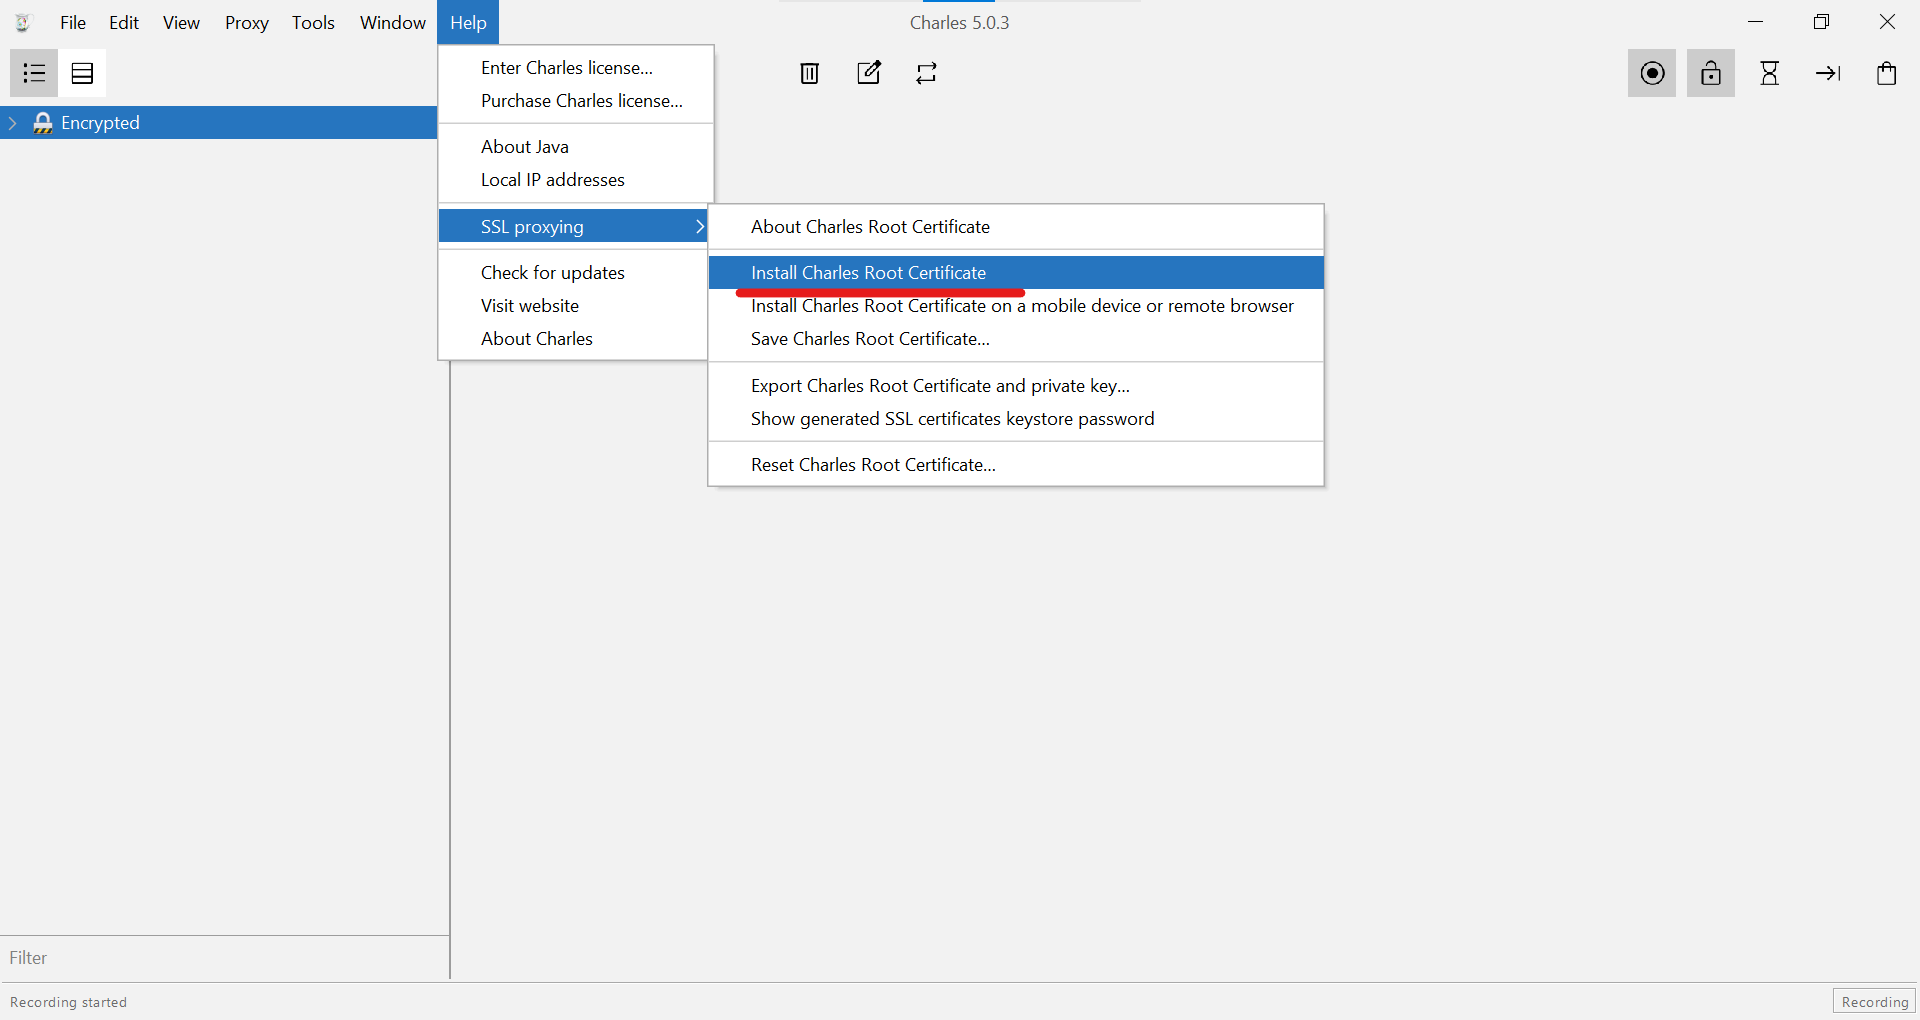 Fig. 15. In the «Help» dropdown menu, you need to hover over «SSL Proxying» and then select «Install Charles Root Certificate» to launch the root certificate installation into the operating system.
Conclusion
The combination of Charles and an external proxy is a powerful tool in the hands of a professional. It allows for deep analysis and debugging of applications in conditions as close as possible to the real-world conditions of users from anywhere in the world. This approach is indispensable for geo-dependent testing, ad traffic analysis, and maintaining an isolated, secure environment during the process of investigating network interactions.
👉 Need reliable proxies for Charles? Our residential and mobile SOCKS5 proxies provide maximum compatibility, stability, and high-trust IP addresses from any geolocation, making them the ideal choice for professional debugging and testing.
